How to Use Windows Admin Center in the Azure Portal
Microsoft announced at its recent Ignite conference that WAC in the Azure Portal in now available in public preview. Prior to this update, it was only possible to manage VMs at the infrastructure level in the Azure Portal. But WAC in the Azure Portal lets administrators manage Windows Server VM guests at a more granular level. For instance, you could manage server files, certificates, and view events. WAC gives you better oversight of Windows Server VMs right from the Azure Portal.
WAC in the Azure Portal requirements
Microsoft has laid out the requirements for using WAC in the Azure Portal. Servers must be running Windows Server 2019 or Windows Server 2016 with at least 3GB of memory. The VMs can be in any region but WAC isn’t supported in Azure China, Azure Government, or other non-public clouds. VM configuration must allow outbound Internet access or an outbound port rule allowing HTTPS traffic to the WAC service IP address. The Azure WAC service doesn’t use a service tag at the moment.
Security considerations
Just like with Remote Desktop, Microsoft doesn’t recommend connecting to VMs using public IP addresses. The best strategy is to connect using a private IP address in the VMs virtual network. You can connect your management PC to an Azure virtual network using a Point-to-Site (P2S) VPN gateway.
How to Set Up Windows Admin Center in the Azure Portal
For simplicity, we’ll set up WAC in the Azure Portal to work with a single VM on its public IP address. But as I previously mentioned, that’s fine for testing but not recommended for production VMs. The first step is to make sure you have a VM provisioned in Azure and that it is running. Check out Create a Virtual Machine in the Azure Cloud on Petri for more details on how to set up VMs in Azure.
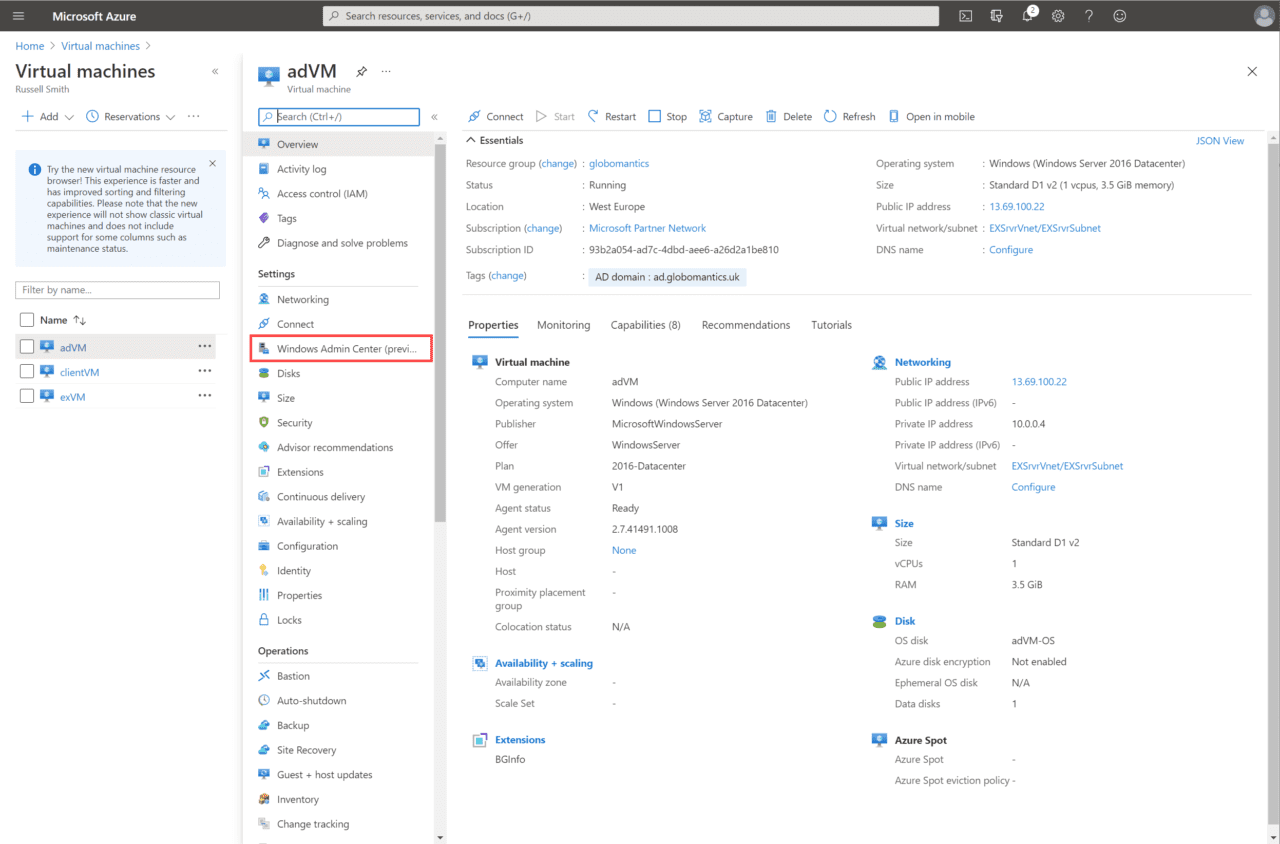
- In the Azure Portal, type virtual machines in the search box and then click Virtual machines in the search results.
- In the list of VMs, click the VM you want to manage using WAC.
- On the Overview page, make sure that the VM is running. If it isn’t running, click Start.
- Under Settings, click Windows Admin Center (preview).
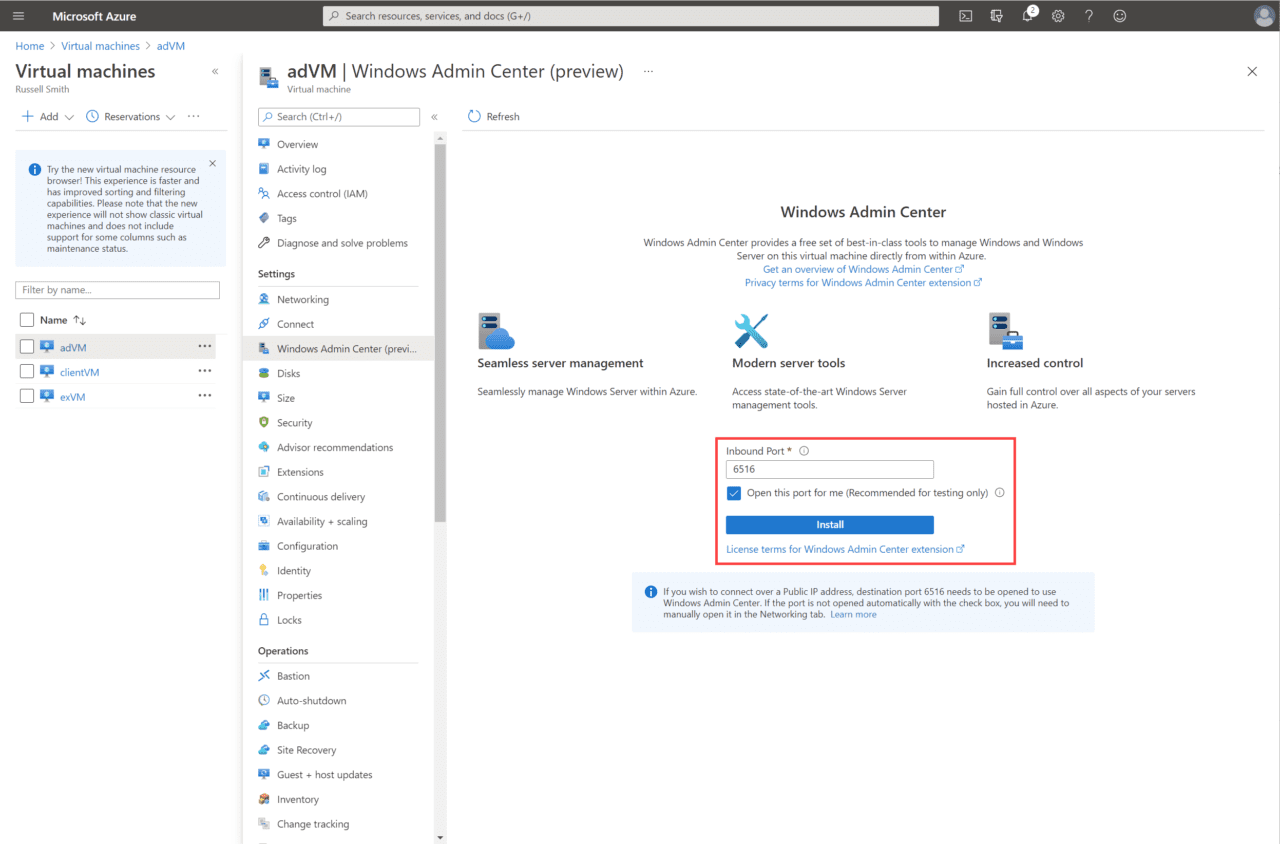
- On the Windows Admin Center page, check Open this port for me (Recommended for testing only). You can leave this unchecked if you plan to connect using the VM’s private IP address.
- Now click Install.
You’ll need to wait up to 5 minutes while WAC installs on your VM. Once completed, you should see a notification appear in the top right of the Azure Portal.
Connect to WAC in the Azure Portal
Now that WAC is setup on your VM, it’s time to connect to it.
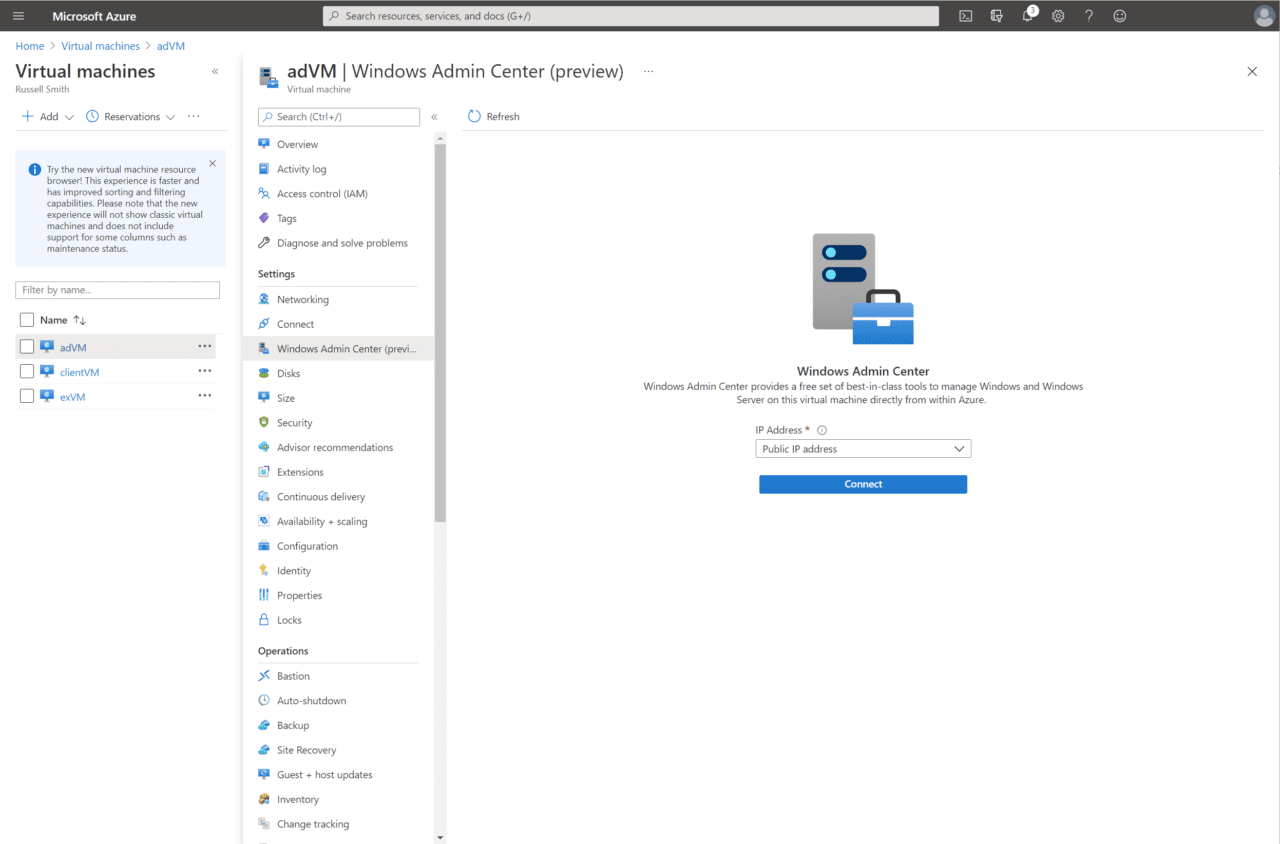
- On the Windows Admin Center (preview) page for your VM, make sure that Public IP address is selected in the dropdown menu and then click Connect.
If you want to connect on the VM’s private IP address, you’ll either need to start the session from a management VM on the same or connected Azure virtual network, or connect your local management PC to the Azure virtual network where the VM you want to manage is located.
- After a few seconds, you’ll be prompted to enter your username and password to access the VM.
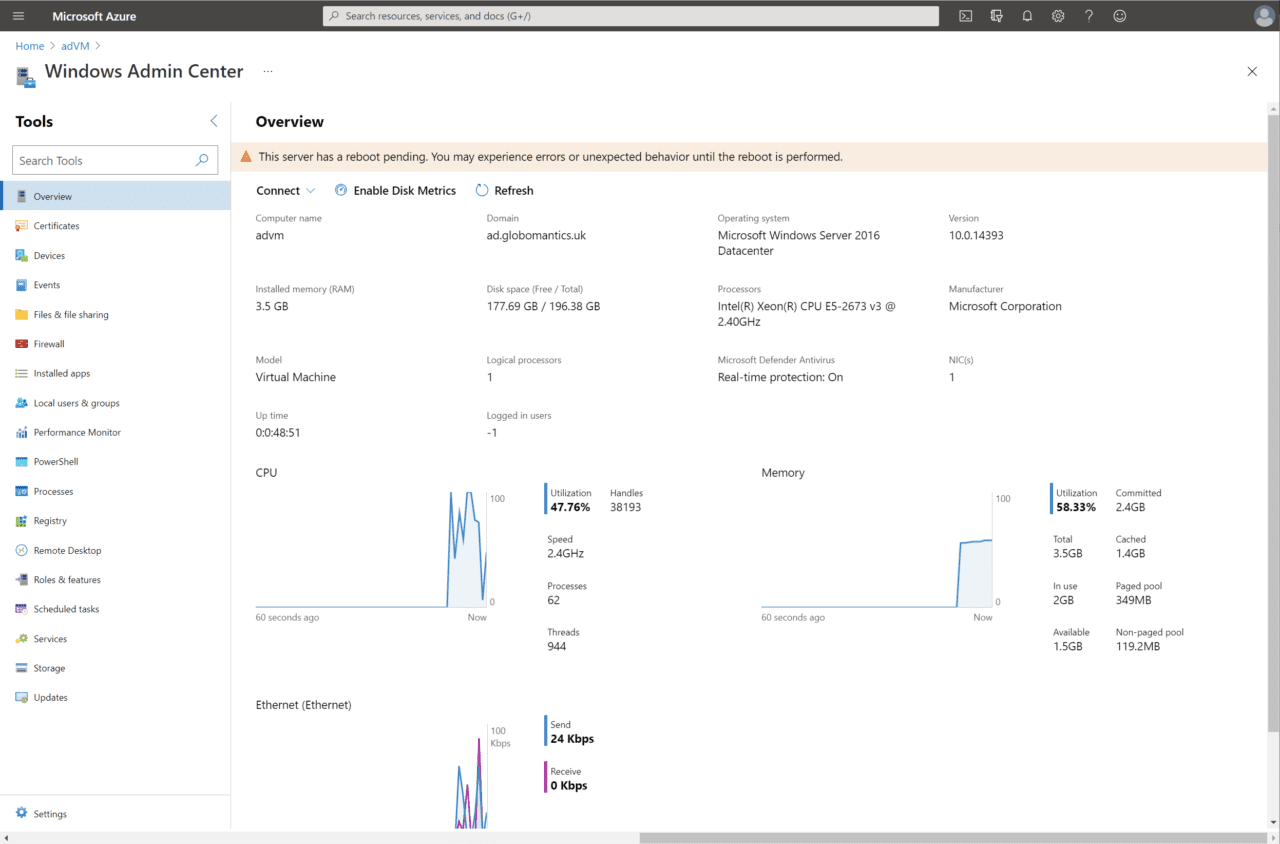
And that’s it! Once authenticated, you should get access to WAC and you can start configuring or managing your remote server.


