How to Use the Azure API Management to Proxy a Public API
Programmatically communicating between different applications, systems, and scripts will often use what is known as an application programming interface (API). When designing an API there are many considerations to take into effect such as:
- Route Structure
- Authentication & Authorization
- Rate Limiting
Of course, not all API’s are designed equally and require the same level of attention. With Microsoft Azure’s API Management service, you can easily proxy an existing API and modify the input and output before that data is received or sent.
This is incredibly useful when you may need to alter the structure of an existing public API, rate limit the number of requests coming in, add authentication, or even cache the results! And these are the things we are going to discuss in this article. We will find out how easy for Azure to quickly consume and manage an API.
Though we are using a public API to demonstrate this, you can also proxy:
- Azure Logic Apps
- Azure App Services
- Azure Function Apps
Creating a New API Management Service
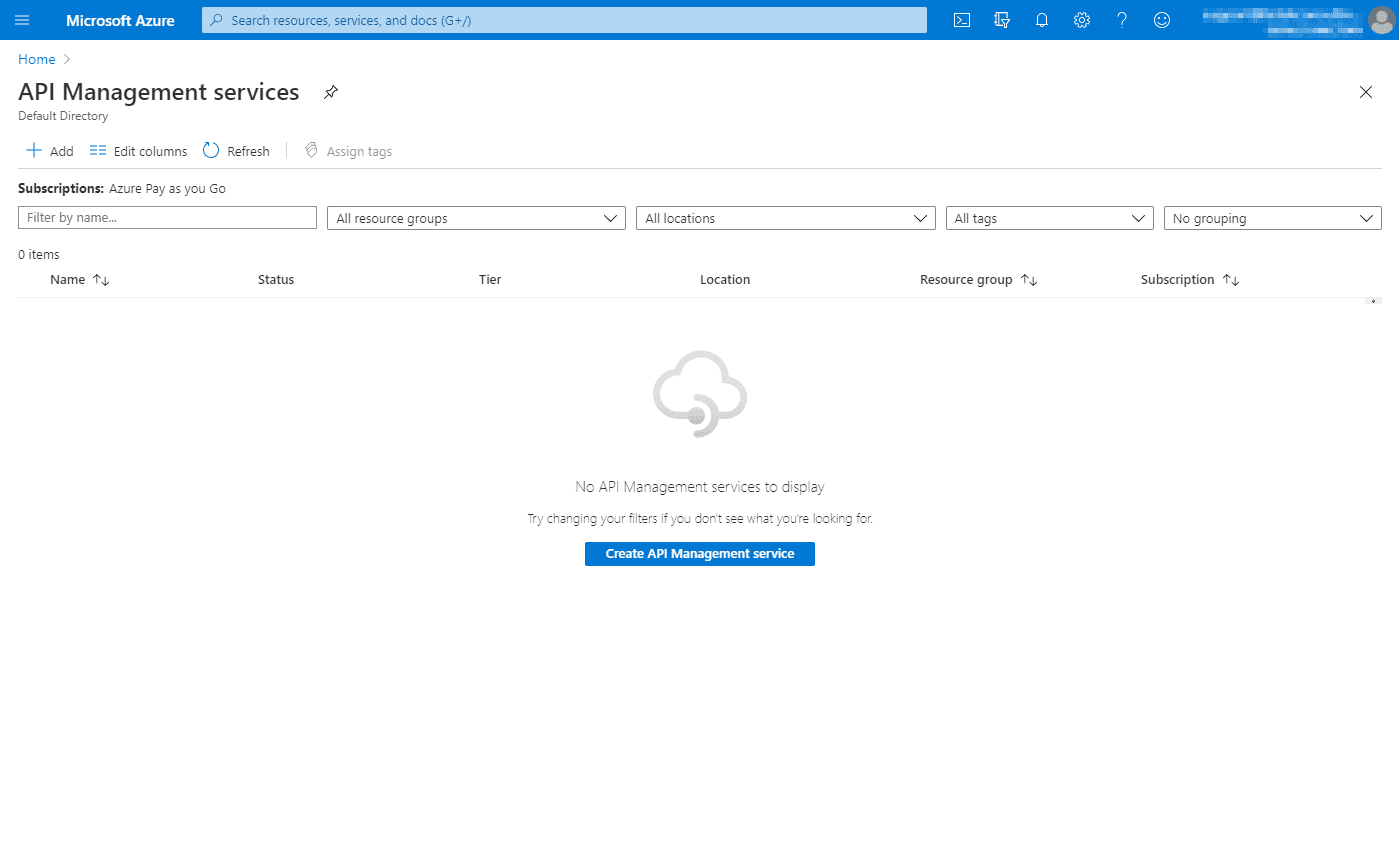
To provision a new API Management service in the Azure Portal, click on the Create API Management service button.
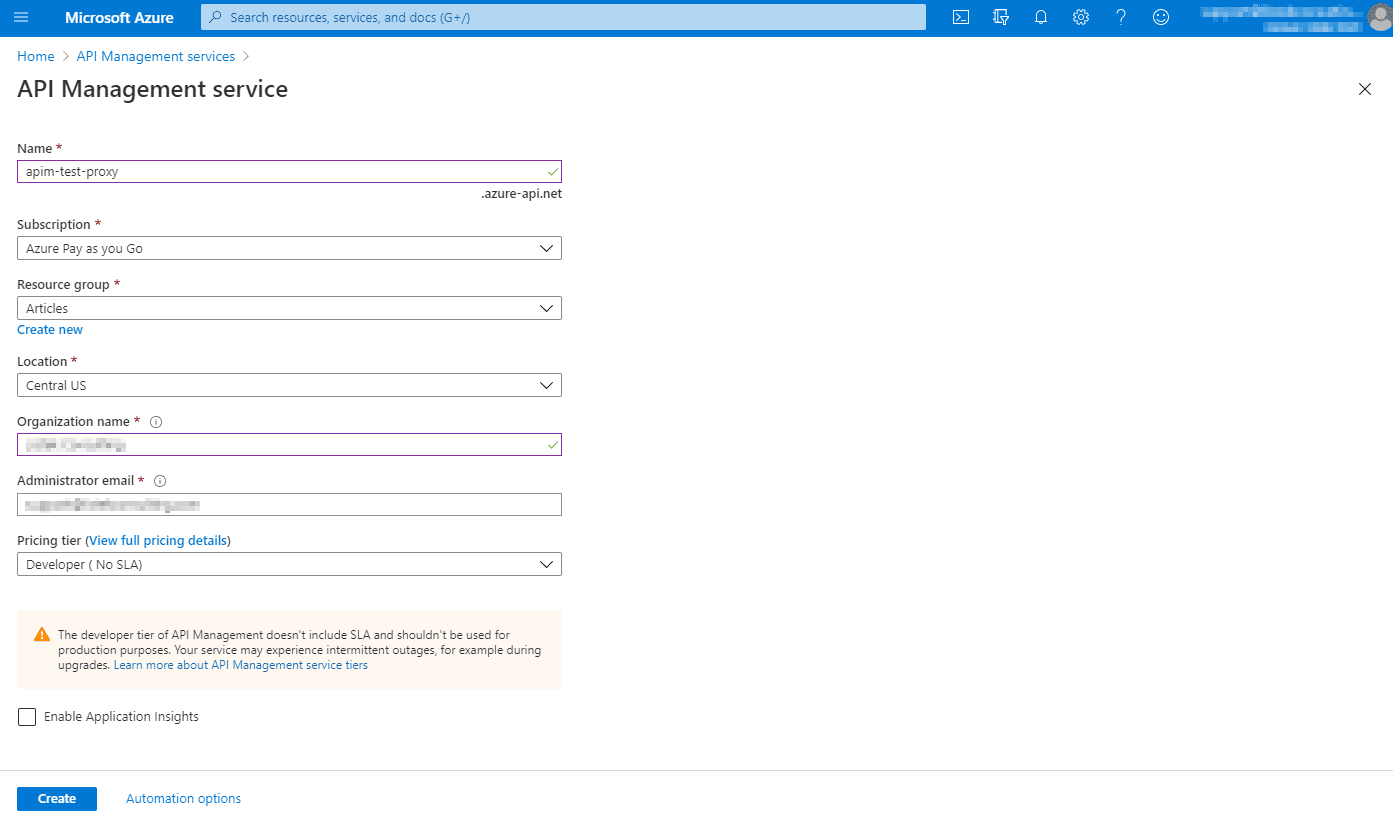
There will be various prompts, but for this example, we have kept the configuration simple.
- Name:
{unique_name}.azure-api.netThe name must be unique across all active API Management instances, yours and others. - Location: The chosen geographic location, which may impact performance.
- Pricing Tier
- Consumption – A lightweight and serverless version of the API Management service, which is billed per execution. 1 million calls are free. These are shared instances which have a number of limitations in functionality.
- Developer – A private instance, but with no SLA and not intended for production workloads.
- Basic
- Standard
- Premium
In a development project, a developer or consumption pricing tiers will help you accomplish the work to be done. However, even if a developer offers more options, it does not offer the 1/million initial calls for free that are available in the consumption pricing tier.
Importing an OpenAPI Schema for Proxy
There are different formats that the API Management service can import. OpenAPI and WADL are two common formats that can be proxied easily through the API Management service.
By importing an API, the available methods will be automatically created as endpoints that can be consumed via the Azure proxy. This saves a lot of time and effort from manually recreating the available methods and associated parameters.
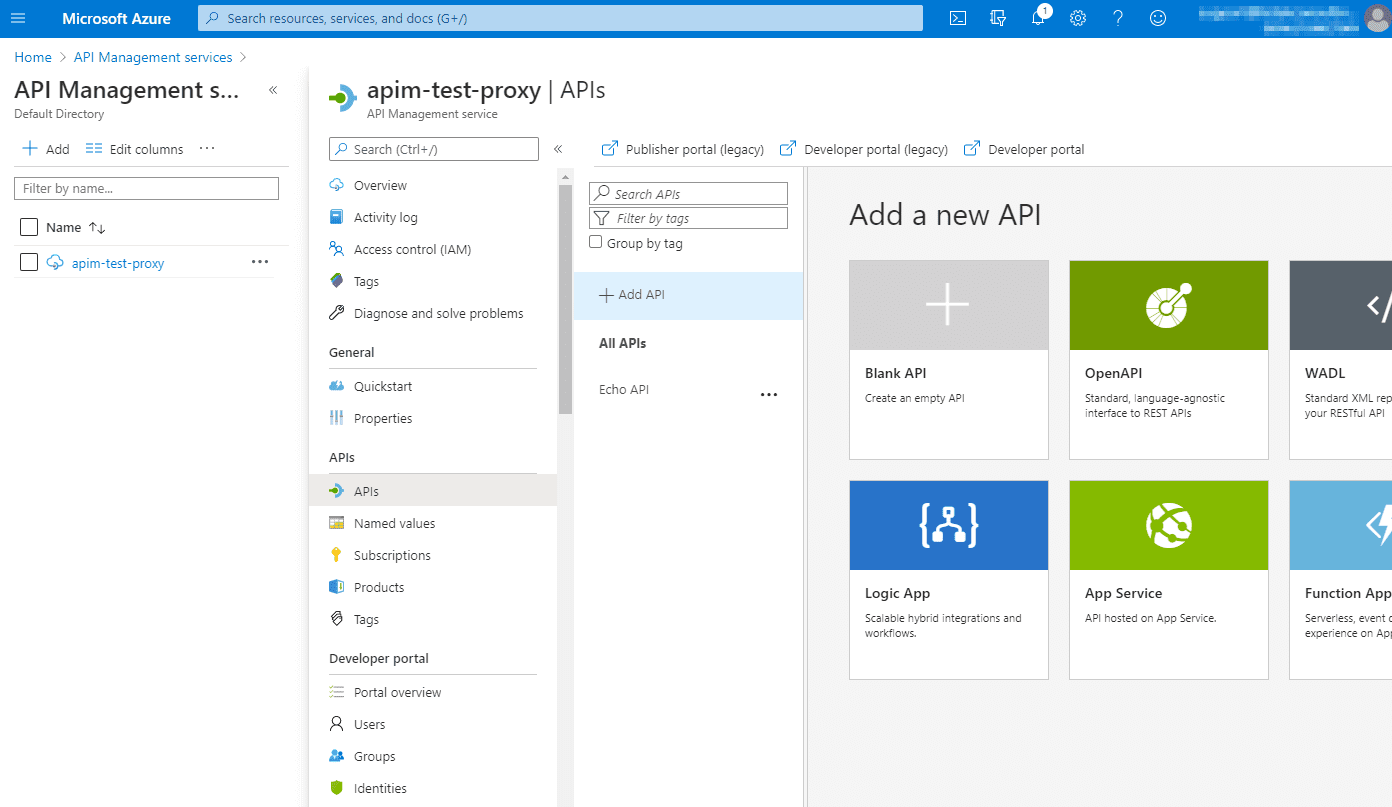
In this example, we are going to proxy an OpenAPI schema. That when imported, will demonstrate a few unique abilities of the API Management service, that of modifying in-flight requests and rate-limiting. Choose the APIs section and click on Add API to set up a new API to proxy.
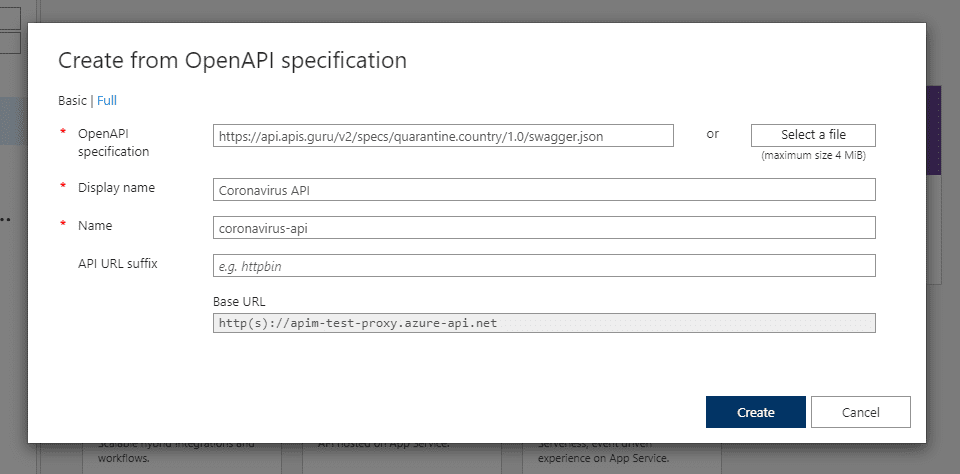
There are details that are necessary to proxy the connection. In this example, we are going to use a Coronavirus API that outputs summary data and country data. It’s necessary to either upload or link to a proper OpenAPI format file, in this case a Swagger definition.
When pasting in a URL, the API Management service will attempt to validate the connection immediately. If the API is valid, the Display name and Name will automatically populate. Otherwise an error would be thrown and you would be unable to continue.
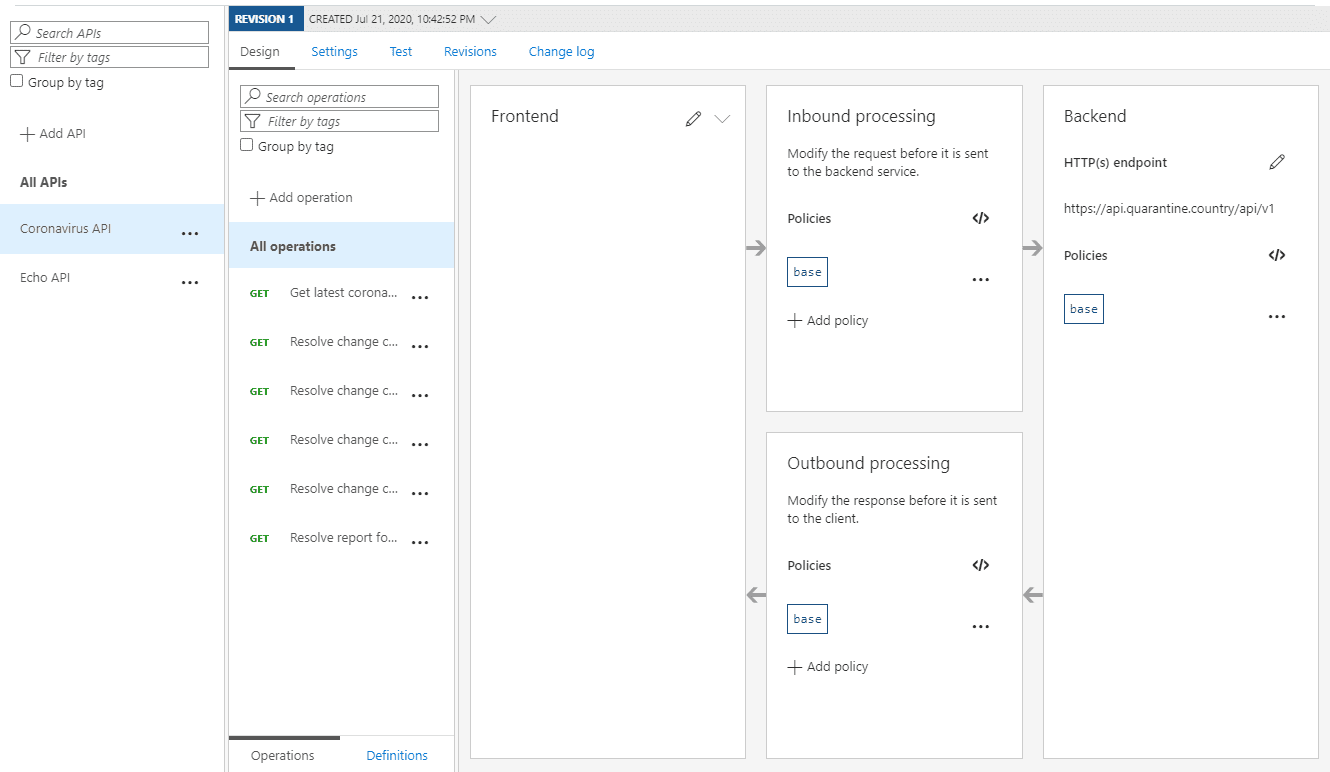
Once imported, you will see the new API listed in the available API. Another selection will show a list of methods.
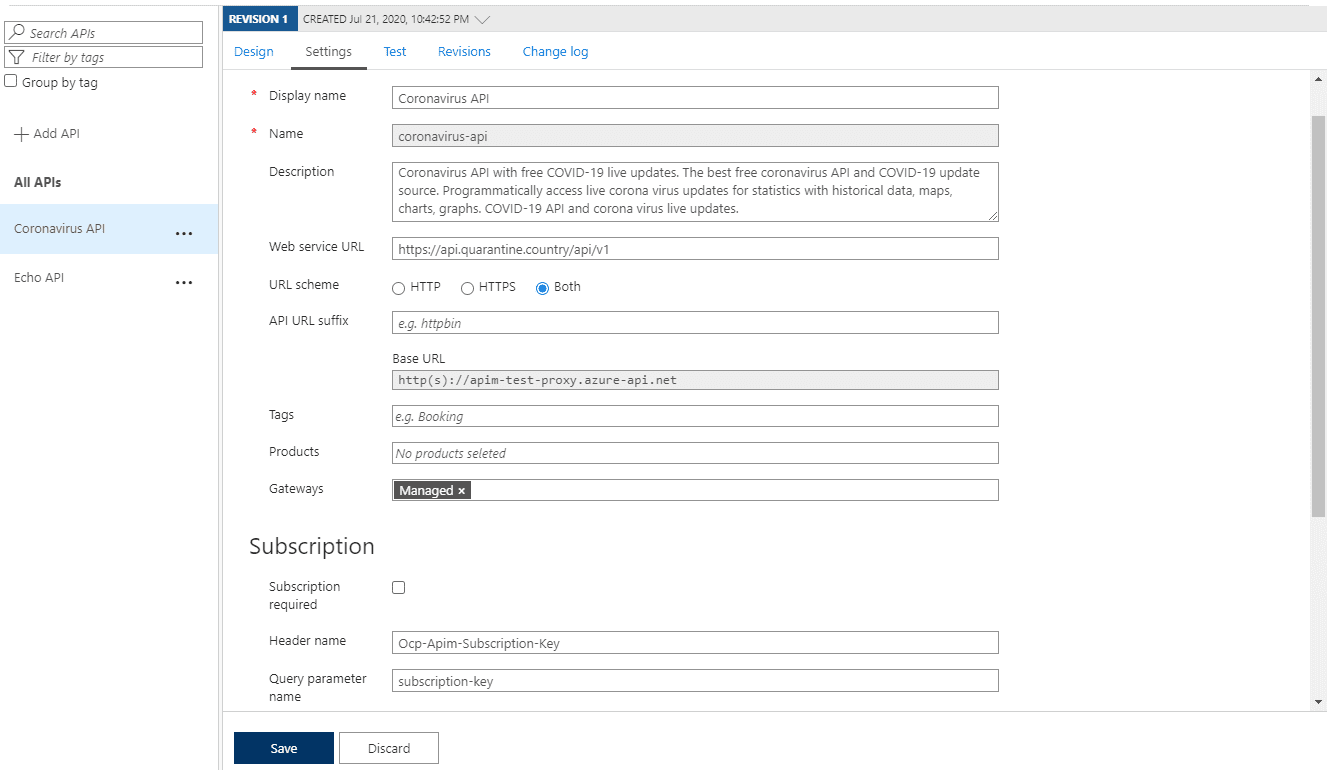
By default, the Subscription required setting is enabled on an imported API. This means that a subscription identifier key is necessary to query the API. For this example we are disabling this feature which means that any client can query this API (provided that no other authentication mechanisms are in place).
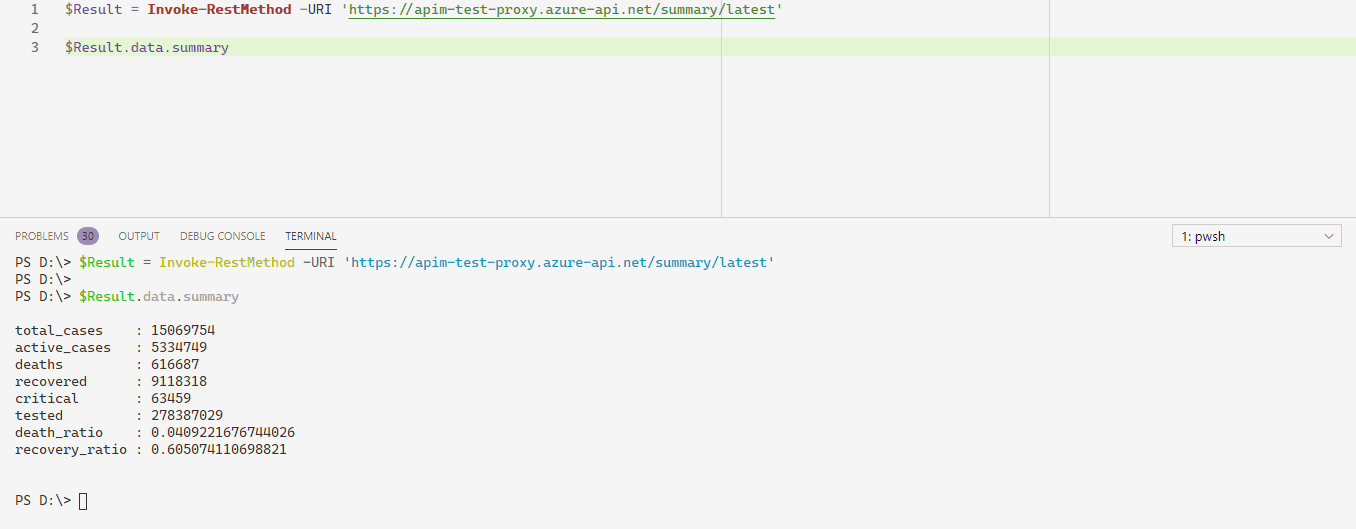
In the available methods list, the /summary/latest method provides a summary of Coronavirus cases in JSON format. Using a standard PowerShell query, as seen below, will allow us to retrieve the results through the API proxy.
$Result = Invoke-RestMethod -URI '<https://apis-test-proxy.azure-api.net/summary/latest>'
$Result.data.summary
Find and Replace a String within the Result Body
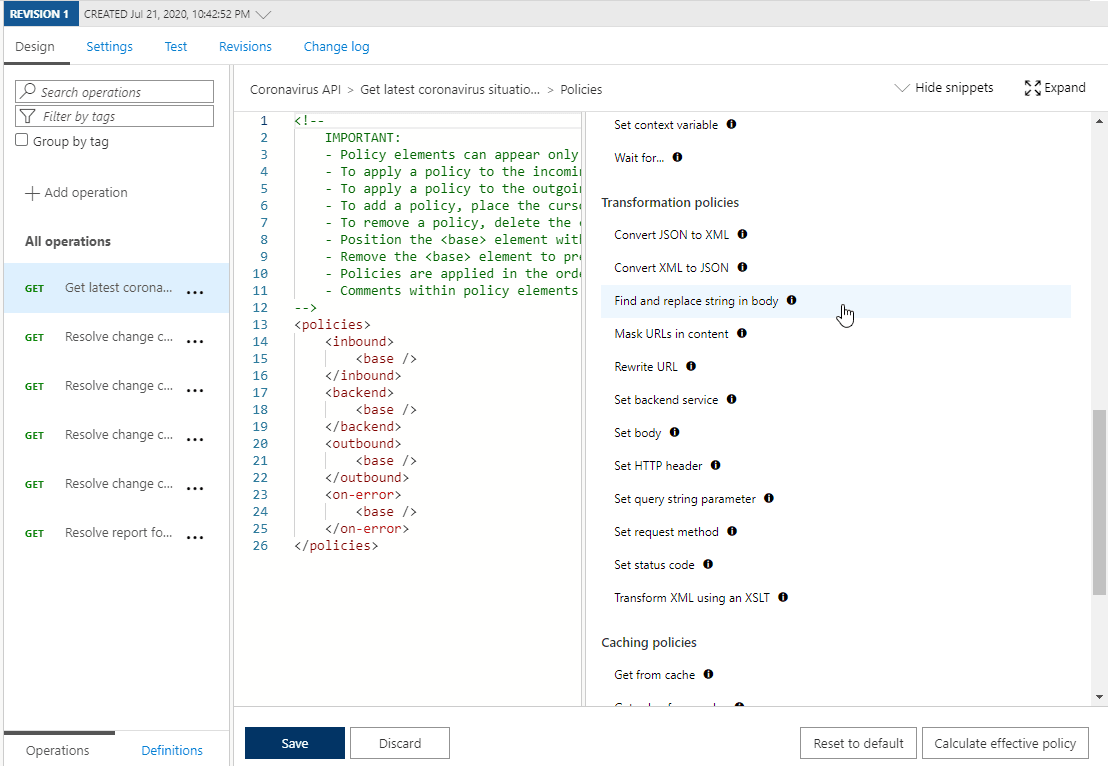
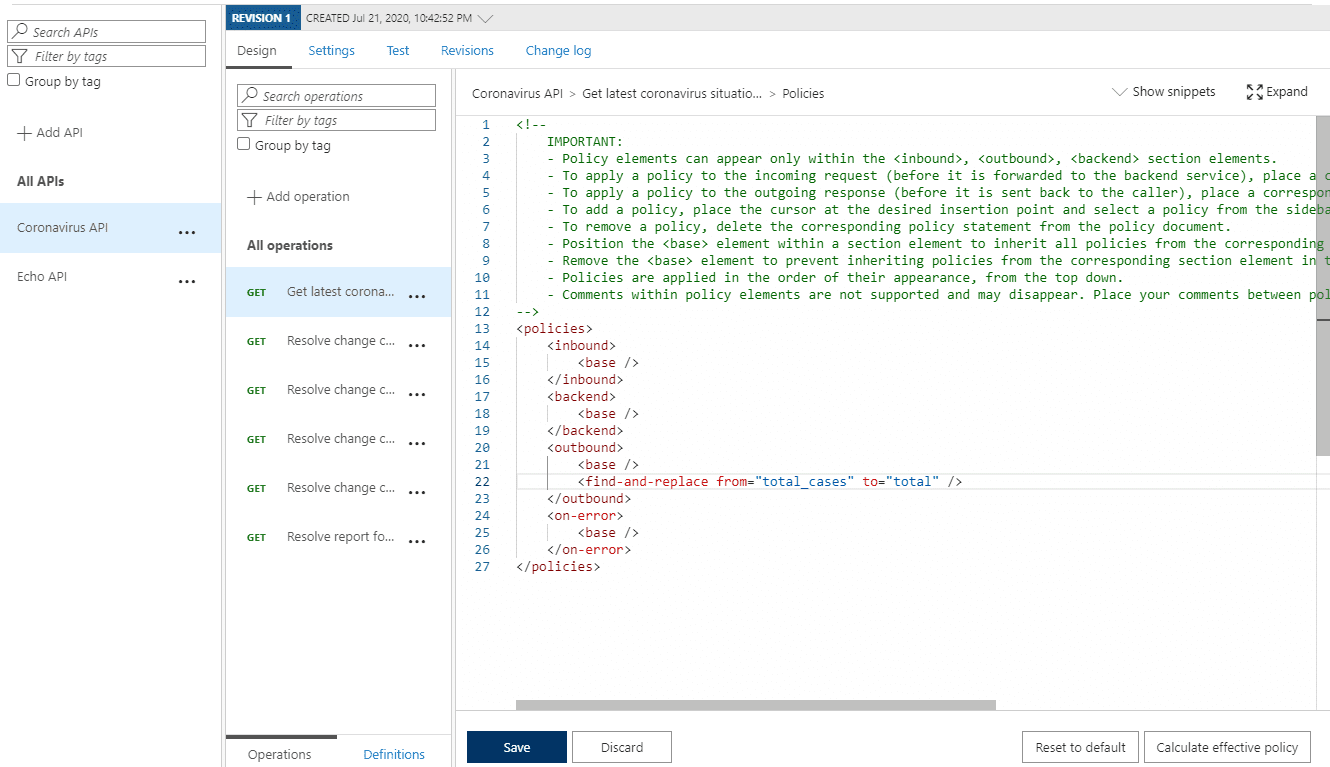
A typical task that we would like to do is to modify the output keys that are returned to the requesting client. Click on the method that you would like to modify, in this case, the /summary/latest method. Next, click on Show Snippets and locate the Find and replace string in body option.
Once chosen, the snippet will populate in the XML definition. Make sure your cursor is in the correct location. Move the XML tag below the <base /> tag under the <outbound> section. This means we will be modifying the result sent back to the client. Enter the following to change the name of total_cases to total.
<find-and-replace from="total_cases" to="total" />
Using the same PowerShell query as before, we now see that the key returned is now total instead of total_cases.
Rate Limit the Request
To limit the number of queries that can be done at any given time, risk overloading the API Management service or running up unnecessary costs, rate-limiting is very useful to prevent this type of issue.
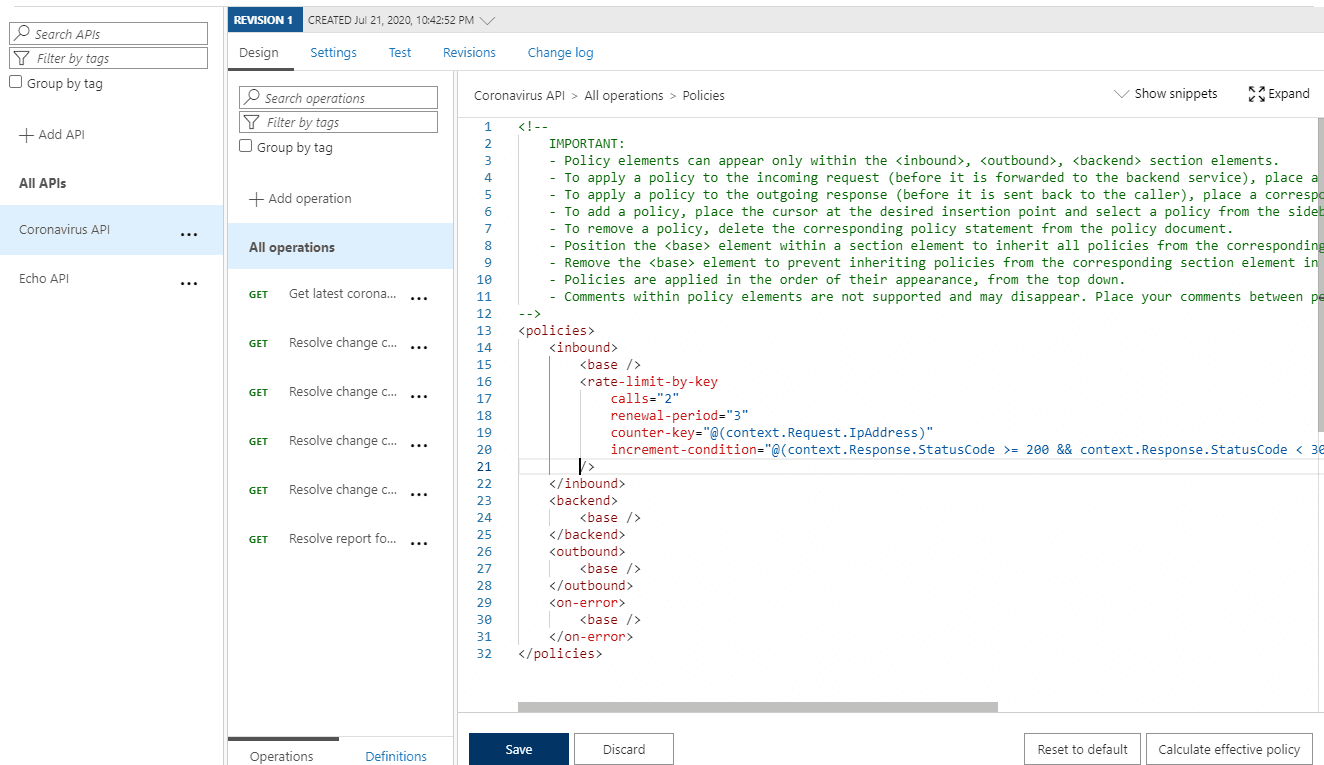
Choose the All operations menu item, to make sure that our rate limiting properly applies to all methods. Enter the following underneath the <base /> key in the <inbound> section to define our rate limiting configuration.
<rate-limit-by-key calls="2" renewal-period="3" counter-key="@(context.Request.IpAddress)" increment-condition="@(context.Response.StatusCode >= 200 && context.Response.StatusCode < 300" />
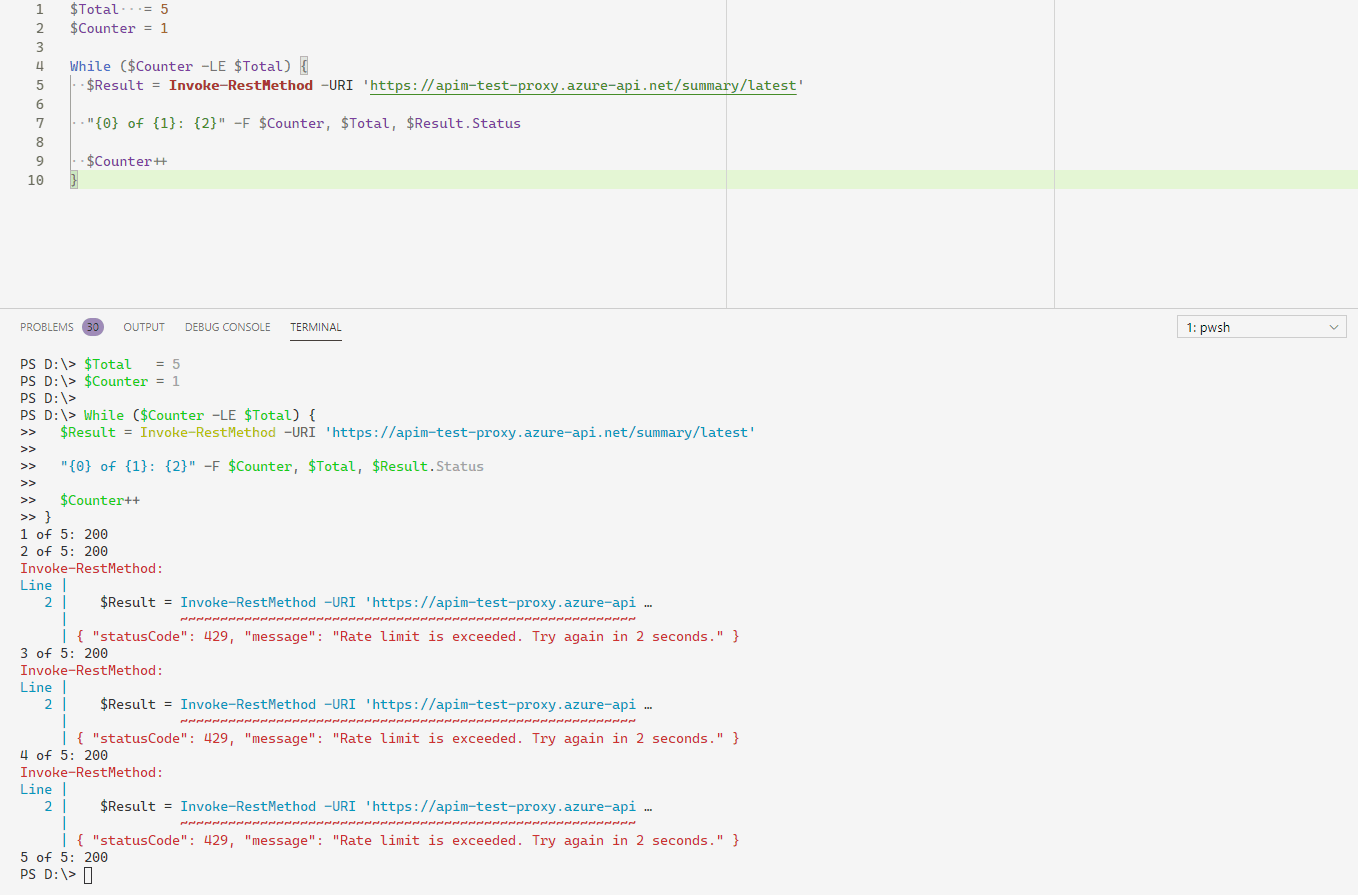
Once the policy is in place we will use a simple PowerShell while loop to demonstrate the rate limiting in action. As you can see below, once we are above 2 calls in a 3 second period, the API Management service returns a 429 error.
Conclusion
Using the API Management service to proxy API connections, either public or via a backend function, increases the utility and security of the existing API’s. With the ability to quickly modify, add new abilities, and cache results, Azure API Management is a very useful tool for any system administrator!


