How To Run Commands on Remote Windows Servers Using Puppet Bolt
Back in December of last year, I wrote about a new configuration management solution from Puppet Labs. Puppet Bolt is a free, open source, agentless, cross-platform tool that aims to make it easier to get started with automation. Bolt is essentially a remote task runner that supports any language the remote nodes natively run, and it can execute any existing management scripts that you have. But what makes Bolt more interesting is that it can be used to orchestrate operations across multiple devices using sharable tasks; and plans written using Puppet DSL. Because Bolt is agentless, DevOps teams can use it to orchestrate operations without installing agents or using a Puppet Master server. Additionally, much like Puppet itself, Bolt can be used in mixed Linux and Windows Server environments.
For more information on Puppet Bolt, see Puppet Bolt Agentless Automation for Linux and Windows Server on Petri.
While you can create complex plans, you don’t need to know Puppet to work with Bolt to run ad-hoc commands on remote devices. The question is why would you want to do that on Windows because PowerShell already has built-in support for remoting? The answer is that you probably wouldn’t use Bolt as a standalone remote task runner for Windows, but you might use it if you intend to run Bolt tasks and plans that also touch Linux devices. So, there is no harm in learning how to run commands remotely on Windows using Bolt if you want to work with it to perform more complex operations.
Install Puppet Bolt
In this article, I’ll show you how to use Puppet Bolt from a Windows 10 device and run commands remotely on Windows Server. Before you can use Bolt, you need to install it on Windows, i.e. your management PC. Because Bolt is agentless, there is nothing to install on the remote devices. Puppet Labs provides an .msi installer for Windows that you can download here.
Once Puppet Bolt is installed on your management PC, open a PowerShell prompt and type the command below to check which version of Bolt is installed:
bolt --version
If you need any additional help with Bolt, run:
bolt --help
Run a Remote Command
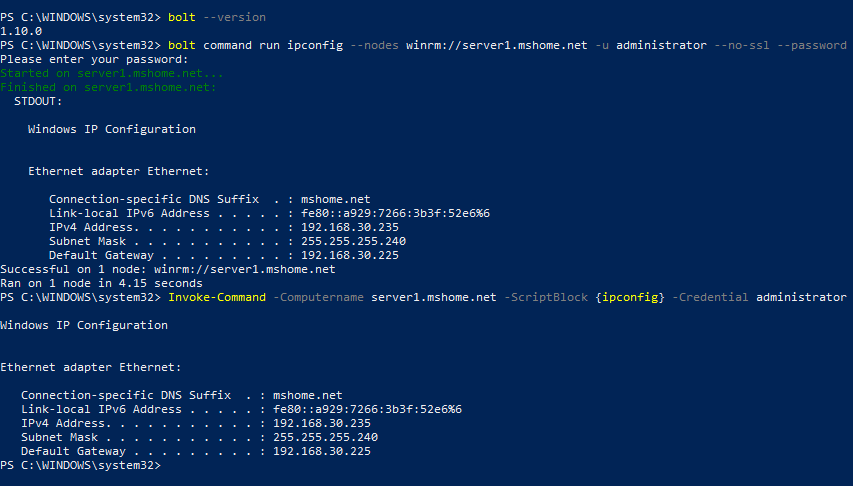
Now that we know Bolt is installed and working on the management PC, let’s run a command on a remote server. In the command below, I am running ipconfig on a remote Windows Server (server1).
bolt command run ipconfig --nodes winrm://server1 -u administrator --no-ssl --password
You can specify one or more nodes with the –nodes parameter. Bolt defaults to using Secure Shell (SSH) but because SSH isn’t installed by default in Windows Server 2019, I specify that Bolt use WinRM. Again, Bolt uses SSL by default, but Windows Server must be configured to use SSL with WinRM. It doesn’t secure communications using SSL out-of-the-box so –no-ssl is used to ensure I can make a connection. SSL is usually used with WinRM in situations where you need to connect to remote devices not in an Active Directory domain. A username is specified because neither the management PC or the remote server are part of a domain. Running the command will prompt me to enter a password for the given user account, although while it’s not recommended, you can specify the password on the command line after the –password parameter.

To perform the same operation using PowerShell Remoting, you would use the Invoke-Command cmdlet as shown here:
Invoke-Command -Computername server1 -ScriptBlock {ipconfig} -Credential administrator
If you want to run something more complicated on the remote device that includes spaces, you need to top and tail the code with single quotes. The command below displays the access control list (ACL) for the Windows folder on the remote server:
bolt command run ‘Get-Acl C:\Windows | Select *’ --nodes winrm://server1 -u administrator --no-ssl --password
As you can see, the basics of Puppet Bolt are simple. In a future article, I’ll look at creating tasks with Bolt.


