How to Create a Deployment Share in MDT 2012
Microsoft Deployment Toolkit 2012, known by the acronym MDT, is a solution accelerator from Microsoft. The solution accelerators are a collection of tools and utilities developed to make implementing Microsoft solutions something that is less of a burden for IT administrators and engineers.
MDT is a free download from Microsoft. However, once it’s installed you’ll still need to configure a few more items before you can start creating system images. This article describes how to create a new distribution share in MDT 2012. It also describes why deployment shares are necessary. For more information on Microsoft Deployment Toolkit 2012, read our article “Microsoft Deployment Toolkit (MDT) 2012 Update 1: Overview and Installation.”
The target computers to which you will be deploying the system images to need a place to download those files. The management computer, which runs the Deployment Workbench, does not need to have the deployment share located directly on the computer.
Putting Deployment Share on Something Other than the Management Computer
There are three great reasons for creating deployment shares that are not on the management computer.
1. Better fault tolerance. You may have a SAN that provides better fault tolerance. Your system images can represent a lot of time and effort getting everything just the way you want. Losing a hard drive that holds all of your system images can be very damaging to the infrastructure. New deployments will have to be delayed until the system image is recreated; during the recreation of the system image, the possibility of errors and missed configuration steps is introduced.
2. Improve performance. You may want to put your system images on faster disks than you have in your management computer to improve performance. Depending on your method of deployment and the amount of programs that you’re installing with the system image, the files that need to be transferred can be very large. Putting those deployment shares on the fastest storage available can makes a long process take less time.
3. Reduce network impact. If there are target computers that are on a different segment of the network, or a different geographic location altogether, you can reduce network impact by placing a deployment share on file storage that is closer to the target computers. The impact of this can be very great. For instance, if you have a 50GB system image including the operating system and all installed applications, each target computer will download 50GB from the deployment share. This could of course greatly impact the network, whether it’s going across the switches across subnets or across a WAN.
Of course, those are not going to be factors in every situation. Many times the management computer is a VM that is already running on a NAS or a good quality JBOD.
If you are going to create deployment shares that are on the network, then create them as network shares before you turn them into Deployment Shares.
Tip: If you’re going to create multiple Deployment Shares, keep the folder structure uniform between them. It is easier to script the Deployment Share creation in PowerShell if all of the paths are the same, such as $computer\DeploymentShare.
How to Create a Distribution Share in Microsoft Deployment Toolkit 2012 Update 1 Using the GUI
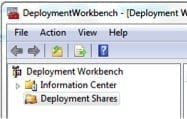
First, open Deployment Workbench on the Management Computer.
Next, start the New Deployment Share Wizard by right-clicking Deployment Shares. Then click New Deployment Share.
Alternatively, if you select Deployment Shares, then New Deployment Share is an option in both the Action menu and the Actions pane on the right side of the Workbench.
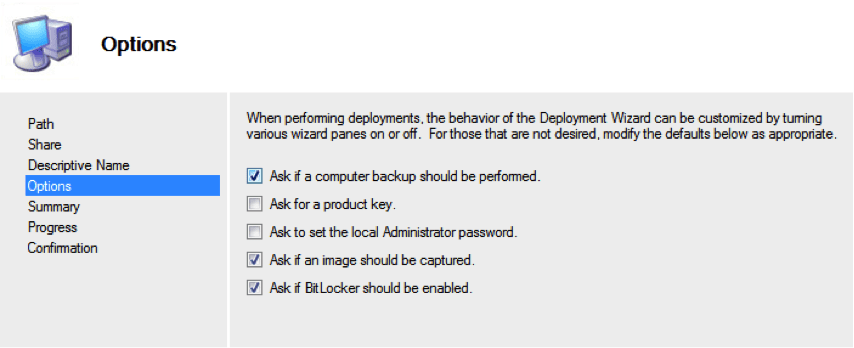
Now it’s time to configure items for the New Deployment Share Wizard. The New Deployment Share Wizard has the following pages that need input:
- Path – This is the path to the share. This can be a local drive, a mapped network drive, or a UNC network share. In the above picture, you can see a warning that the path has already been used as a deployment share.
- Share – This is the name of the share. Like setting the path, the share name needs to not already be in use.
- Descriptive Name – This is simply a friendly name for the Deployment Share.
- Options – There are several options available for the Deployment Share. These options define the behavior of the deployment wizard when run on images in the share. You can specify whether or not the users need to add a product key, for example, or whether an administrator password will be set by the end users.
- Summary – Gives a recap of the options you’ve selected before it creates the Deployment Share.
- Progress – Shows the steps as they are being completed.
- Confirmation – This shows you the status of the operation after creating the Deployment Share.
How to Create Multiple Distribution Shares in Microsoft Deployment Toolkit 2012 Update 1 Using PowerShell
One of the advantages of MDT 2012 with Update 1 is its use of PowerShell cmdlets to automate the process. First, load the Microsoft Deployment Toolkit cmdlets into PowerShell. When MDT 2012 Update 1 is installed, a module for PowerShell is installed with it.
The module is located in the install path for the toolkit. By default, this is “$env:systemroot\Program Files\Microsoft Deployment Toolkit.” The file to load is “MicrosoftDeploymentToolkit.psd1” in the “bin” directory.
You can load the Deployment Toolkits module like this:
# This is only put into a variable to make it easier to read on the web. # At the console, you could type this all in one line. $MDTPath = “$env:systemroot\Program Files\Microsoft Deployment Toolkit” Import-Module “$MDTPath\bin\MicrosoftDeploymentToolkit.psd1”
Create a new PSDrive for the Deployment Share
Not only does the Deployment Toolkit include several cmdlets, but it also includes an important component needed to complete the Deployment Share: a PSProvider type. Normally you would expect a mapped drive to use the “filesystem” PSProvider. However, the MDT module adds a new PSProvider. In this step we create a new PSDrive of the type MDTProvider.
New-PSDrive -Name "$NameOfDeploymentShare" -PSProvider "MDTProvider" -Root "$PathToLocalSharedFolder" -Description "$FriendlyNameOfDeploymentShare" -NetworkPath "\\$env:Computername\$NameOfShare" -Verbose | add-MDTPersistentDrive –Verbose
This creates a PSDrive on the local file system and sends the PSDrive to the Add-MDTPersistentDrive cmdlet, which takes an MDTProvider PSDrive and turns it into a deployment share opened in the Deployment Workbench.
To create the Deployment Share on a network share, modify the above to accommodate the network share. To do this, first change the Root parameter to \\computer\share. Then remove the NetworkPath parameter.
If you wanted to create multiple deployment shares, you can create them with PowerShell more easily than with the GUI.
$AllComputers = “Computer1”, “Computer2”, “Computer3”
$FolderStructure = “DeploymentShare”
$AllComputers | Foreach-Object { New-PSDrive –Name “$_Share” –PSProvider “MDTProvider” –Root “\\$_\$FolderStructure” -Description “Deployment Share on Computer: $_” –Verbose | Add-MDTPersistentDrive –Verbose }


