Customizing the Windows 10 Start Menu
Thanks to users’ complaints about the Start menu in Window 8, Microsoft reinvented the Start menu in Windows 10. Although it’s really not an exact clone of previous Windows versions Start menu, it’s should seem familiar for most users. In this article, I’ll provide tips on how to customize the Windows 10 Start menu.
A Look at the Windows 10 Start Menu
Windows 10 offers two methods for using the Start menu.
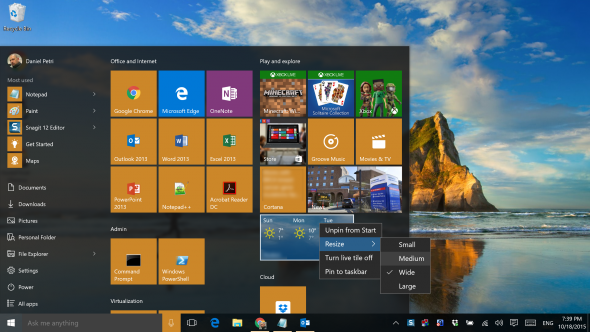
The first is a new hybrid Start menu that offers some flexibility resembling what we’ve been used to in previous versions of Windows. This includes a modern interface, where you can rearrange applications, change the size of the apps tiles, and hide or uninstall the ones that you don’t want. This Start menu can be resized by dragging its corners, and its color can be automatically changed to match the theme of your wallpaper.
The second method for using the Start menu is an interface where the desktop is entirely hidden behind the page that opens when you click on the Start button. Like in Windows 8, you can move, resize, or uninstall applications. This type of Start page may make sense to some, especially for those using tablet computers and touch screens.
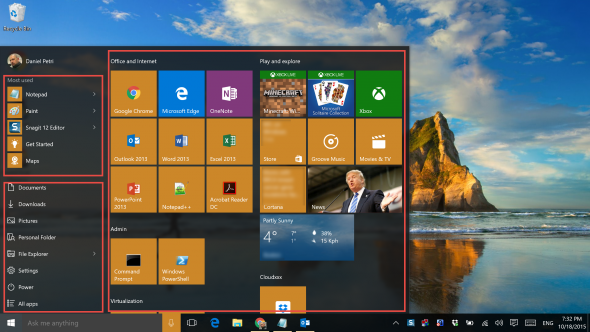
The new Start menu in Windows 10 is made of several components.
Appearing on the lower-left area of the Start menu, you can find shutdown and settings options. Although many of these cannot be removed or controlled, you can navigate to Settings > Personalization > Start to see customizable settings.
The apps section appears on the right side of the Start menu and contains two set of application shortcuts, which include regular desktop applications that you can add on your own, plus the modern apps section that allows you to hide, resize, re-arrange and disable live tile options for these applications. All these section’s settings, group names, and icon placements are stored in a database, which cannot be easily accessed. However, these settings can be cloned between your computers, allowing you to obtain a personalized experience across multiple computers.
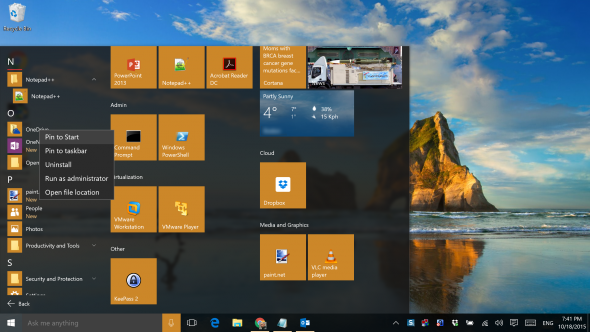
The All Apps section is similar to the one that we’re familiar with in previous Windows versions. This contains a long list of all the installed apps, either desktop or modern apps.
Note: At the time of writing this article, a bug exists in Windows 10 that prevents you from effectively using the All Apps section if you have more than 512 application shortcuts. Microsoft tells me that this will be fixed in a November hotfix.
The Most Used section provides a dynamic list of the apps that you’ve used the most.
Customizing the Windows 10 Start Menu
Now let’s discuss how we go about accessing the parts of the Start menu that are customizable.
In Windows XP, Windows Vista, and Windows 7, when you wanted to access the location of the Start menu folders and shortcuts to various applications that are installed on your computer, you could easily accomplish this by right-clicking the Start button and selecting Explore All Users. This takes you to the location of the Start menu folders, where you can arrange all the shortcuts and programs that you have in customizable folders. In Windows 10, this simply doesn’t work anymore.
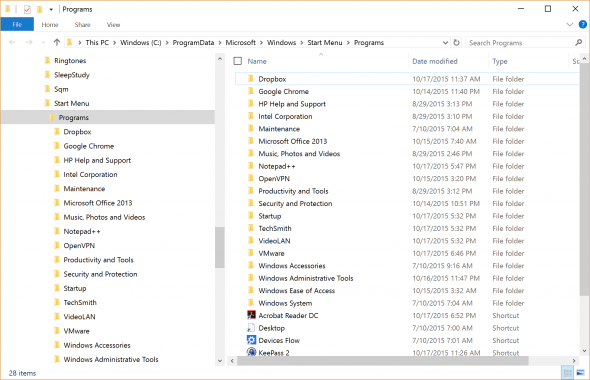
Open this path in Windows Explorer to open the All Users section of the Start menu. You can use drag-and-drop shortcuts to applications, rename folder names, and basically do whatever you were used to doing in previous Windows versions:
C:\ProgramData\Microsoft\Windows\Start Menu\Programs
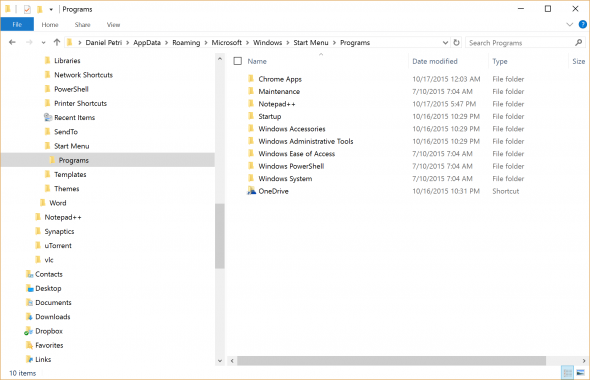
Open this path in Windows Explorer to open the personal user section of the Start menu. Edit, drag and drop, rename folders as needed.
C:\Users\<UserName>\AppData\Roaming\Microsoft\Windows\Start Menu\Programs
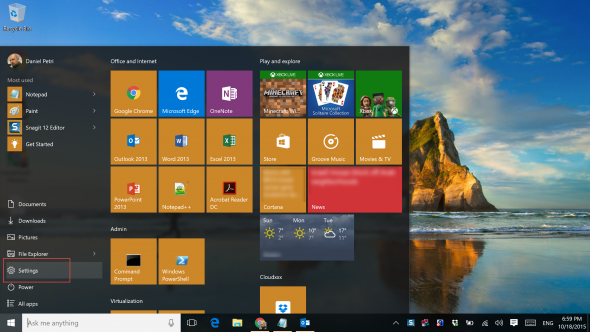
Open Settings from the Start menu.
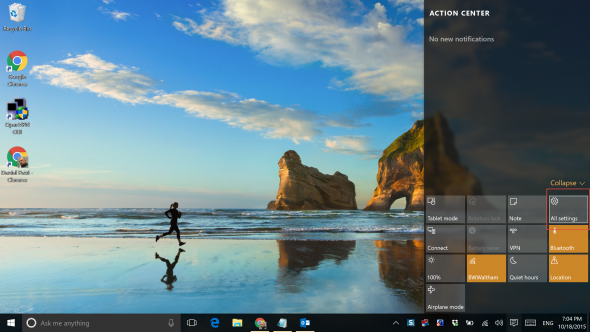
You can also access it by clicking on the Notifications icon in the System Tray area, and clicking on All Settings.
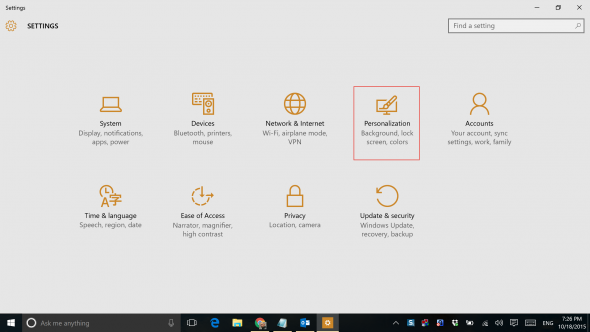
In the Settings window, click on Personalization.
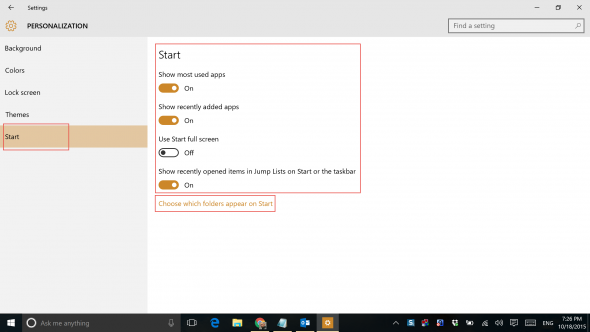
Click on Start.
Now you can make changes to some of the Start menu settings, including changing it to the full-screen Start page mode.
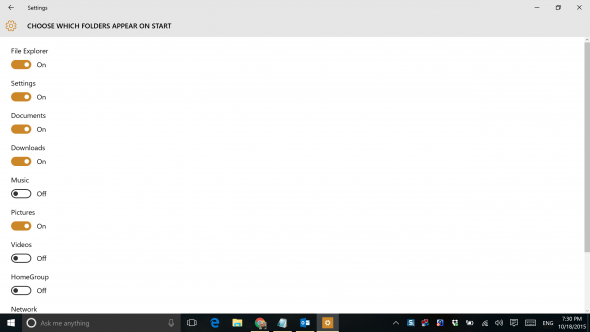
If you want to further customize it, you can click on Choose which folders appear on Start.
To change a tile’s size, location, grouping and so on – simply right click on it and choose the right option, or click to hold and drag it for relocation.
To pin an application to the Start menu or to unpin it, right click and choose the right option.


