Create a Room Mailbox in Office 365
In today’s Ask the Admin, I will show you how to create and use conference rooms in Office 365.
Office 365 has a feature with many different names. It is referred to as room mailbox, meeting room, conference room, etc. Regardless of what you call it, it is a feature that allows members of the Organization Management or Recipient Management role groups to create a resource mailbox that is assigned to a physical location in your organization, such as a meeting room.
Room Versus Equipment Mailboxes
Office 365 allows you to create equipment mailboxes, which are similar in concept to room mailboxes. They are not tied to a physical location, however. For example, an equipment mailbox might be created to let users reserve a resource, such as a projector or PC.
Users can reserve physical spaces by selecting the resource location when creating meeting requests. Additionally, users can be given permissions to a resource mailbox so that they can directly manage its calendar.
Create a Room Mailbox
There are two ways to create room mailboxes in Office 365. The easiest way is by using the Admin app and that is what I will show you below. It is also possible to use the Exchange Administration Center (EAC).
- Log in to Office 365 using an administrator account.
- Click Resources in the list of options in the left pane.
- Click Rooms and equipment under Resources.
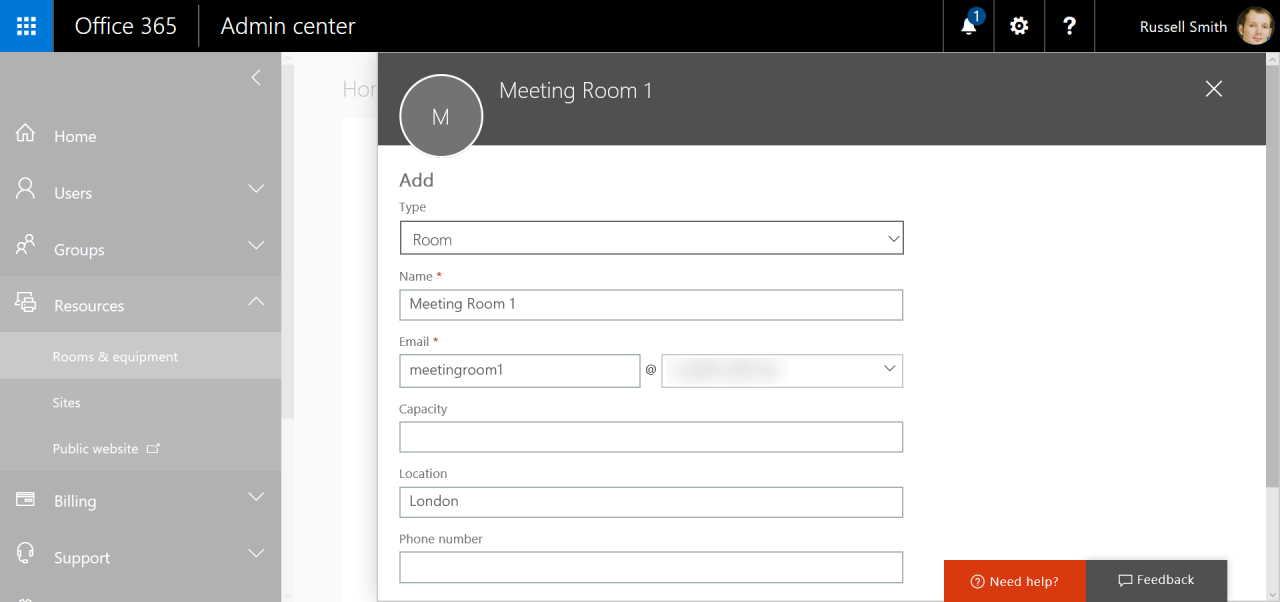
- Click Add under Home > Rooms and equipment on the right of the admin portal.
- Choose the room type in Type dropdown menu. Choose Equipment or Room.
- Enter a name and email address for the new resource.
- Optionally, you can also specify additional information for the resource in the Capacity, Location, and Phone Number.
- Click Add to complete the process.
It might take a few minutes to create the new mailbox.

Once the mailbox has been created, you will see an overview of mailbox configuration in the admin portal.
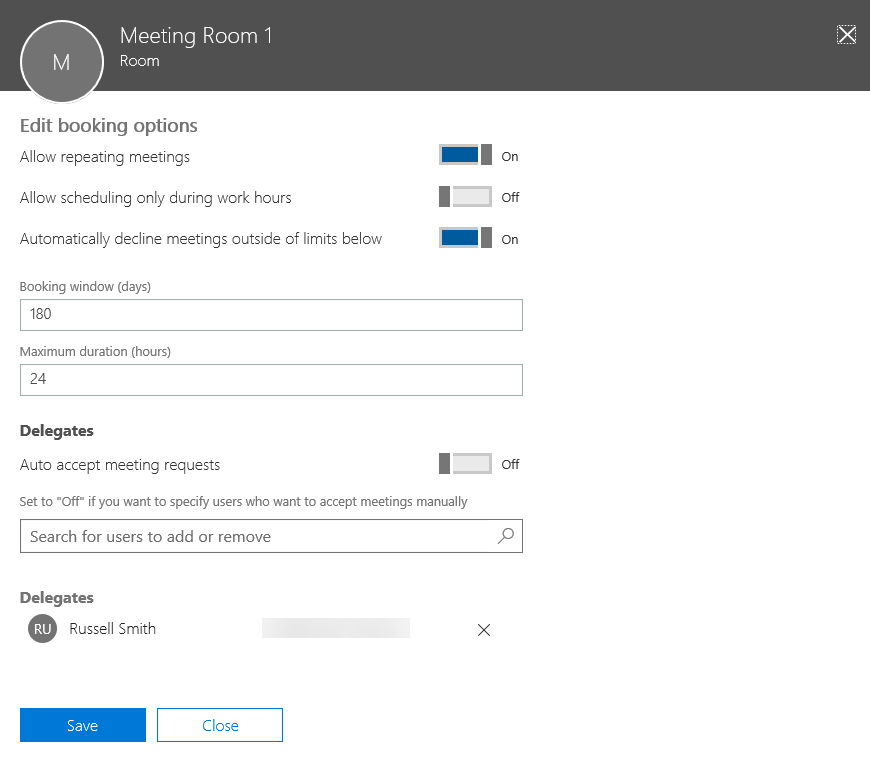
- Click on Set scheduling options to modify who can manage the mailbox.
- Under Edit booking options, you can change some of the default settings for the mailbox. An example of this, you can change whether meeting requests are declined that fall outside of the Booking window and Maximum duration.
- Below Delegates, you can add user accounts that can manage the mailbox. In this example, I have added myself and turned off the setting to Auto accept meeting. I will approve requests manually.
- Click Save when you are done.

The new meeting room will appear in the portal window under Rooms and equipment. Users will be able to select the room from the Add a location or a room dropdown menu when creating a new event in their Office 365 calendar.
Add a Room Calendar in Outlook 2016
If you have been assigned delegate access to a room mailbox, you can open the mailbox calendar in Outlook.
- Open Outlook 2016.
- Switch to Calendar using the icon in the bottom left corner of Outlook.
- Click Open Calendar in the ribbon at the top of Outlook and select Open Shared Calendar.
- In the Open a Shared Calendar dialogue, click Name.
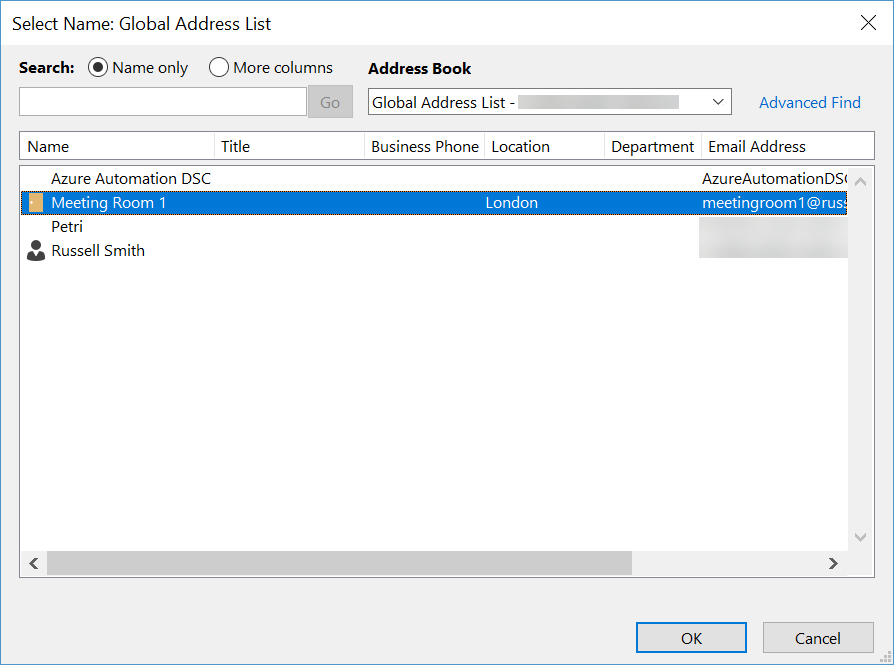
- In the Select Name dialogue, make sure that Address Book is set to Global Address List from the dropdown menu.
- Select the room mailbox from the list of available mailboxes and click OK.
- The calendar will open in Outlook.

In this article, I showed you how to create a room mailbox in Office 365 and manage its settings.


