In a previous Ask the Admin, I showed you how to create two virtual networks and link them using a VPN by using the new Azure management portal that reached General Availability in December 2015. If you followed through those instructions, you were probably tired of clicking by the end. A much quicker way to achieve the same result is to use the Azure Resource Manager (AzureRM) modules for PowerShell.
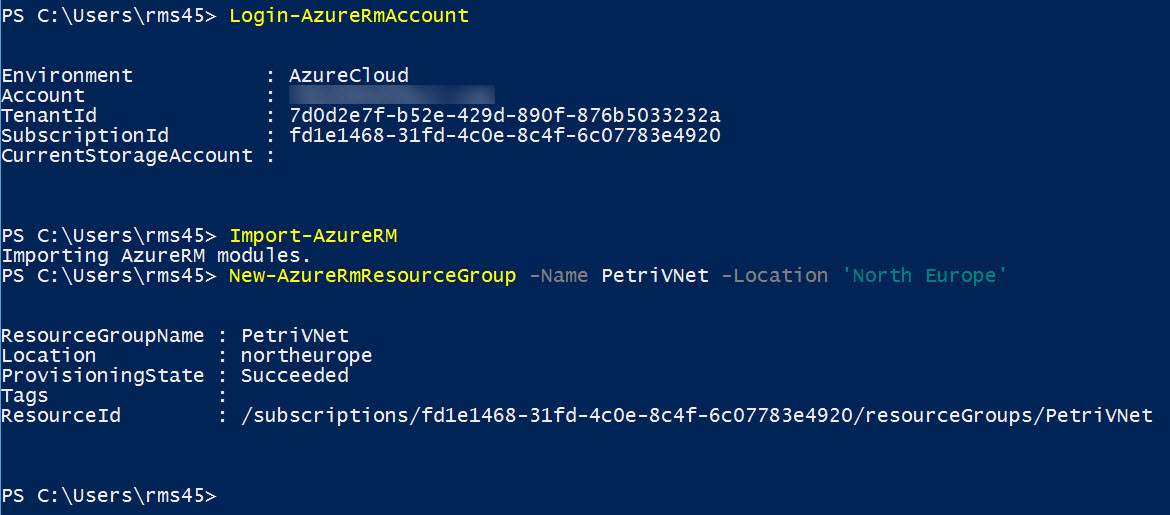
Before you can use the AzureRM modules, you’ll need to install Microsoft Azure PowerShell using the Web Platform Installer. Once installed, open a PowerShell prompt, type Login-AzureRmAccount in the prompt window and press ENTER. When prompted, enter the Microsoft Account username and password associated with your Azure subscription.
If you have more than one Azure subscription associated with your Microsoft account, you can use Get-AzureRmSubscription to list the subscription IDs associated with the login. If you want to change to a different subscription, use Select-AzureRmSubscription to change the active subscription ID, replacing ‘fd1e1468-31fd-4c0e-8c4f-6c07783e4920’ with your subscription ID.
Import the AzureRM modules for use in the current PowerShell session by running Import-AzureRMConnect to Azure and create a new Resource Group (Image Credit: Russell Smith)
Before continuing, we need to create a Resource Group (RG) in which to place the virtual networks and their associated resources. For simplicity, I'm going to create one RG for this demonstration:
Create a virtual network
Now let’s create some variables with information about our first virtual network. For the purposes of this article, I’ll create the first virtual network with an address space of 10.8.0.0/16 and default subnet (Subnet1) using the 10.8.0.0/24 address range. The second virtual network will have an address space of 192.168.0.0/16 and default subnet (Subnet1) with the address range 192.168.0.0/24.
Create a new VNet (Image Credit: Russell Smith)
The chosen address space for the gateway subnet shouldn’t overlap with an existing address space in the virtual network, or have a subnet mask smaller than /16 or greater than /29. Additionally, it must be named GatewaySubnet.
To connect the two virtual networks to one another, we’ll need to create a dynamically provisioned public IP address:
Create a virtual network gateway
A virtual network gateway acts as an endpoint for the network so it can be connected to another VNet using a VPN. In the steps below, we create a new gateway and associate it with a VNet, a gateway subnet and public IP address.
Add a virtual network gateway to the VNet (Image Credit: Russell Smith)
Create a second VNet
Repeat the above steps to create a second virtual network with a different address range. It will need a default subnet, gateway subnet, public IP address and virtual network gateway.
Create connections for both VNets
Now all that’s left to do is create two connection resources so that the VPN can be established from PetVNet1 to PetVNet2, and vice versa.
Create connection resources (Image Credit: Russell Smith)
Create a second connection resource as shown below:
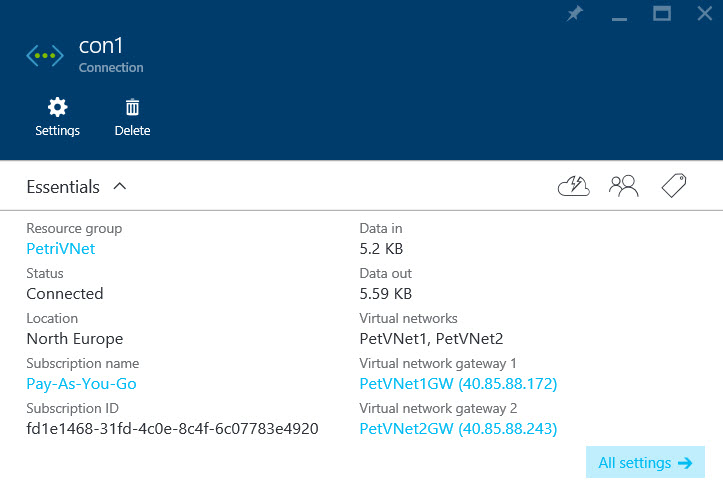
Checking the connection
The easiest way to check if the connection resources have been created successfully and connected is to log in to the new management portal: