Configuring the PowerShell Console
- Blog
- PowerShell
- Post
If you are going to spend your days inside the PowerShell console, then you should make sure the console is configured to make life easier for you. Before we get started, let me make two distinctions. First, the PowerShell console should not be confused with the PowerShell ISE that has a completely different interface. Second, the PowerShell console is based on your operating system and not the version of PowerShell. Remember that PowerShell is an automation engine that has to be hosted in some application. For the traditional console, Microsoft used the command.exe application, which hasn’t really changed since the days of Windows NT. This leads many people to lament the state of PowerShell when it first came out because they didn’t understand the architecture.
- Related: Your First 30 Minutes in PowerShell
The Legacy Console
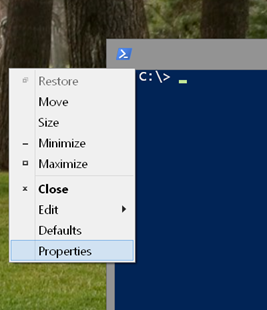
You can adjust your console by right-clicking the system menu in the upper left corner.
Select Properties.
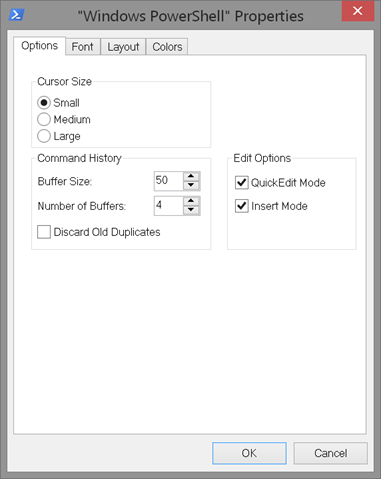
The Edit Options should be checked. This lets you select text in the window and copy it to the clipboard by pressing Enter. You can also paste text at the prompt by right-clicking. Buffer Size refers to the number of items in the command buffer, which you get by pressing the Up Arrow key or F7. This is a separate buffer from command history, which you can get with the Get-History cmdlet. If you never use the F7 shortcut, then you can leave this at 50. Otherwise I’d suggest setting it to a value closest to the value of the built-in variable $MaximumHistoryCount. The largest value you can set for buffer size is 999.
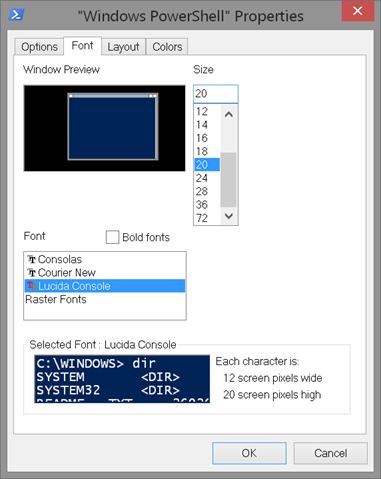
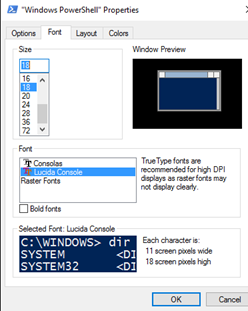
On the Font tab you want to make sure you select a fixed width setting, such as one of the TrueType fonts. You’ll get a preview of what each font looks like. You can also adjust the font size. Personally, I typically go with a larger size, because it makes my screenshots easier to read. But you can pick something that’s easy for you to read on your monitor. I can’t imagine that you’d need anything larger than 20.
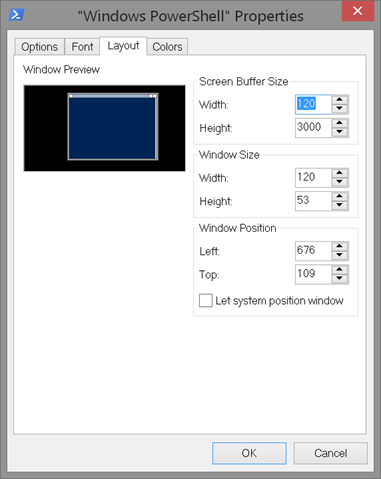
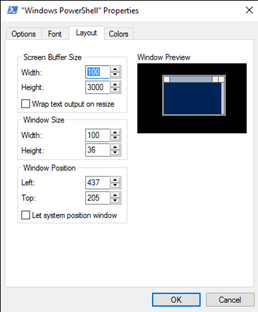
The Layout tab is a bit interesting.
You should get a screen buffer height of 3000. This is good and should meet your needs. When you run a command with a lot of output, and it scrolls off the screen, it’s going into this buffer. This is what the vertical elevator bar is for. If this is set too low, then you risk losing access to results. For a PowerShell window, Microsoft has set the width to 120 characters, which given today’s large monitors should be fine. If you want to experiment with different heights, you can do so, too. One thing I recommend is to make sure that the Screen Buffer width is the same as the window width. Otherwise, you’ll end up with a horizontal scroll bar, which is a nuisance.
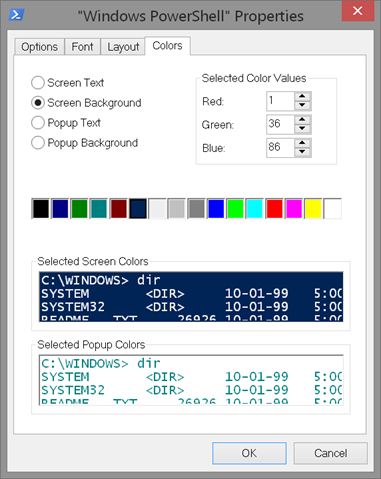
The last tab is for colors.
You can select different color combinations. Just be aware that sometimes PowerShell displays information in different colors, such as errors, warnings, or verbose messages. If you modify the screen text or background, you run the risk of not being able to see these messages or not being able to distinguish them. As a rule, if I decide to change from the default, I stick with black, white, and grays. Of course, if I go with a lighter background, then I pick a black screen text.
Clicking OK will apply all your changes and make them permanent, at least until you decide to change them.
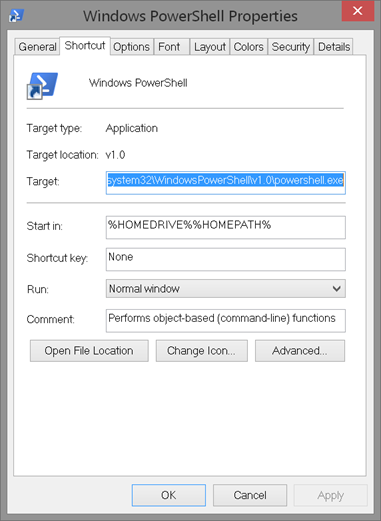
I should point out that all of these settings start with the original shortcut you used to start PowerShell.
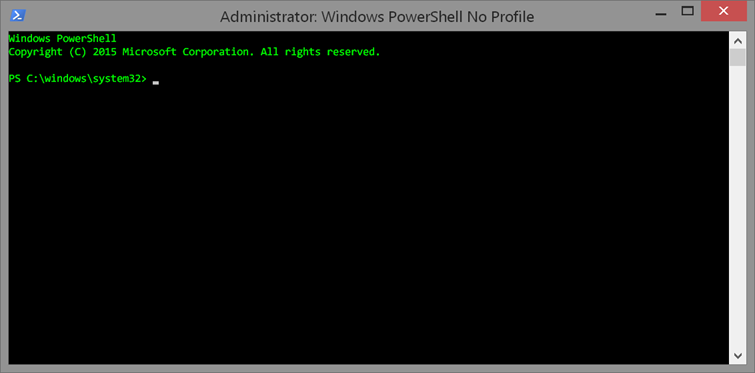
This means that you could create separate shortcuts to start PowerShell with different schemes. For example, I created a copy of the shortcut and modified it to start PowerShell with the –NoProfile parameters.
Next, I cconfigured this window with a different color scheme and size.
The Windows 10 Console
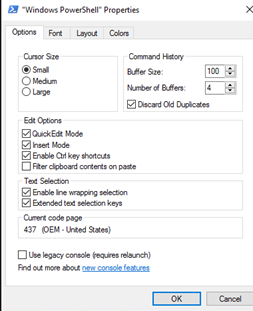
When Microsoft introduced Windows 10, they also introduced a new version command.exe. Many of the items that I just showed you can still set in Windows 10.
One welcome addition is the use of Ctrl+C and Ctr+V for copy and paste. You need to make sure that under Edit Options you have selected Enable Ctrl Key shortcuts. The default options should be more than sufficient for most people.
The Font tab is essentially unchanged.
The same is true for Layout.
You can experiment with the Wrap text on resize option. Personally, I leave it off.
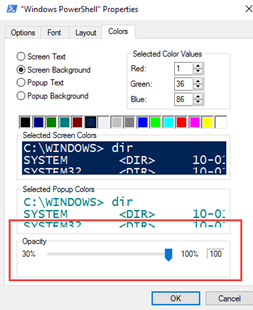
Finally the Colors tab is also familiar with one terrific addition.
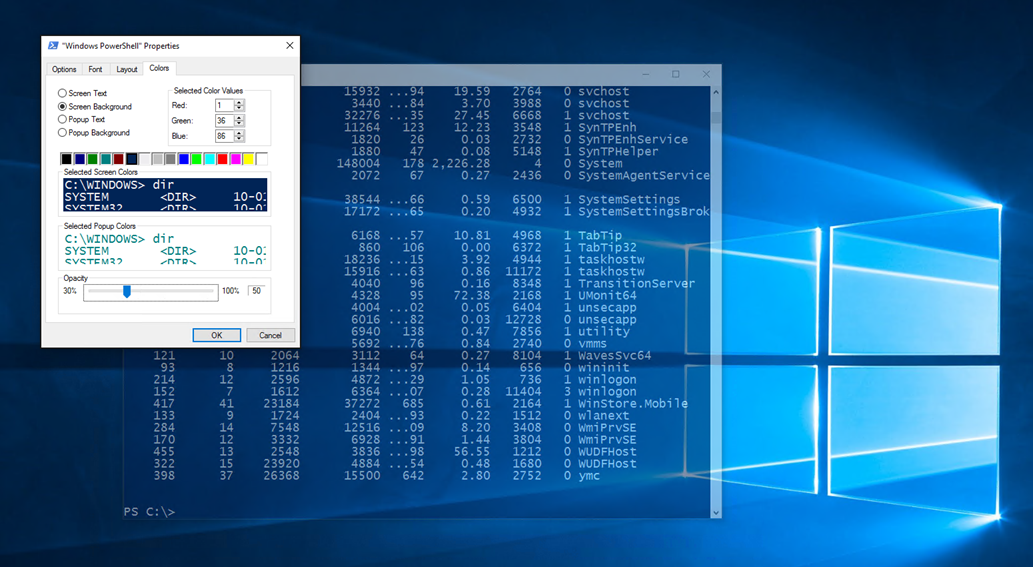
You can now set the Window’s opacity, which means that you can make the PowerShell window a bit more transparent. As you adjust the slider, the window will become more transparent.
Personally, maybe I’m just an old-school guy, but I’m perfectly happy with a setting of 100 percent.
Make the Console Work For You
The bottom line is for you to configure the console to suit the way you work and your environment and it may take a little trial and error to find just the right combination. As for the new features in Windows 10 I’d love to hear if you find them useful so please drop me a comment.


