Windows 11: How to Enable the Classic Start Menu
If you prefer the ‘classic’ Windows 10 Start menu, or if you want Live Tiles back, then Windows 11 gives you the option to revert to the Windows 10 Start menu. Microsoft could remove the ability to switch back to the Windows 10 Start menu in Windows 11. But I expect to appease enterprise users, the setting will remain and that it will also be available to configure in Group Policy. At the time of writing, it’s only possible to switch to the classic start menu by adding a value to the registry.
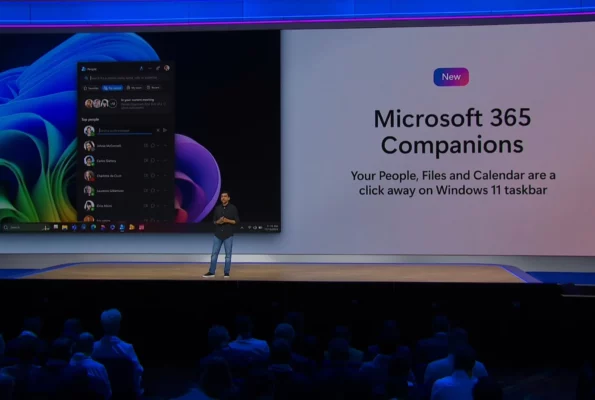
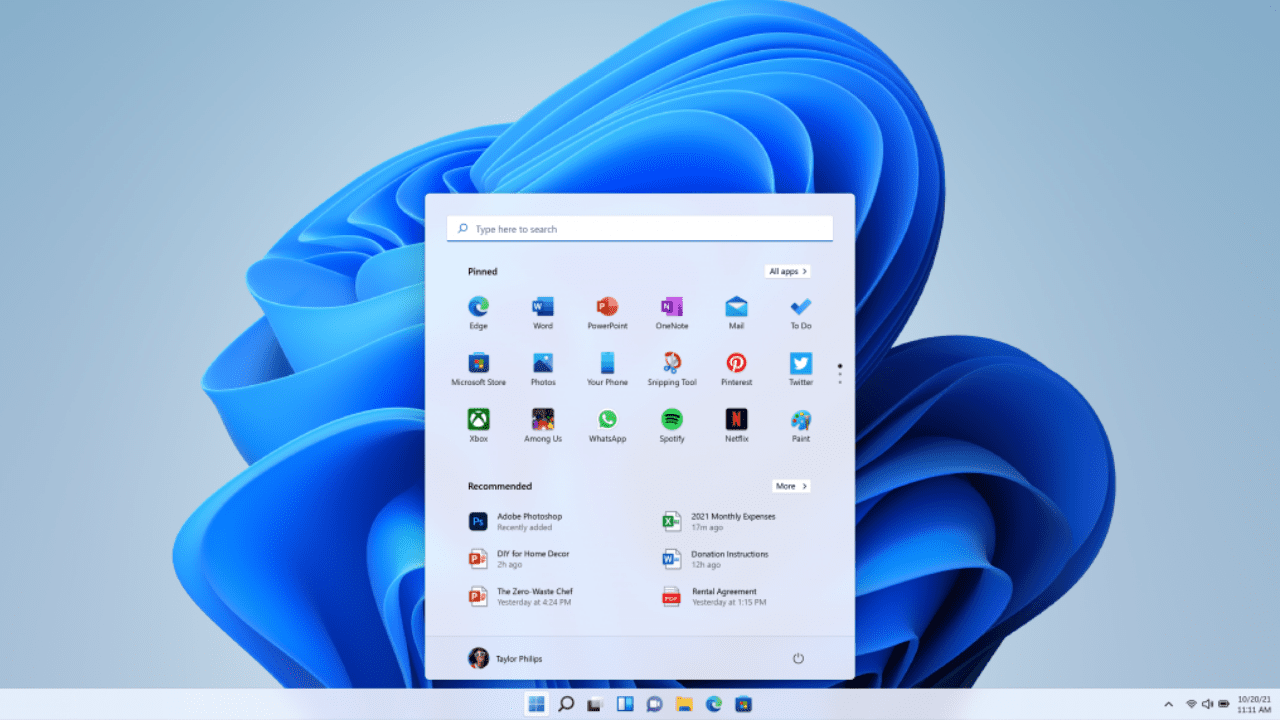
Windows 11 Start menu provides a phone-like experience and cleaner look
But before you rush to change back to the classic Start menu, consider using the new Start menu for a few weeks. In my opinion, it’s a big improvement over the Windows 10 Start menu, which evolved into a bit of a mess. The new Start menu in Windows 11 provides a cleaner experience, disposing of Live Tiles and replacing them with application icons. The app icons can be moved around and arranged as you like, much like you can do on iOS and Android. The icons are arranged in pages, similar to iOS, for a more ‘phone-like’ look and experience.

Live Tiles are no great loss because developers didn’t support them. And even Microsoft’s own applications made limited use of Live Tiles. As there was little interest in the feature, Microsoft never invested further in its development.
The ‘Recommended’ section at the bottom of the new Start menu lets you see docs that you’ve been accessing recently, whether locally or from the cloud. The timeline from Task View is gone in Windows 11, but the ‘Recommended’ section on the new Start menu more than makes up for its removal.
Instead of needing to click three times to power down or put a device to sleep, you just need two clicks on the Windows 11 Start menu. Similarly, to sign out or lock a device also requires just two clicks. ‘All apps’ is now tucked away in the top right corner. But you can still type on the Start menu to search for apps and documents.
How to Switch back to the classic Windows 10 Start menu
But if you have decided that the new Start menu is not for you, you can add a value to the registry and go back to the Windows 10 experience.
- Open the Windows 11 Start menu by clicking the Windows key on the taskbar.
- Type regedit and then click Registry Editor in the search results.
- Click Yes in the User Account Control dialog to give Registry Editor permission to run.
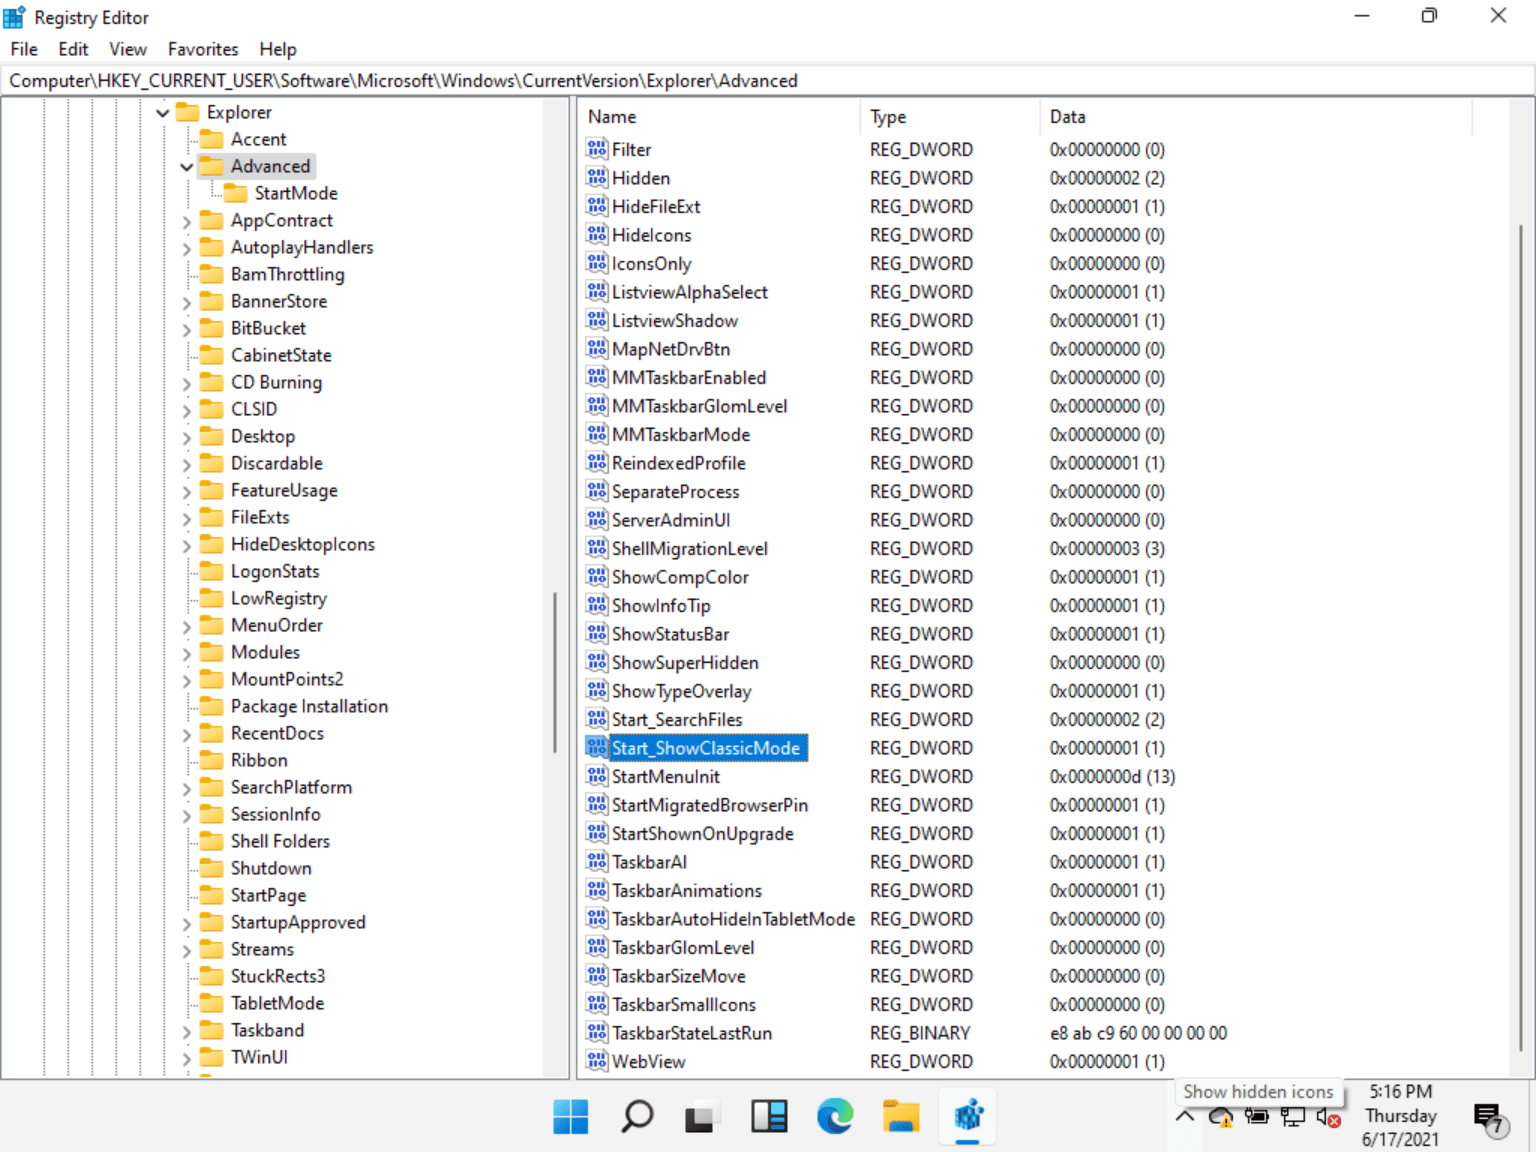
- In the Registry Editor application in the left pane, expand HKEY_CURRENT_USER > Software > Microsoft > Windows > CurrentVersion > Explorer > Advanced.
- Make sure the Advanced key is selected on the right.
- In the right pane of Registry Editor, right click some white space and select New > DWORD (32-bit) Value.
- A new value will appear. In the box, type Start_ShowClassicMode.
- Double click Start_ShowClassicMode.
- In the Edit DWORD dialog box, type 1 in the Value data field and click OK.
- Now close the Registry Editor application.
- Open the Start menu, click your username at the bottom of the menu, and click Sign out.
- Sign into Windows again with the user account you just signed out from. The registry change is per user, so you need to sign back into Windows using the account where you added the Start_ShowClassicMode registry value.
It may take a minute or so before your user account is switched to the classic Windows 10 Start menu.

If you want to use the Windows 11 Start menu again at any point, just delete the Start_ShowClassicMode value from the registry, sign out, and when you sign back into Windows, you will have a restored Windows 11 Start menu experience.
Russell Smith, the Editorial Director at Petri IT Knowledgebase, has over two decades of hands-on experience in IT, in both small business settings and government IT infrastructure projects. Russell started writing for Windows IT Pro Magazine in t...