Windows 10 Multiple Monitor Tricks

In today’s Ask the Admin, I’ll show you a couple of tricks that make working with multiple monitors in Windows 10 easier.
For those of us lucky enough to have multi monitor setups or just a notebook that you connect to an external display when it’s docked, productivity can get a series boost. I don’t have multiple monitors, but I often use my notebook’s screen simultaneously with an external display to get work done faster.
Use a notebook display with an external monitor in Windows 10
One of the disadvantages of using multiple displays of separate sizes is that wherever you position the notebook, it will always require you to move your head into a position that changes your posture to something that’s less than idea. And over a long period, it can cause fatigue and other aches and pains.
If you decide to use an external monitor with your notebook’s display, try positioning the notebook directly below your external monitor rather than to one side. So instead of moving your head sideways and then downwards, you just need to move your head downwards to see the notebook.
Set your displays up and down instead of sideways
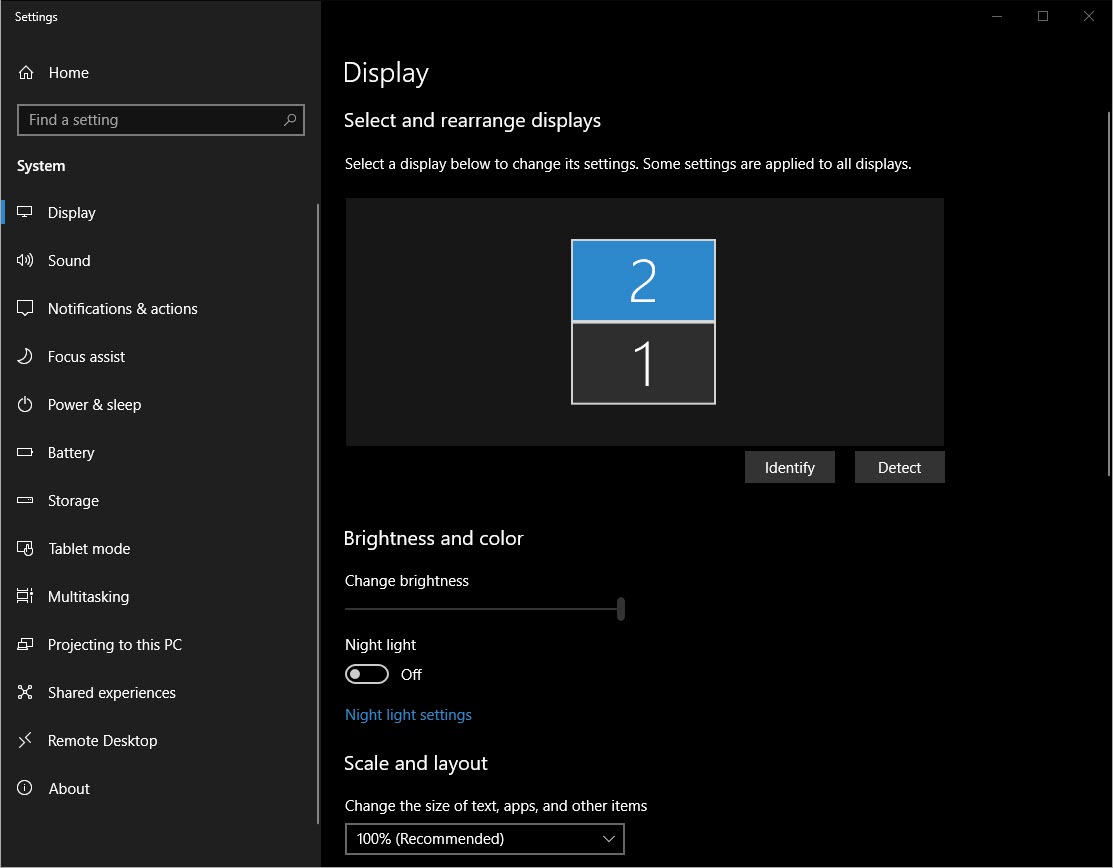
You can configure this display setup in Windows 10 using the Settings app. By default, when you enable a second display, Windows places them side-by-side. But if you want to position your notebook below an external display, in the Settings app drag the screen identified as [1] below the external display [2].
Then when you move your mouse to the bottom of the external display and further down, it will cross to your notebook’s monitor, and vice versa.

To set up a second monitor as shown in the image above:
- Right click the desktop and select Display settings from the menu.
- In the Multiple displays menu, select Extend these displays and then click Keep changes.
- Now drag the first monitor in the graphic at the top of the Customize your display screen to sit below the second display and click Apply.
Extend displays across multiple monitors quickly using Windows + P
If you decide to go with the setup I described above, it’s likely that you won’t want to use the notebook monitor all the time but just when you need the extra screen real estate. But opening the Settings app to change the configuration each time is a bit of a pain.

To quickly extend the display when you have an external monitor connected:
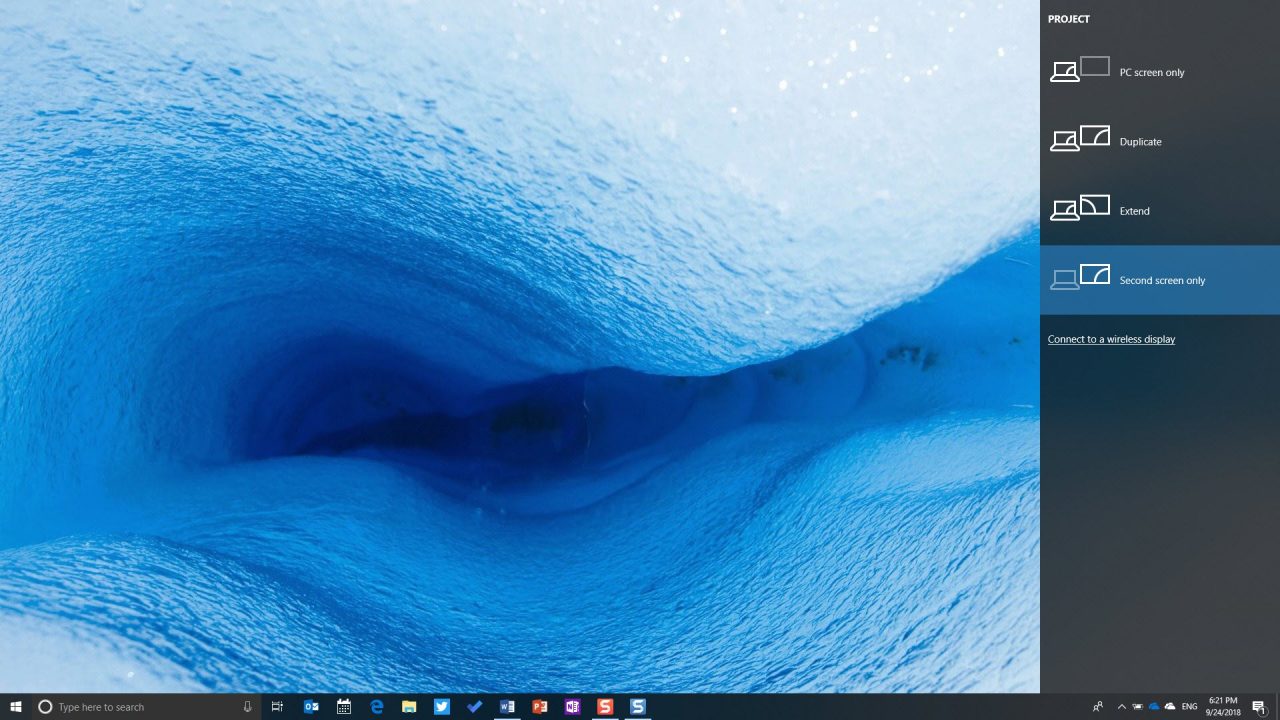
- Press the Windows key and P (WIN+P) to open the Project menu.
- Select Extend from the menu to extend the external display’s screen to your notebook.
- To switch back to using just the external display, press WIN+P again and select Second screen only instead.
And that’s it! Hopefully these tips will make it easier to work with multiple monitors and your notebook at the same time in Windows 10.
Related article: Change Windows 10 Graphics Settings to Solve Display Problems on Devices with Dual GPUs


