Set Up Azure Active Directory Connect Pass-Through Authentication
Microsoft has recently made it easier to securely connect Windows Server Active Directory (AD) to Azure AD, without needing to set up and maintain Active Directory Federation Services (ADFS). In this Ask the Admin, I will show you how to set up Azure AD Connect pass-through authentication (PTA).
A couple of weeks back on Petri, I wrote about how Microsoft added PTA to Azure AD Connect. This is the tool that replaced DirSync for connecting on-premises Windows Server AD to cloud-based Azure AD. ADFS provides federated identities with true single sign-on (SSO). Password hashes are never synchronized to the cloud but ADFS is complicated to set up. PTA provides the main benefits of ADFS, such as storing password hashes on-premises and high availability, without the complexity. Password synchronization is also an option in Azure AD Connect but as the name suggests, password hashes are stored in Azure AD.
If you missed it, you can read the details in Azure Active Directory Connect Makes Cloud Single Sign-On Easy on Petri.
It is worth remembering that at this stage PTA is a preview. This means that it is not supported by Microsoft and should not be configured in production environments. If you want to test it in a lab, you can download the latest version of Azure AD Connect and run the wizard.
The setup process for connecting Windows Server AD to Azure AD using PTA does not differ much from password synchronization. There are some key points you should keep in mind:
- PTA installs a lightweight agent on the device where Azure AD Connect is run. The agent communicates with Azure AD using ports 80 and 443 and can be installed on an AD member server or domain controller. Additional agents must be installed manually if high availability is required.
- Before setting up Azure AD Connect, you should configure a cloud-only global administrator in Azure AD. This account will be needed during the install process and can be used to access Azure AD should something go wrong with Azure AD Connect. An account that is not sourced from Azure AD, such as a Microsoft work or school account, should not be used when Azure AD Connect asks for credentials to connect to Azure AD.
- Azure AD Connect works with Azure AD directories that have been configured with a custom domain name. Azure AD trials use the com domain. Therefore, you will not be able to set up synchronization unless you configure a custom domain name for the directory.
- Once synchronization has been configured, Windows Server AD will become the primary source of knowledge. This means that accounts configured in Windows Server AD will be synchronized to Azure AD but not vice versa. You will still be able to create new cloud-only accounts in Azure AD. Accounts synchronized from Windows Server AD will be visible in the Azure AD portal but the properties will be grayed out. The source property for these accounts will be set to Windows Server AD.
Set Up Azure Active Directory Connect PTA
In this example, I will install Azure AD Connect on a Windows Server 2016 domain controller. For detailed information about the requirements and supported scenarios, see Microsoft’s website.
- Log into your Azure AD tenant and create a new user in Azure AD with Global Administrator rights.
- Log into Azure AD using the account you created above. This step is necessary to change the temporary password.
- Download and run Azure AD Connect on the server where you want to install the PTA agent.
- Agree to the terms and conditions on the welcome page in Azure AD Connect and click Continue.
- To get full control over the settings, click Customize.
- Click Install on the Required components. Azure AD Connect will install SQL Server 2012 Express LocalDB.
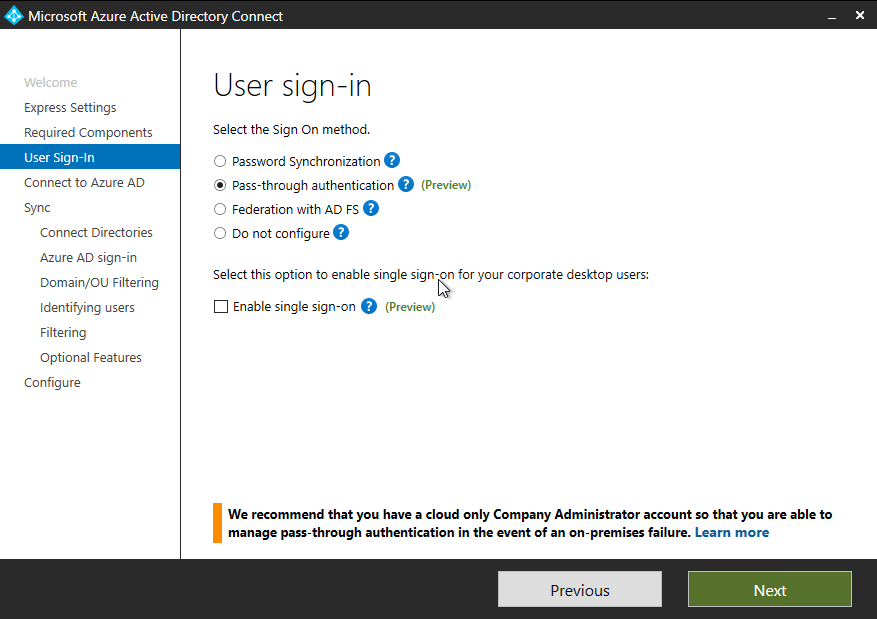
- On the User sign-in page, check Pass-through authentication and Enable single sign-on. Click Next.
- On the Connect to Azure AD page, enter the credentials for the cloud-only global administrator account you created earlier.
- On the Connect your directories page, select a forest from the drop-down menu and click Add Directory.
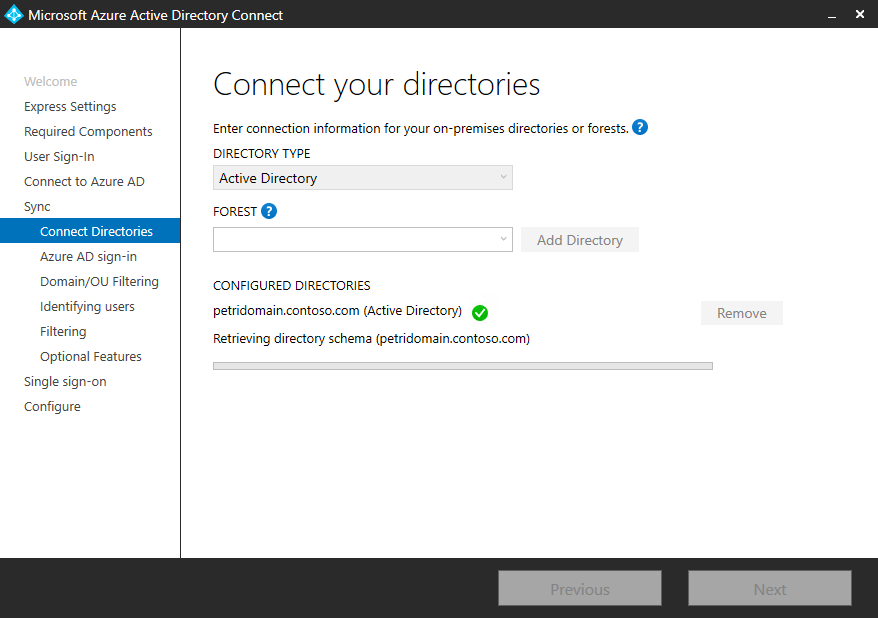
- In the AD Forest account dialogue, check Use existing, enter enterprise admin credentials for the Windows Server AD directory, and click OK.
- Click Next on the Connect your directories.
- On the Azure AD sign-in configuration page, make sure that userPrincipalName is selected in the drop-down menu.
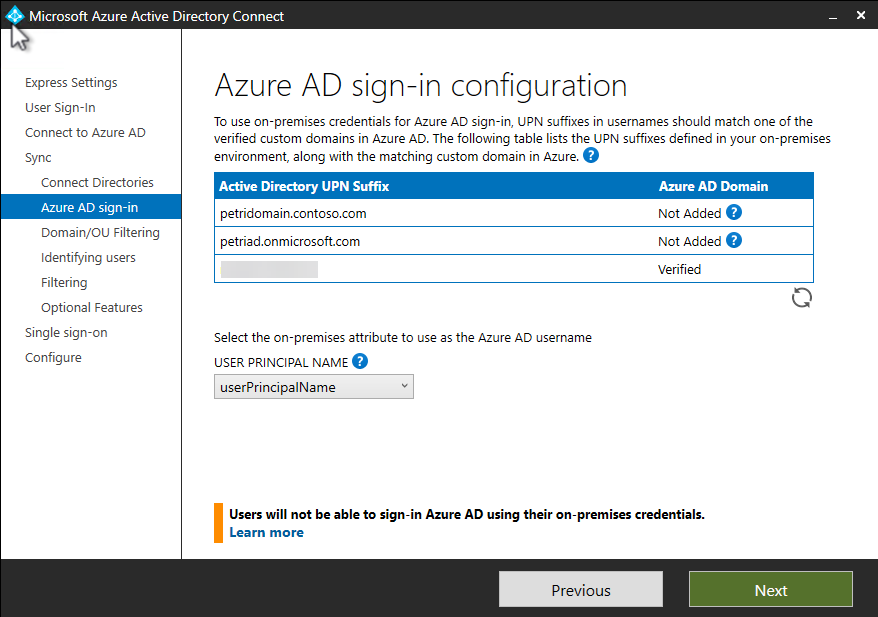
- In the Active Directory UPN Suffix box, one suffix must be verified. If you do not have a UPN suffix configured in Windows Server AD that matches the custom domain name used in Azure AD, you can add a UPN suffix. Click Next.
For more information on how to add a UPN suffix to AD, see How to Add UPN Suffixes in Active Directory on Petri.
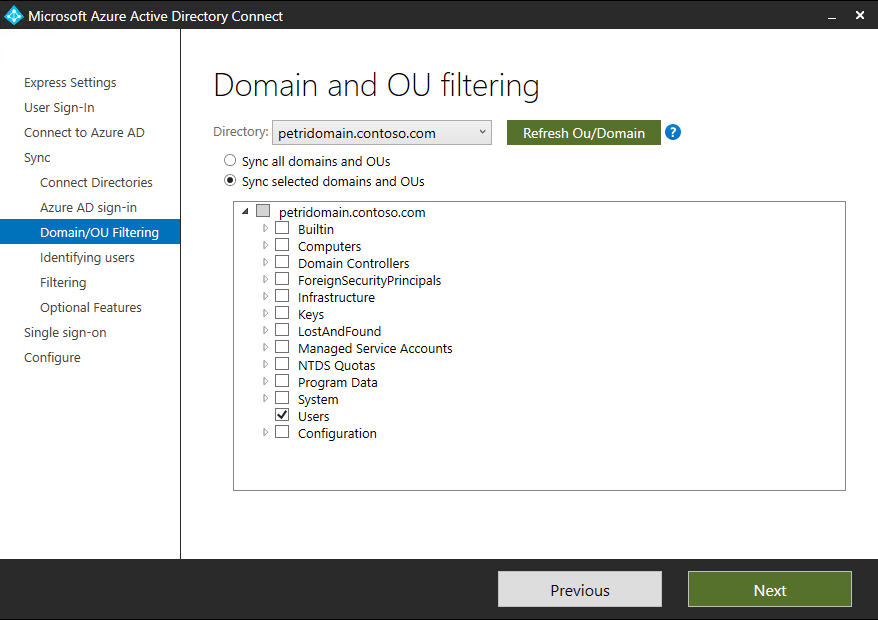
- On the Domain and OU filtering page, expand your Windows Server AD domain and select the OUs you want to synchronize with Azure AD. In this example, I am going to select only the built-in Users. Click Next.
- Click Next to accept the default settings on the Uniquely identifying your users, Filter users and devices, Optional features, and Enable single sign-on.
- On the Ready to configure page, make sure that Start the synchronization process when configuration completes is checked and click Install.
- Click Exit on the Configuration complete page.
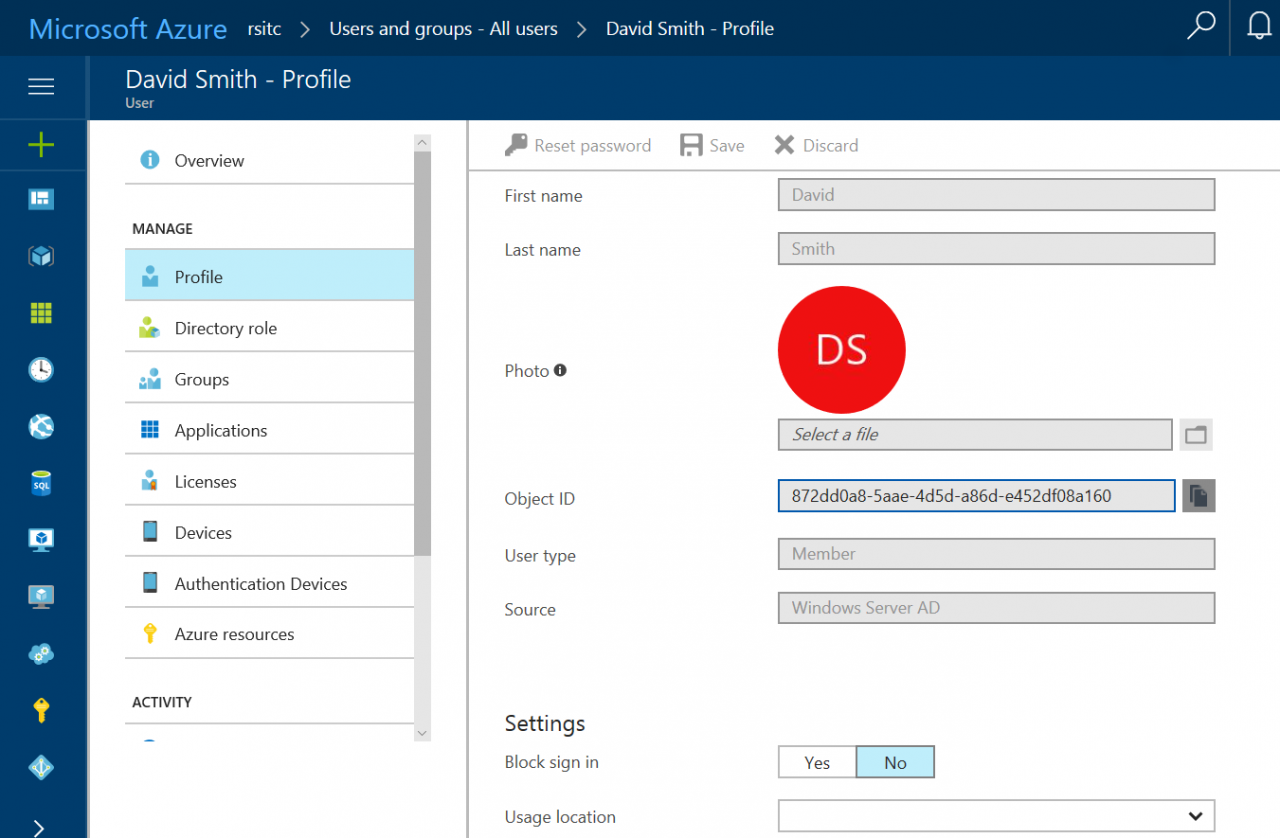
- Log in to Azure AD and check that the accounts in the Users container have been synchronized. In my directory, I can see that the account called David Smith has been synchronized to Azure AD.
In this article, I showed you how to configure Azure AD Connect using PTA. In a future article, I will cover installing additional agents for high availability, more complex configuration options in the Azure AD Connect wizard, password writeback, self-service password resets, and more.


