Manage Active Directory Groups Using PowerShell
In today’s Ask the Admin, I’ll show you how to create and add and remove users from Active Directory groups using PowerShell.
In a previous article on the Petri IT Knowledgebase, Create New Active Directory Users with Excel and PowerShell, I showed you my preferred method for adding new users to Active Directory. It’s easier to collect all the required information about users in a database or Excel spreadsheet and then pipe that to the New-ADUser cmdlet, rather than trying to manually construct a command to create each user.
But in that article, I didn’t take into consideration group membership. Today, I want to show you how to create groups and modify group membership using PowerShell.
Create a New AD Group
To run the PowerShell cmdlets in this article, you’ll either need to be logged into a Windows Server 2012 domain controller or a domain-joined machine that has the AD module for PowerShell installed, and you’ll need to be using an account that has permission to create and modify AD groups. For more information on installing the AD module for PowerShell, see How to Install the Active Directory PowerShell Module on a Member Server on Petri.
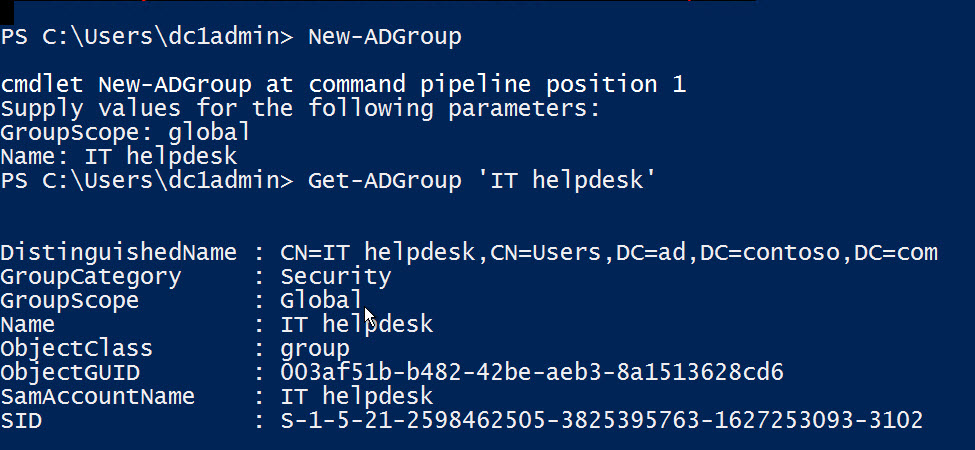
To run the following cmdlets, you don’t necessarily need to remember their syntax. You can just type the cmdlet in a PowerShell prompt and follow the onscreen prompts for information. In the screenshot below, you can see I created a new AD group by simply typing New-ADGroup, pressing ENTER, and then entering values for the two requested parameters: –GroupScope and –Name.

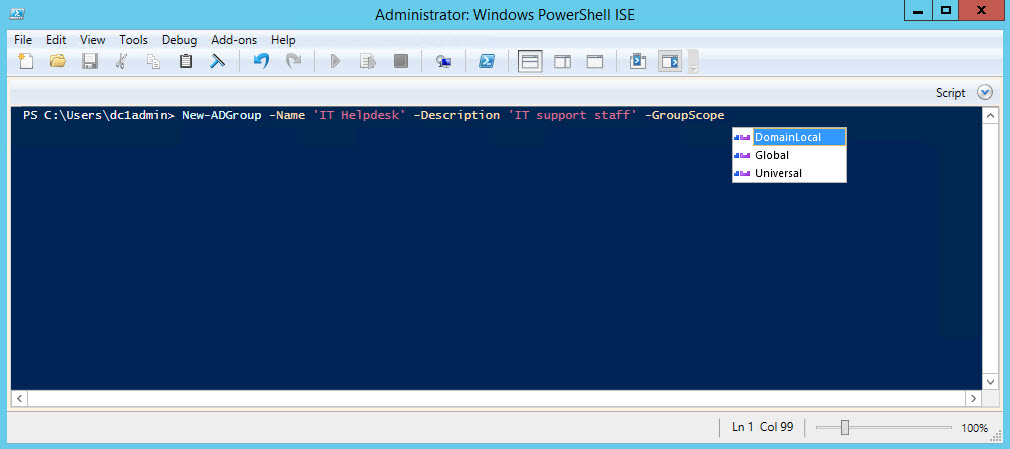
Valid values for the -GroupScope parameter are DomainLocal, Global, and Universal.
If you want to add more parameters when creating a group, you’ll need to know the cmdlet syntax. In this case, I advise that you use the Windows PowerShell Integrated Scripting Environment (ISE) to run commands as it has autocomplete features that help you to get the syntax right. In the figure below, you can see ISE suggesting values for the -GroupScope parameter.

If you want to confirm the creation of the group, run Get-ADGroup -Name ‘IT helpdesk’, replacing ‘IT helpdesk’ with the appropriate group name. If there are any group members, they will also be listed. For more detailed information about using Get-ADGroupMember, see PowerShell Problem Solver: Exporting Active Directory Groups to CSV on Petri.
Modifying AD Group Membership
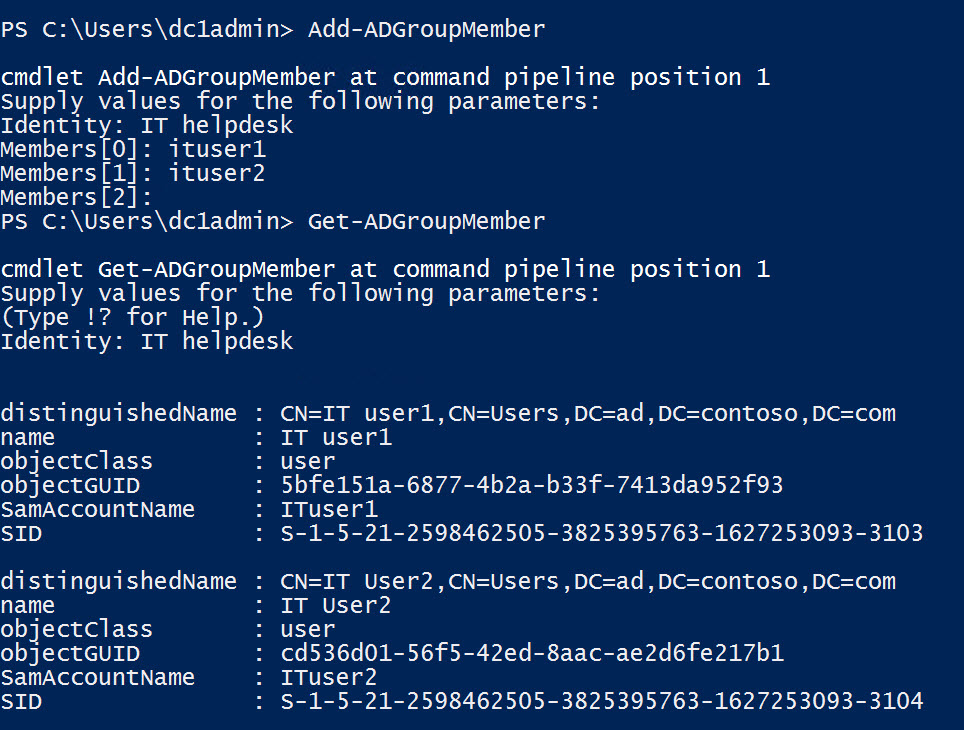
Now that we’ve got a group created, let’s add some user accounts to it. Again, the easy way is to type Add-ADGroupMember, press ENTER and follow the prompts for the obligatory values. -Identity is the name of the group, and then add as many group members as you want. When you’re done, just press enter at the member parameter.

Naturally, you can form a command line, too, as shown here:
Add-ADGroupMember -Identity 'IT helpdesk' -Members Ituser1,ITuser2
Or remove group members in a similar fashion:
Remove-ADGroupMember -Identity 'IT helpdesk' -Members Ituser1,ITuser2
In this article, I showed you how to Active Directory create groups and modify their membership using PowerShell.
Related Article:


