In this tutorial, I’ll show you how to install Docker on Ubuntu 22.04 and detail what you need to get started with containers and images.
How to Install Docker on Ubuntu 22.04
We’re going to install the latest stable version of Docker from the official repository. However, before we proceed, we need to update our Linux system packages.
Update your system repositories
First, run apt update in a terminal session:
- Log in to your Ubuntu machine using your favorite SSH client.
- Update your existing list of packages by running the apt update command:
sudo apt update

Install the prerequisite packages
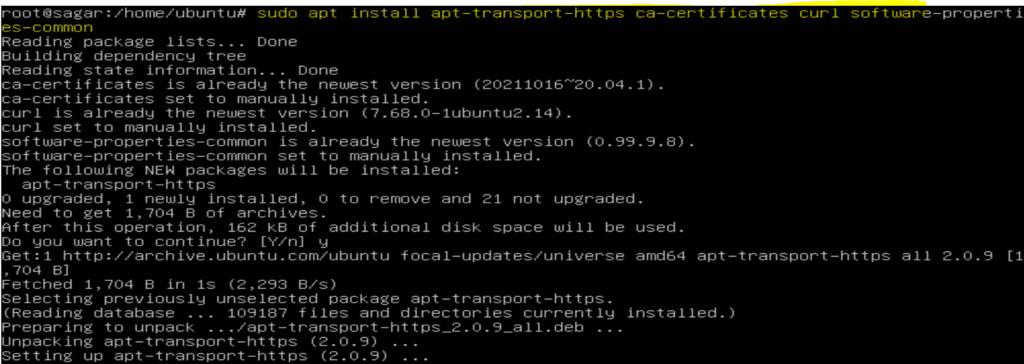
After updating our system packages, we need to add a few important packages that are required to install Docker. To do that, we’ll use the following apt install command with sudo privileges. The command allows Ubuntu to securely connect to external repositories to retrieve the packages we need.
sudo apt install apt-transport-https ca-certificates curl software-properties-common

When asked to continue, type ‘y’ to complete the installation of the prerequisite packages.
Add Docker’s GPG key to your system
To install Docker from the official repository, you need to add Docker’s GPG (GNU Privacy Guard) key to your system. This is required to enable the safe exchange of information with the Docker repository.
You can use the curl command below to add Docker’s GPG key:
curl -fsSL https://download.docker.com/linux/ubuntu/gpg | sudo apt-key add -

If you see “OK” after executing this command, it means that the GPG key has been added successfully.
Add the Docker repository to apt sources
Let’s use the following command to add the Docker repository to APT source packages:
sudo add-apt-repository "deb [arch=amd64] https://download.docker.com/linux/ubuntu focal stable"
You now need to update the local package registry to make sure that you have the latest Docker packages. Here, you can use the same apt update command as before.
sudo apt update

Use the apt-cache command to specify the installation source
If you need to install a specific version of Docker on Ubuntu, you can first list all the available versions in the repository. To do that, you can use the apt-cache command.
Here, we specify the docker.io package we’ll be using to install the Docker containerization software. Adding madison in the command lets us install the package from the Docker repository instead of the default Ubuntu repository.
apt-cache madison docker-io

Install Docker
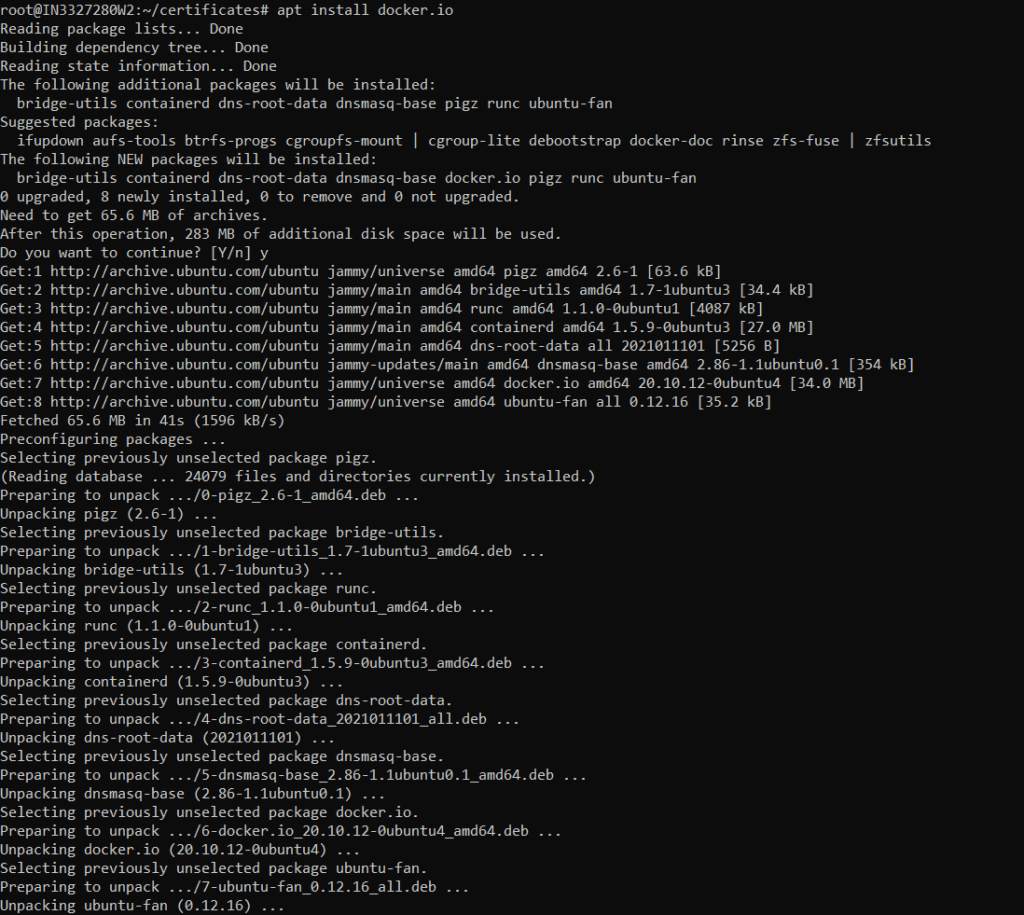
We’re now all set to install Docker. Run the apt install command below, and you’ll need to enter ‘y’ or ‘Y’ to allow the installation to proceed:
sudo apt install docker-io

Docker has now been installed. Now, I’ll show you how to configure it on Ubuntu.
How to configure Docker on Ubuntu 22.04
Before we go any further, you may want to check the status and version of Docker on your system.
Checking Docker status
You can easily check the status of Docker using the following command:
service docker status

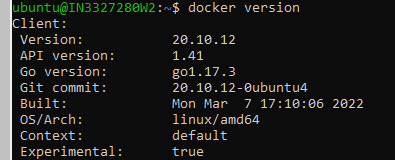
You can also use the following command to check the version of Docker installed on your system:
docker version

We can see that everything is in order. I’ll now show you how to add users to a Docker group, which will give them permission to run Docker commands without root privileges.
Adding users to the Docker group
With some versions of Linux, a Docker group is automatically created during the installation of Docker. Users in this group have permission to run Docker commands. The purpose of this group is to allow users other than ‘root’ to run Docker commands, as using the root account can be risky if it’s used incorrectly.
You can check if a Docker group exists by running the groupadd command below: If a group doesn’t exist already, it will be created. Otherwise, as you can see in the figure below, the results will tell you that the Docker group is already present.
groupadd docker

Now, we’ll add the non-root ‘Ubuntu’ user to the Docker group so it can run Docker commands. To do that, we’ll use the usermod command with the ‘-aG’ string (which is case-sensitive). Here, the ‘a’ parameter is used to add a user, and ‘G’ specifies that we’re targeting a group.
sudo usermod -aG docker ubuntu

Getting started with Docker on Ubuntu 22.04
I’ll now briefly detail the most important commands you need to know to get started with Docker. Let’s start with pulling a Docker image from the Docker Hub.
Testing Docker with a test image
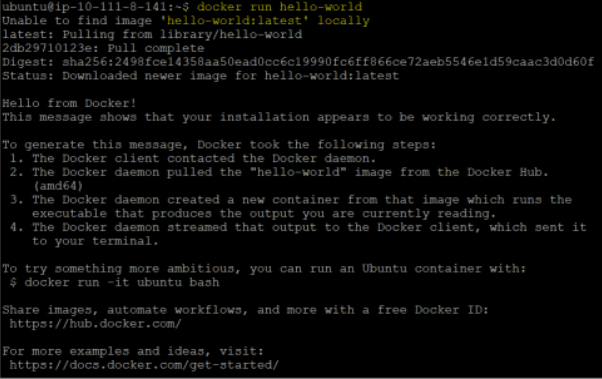
We’ll now download a Docker test image, which is a read-only file, and run it in a container. By default, Docker pulls images from the Docker Hub, and that’s the case for the ‘hello-world’ image in our test command below:
docker run hello-world

Here, this test image is configured to show that our Docker installation is working correctly.
Check the list of running containers
To check all Docker images that are available on your system, you can run the docker images command:
docker images

To check the list of Docker containers running on your system, you can use the docker ps command. Here, the results will give us details about the container ID, the docker image used with this container (nginx), its creation date, and more.
docker ps

Note: You can also use the docker ps -a command to check details about containers that are currently running as well as those that have been stopped.
How to pull a Docker image from the Docker Hub
To search for an image on the Docker Hub, you can use the docker command followed by the search subcommand. Here’s how the basic syntax works:
docker search <Name-of-the-docker-image>
To pull a docker image on your machine, you need to use the same docker command followed by the pull subcommand. Here, let’s try to pull the official Docker image for NGINX, which is one of the most popular web servers on the market.
docker pull nginx

How to run a Docker container on Ubuntu
To run a Docker container, you need to use the docker run command. If you already have an image on your system to run your container, then this command will use it by default. Otherwise, it will pull the image from the Docker Hub, and this image will remain on your system for subsequent execution.
By default, Docker containers run in attached mode (in the foreground), which means that Docker starts the process in the container and all details about the processes will be printed on the console or terminal itself.
In detached mode (in the background), you add the -d flag with the docker run command, and Docker containers will run in the background of your terminal.
In the example below, I’ll be running a container from the nginx image in attached mode.
docker run nginx

How to remove Docker containers
To remove a Docker container from your system, you need to use the docker rm command. Removing a docker container will also free up space on your device.
The syntax for the docker rm command is pretty simple:
Docker rm name_of_the_container
It is also possible to remove multiple Docker containers at the same time. To do that, you need to provide the name or container ID of the containers you want to remove:
Docker rm container_ID_1 container_ID_2 container_ID_3

Note: To stop a container from running, you need to use the docker stop command instead of the docker rm command, which will remove it.
Docker port mapping
To expose Docker containers to the outside world, you need to publish them using the –publish or -p flag. These flags create a firewall rule that maps a container port to a port on the Docker host.
Below are some command examples for updating Docker port mapping:
- To access a container running on port 5000 from a web browser over port 80, you would need to run the docker run command with the -p flag. The -p flag will map port 80 on the Docker host to port 5000 on the container:
Docker run -p 80:5000 nginx

- Similarly, in the command below, the Docker host will listen to the application on web port 8000 and internally on port 5000 of the container’s assigned IP address.
Docker run -p 8000:5000 nginx

- Finally, if we need the Docker host to listen to an application on web port 8001 and internally on port 5000 of the container’s assigned IP address, then execute the command below.
Docker run -p 8001:5000 nginx

You can run as many applications as you want with different Docker host ports, but you cannot use the same Docker host port again. Lastly, if you need to create a new image on a Docker engine or server, you should use the docker build command after creating a Docker file.
A versatile containerization technology
In this tutorial, I showed you how to install Docker on Ubuntu and detailed the basic commands you need to know to start using Docker images and containers. Docker is a great way to host your applications separately and efficiently. In an upcoming article, I’ll show you how to create a Docker file step by step, so stay tuned to Petri!


