In this Ask the Admin, I will explain G Suite appointment slots, including how to use them.
Office 365 users and admins might not be familiar with appointment slots but as with most things G Suite, it is a well-implemented feature that can be mastered in minutes. Appointment slots are popular among users in the education sector. Similar in concept to calendar resources, such as meeting rooms, appointment slots allow users to block out periods of time on their calendars that other users can then book. For example, a professor might make time slots available for students to view and book.
Create an Appointment Slot
Let’s have a look at how to create appointment slots in G Suite calendar. To follow the instructions below, you will need a G Suite subscription.
- Log into G Suite calendar.
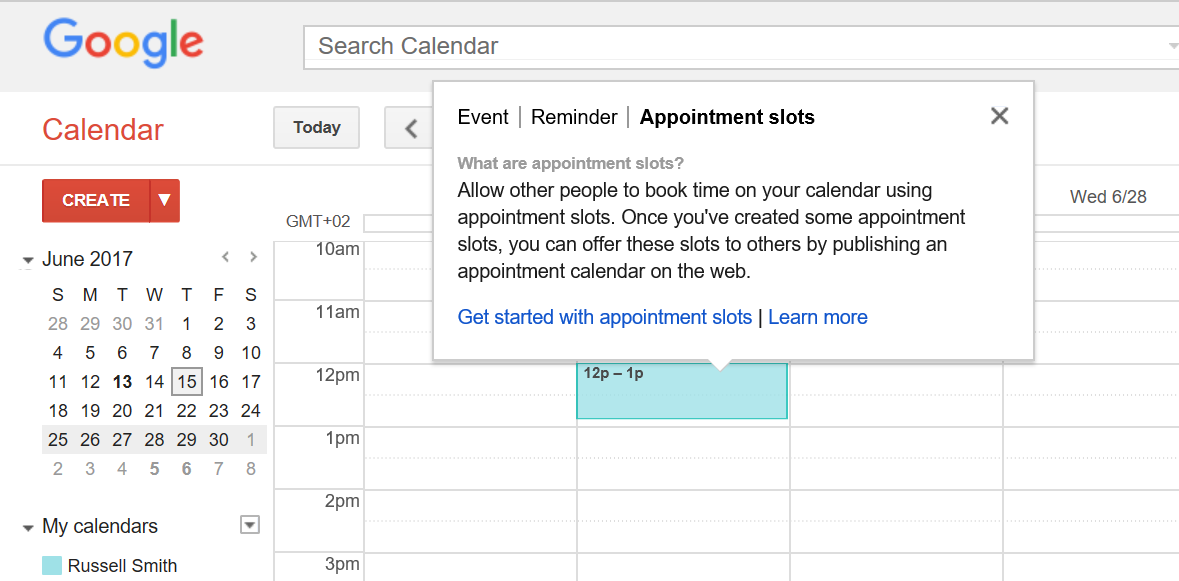
- Click anywhere on the calendar to create an appointment slot.
- In the event box that pops up, click Appointment slots in the top right corner.

- If it is the first time creating an appointment slot, you will be presented with some text explaining what appointment slots are. Click Get started with appointment slots to create one.
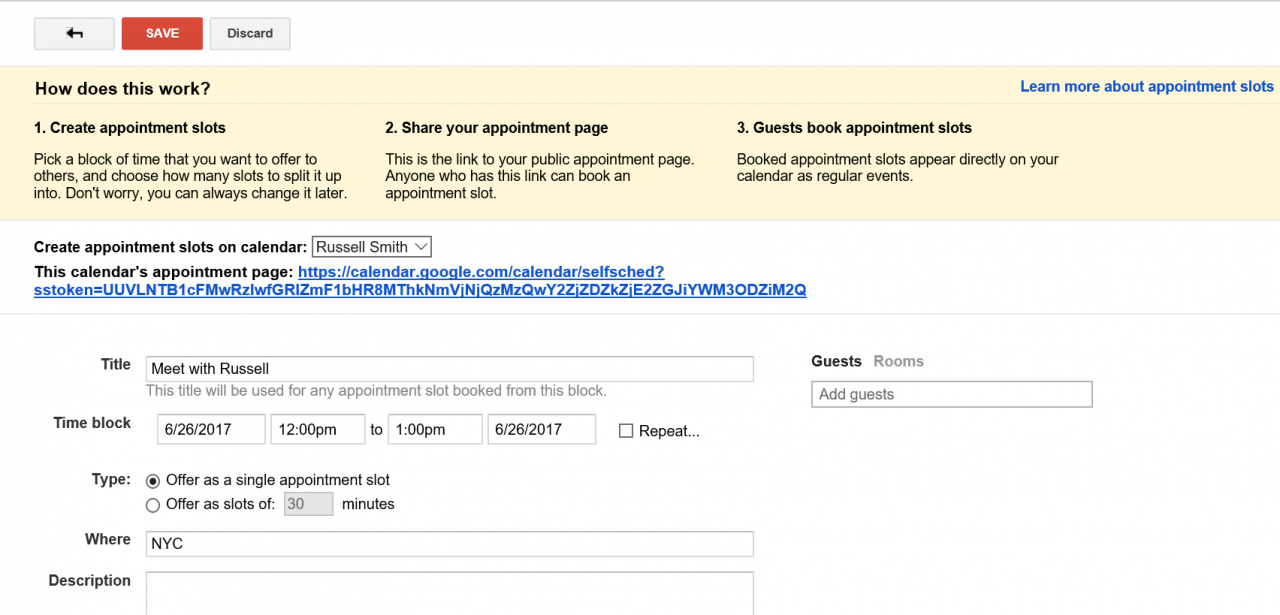
- On the details page, enter a title for the slot.
- The Time block fields will already be completed according to where you clicked on the calendar. You can modify the time and date if necessary.
- By default, G Suite blocks out one hour and divides it into two 30 minute slots. You can either change the Type field to Offer as a single appointment slot to create a single slot in the blocked-out time or change the value in the Offer as slots of the dropdown menu. If you block out one hour on the calendar and then set the Offer as slots of value to 45, you will end up with just one slot.

- As with other types of calendar events, you can add guests or rooms to the appointment slot details.
- Note the This calendar’s appointment page URL. You can make this URL publicly available so that other G Suite users can book slots on your calendar.
- When you are done, click SAVE at the top of the browser window.
When you create an appointment slot for the second time, you will be given the opportunity to create the slot by providing basic details, i.e. without having to switch to the details page. If you want to add extra details, just click Edit details at the bottom of the pop-up dialogue. Otherwise, the process remains the same.
Book an Appointment Slot
Now, users just need to book a slot using the provided URL.
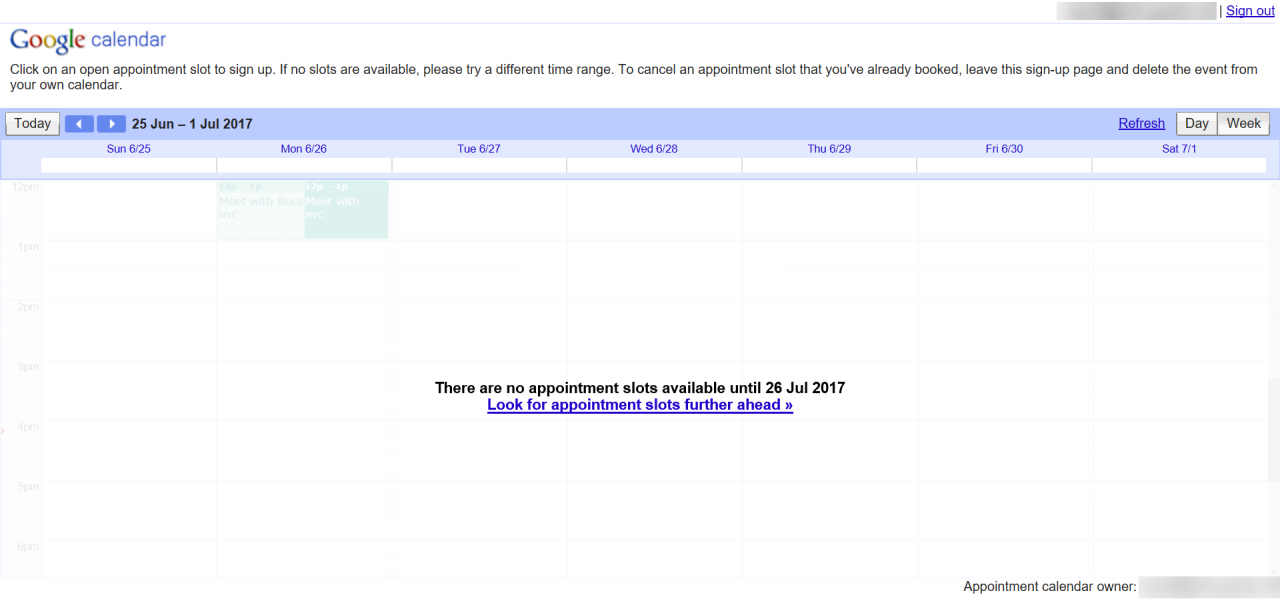
- Open the calendar where the slots were created by using the supplied URL.
- If you have not done so, log into G Suite.

- Find an available slot on the calendar and click to book it.
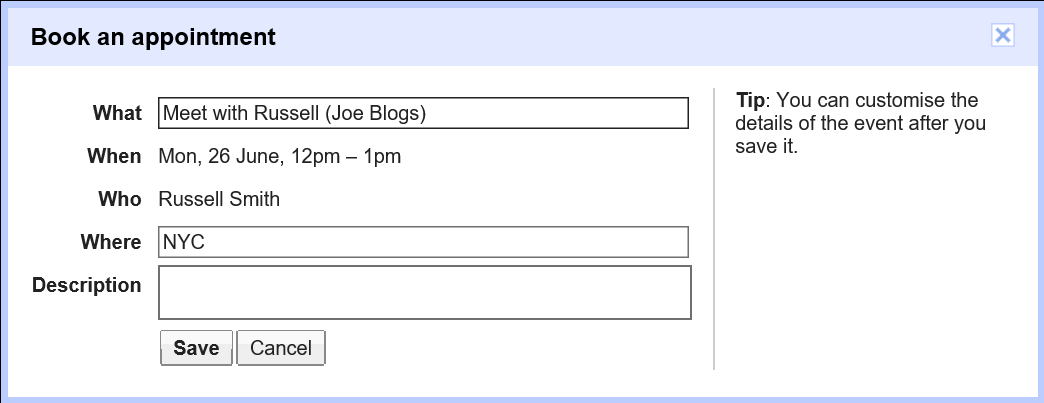
- In the Book an appointment dialogue, review the details and click Save.
- You will see a message saying that your appointment has been saved. It comes with a link so that you can view it on your own calendar.
- Close the Book an appointment dialogue.

In this article, I explained how appointment slots work in Google G Suite, as well as how to create and book them.


