Enable and Restore File History in Windows 8
As I mentioned in a previous Petri IT Knowledgebase article in which I showed you how Windows 8 File History protects users from data loss , Windows 8 File History protects what is most important to users — their data. Remember, File History is not just another name for a backup. File History focuses only on the files and folders that are typically the nearest and dearest to a user’s heart, including Libraries, Desktop, Favorites, and Contacts folders. File History also protects against unwanted and accidental changes by maintaining unlimited versions of a file — provided, of course, you have enough storage and sanity to let it. In this article, we’ll tackle the steps in enabling and restoring File History.
Enabling File History in Windows 8
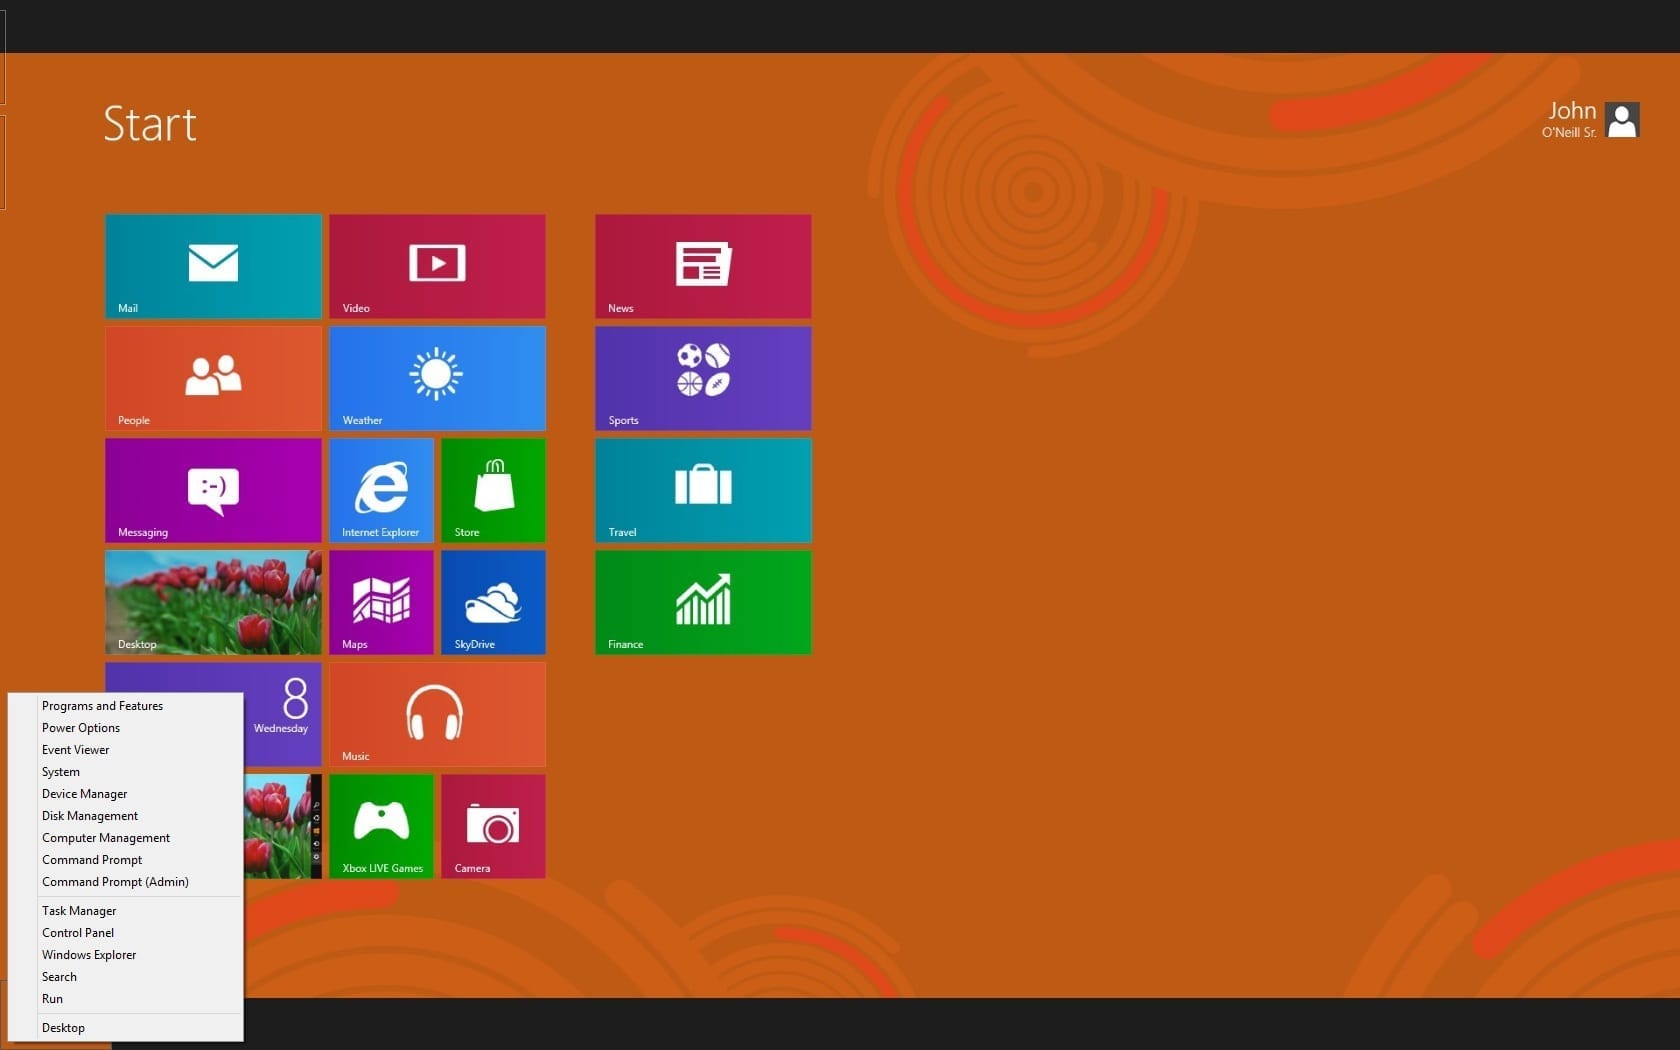
Really, this is a straightforward and quick process. From the Windows 8 Metro interface, open the Charms Bar by moving the mouse cursor to the extreme lower left corner. Right-click on this Hot Corner and a menu pops up. Click Control Panel.
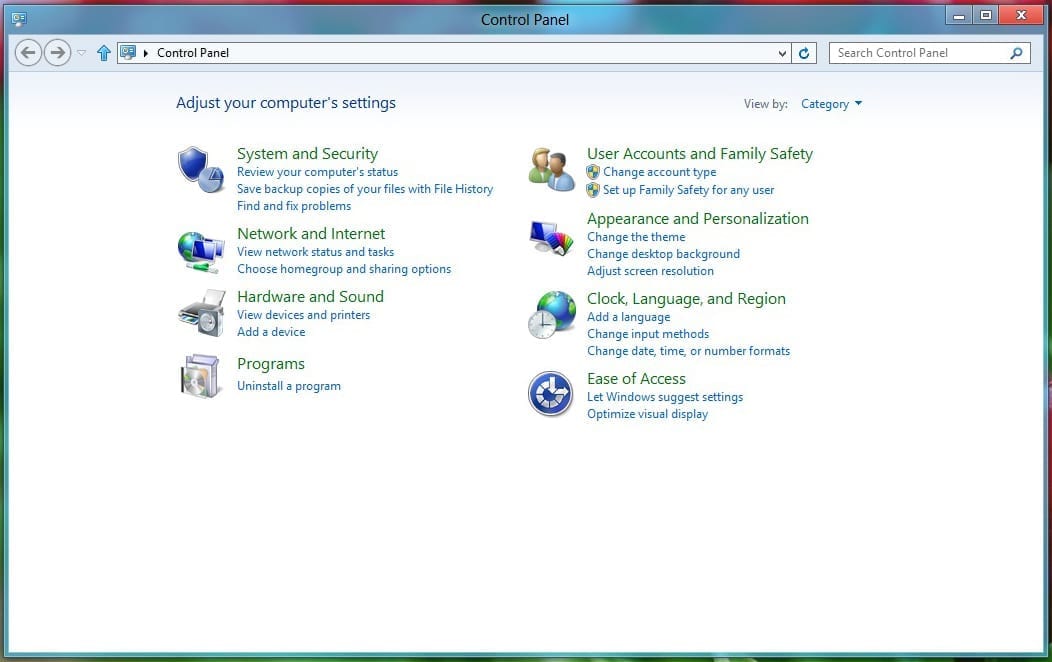
From the control panel, under System and Security, select “Save backup copies of your files with File History.” [Download Windows 8 Release Preview]
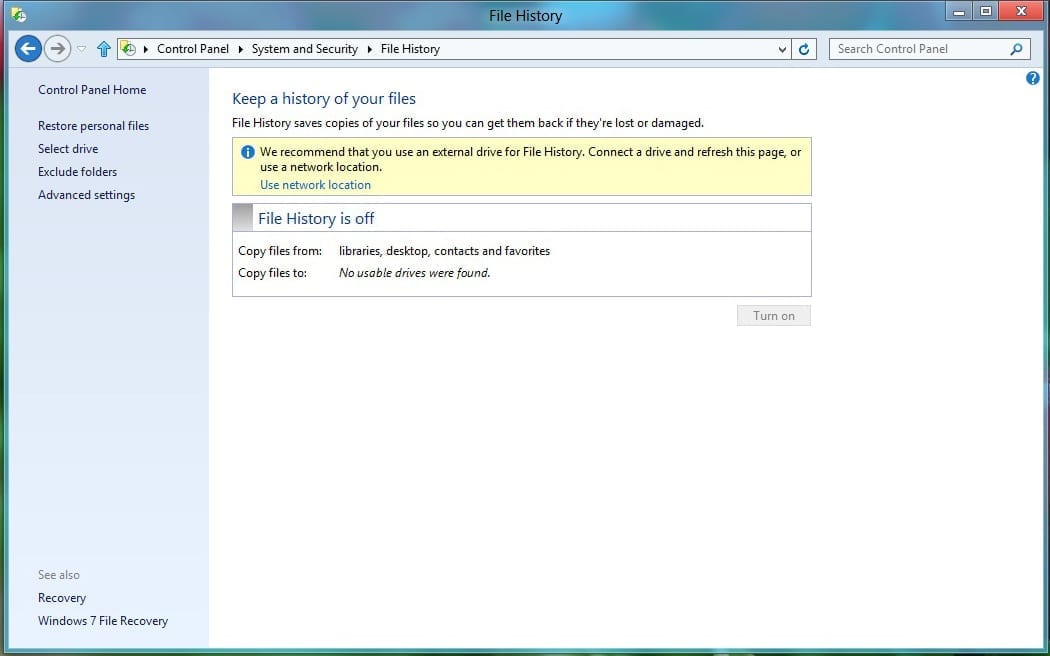
The first thing to do when the File History Control Panel App opens is to set a storage location for the protected files. Click Use Network Drive. Note: If you have an external drive (such as a USB drive) connected to the PC, it will default here.
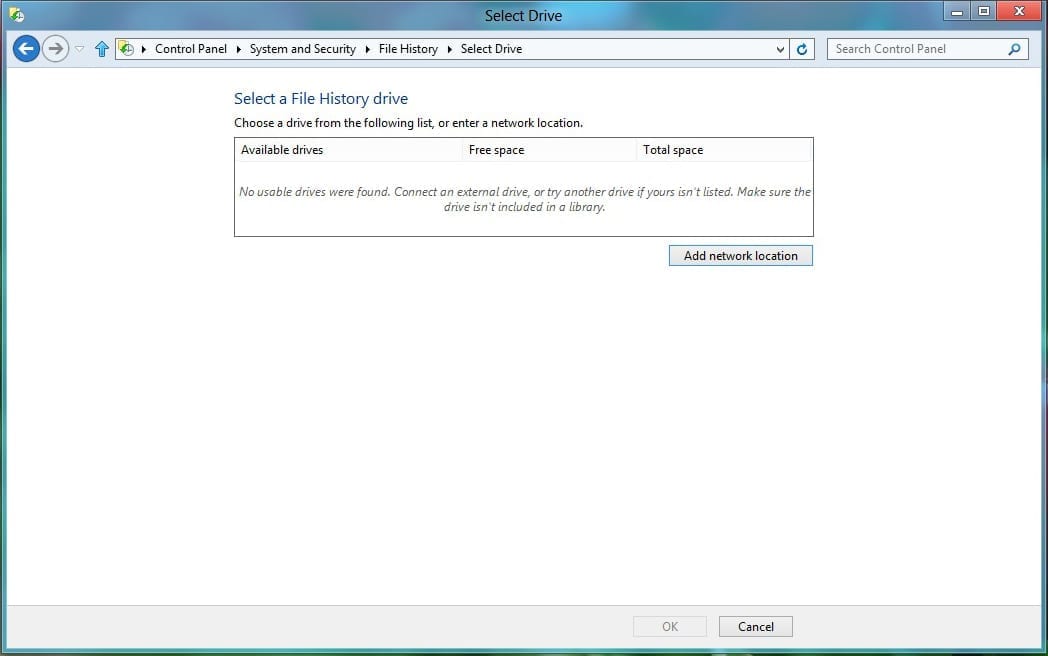
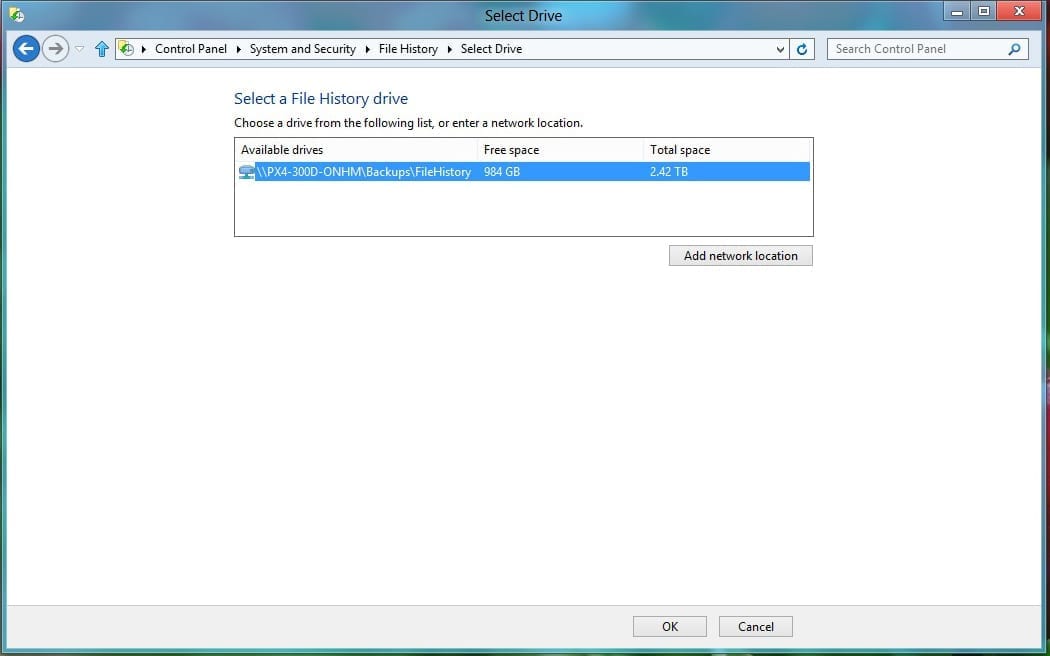
The Select a File History drive dialog opens. Select “Add network location.”
Browse or enter the network share you would like File History to use. Once selected, you’ll return to the Select a File History drive screen and the network location will be displayed along with information regarding free space and total space available. Click OK to return to the main File History Control Panel App.
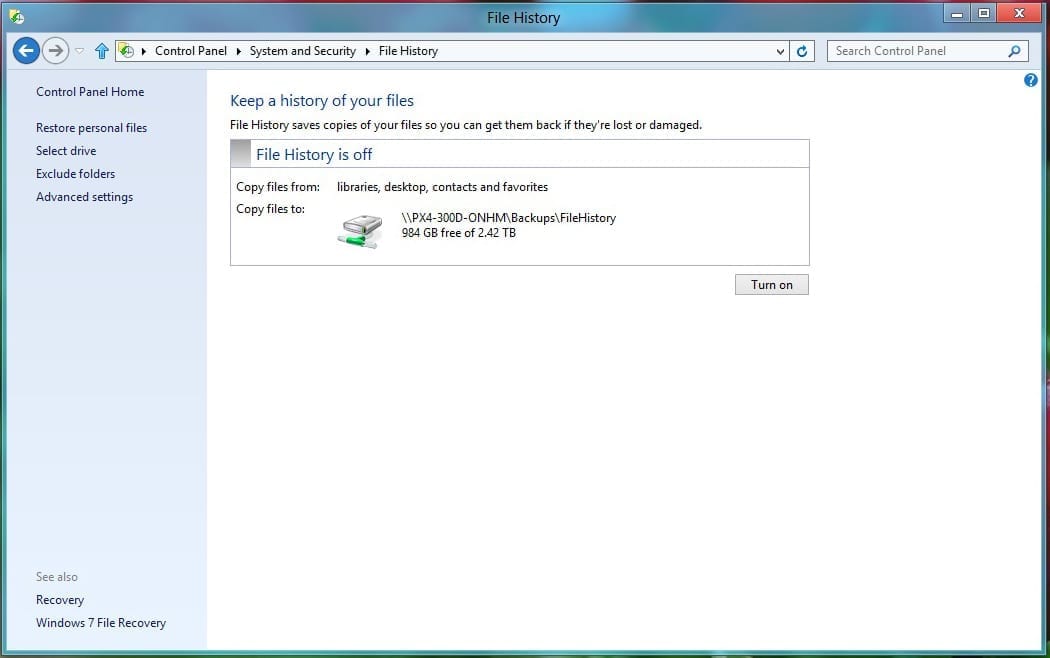
Now, take a look at the File History Control Panel App. The locations to be monitored for changes are displayed along with the external network storage location that we just set. The final step is to click Turn On. That’s all there is to it!
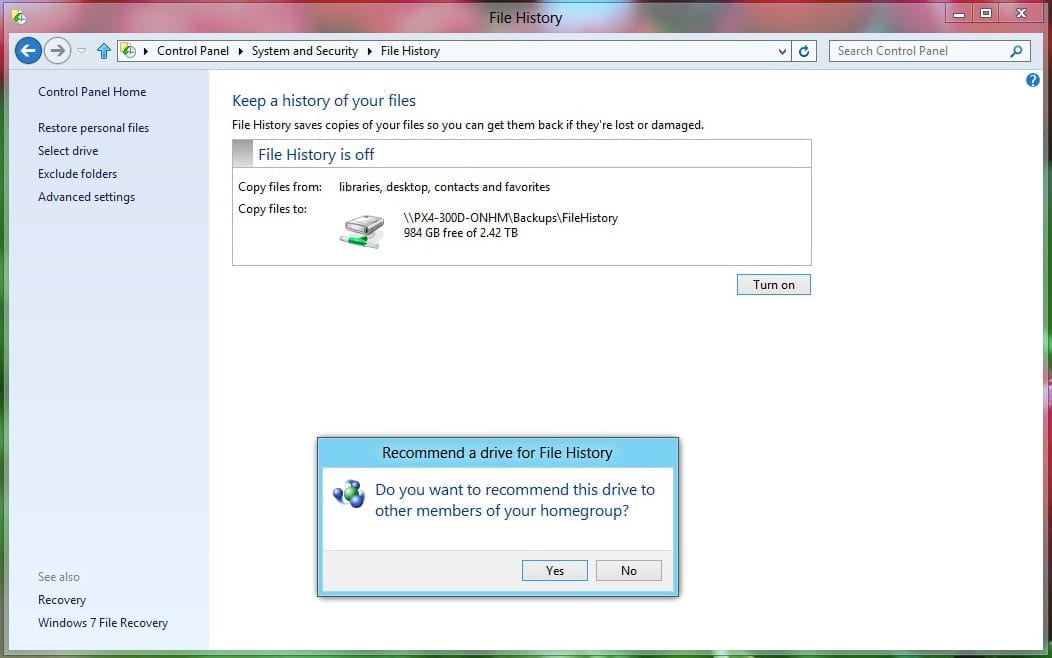
If the Windows 8 PC is part of a HomeGroup, File History will suggest recommending the storage location you set to other members of your HomeGroup. If you don’t want to, just click No to move forward.
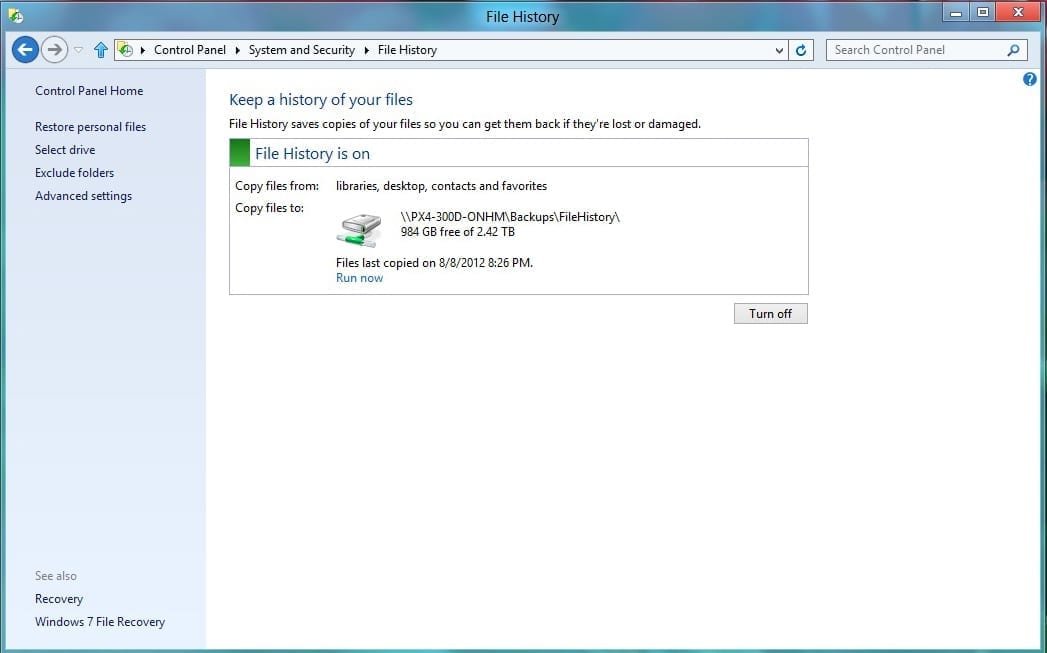
Immediately after File History turns on, monitored files will back up to the selected storage location. When the initial backup is finished, the app displays the date and time the files were last copied.
Restoring a File Using File History
Knowing how to turn on File History is only half the battle. Using it effectively requires understanding how to restore a file when the need arises. The example I provide below will restore a version of a personal document stored in the Documents Library.
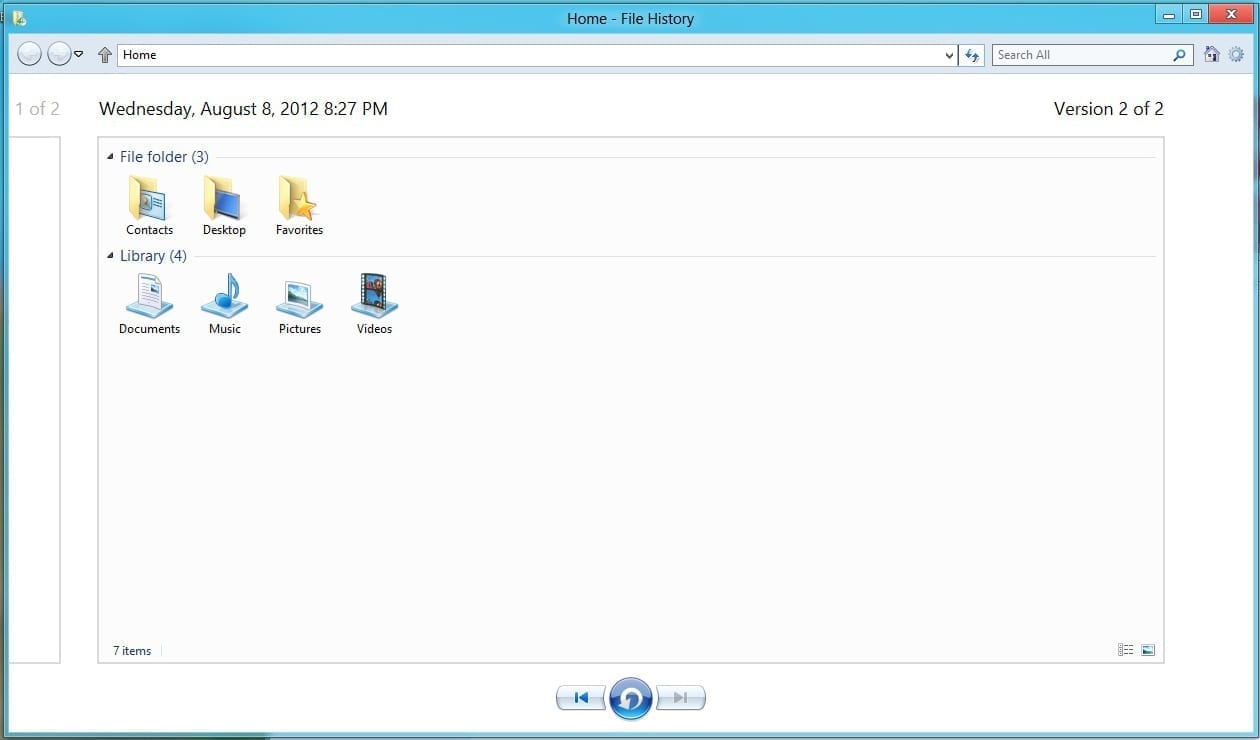
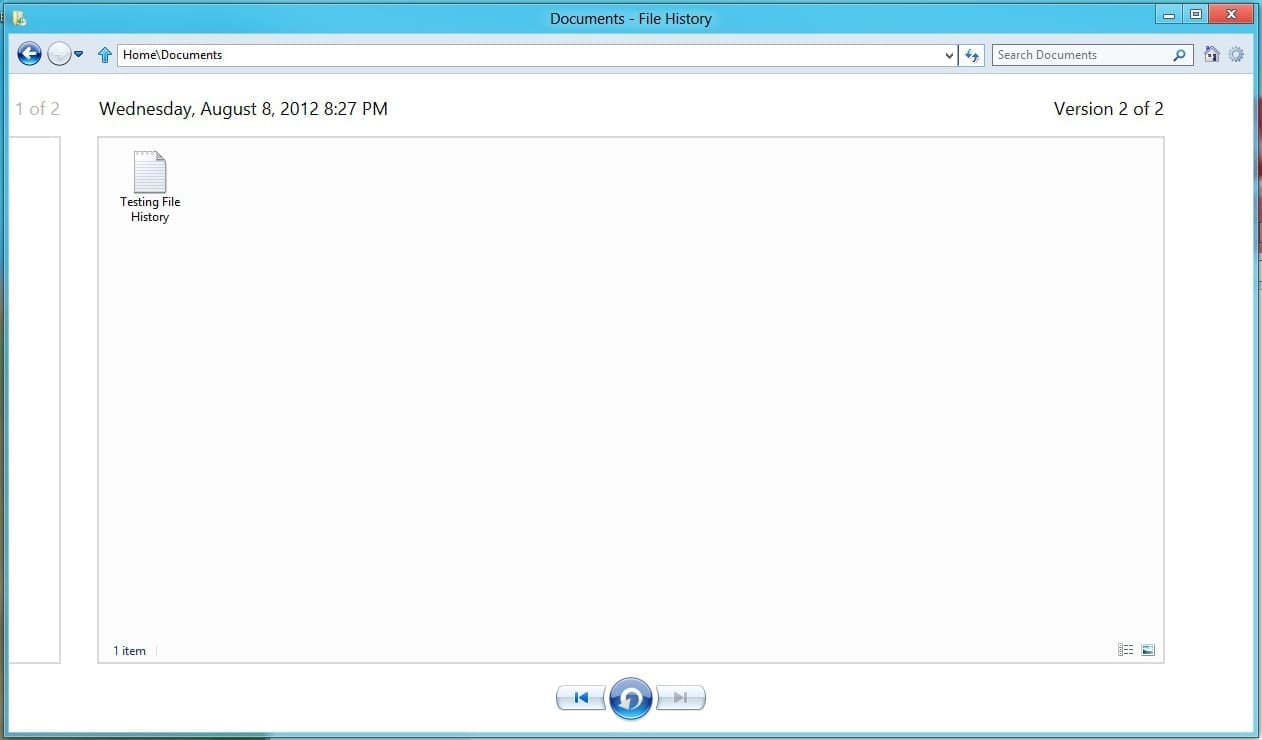
On the left side of the File History Control Panel App, select “Restore personal files.” The File History restore window opens, displaying the locations protected by File History. Under Library, double-click Documents.
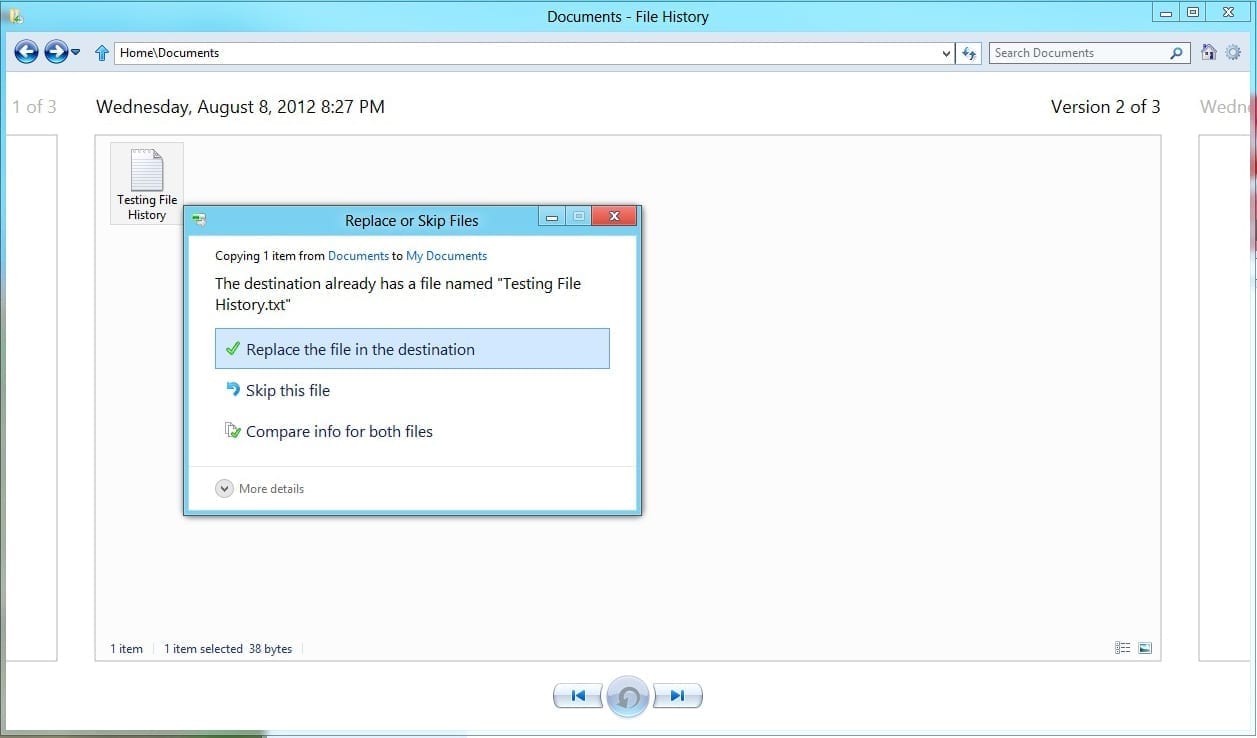
The right and left arrow buttons at the bottom of the window allow you to move between versions of a selected file. The circular arrow button in the middle begins the restore. Seriously, it’s as easy as it sounds. Simply select the file, then click the right arrow until you are at the most recent version (the right arrow button will turn gray).
Click the restore action button in the middle.
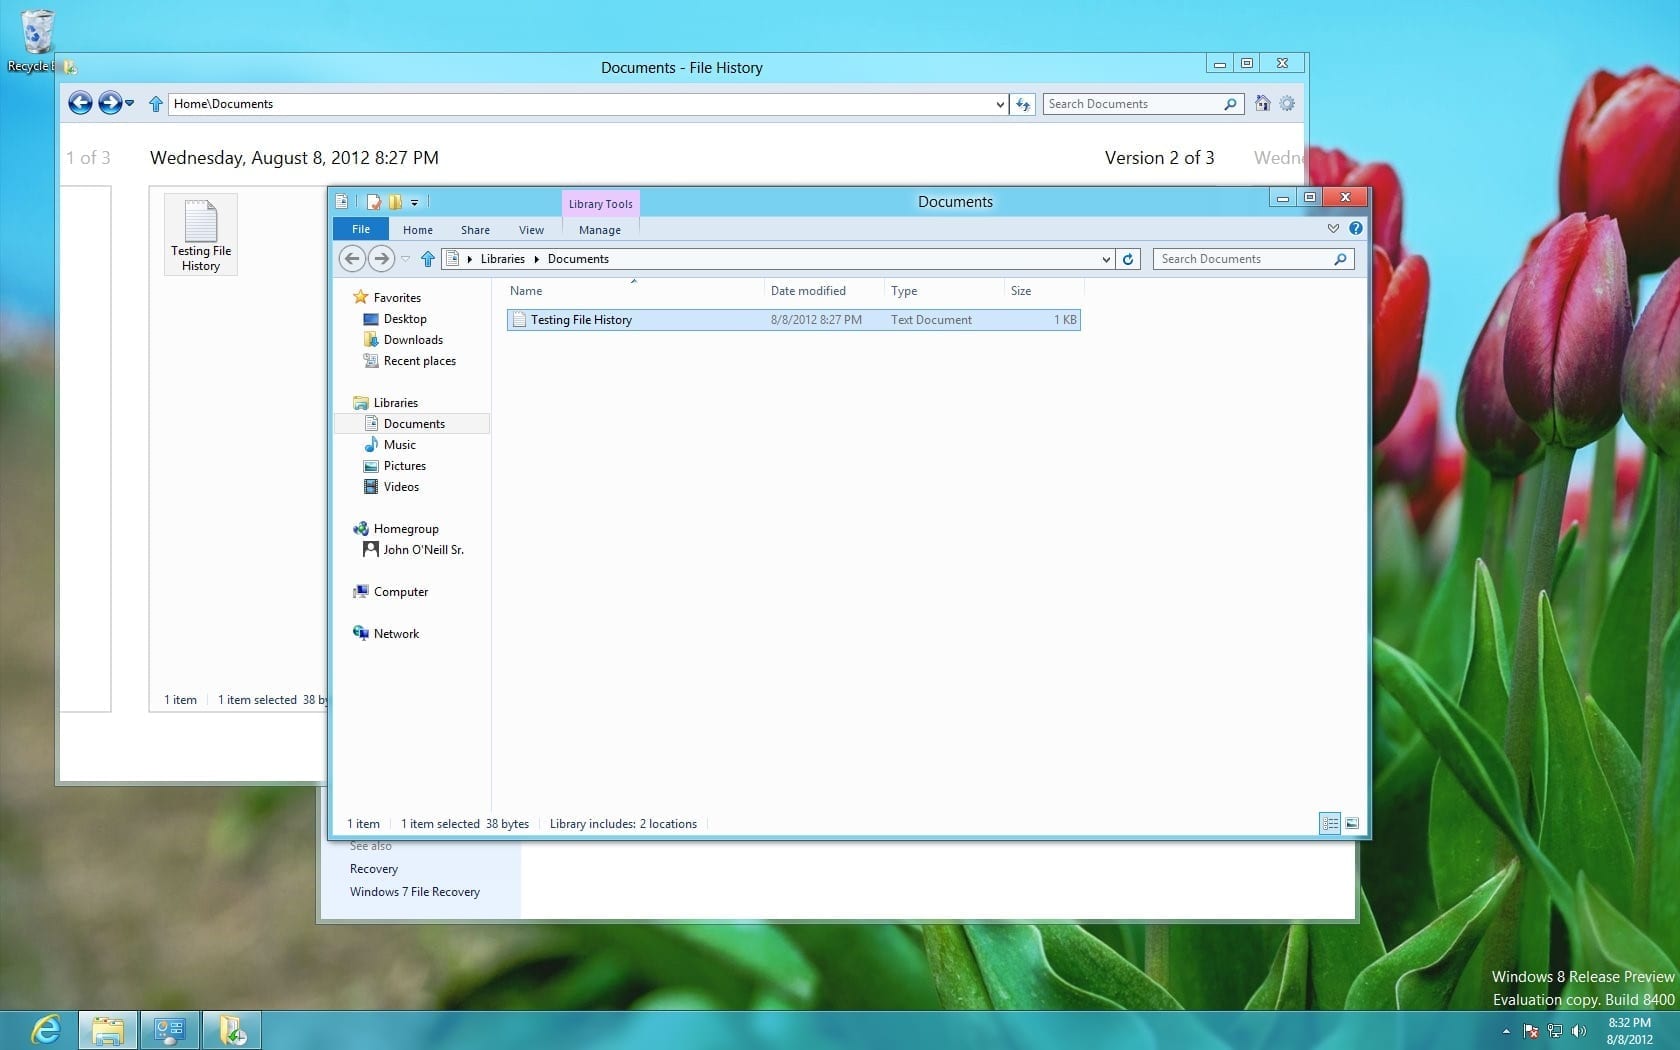
Select “Replace the file in the destination” to confirm overwriting the destination file with the File History version. All finished! Viewing the restored file properties show the restore was successful.
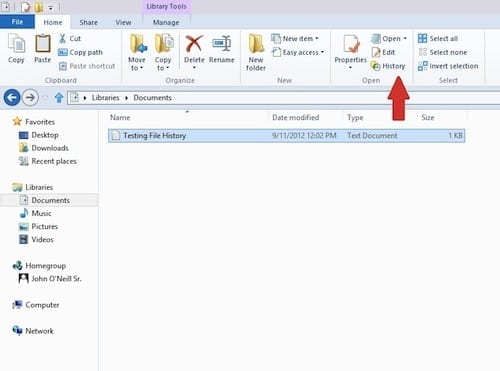
Pro Tip: Restore files protected by File History right from within Windows Explorer. Browse to the file you want to restore, click once on it, then click History on the Windows Explorer Ribbon. All versions of the file maintained will be displayed. Navigate to the desired version and restore it using the exact same steps as outlined above.
File History is easy to use, a set-it-and-forget-it means of protecting a user’s most valuable data. It is designed to allow even a novice Windows 8 user to take advantage of it with little or no IT intervention required. In an era of smaller IT teams and ever-mobile users, this could be one of the most valuable features of Windows 8 for small- and medium-sized organizations.
Keep an eye out for a future Petri article in which I’ll cover the advanced options of File History — what they do along with how and when to set them.


