Creating a Simple Flow to Send OnDemand Notifications on Specific Documents
Microsoft Flow integration in SharePoint Online (SPO) provides a very simple way to model common collaboration scenarios such as send an OnDemand notification when a specific document has been uploaded to a document library or a list item has been created in a list. In this article, I will show you how to create a simple Flow to send an OnDemand notification when a document is selected in a document library.
Creating the Flow
In my example, I’m going to create a Flow for a document library. The first step is to access an existing document library. Click on Flow in the actions bar and then click on Create a flow:
Figure 1: Creating a Flow From an Existing Document Library
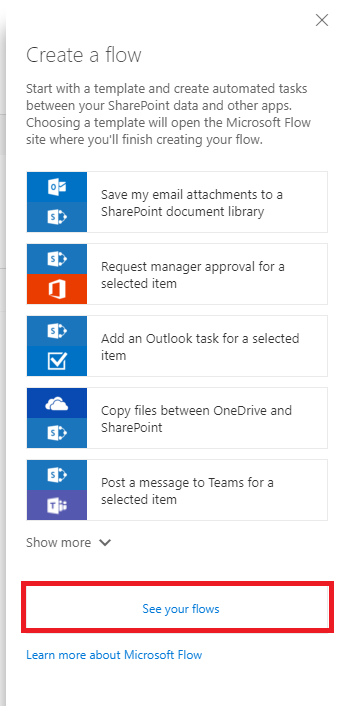
From the “Create a flow” panel, click on “See your flows” link so that you can access Flow authoring and management environment.
Figure 2: “Create a Flow” Panel
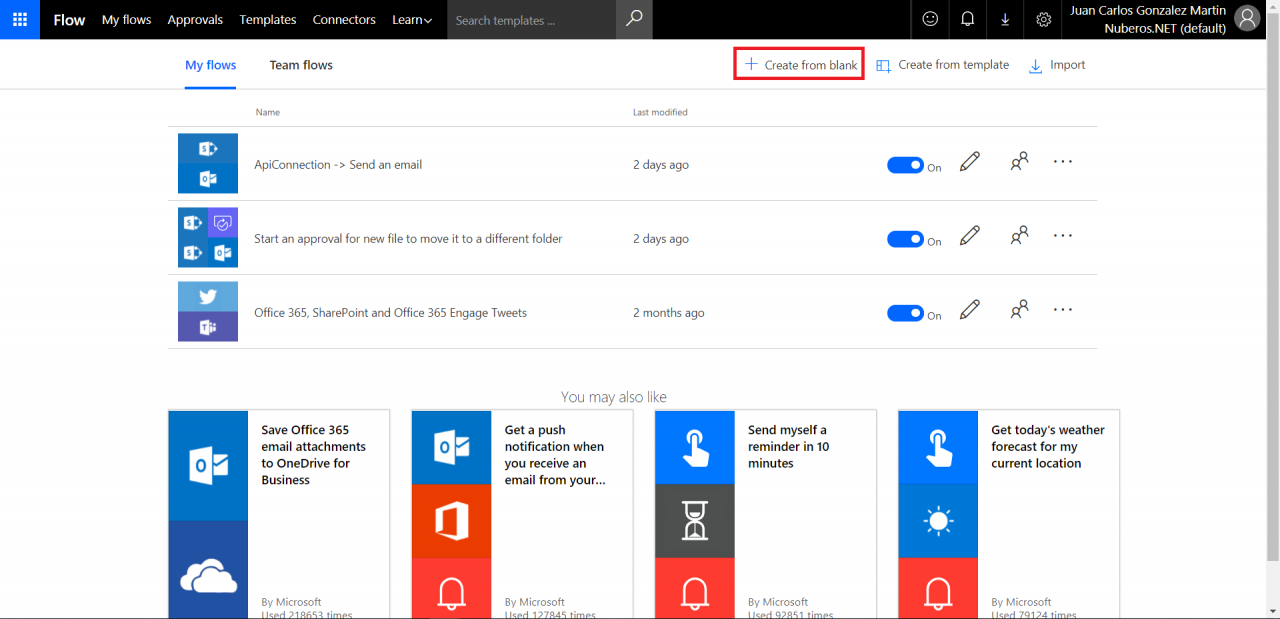
In the home page of the Flow environment, click on “My Flows” link in the navigation bar and then on “Create from back”:
Figure 3: Creating a Flow From Blank
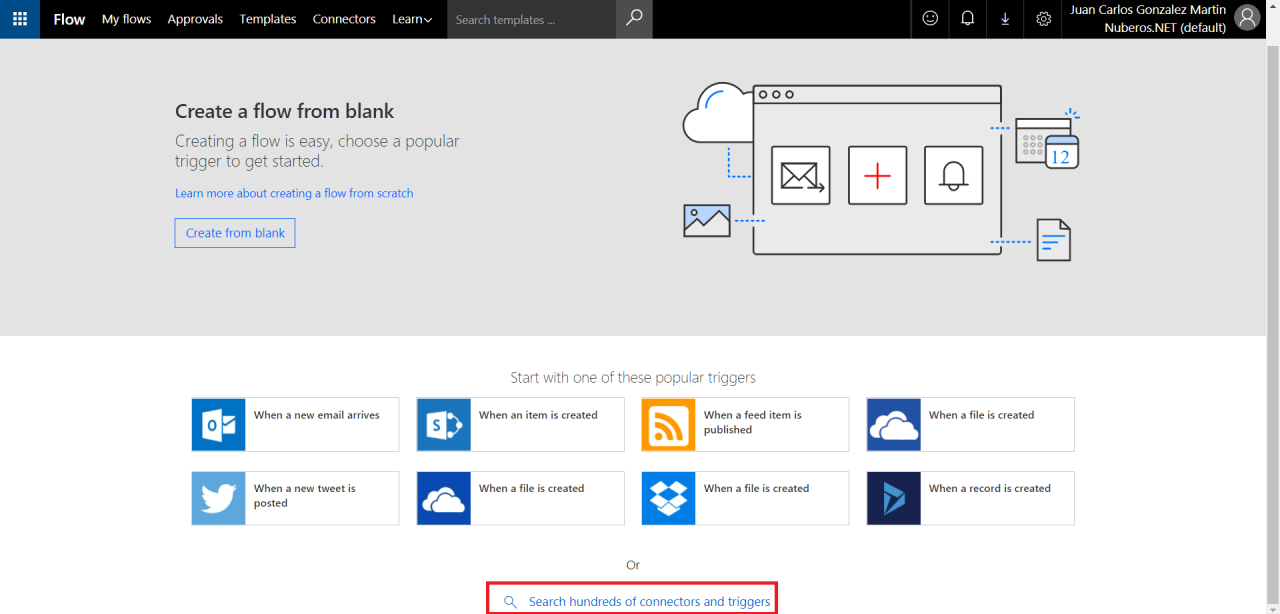
Creating a Flow from blank allows you to select the trigger that is going to start the Flow. To choose the right trigger just click on “search hundreds of connectors and triggers”:
Figure 4: Choosing the Start Trigger for the Flow
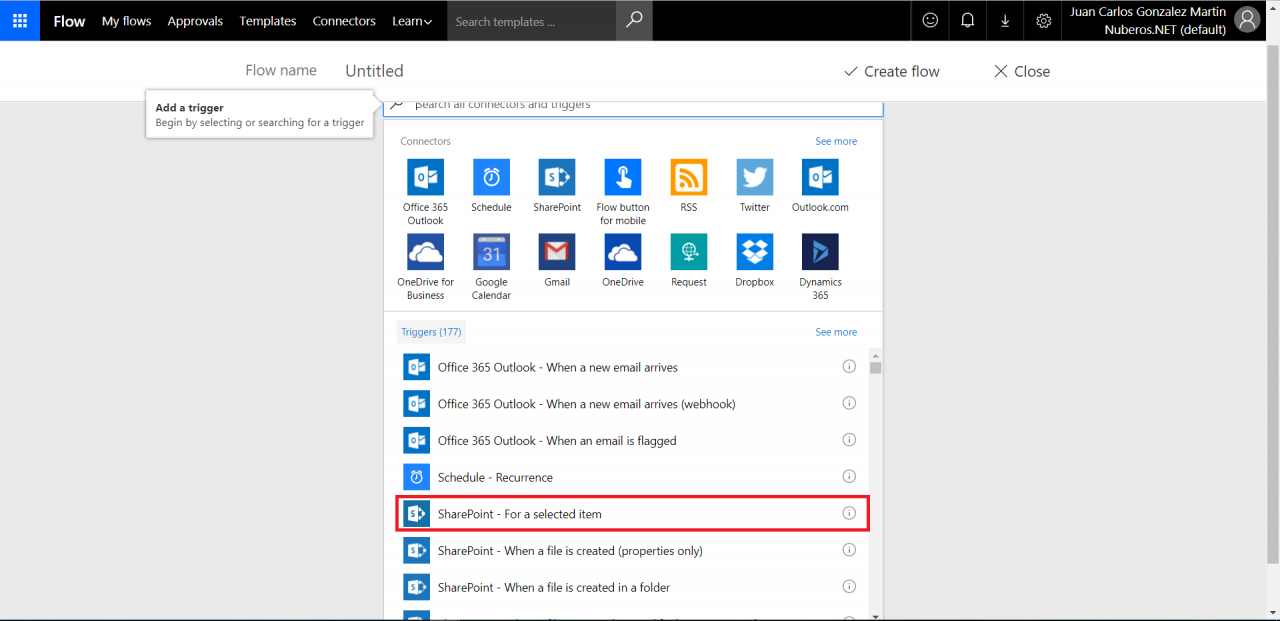
Select “SharePoint – For a selected item” as the start trigger of the flow. From here, you will be able to launch your Flow when you select a document in a document library or a list item in a list.
Figure 5: Selecting “SharePoint – For a Selected Item” as Start Trigger
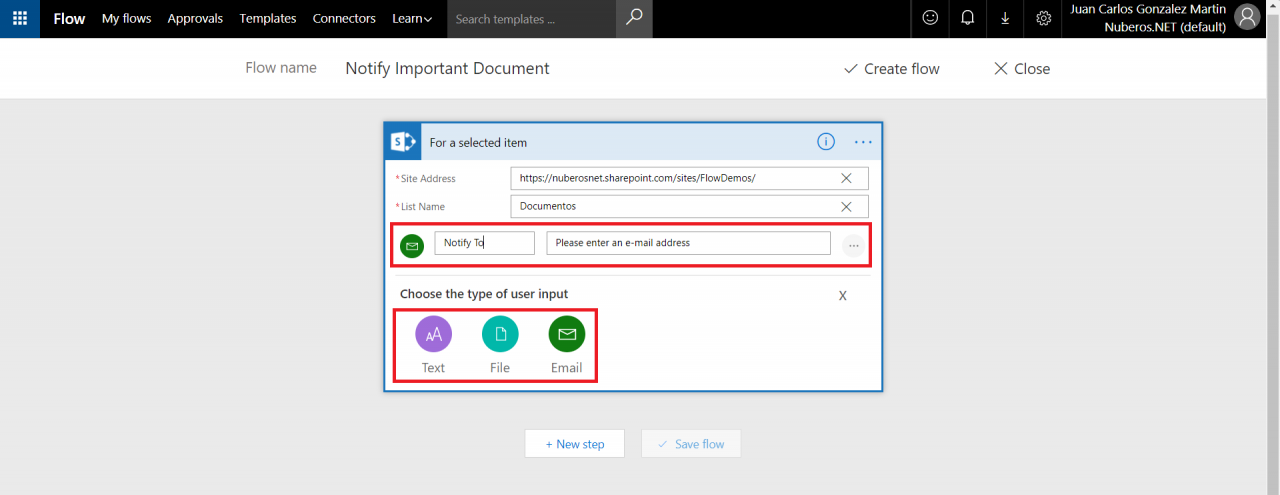
As soon as we select the trigger, the Flow designer is shown. We can first configure the start Trigger as follows:
- Select or type the SPO Site URL and the name or GUID of the list/document library where you are going to use the Flow. Bear in mind that in the case of a document library, you will need to manually type the document library GUID so that you can use this trigger.
- Add the following data entries to the trigger. Note: At the moment of writing this article, only three data entries types are supported: E-Mail, Text, and File:
- E-Mail data entry: name it “Notify To”
- Text data entry: name it “Description”
Figure 6: Trigger Configuration
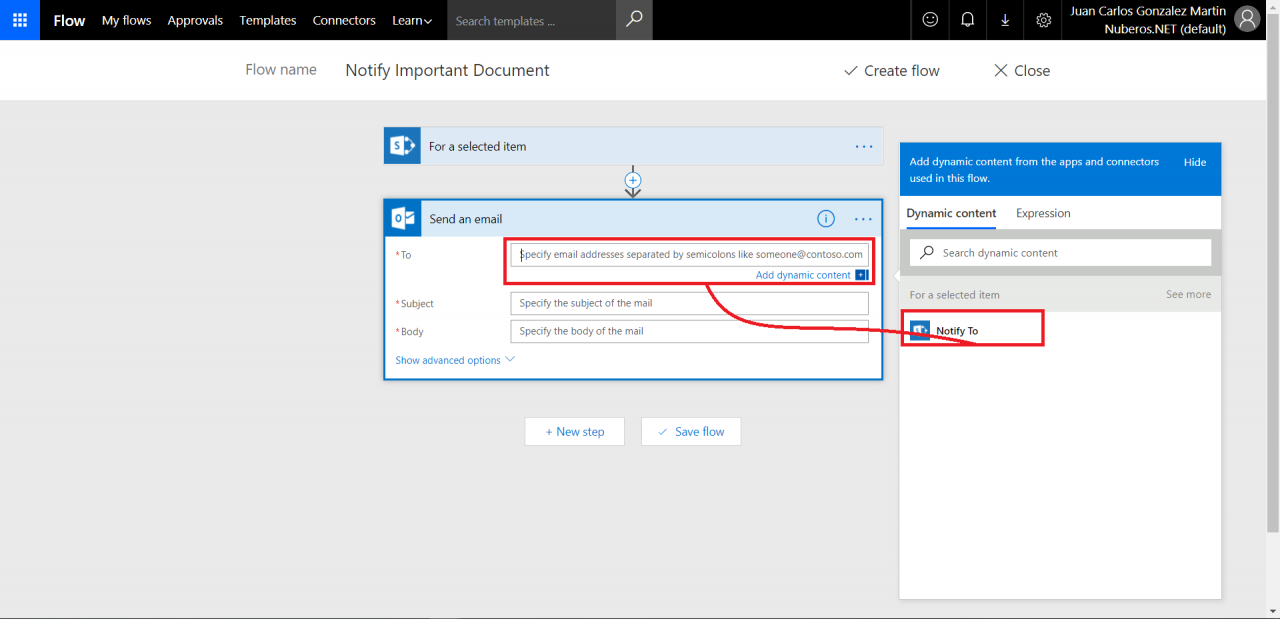
Once you are done with the Flow trigger, we are ready to add required actions and conditions to our Flow. In my case, I’m going to add an “Outlook – Send an email” action configured in the following way:
- In the “To” field, select the value of the “E-Mail” data entry added to the Trigger configuration.
- In the “Subject” field, add the value of the “Description” data entry added to the Trigger configuration.
- In the “Body” field, add a simple text.
Figure 7: Configuring the “Outlook – Send an Email” Action
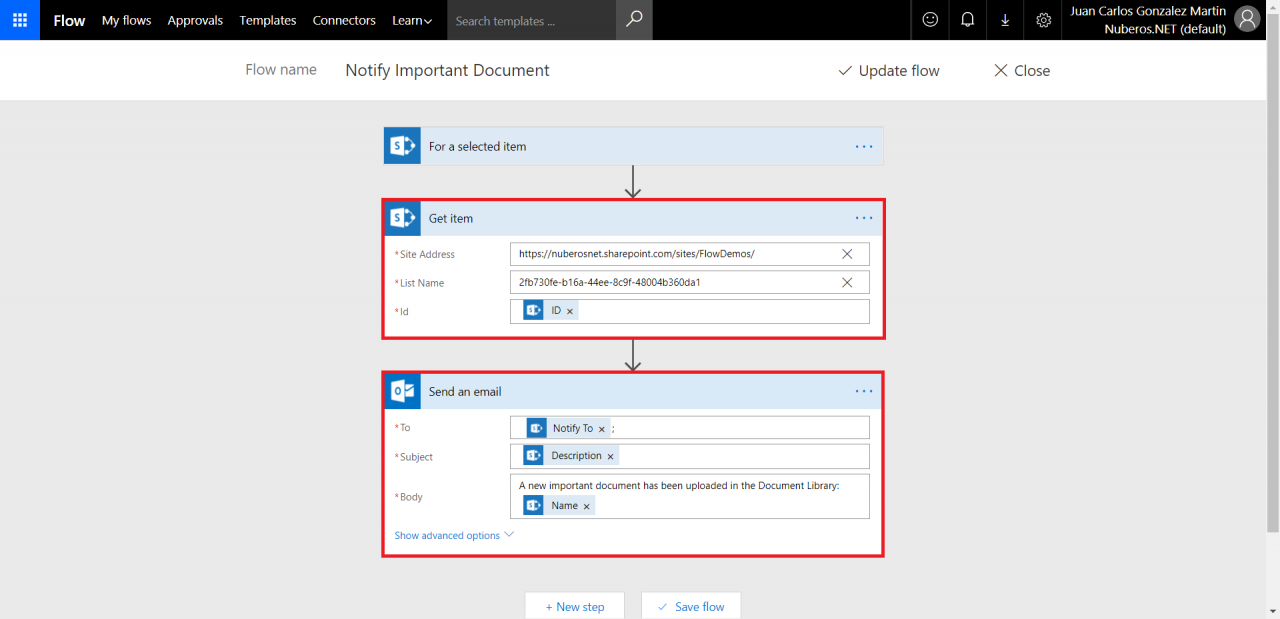
- To make a more complete configuration of the “Body” field in that action, we can make use of the “SharePoint – Get Item” action. We can get additional fields from the document selected when starting the Flow.
Figure 8: “SharePoint – Get Item” and “Outlook – Send an Email” Actions
Once the Flow is ready, save your changes so that you can verify it works as expected.
Testing the Flow
To test the Flow, we only need to access the document library configured in the Flow start trigger and verify the Flow is there:
Figure 9: Verifying the Flow Is Ready to be Used in the Document Library
If we click on the Flow, the Flow launch panel is displayed, so we can type the Flow entry parameters configured at design time in the start trigger. Configure the values for the Flow entry parameters and click on “Run Flow”.
Figure 10: Flow Launch Panel
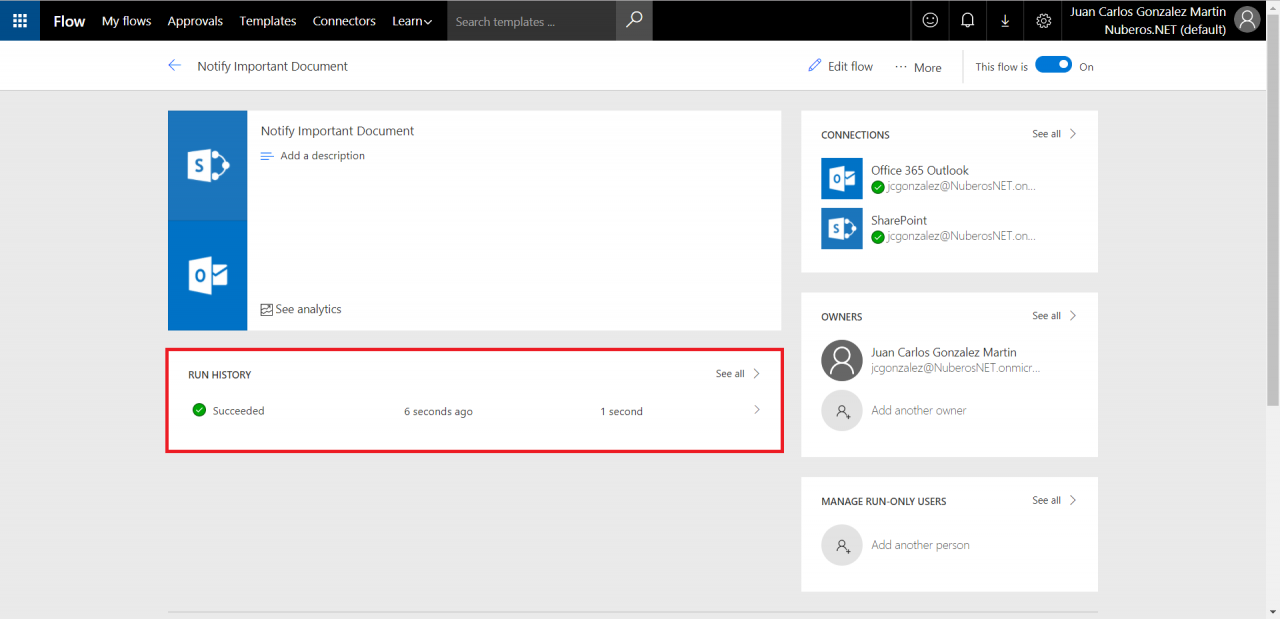
If everything goes well, we will see in the Flow status page that the flow has been executed as expected and it will accordingly send an e-mail to the e-mails typed in the “Notify to” field.
Figure 11: Flow Execution Status Page
Conclusions
Flow and SPO integration bring to the table the ability to design and implement very simple collaboration scenarios, which help to improve out-of-the-box collaboration features available out of the box in SPO.
Juan Carlos González Martín
Office Servers and Services MVP
Modern Workplace Team Leader | Zertia Telecomunicaciones
[email protected]
@jcgm1978 | https://jcgonzalezmartin.wordpress.com/


