Create an Azure RemoteApp Template from an Azure VM
In this post I will show you how to create an Azure RemoteApp custom template using a virtual machine in the Azure cloud.
Creating a RemoteApp template on-premises and in Azure
In a previous article, I described how to create a custom template using an on-premises Hyper-V virtual machine. That method is pretty slow:
- You need to create a virtual machine
- Configure and patch the guest OS
- Install apps and patch them and the guest OS
- Sysprep the virtual machine
- Upload the generalized VHD over limited bandwidth
This is a time consuming and slow method, plus it’s filled with many opportunities to get something wrong, such as accidentally deploying a Generation 2 virtual machine, which cannot be used at this point.
Instead, with this method, you use a virtual machine template in Azure that’s almost ready for RemoteApp. And best of all, the upload is actually an in-Azure data transfer that takes minutes instead of hours.
Note: I was working on a method that involved some complicated PowerShell cmdlets to transfer the generalized VHD from a storage blob to RemoteApp. Then I found a new post by Microsoft’s Pierre Roman that offered an alternative way to do the VHD transfer that does not use PowerShell. The guide was missing the final step, which I figured out and shared with Pierre. So thanks to the folks at the Canadian IT Pro Connection website for their help!
Deploy Session Host from Azure Gallery
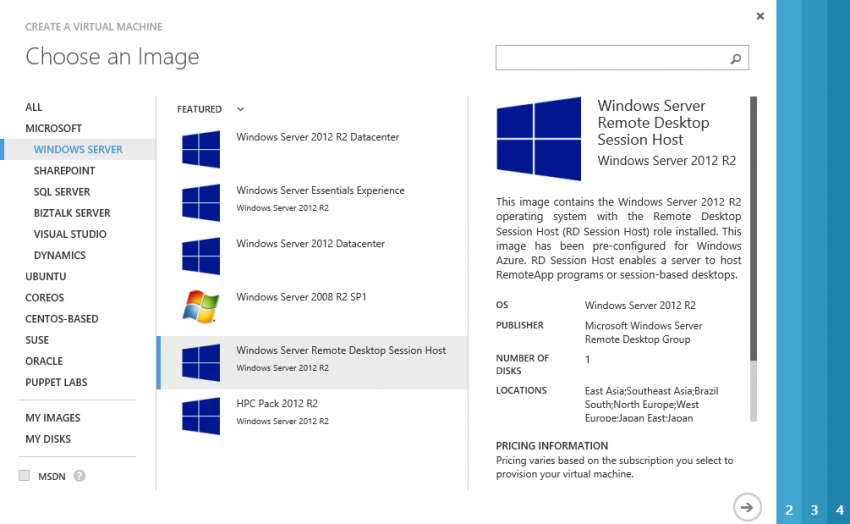
With this approach, you are going to build the template machine in Azure. Log into the Azure management portal, ensure that you have storage and networking ready for virtual machines, and Click New > Compute > Virtual Machine > From Gallery. Select Windows Server > Windows Server Remote Desktop Session Host as the base template to create your virtual machine.
This template is designed to be used for creating a RemoteApp custom template. EFS is disabled and the necessary roles and features are already installed. Of course, it is a Generation 1 virtual machine with a suitably laid out VHD format virtual hard disk.
Go to create a machine. Note that the machine doesn’t need to have a great specification, as a Basic A1 will more than suffice as long as it meets the installation requirements of the software that you are installing. The later step of creating a template will destroy the machine. All we are keeping is the virtual hard disk and that will be deployed by RemoteApp with a larger machine specification.
Install Software
Log into the virtual machine using Connect (Remote Desktop), and install your software. Be sure to patch the machine:
- Windows Update
- Any custom patches required for the software
Note: Ignore any pop-up warnings about RDS licensing.
Validate RemoteApp Compatibility
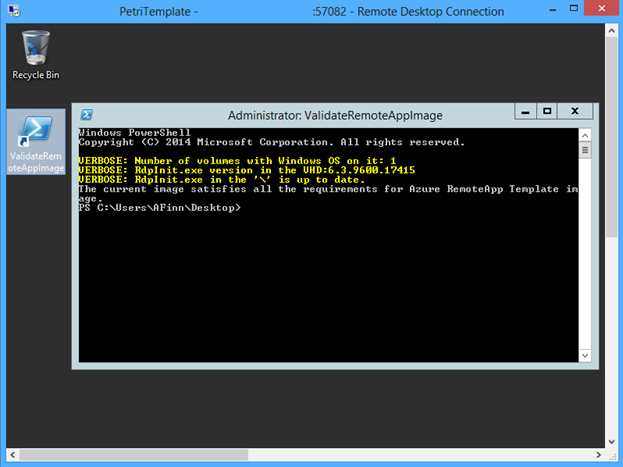
You need to test your new virtual machine for RemoteApp compatibility after you have completed customizing the virtual machine. On the desktop, you will find a shortcut to a script called ValidateRemoteAppImage. Run this script to ensure that what you are producing should still be technically able to run in RemoteApp.
Generalize the Image
Do not proceed unless you are ready to create an image. Generalizing a machine will render it inaccessible in Azure. The machine will boot up in the Out of Box Experience (OOBE) and not have Remote Desktop support.
Run the following command to sysprep the virtual machine:
C:\Windows\System32\sysprep\sysprep.exe /generalize /oobe /shutdown
Do not use the /mode:VM parameter.
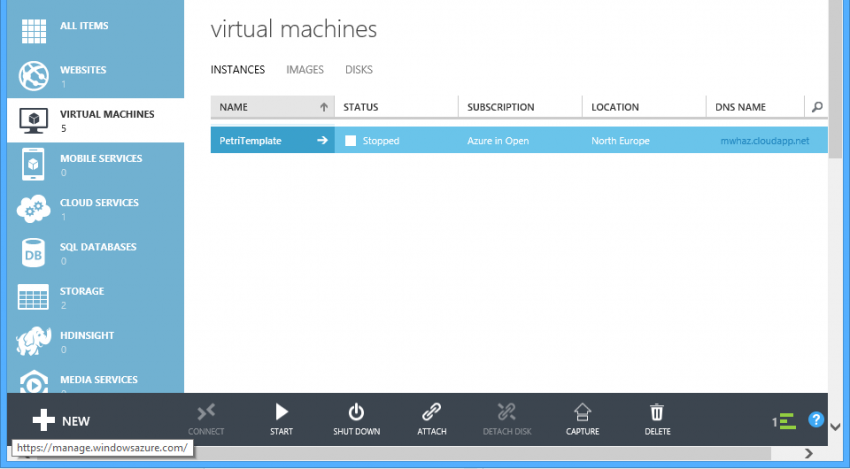
Sysprep might take quite a while to run in an Azure virtual machine. Wait until the virtual machine is shown with a stopped status in the management portal.
Capture a Template
The next step will create a template virtual machine. Note that the step will destroy the existing virtual machine and move the virtual hard disk.
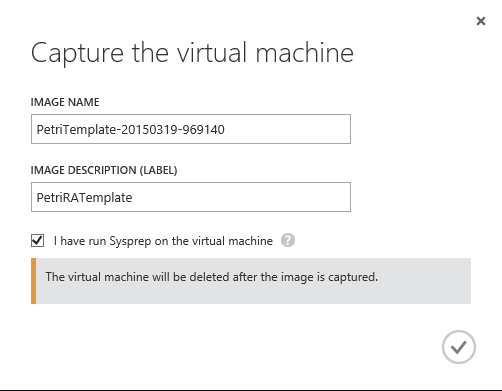
Select the virtual machine, and click Capture. Give the image a description and check the box to state that the machine has been generalized using Sysprep. This step takes a couple of minutes.
Import the Template into RemoteApp
A new template will be created and appear in Virtual Machines > Images. We will import this template into RemoteApp so that new app collections can be created from it.
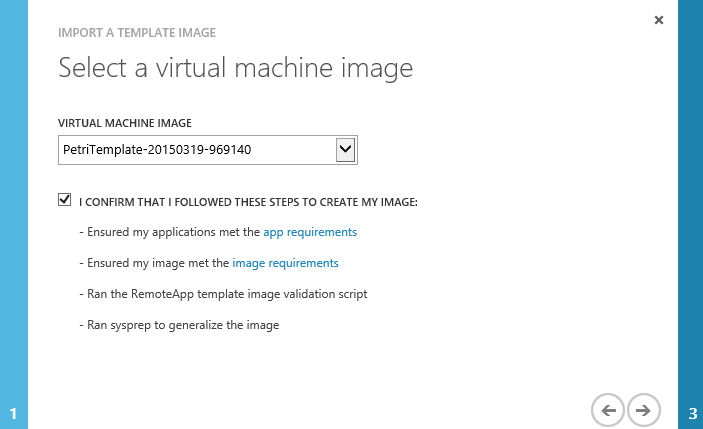
Browse to RemoteApp > Template Images and click Add. Choose the option to Import An Image From Your Virtual Machines Library. Select the newly created virtual machine image, check that you have followed all of the steps and check the box to confirm that everything is correct.
Name the new image, select the Azure region and wait a couple of minutes. The image is imported into RemoteApp pretty quickly. It starts with an Upload Pending status for a minute or so, and then moving from an Import In Progress status to Import Complete.
Don’t rush because the image is not ready yet. Look at the import date. If it’s 00:00 on January 1, 1900 then you need to wait just a little longer. Wait for the image to move to a ready state and for the date to change to the actual upload date. Now you can create a new cloud or hybrid app collection using your custom template.
This process is pretty easy and very quick. Furthermore, it might even be completely automatable using Azure Automation.


