Adding a New Office 365 Group to an Existing (Classic) SharePoint Online Site
As announced in this post in the Microsoft Tech Community, the ability to add a new Office 365 Group to an existing SharePoint Online (SPO) site is finally coming to Office 365. You will be able to connect existing classic SPO sites to new Office 365 Groups by means of two possible mechanisms:
- PowerShell (first mechanism available after the official announcement of this feature)
- The “Connect to new Office 365 Group” option available in the site settings menu
In this article I will explain step by step how to connect an existing SPO site to a new Office 365 Group or, in other words, how to Groupify an existing SPO site.
Adding a New Office 365 Group to the Site Through the UI
To add a new Office 365 Group to an existing site through the UI:
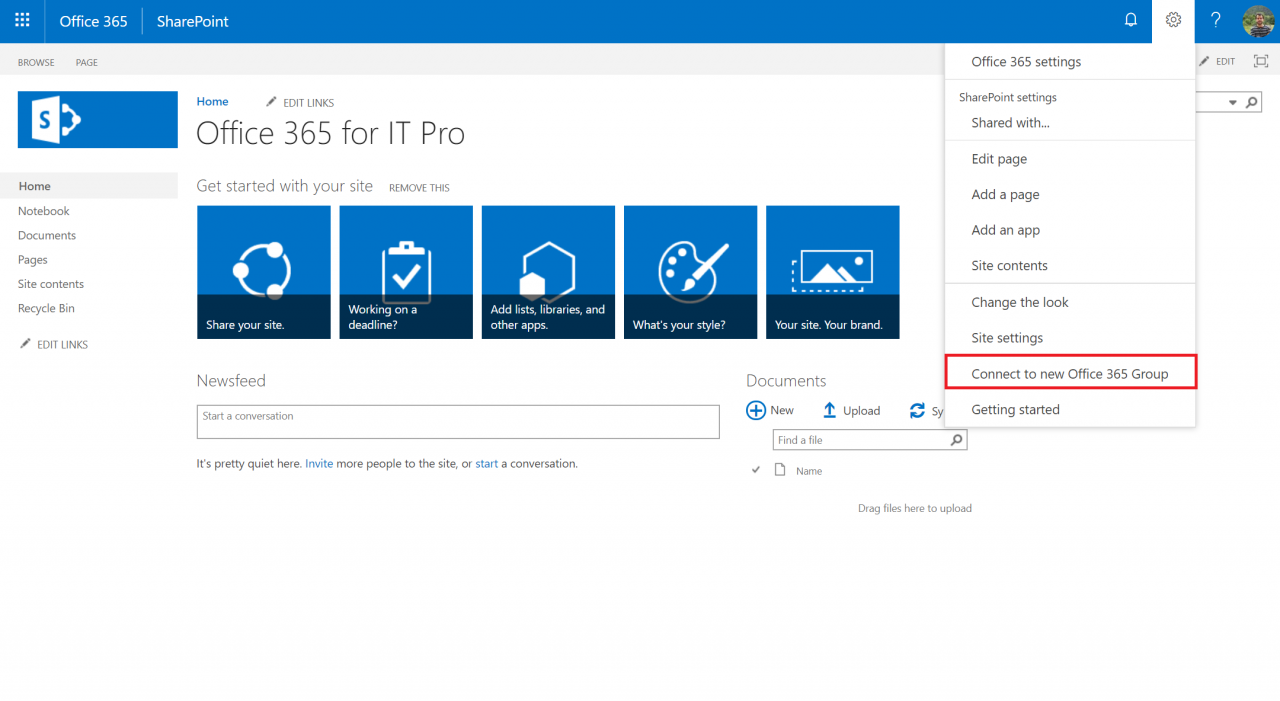
Click on Settings -> Connect to new Office 365 Group.
Figure 1 — Connect to New Office 365 Group Option
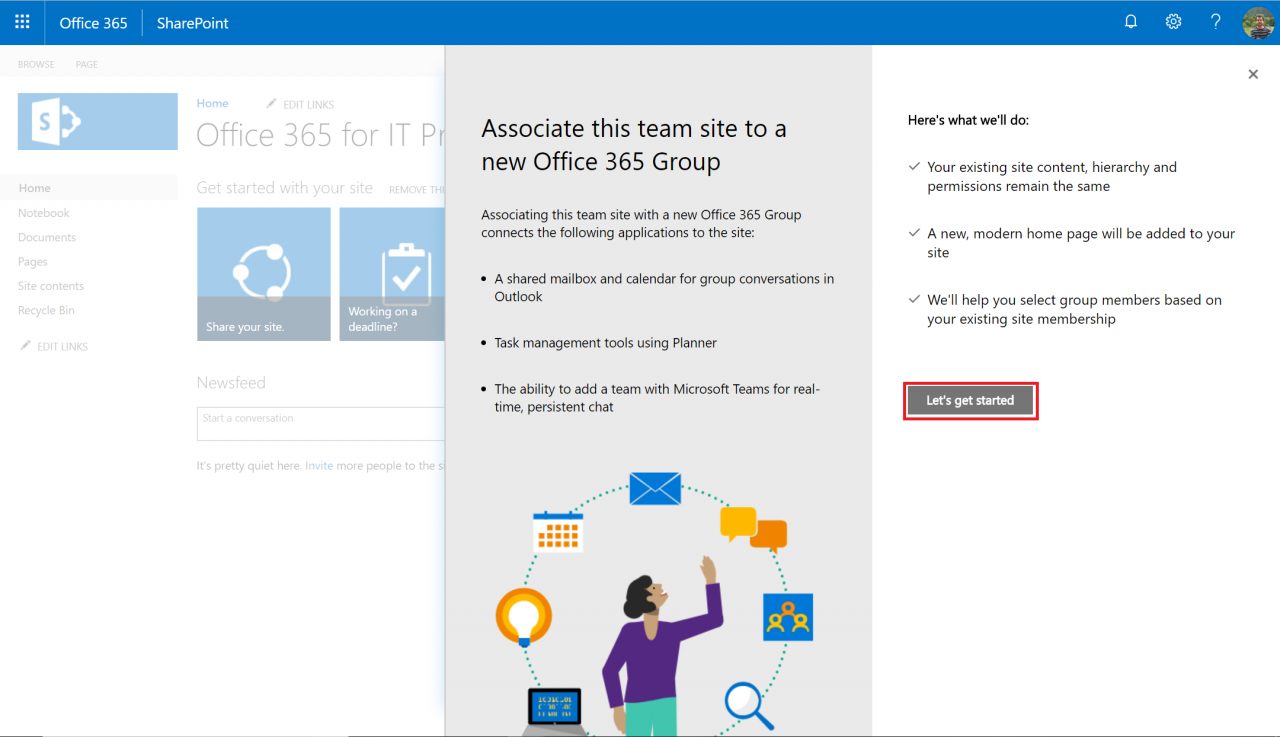
Then, a panel explaining the process and the results that will happen when the new Group is added to the site is displayed.
Figure 2 — Initial Configuration Panel in the Process
As you can see in that panel, the process will do the following tasks:
- Add a shared mailbox and calendar for group conversations.
- Create a Planner Plan for Tasks management.
- Provision a new, modern page as a home page for the site.
- Configure Group membership based on existing site membership.
- Keep existing site contents, hierarchy, and permissions.
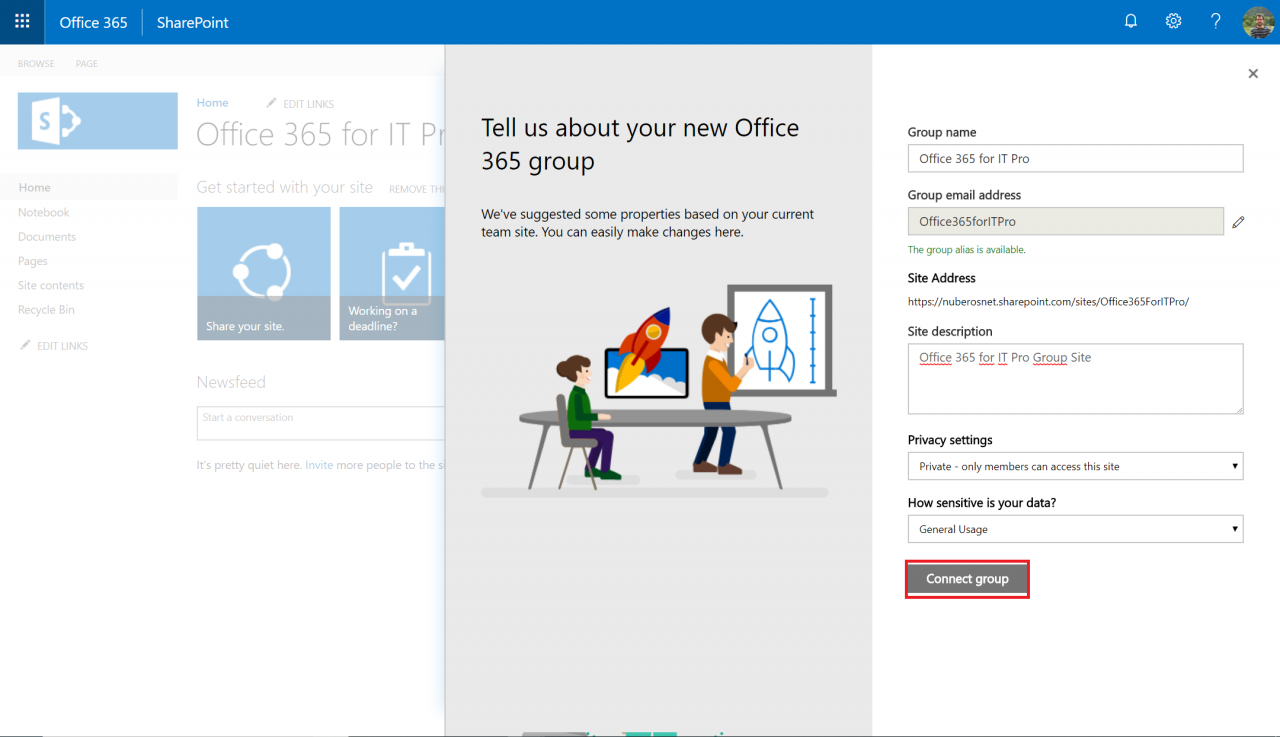
Once we are ready to start the process to add a new Group to the site, we only need to click on “Let’s get started” so a new panel is shown. This new panel is intended to set up basic Group configuration settings (Note that you cannot change the site URL, which is something that you can do when you are creating a brand new modern SPO site):
- Group name
- Group e-mail address
- Group site description
- Privacy settings for the Group
- Group classification (in case you have enabled it in your tenant)
Figure 3 — Basic Group Settings Panel
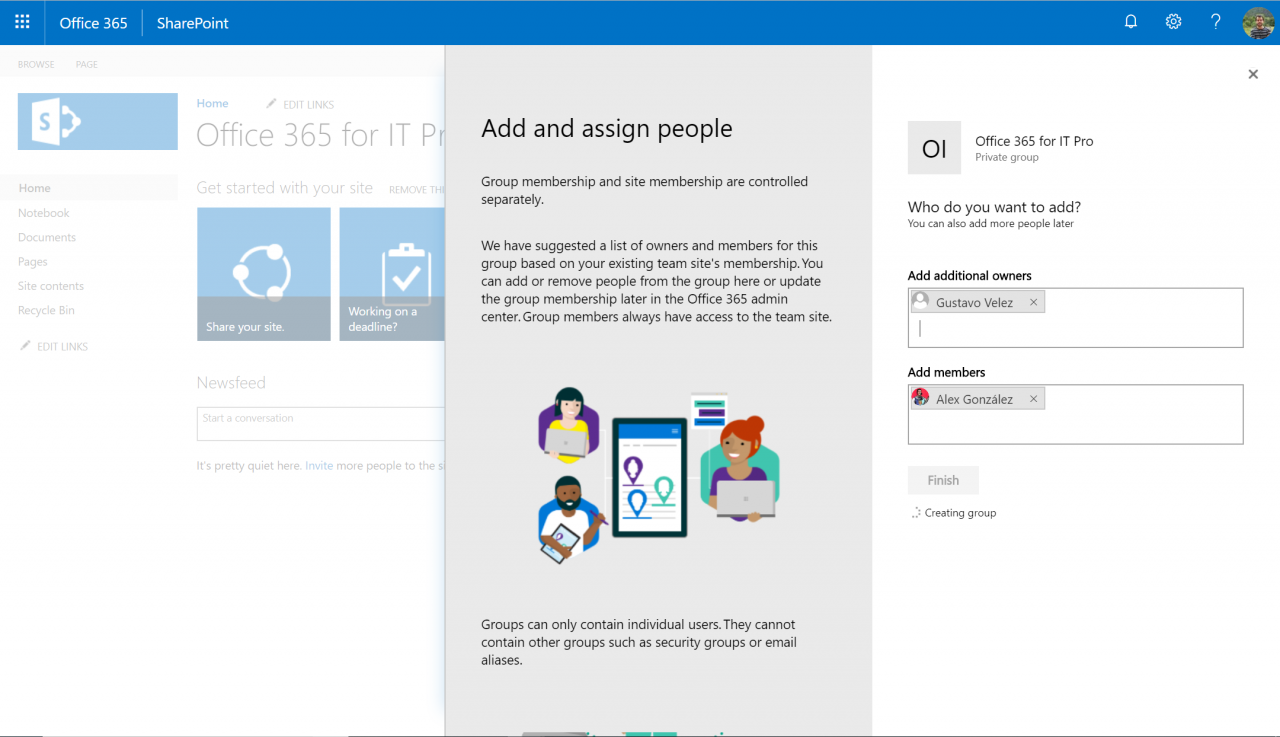
When we are ready with the basic Group settings, we can start the process of adding it to the site by means of the “Connect group” button. As soon as we click on this button, another configuration panel is displayed. In this panel, Group membership based on site membership is automatically configured so that the Group is created following the below rules:
- Any user that belongs to a SharePoint Group in the site that grants owner permissions on the site is going to be added as Group owner.
- In the same way, any user that belongs to a SharePoint Group in the site that grants member permissions on the site is going to be added as Group member.
Figure 4 — Add and Assign People Pane
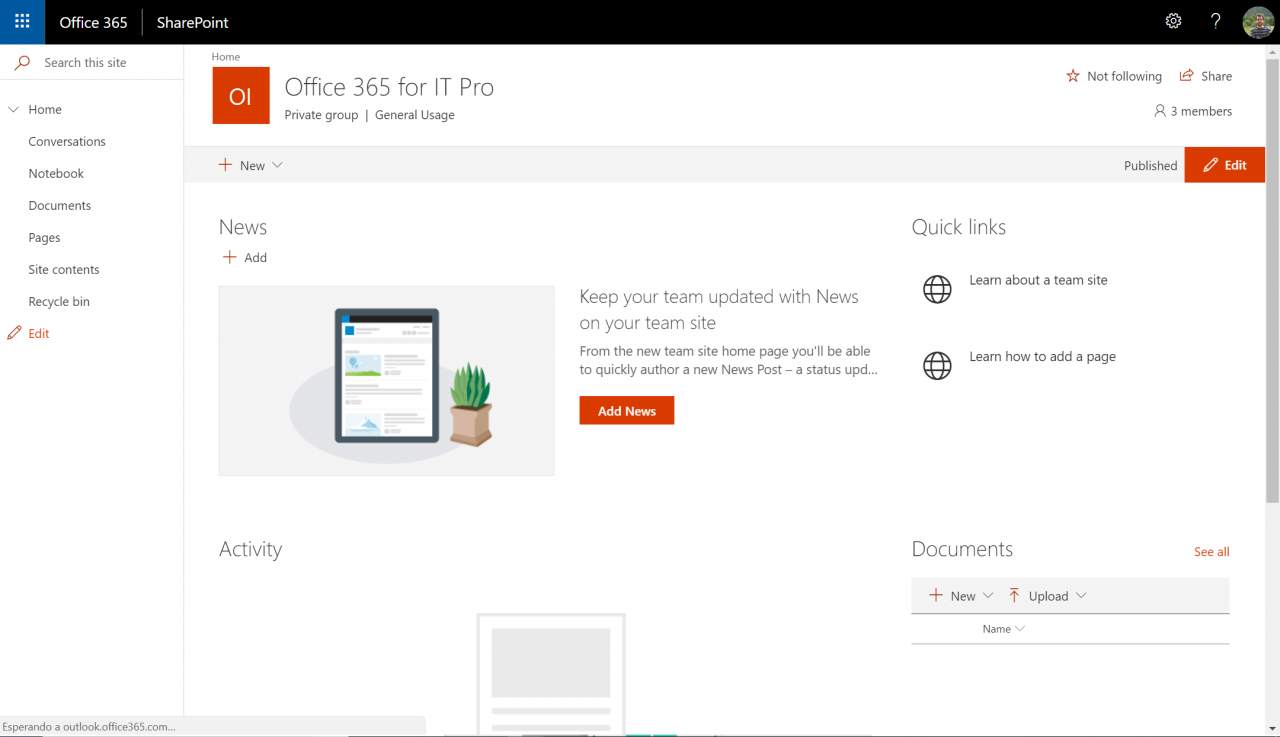
Once the Group creation process finishes, we can click on the “Finish” button. This redirects us to the brand new modern home provisioned in the process.
Figure 5 — New Home Page Provisioned for the Site
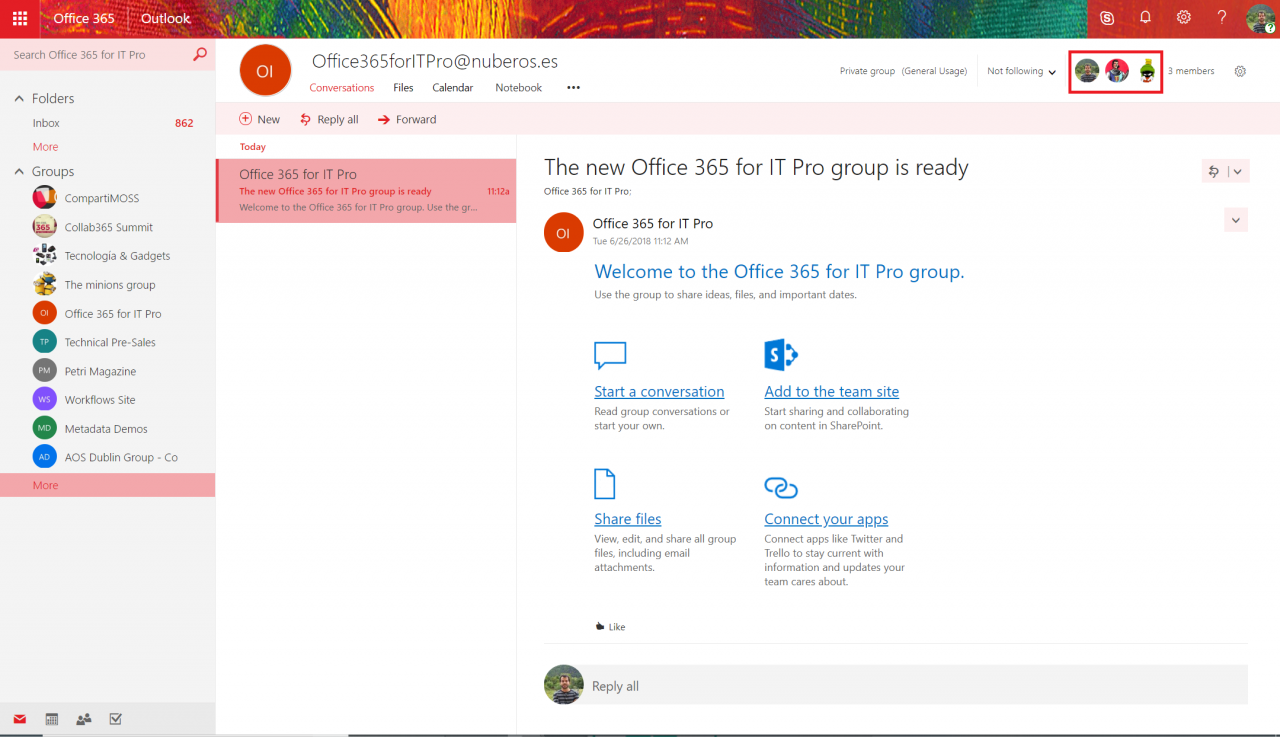
Of course, we can also check that the other Group elements are already in place, such as the Group Mailbox created for Group conversations.
Figure 6 — Group Mailbox Provisioned
Adding a New Office 365 Group to the Site Through PowerShell
As with many other Office 365 features, Microsoft provides a “PowerShell way” to add a new Office 365 Group to an existing SPO site. You only need to open your favorite PowerShell tool (Note: Be sure to previously update your SPO Management Shell installation with the latest version available) and execute the following PowerShell sequence:
$sUserName="<Office365_User>@<Office365_Domain>.onmicrosoft.com"
$sMessage="Type your Office 365 Credentials"
$sSPOAdminCenterUrl="https://<Office365_Domain>-admin.sharepoint.com"
$sClassicSPOSite="https://<Office365_Domain>.sharepoint.com/sites/<Site_Name>/"
$O365Cred=Get-Credential -UserName $sUserName -Message $sMessage
Connect-SPOService -Url $sSPOAdminCenterUrl -Credential $O365Cred
$sGroupDisplayName="<Group Display Name>"
$sGroupAlias="<GroupAlias>"
Set-SPOSiteOffice365Group -Site $sClassicSPOSite -DisplayName $sGroupDisplayName -Alias $sGroupAlias -IsPublic $true
As a result, you will have a new Office 365 Group that has been added to the existing site.
Conclusions
Microsoft has finally provided the ability to add a new Office 365 Group to existing SPO sites so that we can almost “convert” classic SPO sites into modern Team Sites. We can take advantage of all the capabilities an Office 365 Group provides to modern Team Sites:
- A new modern home page for the site
- Site Membership is managed through Group Membership
- A Shared Mailbox and calendar for Group conversations and meetings
- A Planner Plan for Group Tasks management
Juan Carlos González Martín
Office Servers and Services MVP
Cloud and Productivity Advisor
[email protected]
@jcgm1978 | https://jcgonzalezmartin.wordpress.com/


