Windows 10 Upgrade Tip: Cleaning Up Temporary Files
Windows 10 has been offered as a free upgrade for Windows 7, 8, and 8.1 users by Microsoft since July 2015. If you’re upgrading to Windows 10, I’ll explain why Windows 10 retains temporary files from your previous operating system, as well as outlining steps on how to clean up your temporary files to increase your storage space.
- Related: Windows 10: Beating the Upgrade Fear
Note: To upgrade, users must be running Windows 7 Service Pack 1 or Windows 8 (Windows 8.1 Update). If you do not meet these prerequisites, then you might be able to still be able to upgrade to Windows 10, but you’ll need to download an ISO image from Microsoft.
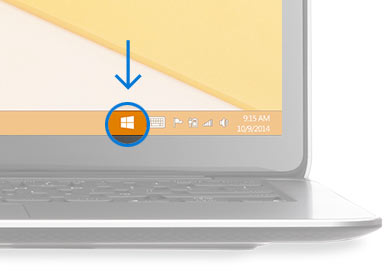
Owners of these operating systems should see a Windows icon in their taskbar next to the clock, notifying them that they can reserve a free upgrade to Windows 10. If they choose to do so, a 3 GB file will be downloaded and placed on the computer’s local drive.
According to Microsoft, the free upgrade will be available until the end of July 2016, and users can cancel their reservations at at any time if they don’t want to upgrade to Windows 10.
The upgrade process itself is pretty painless, and it takes a couple of reboots to get things straight. We’ll cover those in a separate article. Once the computer is upgraded and up and running, you’ll find that much of the original disk space that was available on your system partition is now gone.
If you recall, the 3 GB file that was downloaded as part of the upgrade offer, was copied over to the system folder of the existing Windows operating system, allowing for the upgrade process to run. Because the upgrade program actually allows you to revert back to the previous OS — Windows 7, 8, or 8.1 — Windows keeps all the system files and settings used by the previous OS, and keeps it indefinitely unless you choose to remove them. These recovery files are only needed if you ever wish to revert back to the previous OS, as they are not required if you decide you want to stick with Windows 10.
How do you get rid of those unnecessary temporary files after you’ve upgraded to Windows 10?
Open Windows Explorer by using the Start menu or clicking on the Win Logo key + E.
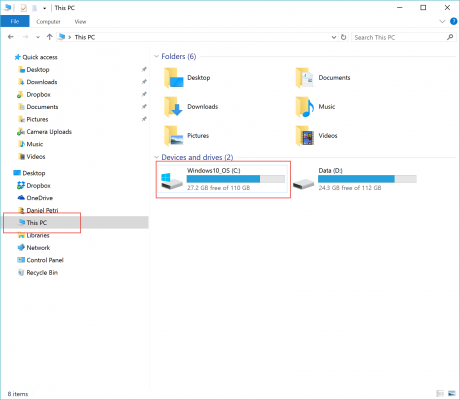
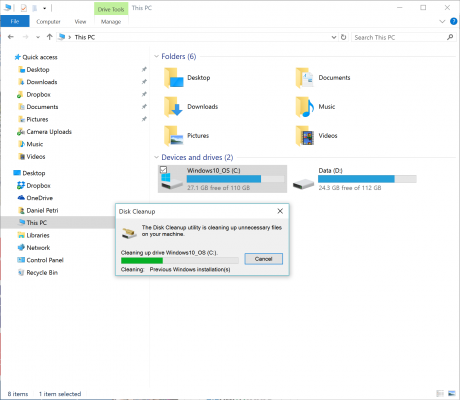
Expand “This PC” and notice how much free space you’ve got on the C drive. In this case, 27.2 GB.
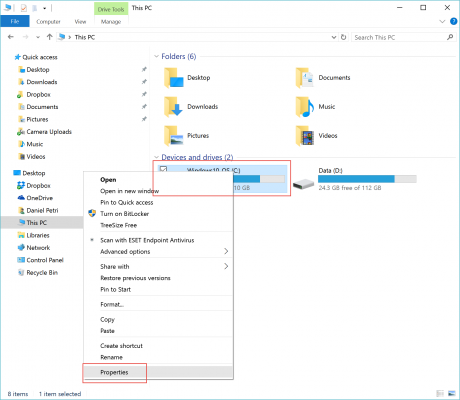
Right-click on the C drive. Select Properties.
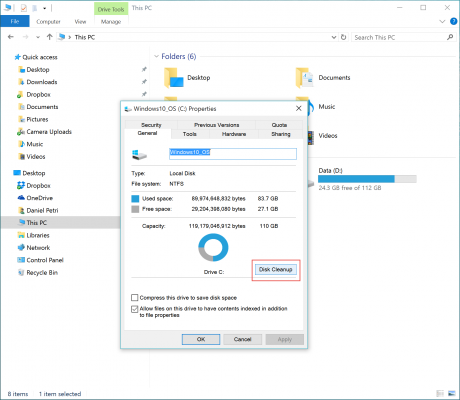
In the C drive Properties window, click on Disk Cleanup.
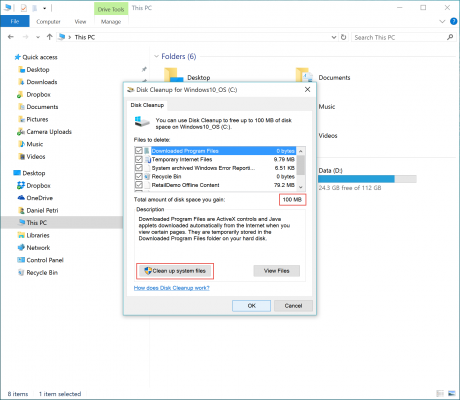
Next, review the options for deleting files. These include typical things that you can safely delete, such as temporary Internet files, error logs, and thumbnails. You don’t have to select them, but you can if you want to.
At this time, you can close the C drive Properties window.
Click on Clean up system files.
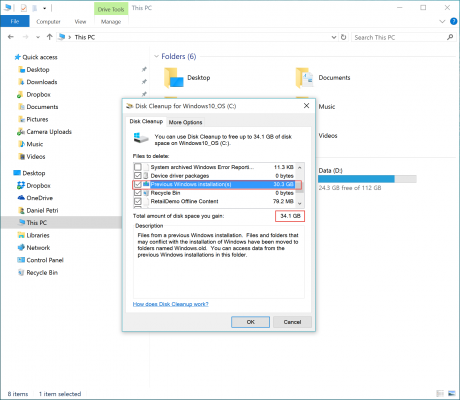
The window closes and after a few seconds it will re-open. This time, you’ll get more options to delete. We are interested in the “Previous Windows Installation(s)” option.
Select it. It will free up tens of GB of disk space. In this case, 30.3 GB.
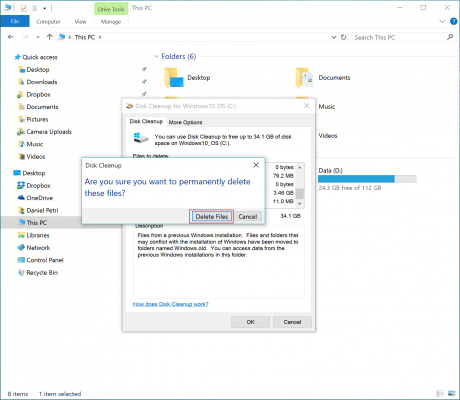
You will be prompted to acknowledge the deletion, click “Delete Files” if you want to continue.
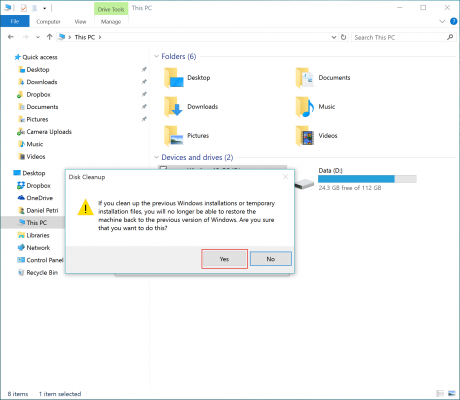
You will be prompted to acknowledge the fact that if these files will be deleted, you will no longer be able to revert to the previous operating system. Click “Yes” if you want to continue.
A progress window will appear.
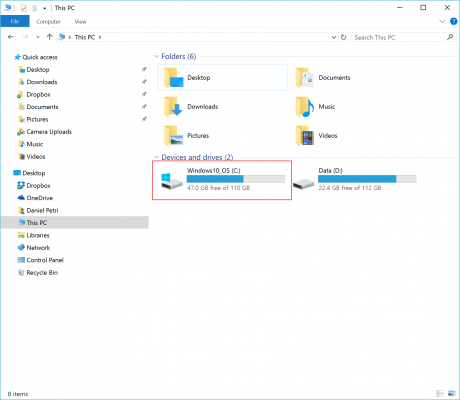
Once it’s done, note the free disk space on the C drive.
Done!


