Using the Windows Server 2012 Security Configuration and Analysis Tool
Windows Server 2012 is quite secure out-of-the-box, balancing usability and compatibility against security. For organizations that need to implement tight security or comply with strict regulatory codes, security needs to be managed beyond the default settings.
In this first part of a three-part series, I’ll explain how to work with security baseline templates using the built-in Windows Server 2012 Security Configuration and Analysis snap-in and its command-line equivalent, SecEdit.
What is a Security Baseline Template?
Microsoft provides security templates for Windows Server and client operating systems, containing security configuration designed for different scenarios and server roles. There are some security templates that are part of the operating system and get applied during different operations, such as when promoting a server to a domain controller.
Default Security Templates
In Windows Server 2003, the default security templates are located in %systemroot%securitytemplates, and include templates such as Setup Security.inf and Compatws.inf.
Setup Security.inf is created when the operating system is installed and differs from device to device, depending on whether there was a clean installation or upgrade of Windows. The Compatws.inf template changes access control lists, including the Users group entry on files and registry keys, to relax security so programs that don’t adhere to the recommendations in the Windows Logo Program for Software will run without administrative privileges.
Other templates included out-of-the-box are:
- DC security.inf (for domain controllers)
- Securedc.inf
- Securews.inf
- Hisecdc.inf
- Hisecws.inf
- Rootsec.inf (applies default permissions for the root of the system drive)
- Notssid.inf (removes Terminal Server security identifiers from the file system and registry)
In Windows Server 2008 and later versions, security templates are located in %systemroot%inf and are more limited than in Windows Server 2003. Templates include:
- Defltbase.inf
- Defltsv.inf
- Defltdc.inf
- DCfirst.inf (for the first domain controller in a domain)
Additional Security Templates
Templates that can be used to apply high security settings to domain controllers or to servers running other roles and applications used to be distributed as .inf files. These files could be imported into Group Policy Objects (GPOs) to secure multiple devices. Moreover, security templates can also be imported into security databases and used to configure individual servers where there is no Active Directory. Additional templates are now provided with the Security Compliance Manager (SCM) tool, which we will cover in part two.
Security Configuration and Analysis
Windows Server provides a hidden tool that can be used to compare the configuration settings in a security database with actual settings on a local computer, or apply settings from a security database, and is useful for checking compliance on individual servers.
Create a New Security Database
Before you can analyze or configure security, a security database must be created.
- Log on to Windows Server 2012 R2 with an account that has local administrator permissions.
- Press the WINDOWS key to switch to the Start screen.
- On the Start screen, type mmc and press ENTER to select it from the search results.
- In the MMC window, click File and select Add/Remove Snap-in… from the menu.
- In the Add or Remove Snap-ins dialog, scroll down the list of Available snap-ins and select Security Configuration and Analysis in the list.

Add the Windows Server 2012 security configuration and analysis tool snap-in. (Image: Russell Smith)
- Click Add in the center of the dialog.
- Click OK.
- In the left pane of the MMC window, right click Security Configuration and Analysis and select Open Database from the menu.
Although we have selected Open Database, we are actually going to create a new database, as we don’t have anything to work with at the moment.
- In the Open database dialog, browse to the location where you want to save the new security database, type a name for it in the File name box and click Open.
- In the Import Template dialog, select an .inf file to use for configuring the security database and click Open. This can be one of the default templates provided with Windows Server 2012 R2, such as defltsv.inf.
After a few seconds, the settings from the .inf file should be imported into the new security database.
Comparing database and actual security settings on Windows Server. (Image: Russell Smith)
Analyze Server Security
Now that we have a new database open in the tool with settings imported from the .inf file, we can compare the settings in the database with those configured on the local computer.
- Right click Security Configuration and Analysis in the left pane of the MMC and select Analyze Computer Now from the menu.
- In the Perform Analysis dialog, click OK to select the default location for the error log files.
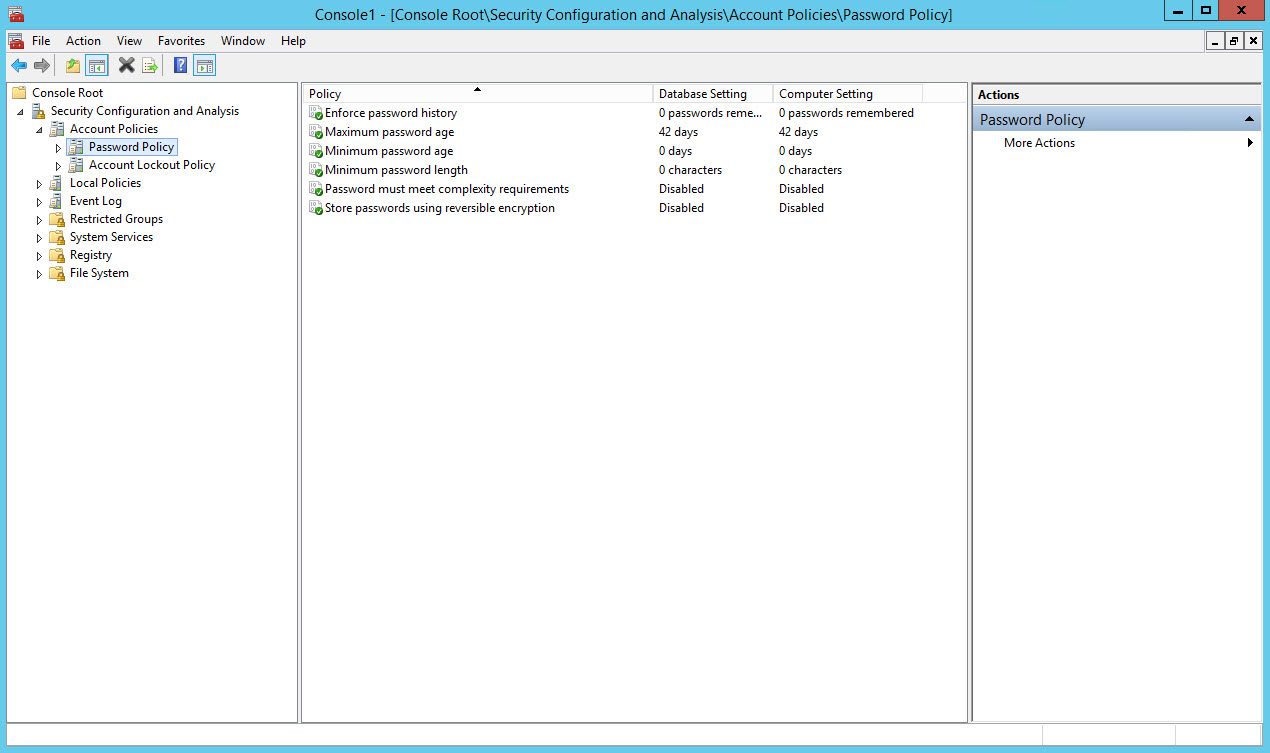
- In the left pane of the MMC window, expand Account Policies under Security Configuration and Analysis and click Password Policy.
- In the center pane of the MMC, you’ll see each setting in the Password Policy category, with the Database Setting listed first, and then the actual Computer Setting.
Assuming you are logged on to a standalone server and you haven’t changed the settings from the defaults, the database and computer settings read be the same.
Edit Security Settings in the Database
Now that we can see how the database settings and server configuration compare, it’s possible to configure the settings in the database.
- In the left pane of the MMC window, expand Account Policies under Security Configuration and Analysis and click Password Policy.
- In the center pane, double click Password must meet complexity requirements.
- In the Password must meet complexity requirements Properties dialog, make sure that Define this policy in the database is checked, change the policy setting from Enabled to Disabled and click OK.
- Right click Security Configuration and Analysis in the left pane of the MMC and select Save from the menu.
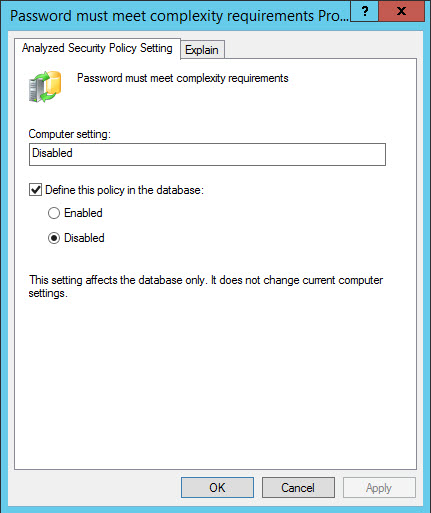
Configuring analyzed security policy settings. (Image: Russell Smith)
You can repeat this procedure for any policy setting in the security database.
Configure Server Security
Let’s configure the server using the settings in the security database now that there is a difference between the database policy settings and the server’s actual configuration.
- Right click Security Configuration and Analysis in the left pane of the MMC and select Configure Computer Now from the menu.
- In the Configure System dialog, click OK to select the default location for the error log files.
After configuration you should re-analyze the server using the instructions above to check the settings have been applied.
Export Database Settings
Once you have the settings in the security database configured as desired, you can export the settings as an .inf file to use on other systems or to deploy with Group Policy.
- Right click Security Configuration and Analysis in the left pane of the MMC and select Export Template from the menu.
- In the Export Template To dialog, select a file location, type a name for the .inf file in the File name box and click Save.
You can later import an .inf file to a security database using the procedure described above, but instead by selecting Import Template from the menu.
Using the SecEdit Command Line Tool
The tasks that we completed above with the Security Configuration and Analysis tool can also be performed from the command line, along with a couple of other functions that aren’t accessible from the GUI. Before running the tool, make sure that you have closed the Security Configuration and Analysis MMC.
To analyze a server, open a command prompt and run the following command, replacing c:security.sdb and c:security.log with appropriate paths. The results will be written to the log file.
secedit /analyze /db c:security.sdb /log c:security.log

The above command assumes that security.sdb is already configured with settings from an .inf file. If you want to import settings from an .inf file at the same time run the following command:
secedit /analyze /db c:security.sdb /cfg c:security.inf /log c:security.log
Template Validation and Configuration Rollback
Two functions not available in the Security Configuration and Analysis tool are the ability to validate .inf files and generate what are essentially ‘undo’ templates that can reverse applied settings.
To validate an .inf file, run the following command, replacing c:security.inf with the path to the .inf file you would like to validate.
secedit /validate c:security.inf
Additionally, secedit can be used to generate rollback templates for reversing applied settings, which is useful in a test environment but should never be relied upon in production. To generate a rollback template, you must specify an existing template against which an analysis of the local server is performed to generate a rollback template.
secedit /generaterollback /cfg c:security.inf /rbk c:rollback.inf
You’ll be warned that file and registry security settings cannot be rolled back. Type Y at the prompt and press ENTER. The rollback template will then be generated in the specified directory.
For more information on syntax and parameters that can be used with the secedit tool, type secedit -? and press ENTER at the command line.
In part two of this series, I’ll show you how to use Microsoft’s free Security Compliance Manager tool to manage security templates.
Russell Smith, the Editorial Director at Petri IT Knowledgebase, has over two decades of hands-on experience in IT, in both small business settings and government IT infrastructure projects. Russell started writing for Windows IT Pro Magazine in t...