Using SYSPREP in Windows 11

Deploying Windows 11 to hundreds or even thousands of devices can be automated if you have a system image that you can clone. To create an image for cloning, you first install Windows 11 on a device or virtual machine (VM), and then configure the operating system to your requirements. For example, you might decide to install certain applications or change default Windows configuration settings.
You can create images with a light touch, where only a minimum of changes are made to the out-of-box OS configuration. The result is known as a ‘thin image’. Or organizations might decide to go the whole hog and install and configure everything required for a set of users, creating a ‘fat image’.
Generalizing a Windows 11 system
Windows must be ‘generalized’ before you can use it as an image for cloning. When Windows is installed, it creates unique security identifiers (SID) that must not be used on other Windows devices. The process of ‘generalizing’ the operating system removes the unique SIDs assigned to the installation. And it is performed using a program called SYSPREP.
If you want to know how to use sysprep with Windows 10, check out Using Sysprep in Windows 10 on Petri.
Once Windows is generalized, it is returned to a state where if the image is booted, it will run through the Out-of-Box Experience (OOBE) again and reassign unique SIDs to the installation.
The generalization process also removes all hardware devices. So that you can use the image to deploy Windows to different hardware, devices are redetected when the image is booted after generalization. Generalization also removes system restore points and event logs. But by default, it doesn’t remove device drivers.
If you are going to use your generalized image to deploy Windows on identical hardware, you can change the default behavior so that generalizing the image doesn’t remove hardware devices.
Booting Windows 11 into Audit Mode
Audit Mode in Windows 11 is used for making online customizations to a Windows image. There are a few things you should bear in mind when running Windows 11 in Audit Mode. You should not:
- Use Windows Update to install patches. It will likely result in an error when running SYSPREP.
- Connect the device to the Internet.
- Install apps from the Microsoft Store.
- Join the computer to a domain.
The easiest way to boot into Audit Mode is using the SYSPREP command, which is located in the following path C:WindowsSystem32Sysprep
- Click the Start menu on the taskbar.
- Type command and then, making sure Command Prompt is highlighted on the left, click Run as administrator in the pane on the right of the search results.
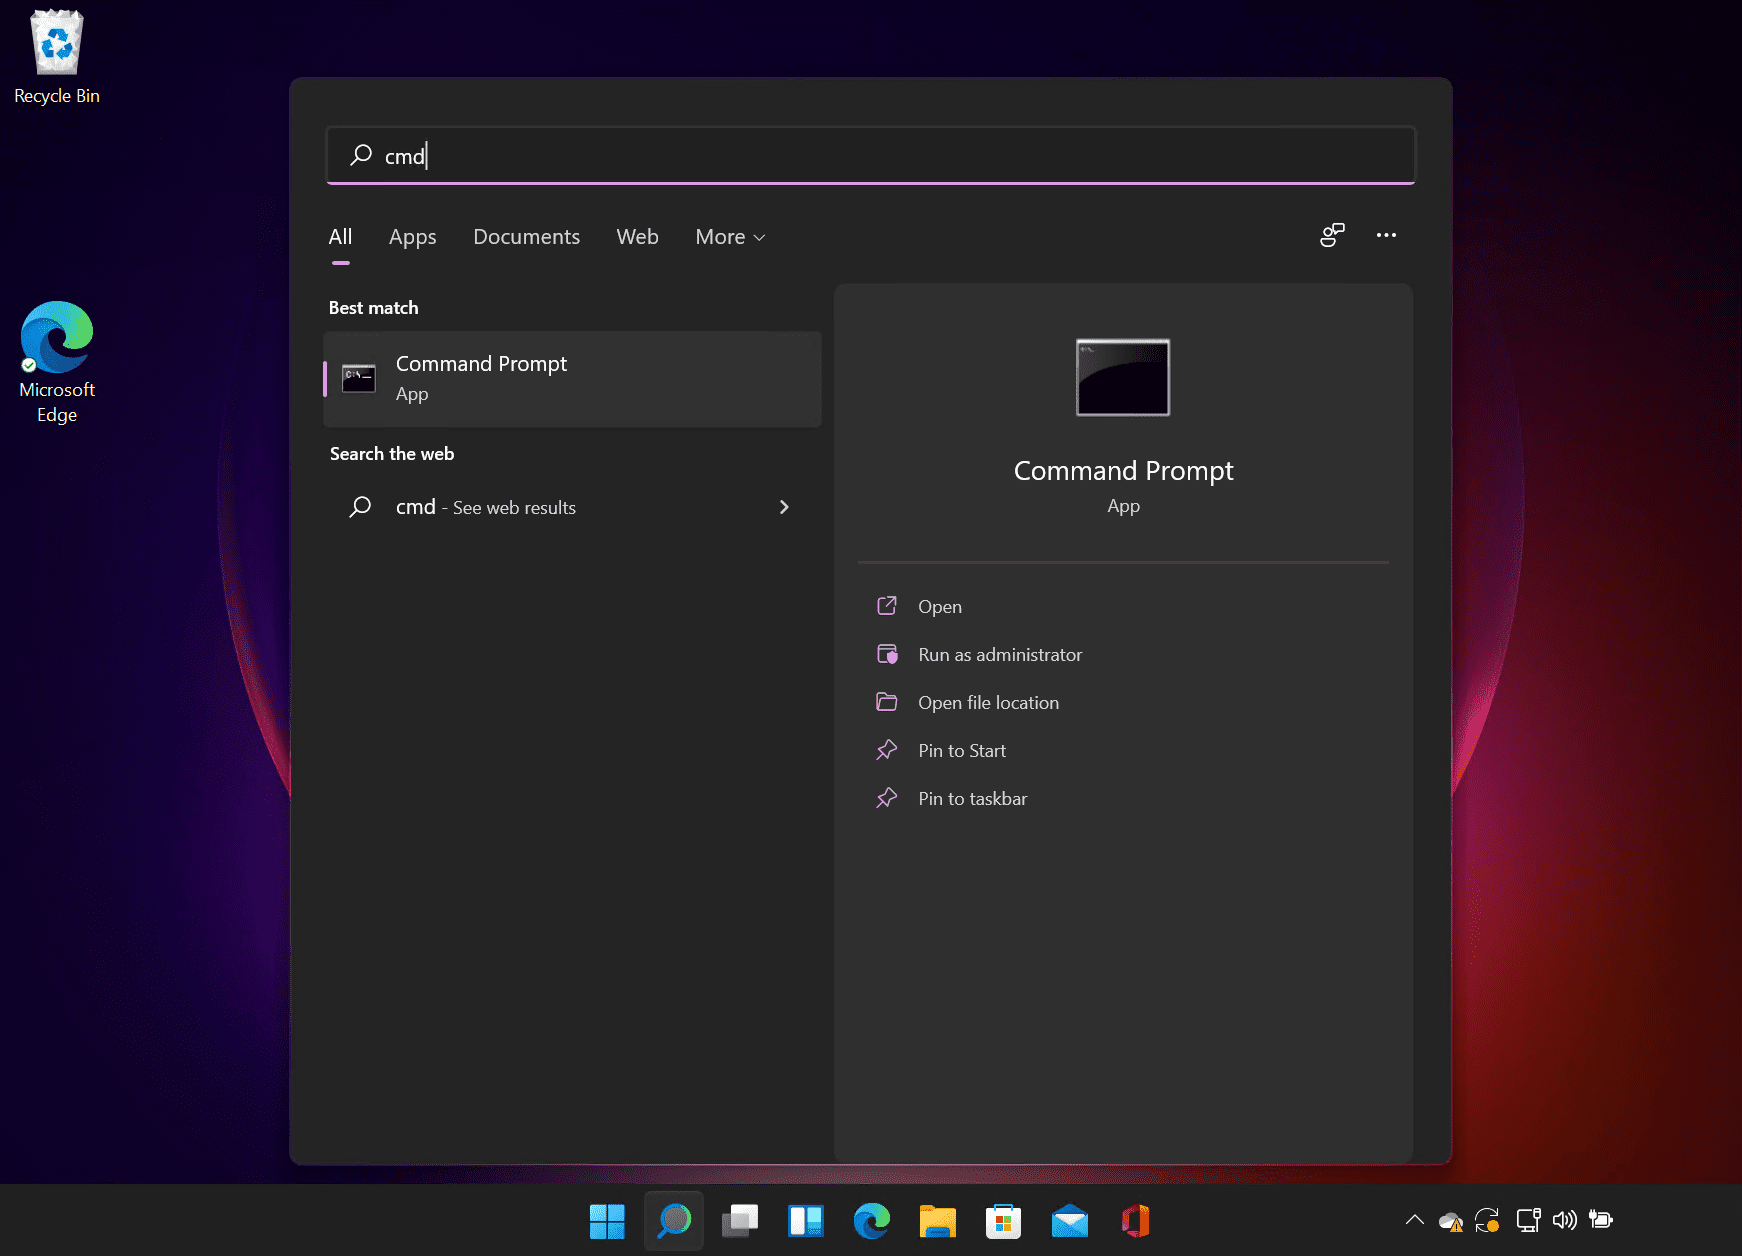
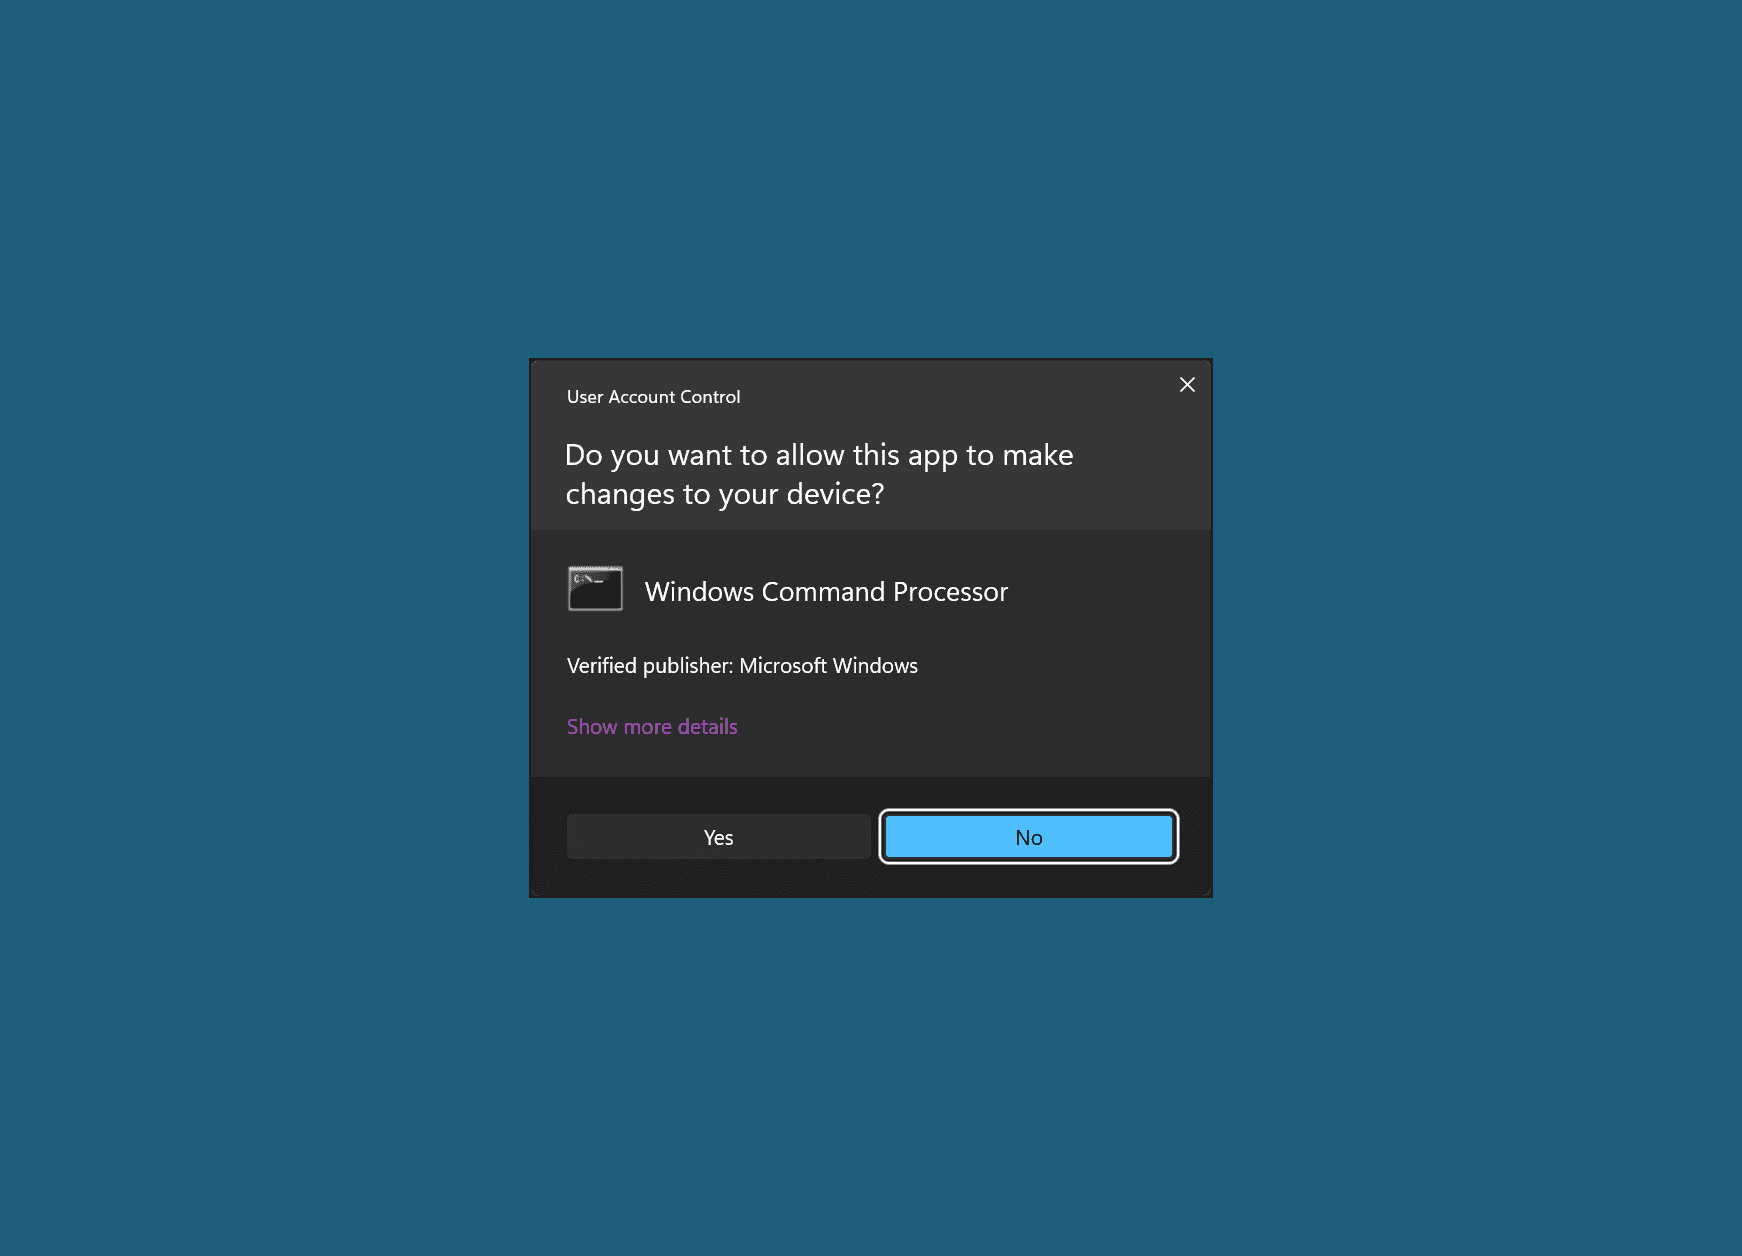
- Give consent or provide an administrator username and password as prompted.
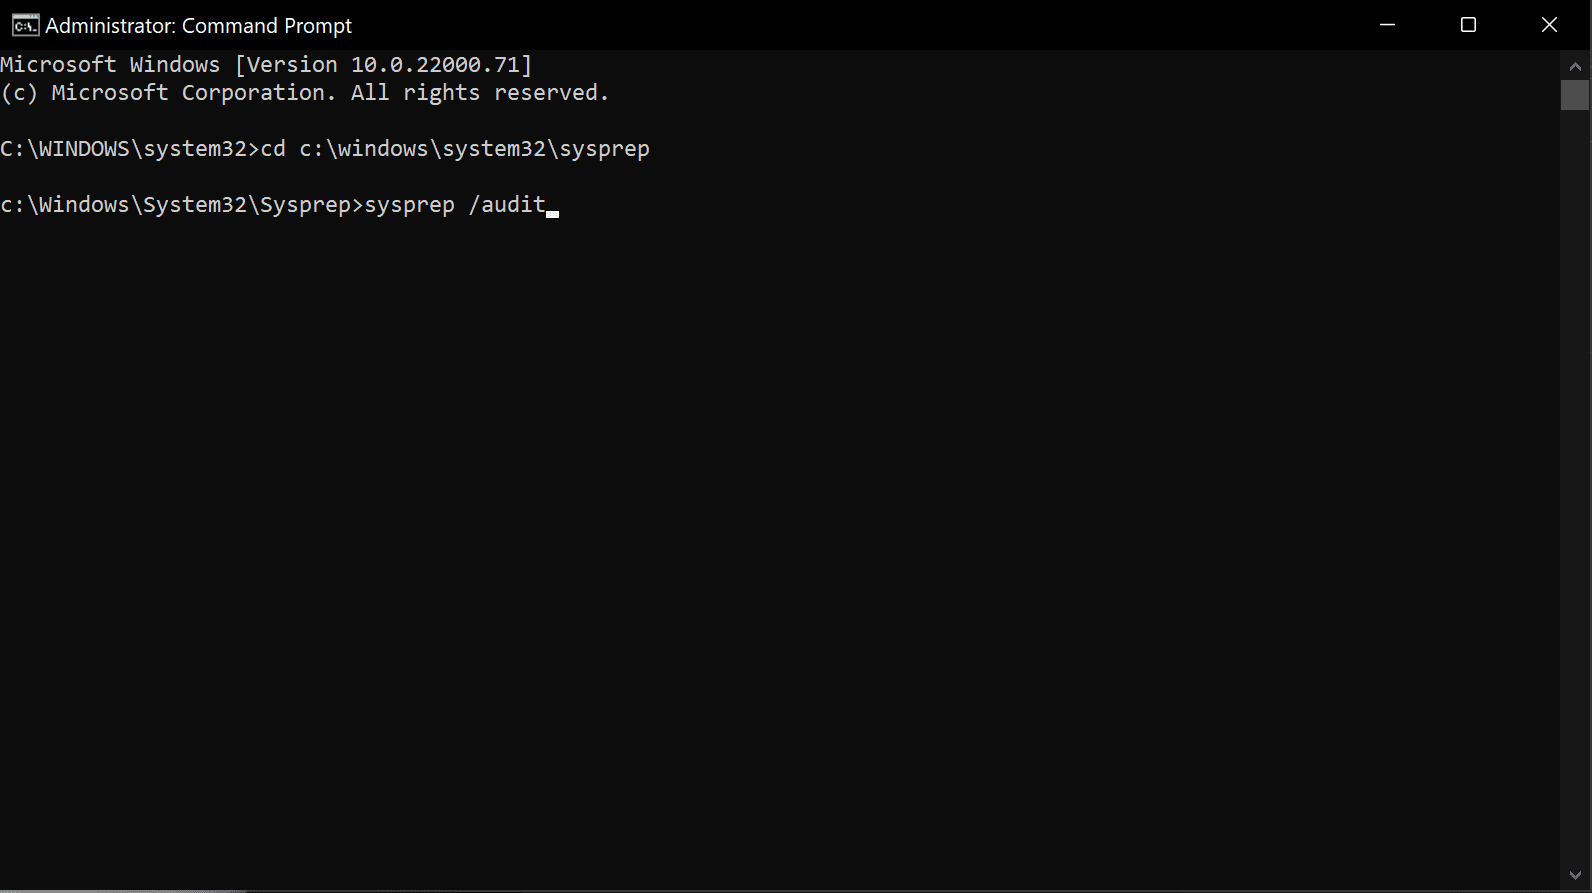
- In the command prompt window, run the command below to change the working directory to SYSPREP.
cd c:windowssystem32sysprep
- To enter Audit Mode, run SYSPREP with the /audit switch as shown below.
sysprep /audit
Generalize an image using SYSPREP
After a few seconds, Windows 11 will shut down. Start the device again and it will boot into Audit Mode. And you will automatically be logged in using the default Administrator account.

When you reach the desktop, SYSPREP should already be open. You can go ahead and make any required customizations to Windows 11. When you are finished, use SYSPREP to generalize the image.
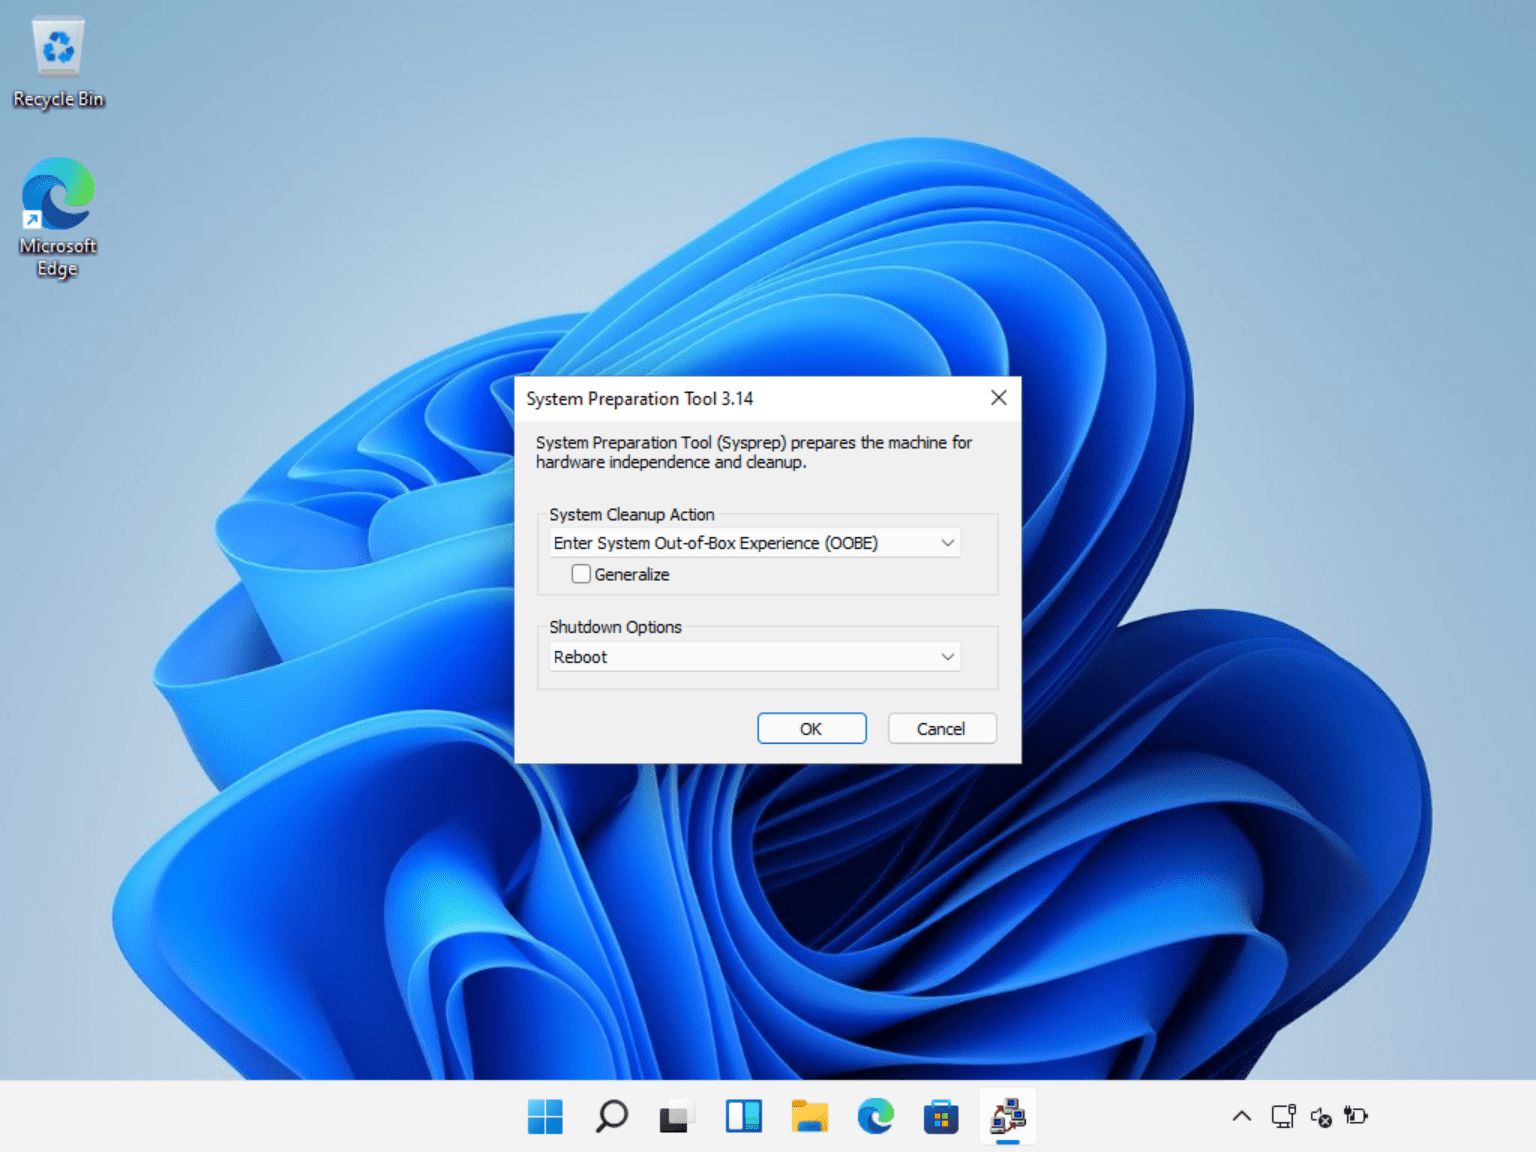
- In the SYSPREP window, make sure that Enter System Out-of-Box Experience (OOBE) is selected from the System Cleanup Action menu and that Generalize is checked.
- In the Shutdown Options menu, select Shutdown if you plan to use the image to deploy Windows on other devices.
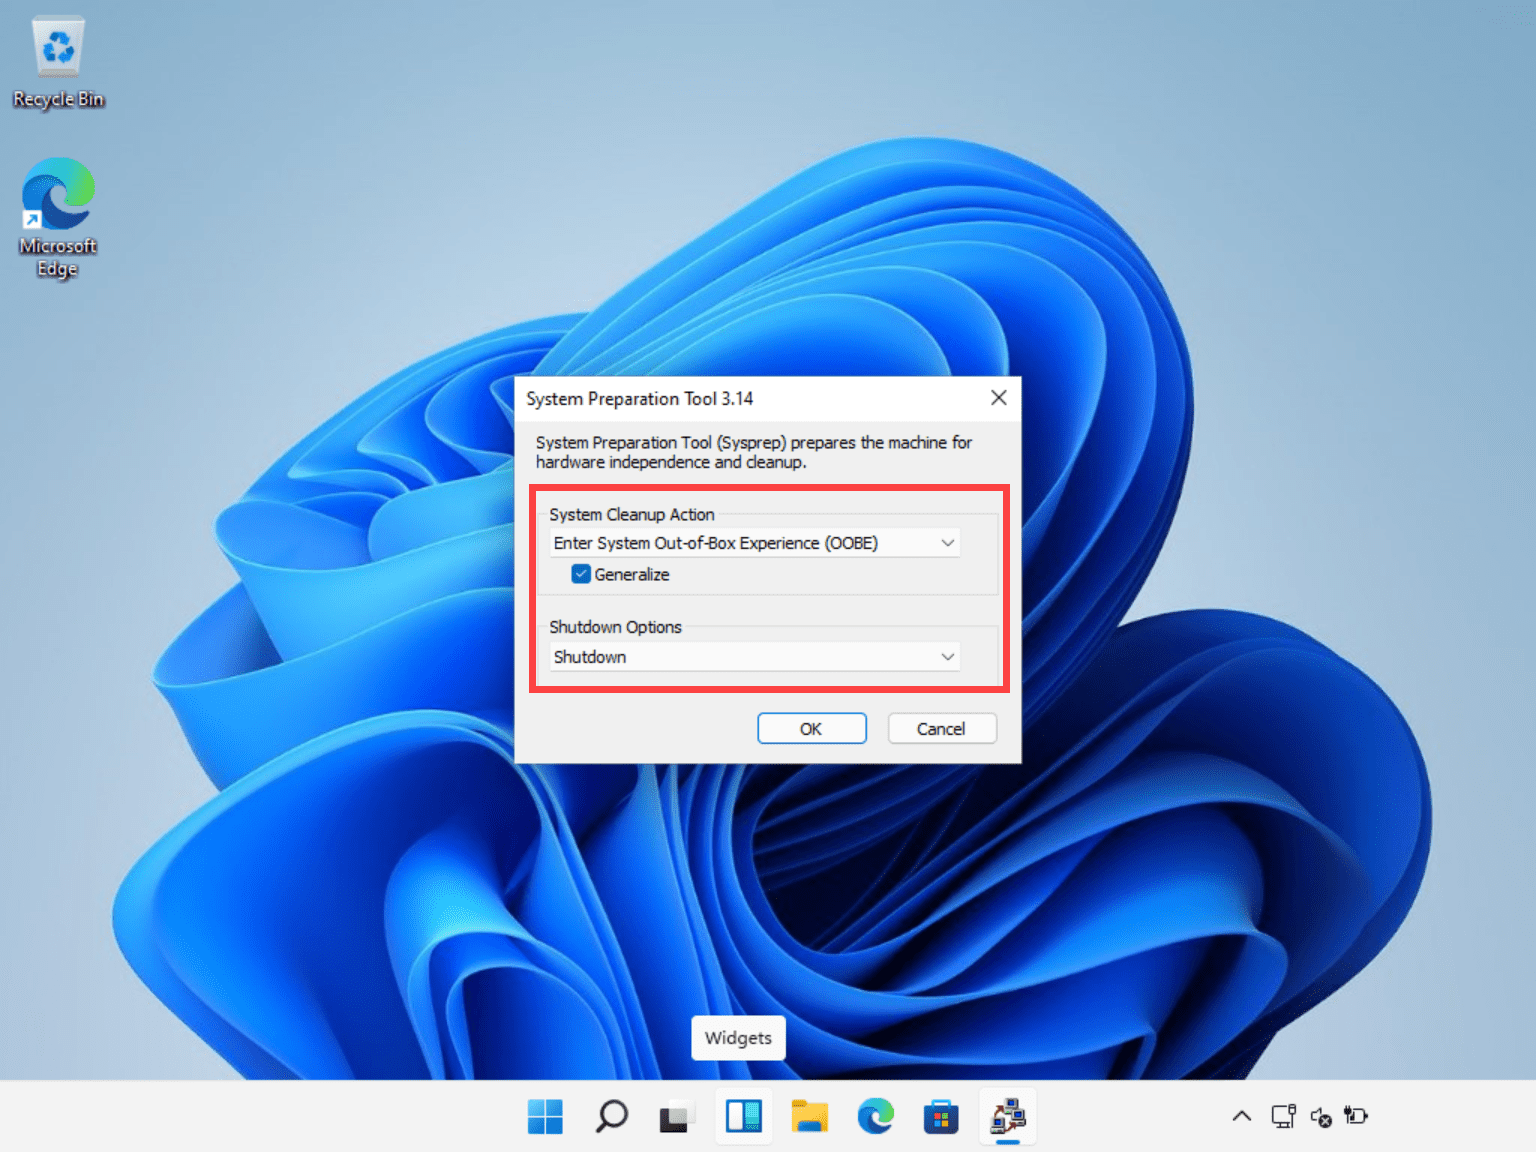
- Otherwise, you can select Reboot, and the device will reboot to the OOBE experience.
- Now click OK.
- SYSPREP will now generalize the installation, which may take a few minutes.

The device will either shut down or reboot depending on what you selected in step 2 above. Once you have generalized the image, you can then distribute it for wide deployment. You might use a cloning tool or capture the image using the DISM command-line tool. When the image is used on the same or other device, it will be booted into OOBE setup. Any customizations and software you installed on your custom image will be maintained.

SYSPREP command line options
The SYSPREP GUI operation that we performed above can also be run from the command line:
sysprep /generalize /shutdown /oobe
If you are running Windows in a VM, you can also generalize the OS for deployment on other VMs. VM mode only works if you are running SYSPREP in a VM.
sysprep /generalize /oobe /mode:vm
VM mode generalizes a virtual hard disk (VHD) for deployment as a VHD on the same VM or hypervisor. The hypervisor and hardware profile must be identical to those that the image was created on.
Russell Smith, the Editorial Director at Petri IT Knowledgebase, has over two decades of hands-on experience in IT, in both small business settings and government IT infrastructure projects. Russell started writing for Windows IT Pro Magazine in t...