Using PowerShell to Provision Member Servers in Microsoft Azure
In this Ask the Admin, I’ll show you how to provision member servers to an existing domain in Microsoft Azure using PowerShell.
In my Petri IT Knowledgebase article, “Provisioning of Domain Controllers in Azure using PowerShell,” I showed you how to use PowerShell to provision domain controllers in Azure with a single click. Now that you can quickly create a new Active Directory domain in Azure, I’ll show you how to provision a new member server using a couple of simple commands.
Windows PowerShell Script Pre-Requisites
Before you can use the code included in this article, you will need to have an Azure subscription, install the PowerShell tools for Azure and set up a secure connection to your subscription as described in “Setup Windows Azure PowerShell Management.”
Before diving in, there are several other considerations:
- The script assumes that you will deploy each new VM to a unique cloud service.
- The script has been tested on Windows 8.1 Update 1, so it may not work with earlier versions of PowerShell.
- The script should be run as a local administrator.
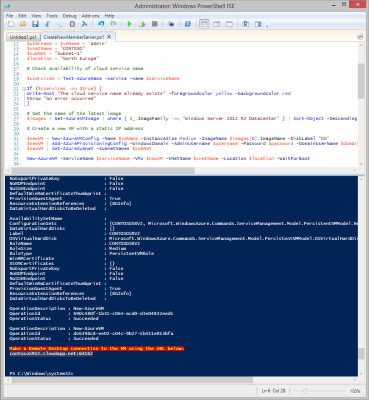
Running the script in Windows PowerShell ISE. (Image: Russell Smith)
Running the PowerShell Script
In this script we are going to provision a new VM that will be a member server of the ad.contoso.com domain, which is already running in Azure. I have a virtual network (Contoso) and subnet (Subnet-1) pre-configured. Domain controllers (DCs) already set up must be running in Azure.
Setting up variables
After specifying the Azure subscription and storage account, there are two sections that define variables. Custom variables need to be changed every time you run the script to determine the name of the new VM and cloud service name. All other variables should be changed to reflect your domain and Azure environment.
Set-AzureSubscription “Pay-As-You-Go” -CurrentStorageAccount portalvhdsxgwgzn2ml54p5 # Set custom variables $vmName = "CONTOSOSRV1" $serviceName = "contosoSRV1" # Set static variables $domainadmin = "contosodc1admin" $password = "Passw0rd!" $username = $vmName + "admin" $vnetName = "CONTOSO" $subNet = "Subnet-1" $location = "North Europe" $domain = "ad.contoso.com" $netBios = "AD" $imageFamily = "Windows Server 2012 R2 Datacenter" $instanceSize = "Medium"
Before provisioning the new VM, we need to check using the Test-AzureName cmdlet that the cloud service name specified in the variables section is available. If the name is unavailable, then an error is thrown and the script exits.
# Check availability of cloud service name
$cservices = Test-AzureName -service -name $serviceName
If ($cservices -eq $true) {
Write-Host "The cloud service name already exists" -foregroundcolor yellow -backgroundcolor red
throw "An error occurred" }
The script then determines the Azure gallery image that will be used to provision the new VM. Here we use the Get-AzureVMImage cmdlet to retrieve and sort the available Windows Server 2012 R2 Datacenter edition images, with the latest at the top of the list.
# Get the name of the latest image
$imageName = Get-AzureVMImage | where { $_.ImageFamily -eq $imageFamily } | sort PublishedDate -Descending | select -ExpandProperty ImageName -First 1
Provision the New Virtual Machine
Now we are ready to provision the VM. Using the Add-AzureProvisioningConfig cmdlet, we can specify all the necessary domain join details so that we don’t have to remotely connect to the VM after it’s provisioned to join it to our domain.
# Create a new VM with a static IP address $newVM = New-AzureVMConfig -Name $vmName -InstanceSize $instanceSize -ImageName $imageName -DiskLabel "OS" $newVM | Add-AzureProvisioningConfig -WindowsDomain -AdminUsername $username -Password $password -DomainUserName $domainadmin -DomainPassword $password -Domain $netBios -JoinDomain $domain -DisableAutomaticUpdates $newVM | Set-AzureSubnet -SubnetNames $subNet New-AzureVM -ServiceName $serviceName -VMs $newVM -VNetName $vnetName -Location $location -WaitForBoot
Finally, the script determines the RDP port that is randomly assigned by Azure when the VM is provisioned, and displays the full URL so that we can connect to the VM using Remote Desktop.
# Display the RDP connection string
$rdpPort = $myVM | Get-AzureEndpoint | where { $_.Name -eq “RDP” }
$rdpString = $servicename + ".cloudapp.net:" + $rdpPort.Port
write-host "Make a Remote Desktop connection to the VM using the URL below:" -foregroundcolor yellow -backgroundcolor red
write-host $rdpString


