How to Use a Windows Notebook with an External Monitor
If you regularly use a Windows 10 notebook with an external screen, the default power settings and display configuration isn’t ideal. In this article, I’ll show you how to have a smoother and more productive experience when using an external monitor.
Connecting an external monitor
There are several different connector types that can be used to connect external monitors to notebooks. If you are using modern hardware, then USB-C ports are usually the go-to connector type for working with an external display because they can carry DisplayPort signals. Notebooks might additionally have dedicated DisplayPort or HDMI ports that you can use to connect an external monitor.
You should check with the notebook manufacturer that the port you intend to use supports the maximum display resolution and refresh rate of your monitor. If you want to run more than one external display, then it’s likely that the resolution and refresh rate of each display will be restricted. This is usually determined by the capabilities of the notebook’s graphics card.
Extending or duplicating the notebook’s display
In most cases, it’s likely that you will use an external monitor on its own. I.e. without also utilizing the notebook’s built-in screen. That’s because the size of the notebook screen is probably smaller than your external monitor. The two screens aren’t likely to be convenient to use together.
But there will be times when having a less-than-ideal second display, in the form of the notebook’s built in screen, might come in handy. The default Windows display configuration is to extend your display across the connected screens.

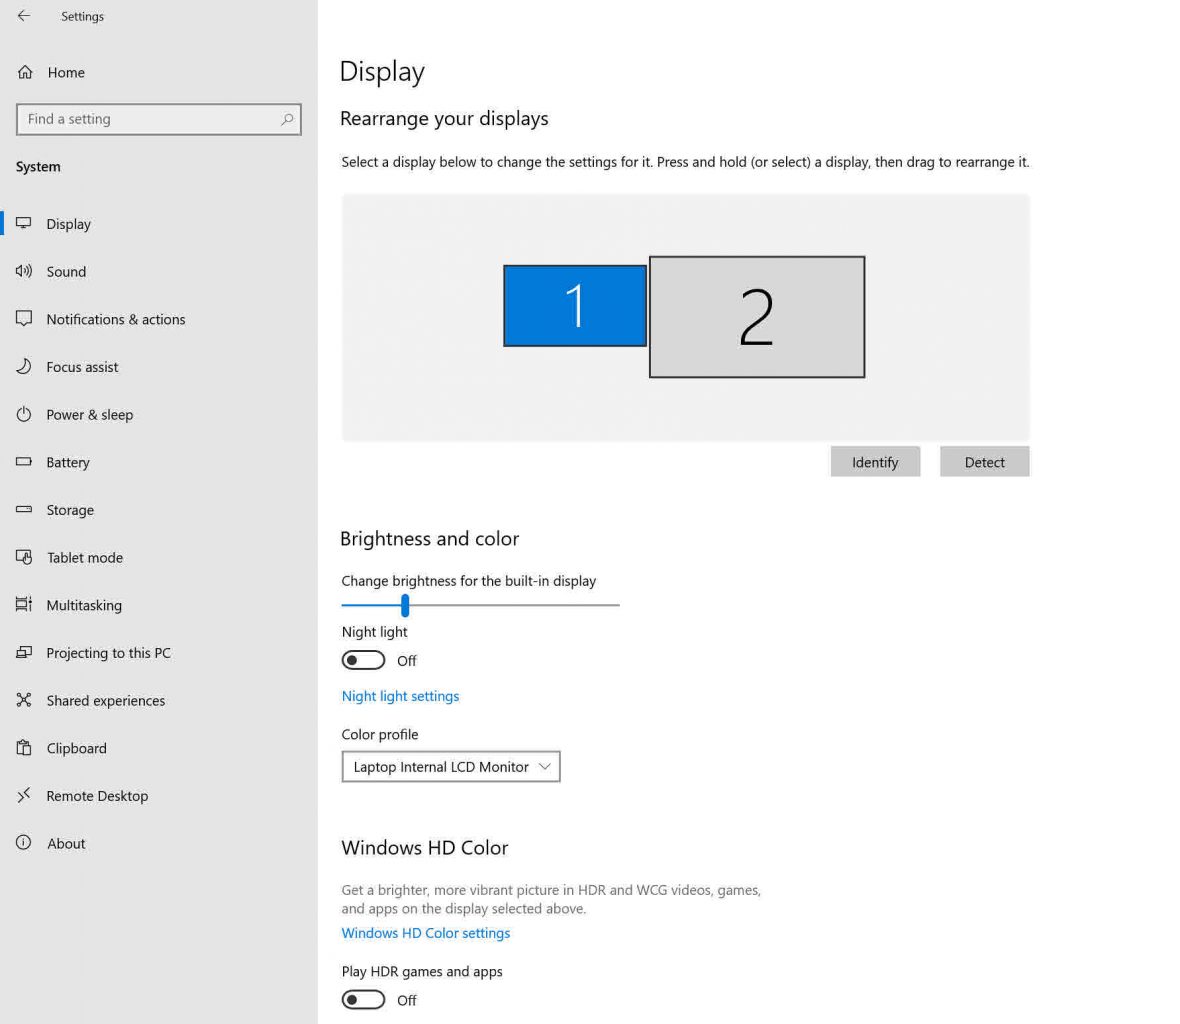
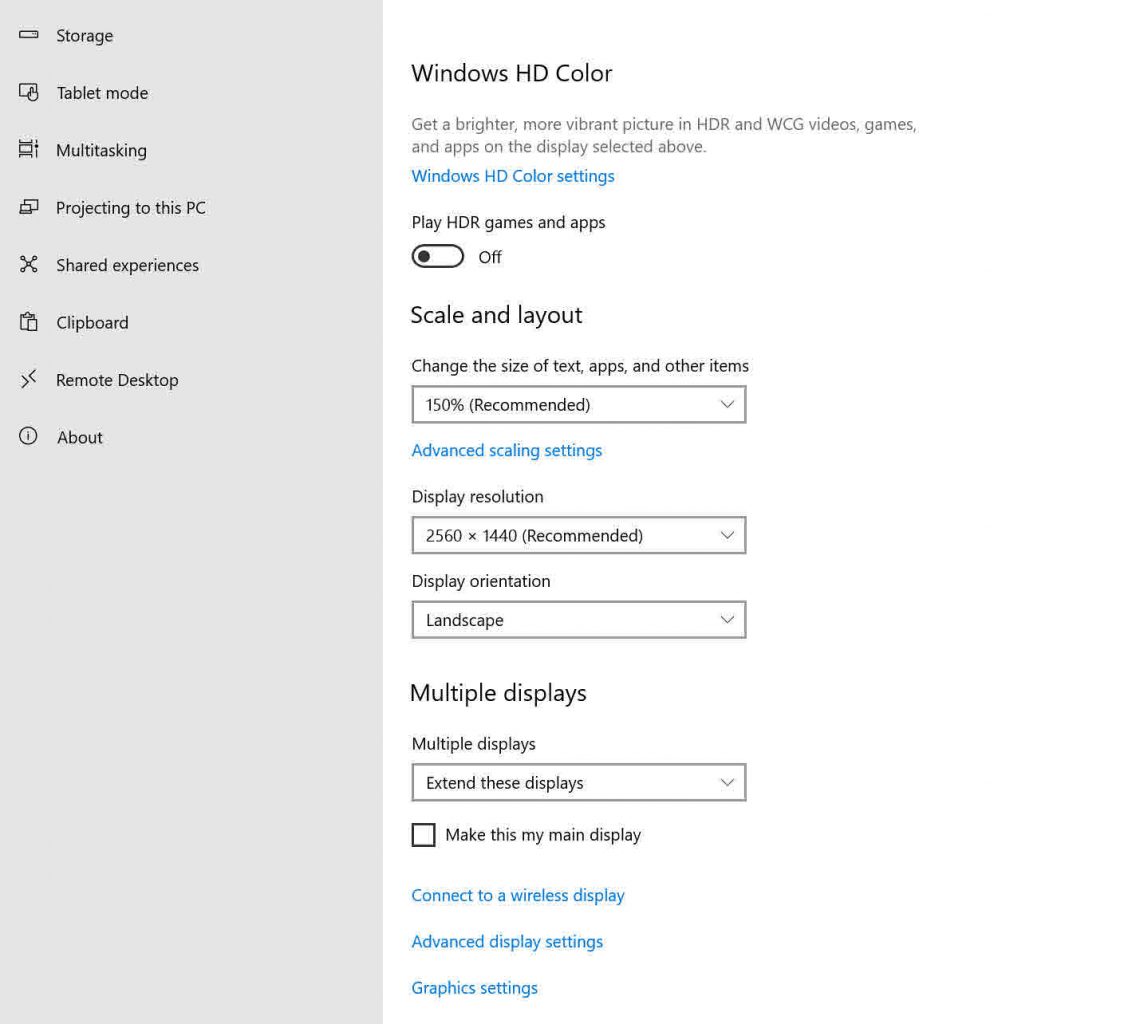
To configure your display, open the Settings app from the Start menu or by pressing WIN+I. In the Settings app, click System. Display is the first option in the list on the left. If you have more than one display connected and the lid of the notebook isn’t closed, you can choose to either extend or duplicate the display using the Multiple displays dropdown menu.
Alternatively, you can select Show only on 1 or Show only on 2 from the Multiple displays dropdown menu if you want to use an external display and keep the notebook’s lid open. By default, ‘1’ usually refers to the notebook’s built-in screen and ‘2’ to the external monitor.

If you choose to extend your display, you can drag and drop the displays in the box at the top of the Settings screen to determine the order in which the displays are extended. I.e. from left to right, or vice versa. And from top to bottom, or vice versa.
Working with only the external display
For most of us, working with only the external display is likely to be the most common configuration. For the notebook to enter and exit sleep states normally, I recommend using the notebook with the lid closed. That is because with the lid closed, only the external display is recognized by Windows, allowing you to wake from sleep faster and more reliably. If the built-in screen is enabled, Windows will need to adjust the display for the notebook’s internal display when it wakes from sleep. And when the external display is detected, adjust the display again for the external screen’s resolution and DPI settings.
Change Windows power settings
Before you can work with the notebook and close the lid, you need to change the default power settings.
- In the search box in the bottom left of the taskbar, type control panel and then click Control Panel in the list of search results.
- In the Control Panel window, type power in the search box in the top right, and press ENTER.
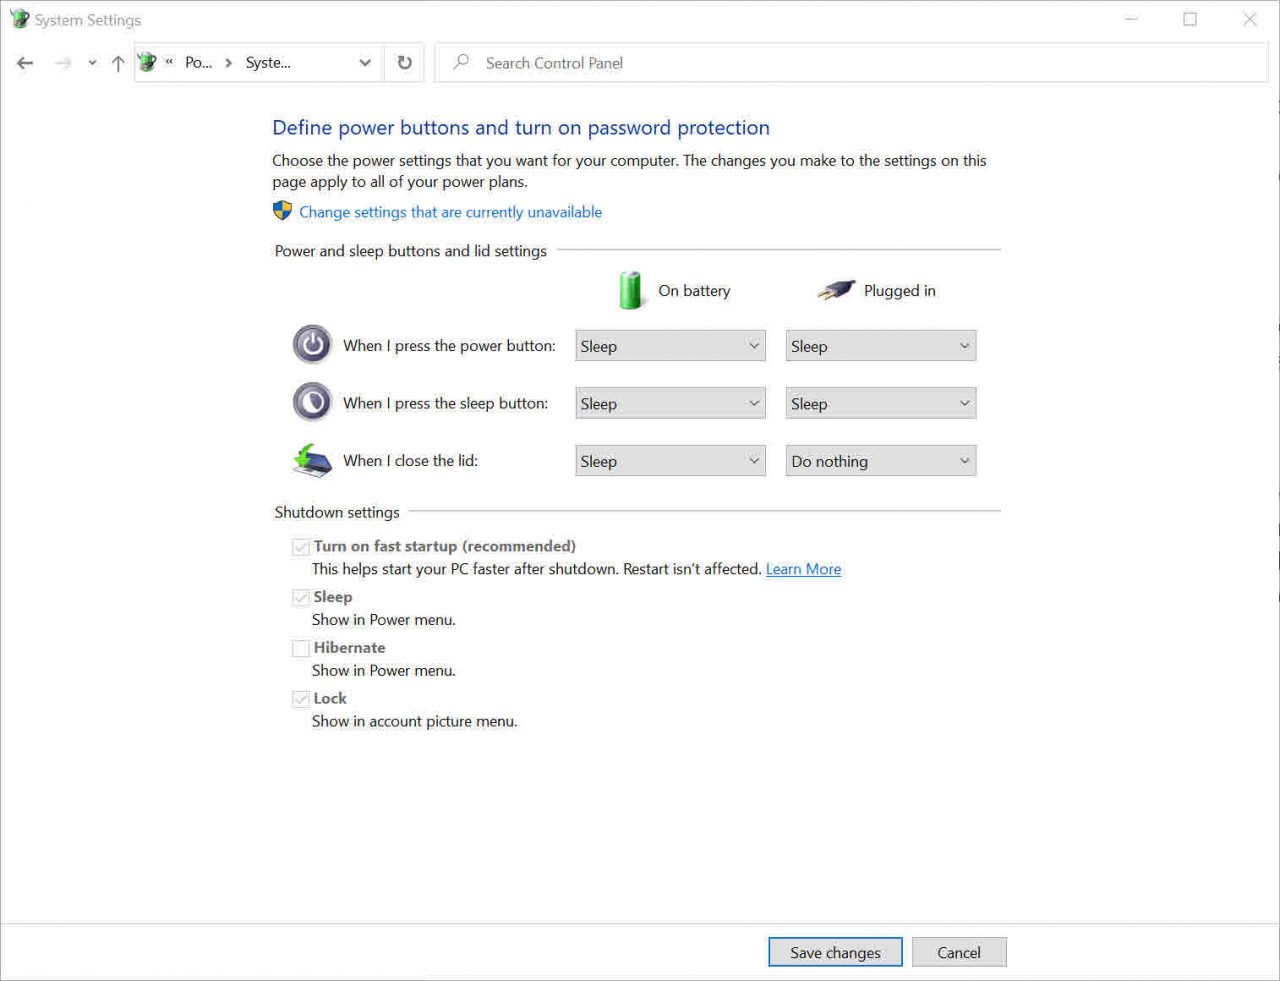
- In the list under Power Options, click Change what closing the lid does.
- Under Power and sleep buttons and lid settings, use the dropdown menu to set When I close the lid under Plugged in to Do nothing.
- Click Save changes and then close the Control Panel.

Now close the notebook’s lid. If you open Settings again by pressing WIN+I, and then click System > Display, you should see that only one screen is shown in the app. And when your notebook wakes from sleep, it will default to using the external display immediately.
Reset the Windows graphics stack
Changing the display and power settings so that Windows works better when you want to use an external monitor exclusively with your notebook is usually the way to go. But Windows still sometimes gets its knickers in a twist after waking from sleep, incorrectly displaying dialog boxes at the chosen resolution and DPI settings for example. There are several ways you can correct this:
- Restart Windows.
- Log out and log back in.
- Reset the graphics stack.
Resetting the graphics stack is the least invasive way to correct any display issues. To reset the graphics stack, press WIN+CTRL+SHIFT+B simultaneously.


