A Simple Guide to Linux Shell Scripting With Bash

Ever found yourself wanting to learn more about Linux shell scripting, but you weren’t sure where to begin? Are you relatively new to the world of Unix-based operating systems and want to extend your skills to do some basic shell programming? This tutorial for beginners will go over the basics of Linux shell scripting with Bash, including creating and running a script, as well as working with strings and loops.
Shell scripting is used to automate common administrative tasks
Regardless of the operating system, shell scripts are used to automate repetitive administrative tasks. For example, in Windows you can rename files using File Explorer. But if you need to rename many files, it would be a time-consuming task to use the graphical shell. PowerShell allows you to automate the task and repeat it reliably.
In Linux-based operating systems, Bash and other shells are used to automate tasks like working with files, modifying system configuration, and many other tasks that could otherwise be performed by typing single commands.
What you need to learn Bash shell scripting
To write and run a Bash script, you only need three things:
- Any plain text editor, such as Notepad, Text Editor, TextEdit, vi, emacs, or Visual Studio Code.
- A terminal emulator, an application that comes preinstalled with most operating systems and is often called Terminal, Console, or Command Prompt.
- Bash itself.
The terminal emulator is where you’ll type commands and run them by hitting Enter or Return. As for Bash, whether you have it pre-installed will depend on your platform:
- On macOS, Bash is preinstalled. On more recent versions, the Z shell (zsh) is the default shell, and that’s ok. As long as Bash is installed, you can run Bash scripts from zsh too.
- Linux distributions generally have Bash installed. (You can check by looking if your system includes the /bin/bash file.) Android is a special case that doesn’t ship with Bash. There are steps to get Bash onto Android, which this article won’t go into.
- Windows does not come bundled with Bash. PowerShell is the default command-line shell in Windows. You’ll need to install a Linux distribution under the Windows Subsystem for Linux (WSL) to run Bash.
To find your Bash version, run the bash –version command. While even older Bash versions give you a lot of power, Bash 3 and 4 both introduce nice shorthand notations for certain basic commands. If a command requires one of these versions of Bash, it will be mentioned below.
What is a shell?
In the computing world, a shell is a program that serves as an interface for the underlying OS. A shell can be a graphical user interface (GUI), like the Windows shell.
Shell scripting languages
However, people generally use the term to refer specifically to a command line interface (CLI) — an interface consisting of lines of text that you interact with using only the keyboard. Here are some examples of shell scripting languages for *nix operating systems:
- the Bash shell (short for “Bourne Again Shell”)
- the C shell
- the Korn shell
Here, we’ll focus on the Bash shell. It’s a popular free Unix shell preinstalled on most Linux distros and on macOS.
What is a shell script?
Shells have their own programming language. You use this language to send commands to the shell, which it then executes. You can type these commands into the shell directly, or you can save them to a file — a script — and then execute that file from the shell. The syntax for writing commands is the same in both cases.
This article will cover shell scripting basics to create this file.
Basic shell scripting
Let’s start with some basic shell scripting. To write a simple script we will learn some simple shell scripting commands in Linux:
- Create a new empty text file in a text editor.
- Write
#!/bin/bashas the first line. - Type your commands below that.
- Save the file, preferably with a “.sh” extension or no extension at all.
The #!/bin/bash line is called a “shebang.” It tells your shell that this script should be executed in Bash and should be the first line in your script. If you switch to a different shell, your script will still be run in Bash.
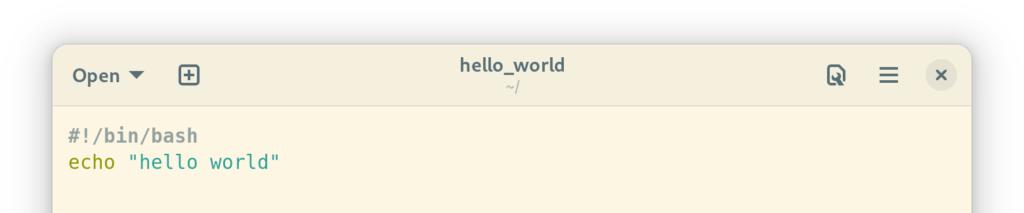
To try this process out yourself, create a file called ‘hello_world’ in your home directory:
#!/bin/bash
echo "hello world"
That’s it — you’ve created a Bash script!
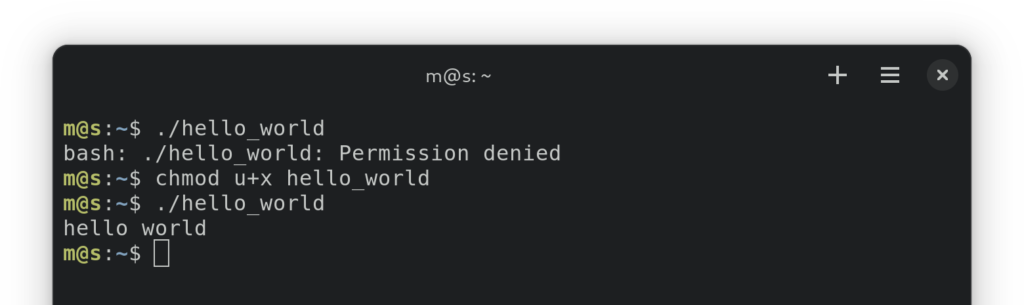
Before you can run it, you will probably need to change permissions on the file.
Setting permissions to run a shell script using chmod
To modify the permissions on our ‘hello_world‘ file, you would run this specific command in your terminal emulator. This gives the user that owns the file the permission to execute the file.:
chmod u+x 'hello_world'
If you just want to run your shell script, you can skip to the next section. For those curious about the chmod command, chmod is short for “change mode”, and serves to change file “modes” (or permissions) in Unix. In Unix-like operating systems, you can set file permissions for 3 classes of users:
- The user that owns the file (represented by
uin chmod). - The group that owns the file (
g). - Others (
o).
With the chmod command, you can also use a to refer to all of these.
Each file has 3 types of permissions (or “modes”):
- Read (
r) - Write (
w) - Execute (
x)
And you can also add (+) or remove (-) permissions.
The first parameter in chmod is a combination of these three — user first, action second, and mode third. Here are a few command examples:
chmod gu+rw 'hello_world'would add read and write permissions for the owner and the owning group.chmod a-x 'hello_world'would remove executable permissions for everyone.chmod u+rwx 'hello_world' 'hello_world_2'would give the owner the permission to read, write, and execute the “hello_world” and “hello_world_2” files.
We’ve only covered the very basics of the chmod command here. There’s also a more complicated, but less verbose way of defining these modes (the “numeric notation”), as well as a different command you can use to see which permissions your files have (ls -l). We won’t go into these topics here.
Executing a shell script
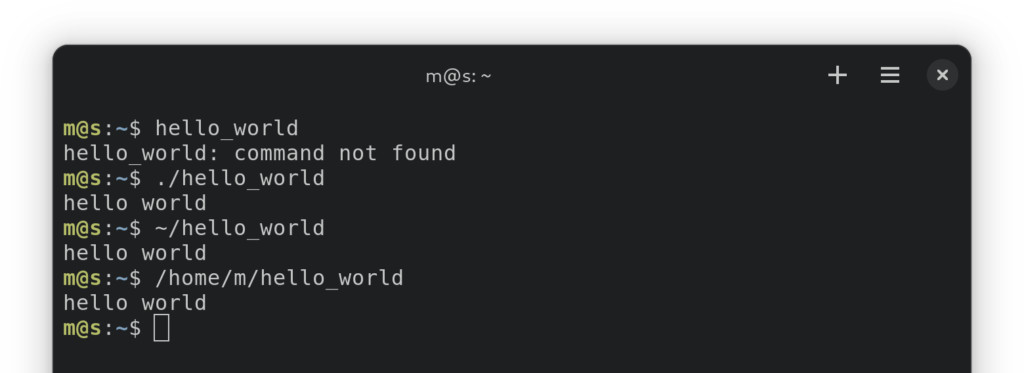
Time to execute our first script. In general, to run a script, simply type its path into the terminal emulator and hit enter.
./hello_world
You can use the relative or the absolute path. When using the relative path, always use ./ at the beginning of your command: This tells the terminal to look in the current folder (represented by '.'), rather than in the directories defined in the PATH environment variable.
Using comments to annotate your script
Everything after a # on a single line in a Bash script is considered a comment. These can be helpful for communicating what a complex line does or giving a rundown of what bigger pieces of your script do.
For example:
#!/bin/bash

#
# This shell script prints "hello world".
#

echo "hello world" # This line prints "hello world".
An introduction to variables
When writing scripts, it can be useful to define variables. In Bash, you do this by typing the variable name and value, separated by an equals sign: VARIABLENAME='VALUE'.
You should not put spaces next to the equals sign — Bash would think you want to run a process instead.
Use single quotes to surround the value to prevent Bash from interpreting it as something else. In Bash, variables don’t have types — everything is basically a string. It’s up to Bash programs to parse the string as a different type, such as a number.
To refer to a variable’s value, use the variable name preceded by the dollar sign: $VARIABLENAME.
To try this in practice, you can change your script to this:
#!/bin/bash
HELLO="hello variable world"
echo $HELLO # should print "hello variable world"
Receiving arguments
The individual words that you write when typing a command are called arguments. In our chmod u+x 'hello_world' example, chmod, u+x, and 'hello_world' are three different arguments. chmod is the command name while u+x and hello_world are called parameters — arguments that provide extra information to the command.
In your script, you can access these arguments through variables. To avoid conflicting with local variables, these variables are named using numbers — $0 refers to the command name, $1 is the next argument that follows, $2 the one after, and so on.
Let’s try this out:
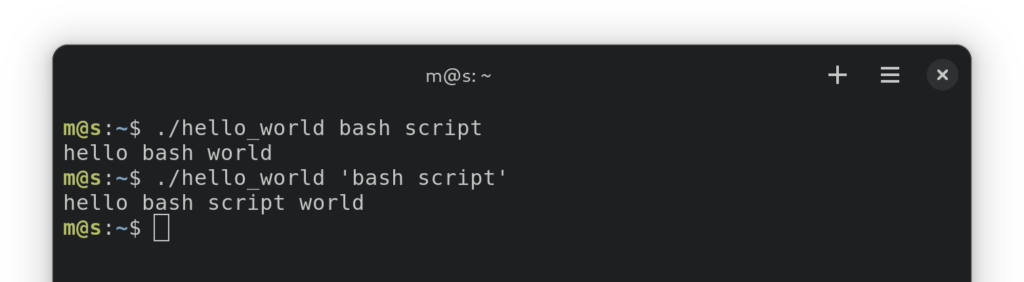
#!/bin/bash
HELLO="hello $1 world"
echo $HELLO
Now, run this script with these parameters:
./hello_world bash script
The output should be hello bash world, with the first parameter used and the second ignored.
If you wanted bash script to be seen as one parameter, you would need to put it in quotes:
./hello_world 'bash script'
Using the if statement to run code conditionally
One of the core things that programmers want to do inside a script is run a piece of code only if a certain condition is met. Bash has the if statement for that:
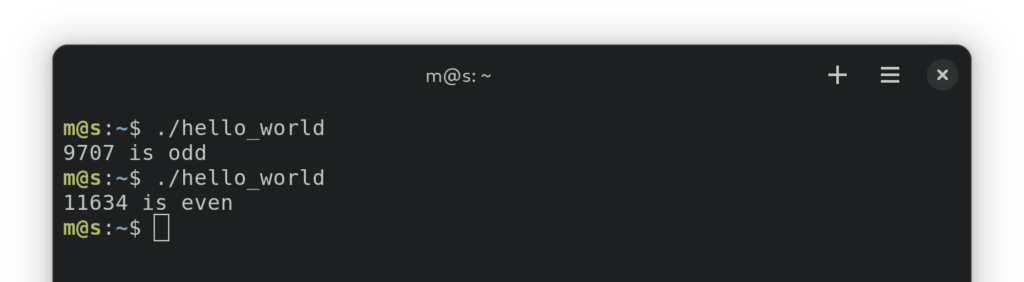
NUM=$RANDOM
if (( $NUM % 2 )) # if CONDITION
then
    echo "$NUM is odd"
fi # this is how you end an if statement
Tip: From here on out, these examples are assumed to be part of a larger script and omit the #!/bin/bash at the beginning. Don’t forget it as the first line of your script, though!
You can also use else inside an if statement to specify what to do if a condition is not met, or an elif (short for “else if“) statement to specify another condition if the first condition wasn’t met:
NUM=$RANDOM
if [ $NUM -eq 12 ]
then
    echo "$NUM is my favorite number"
elif (( $NUM % 2 ))
then
    echo "$NUM is odd"
else
    echo "$NUM is even"fi
‘fi‘ is used to close the if statement.
Tip: If you’re not sure how to write the condition itself, look into the test, single brackets ([]), and double parentheses ((())) notation.
Repeating a series of commands using a for loop
Now that we’ve covered running code conditionally, let’s look at how to run code a certain number of times as long as a condition is met.
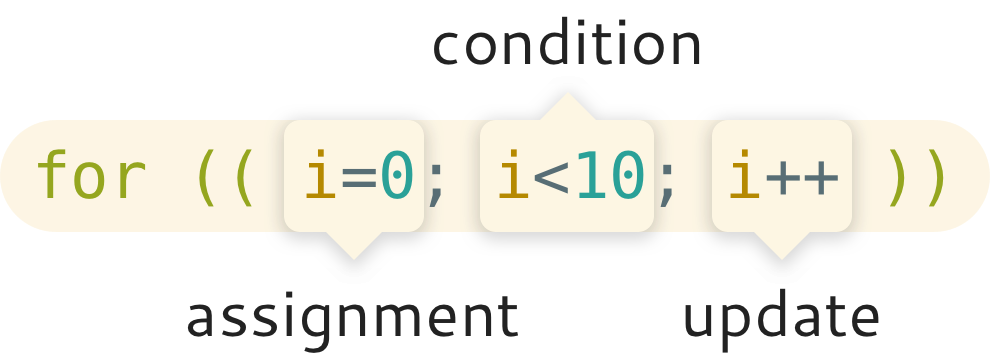
The for loop is perfect for such a task — specifically its “three expression syntax”. The idea behind it is to assign a loop-specific variable and gradually change it until a certain condition is met. Here’s how it’s structured:
for (( ASSIGNMENT_EXPRESSION ; CONDITION_EXPRESSION ; UPDATE_EXPRESSION ))
do
    COMMANDS
done
For example, if you want to have a loop run 10 times with values for i going from 0 to 9, your for loop might look like this:
for (( i=0; i<10; i++ ))
do
    echo $i
done
Let’s break it down:
i=0is the assignment expression here. It’s run only once before the loop is executed, which is why it’s useful for initializing a variable.i<10is our condition expression. This expression is evaluated before each iteration of a loop. If it is equal to zero (which means the same as “true” in Bash), the next iteration is not run.i++is our update expression. It’s run after each iteration of a loop.
Cycling through elements in a list
Aside from the three expression syntax, you can also use the in keyword to define a for loop. This alternative syntax is used to iterate through a series of items.
The most basic example is simply to list the set of items you want to iterate through after the in keyword, separated by spaces. For example:
for i in 0 1 2 3 4 5 6 7 8 9 # space-separated list items
do
    echo $i
done
You can also iterate through items output by a command:
for i in $(seq 0 1 9)
The $() notation is used for command substitution in general — it runs a command and its output is used as the input for the parent command surrounding it.
If you’re iterating through integers, it’s better to use Bash’s built-in range syntax, which is more efficient than the seq command. However, this syntax is only available in more recent Bash versions:
for i in {0..9}, available in Bash 3.for i in {0..9..1}, available in Bash 4, where the last number represents the increment.
In the same vein, you can iterate through strings too:
for s in 'item1' 'item2' 'item3'
Using globbing to get files matching a pattern
One of the more common use cases for the for loops discussed in the previous section is iterating through individual files.
To tackle this, we need to cover so-called “glob expansions” first. This is a feature in Bash that let you specify filenames using pattern matching. There are special characters called wildcards that you use to define those patterns.
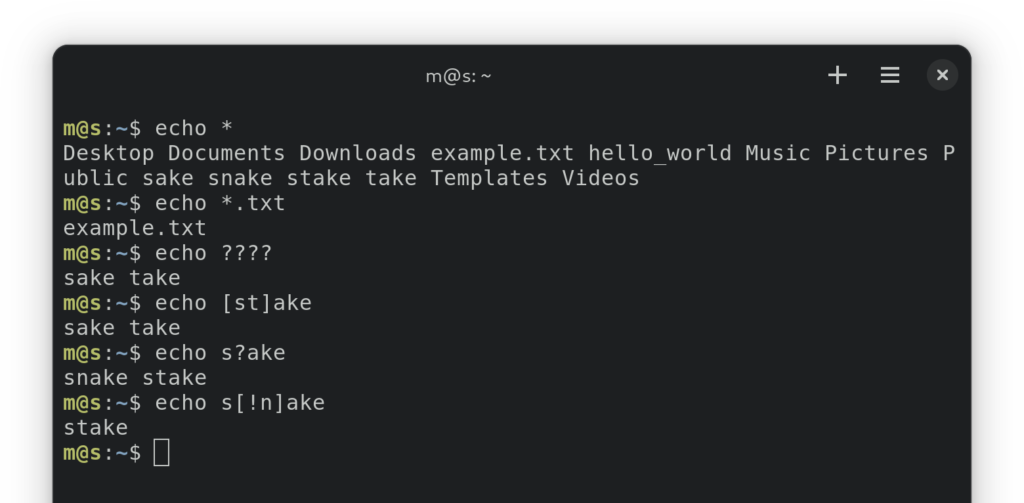
Before going in-depth with this, let’s look at a few specific examples:
echo *: A command that returns the names of all files in your current directory, except hidden ones.echo *.txt: A command that returns the names of all non-hidden files with.atxtextension in your current directory.echo ????: A command that returns all four-letter filenames in your current directory.
The wildcards that we used were * and ? here. There’s also one more wildcard that we didn’t use. Here’s an overview:
- The asterisk (
*) represents any number of characters (including 0) in a file or directory name. - The question mark (
?) represents a single character in a file or directory name. - The double asterisk (
**) represents any number of characters in a full file path. It’s a feature in Bash 4 and above and has to be enabled by runningshopt -s globstar. - Square brackets (
[]) are used to represent a character within a set of symbols in a file or directory name. For example[st]akewould find files namedsakeortake, but notstake.
Note that all hidden files (which are files with names starting with a period .) are ignored when using glob expansion.
The square bracket notation allows a bit more complexity, including:
- Ranges defined by the first and last value — e.g.
[1-8] - Elimination of certain characters by using ! as the first character inside the brackets — e.g.
[!3]
To treat one of these special characters as a normal character without any meaning instead, simply put a backslash before it — e.g. \?.
Iterating through files using a for loop
Now that we’ve covered the basics of glob expansion, let’s take a look at how to use it to iterate through files.
We can simply use the glob operators in the for loop itself. Here’s a simple example of a loop printing the name of each file in the current directory:
for f in *
do
    echo $f
done
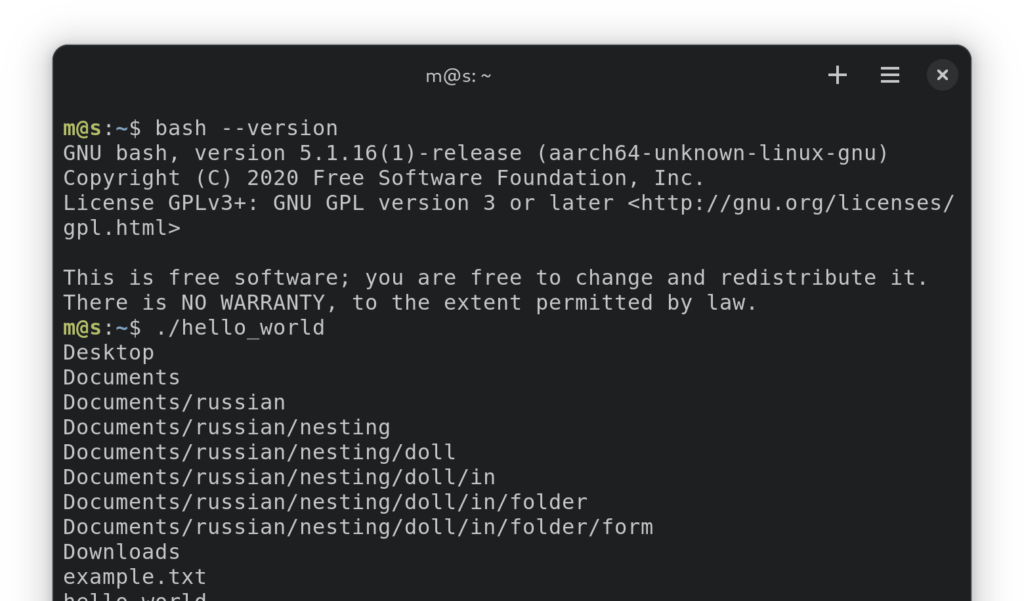
To print the names of each file in the current directory as well as its subdirectories, check that you’re running Bash 4.0 or above by running bash --version, and then you can run the following command:
shopt -s globstar # enables using **
for f in **
do
    echo $f
done
Tip: If you’re running an older version of Bash, you won’t be able to use globbing with a for loop for this. Your best course of action would be the find command, but we won’t go over that in this article.
These are, of course, just some of the simplest loops you can run, but there’s a lot more you can do. For example, to rename all the JPGs in a folder to give them a consistent sequential filename, you could run:
i=1
for f in *.jpg
do
    mv -i -- "$f" "image_$i.jpg"
    let i=i+1
done
Running code while a condition is true
The for loop isn’t the only type of loop we can use in Bash — we also have while: This type of loop runs as long as a specific condition is true.
The syntax is similar to the for loop syntax:
while CONDITION
do
    COMMANDS
done
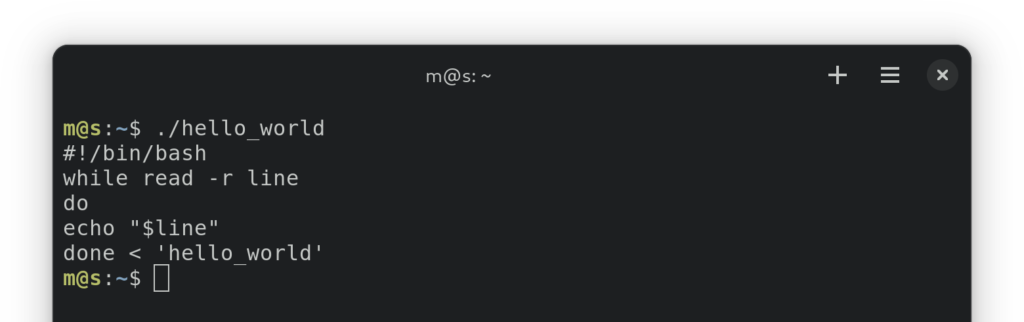
For a practical example, this is how you could read a file line-by-line (except leading or trailing whitespaces) until you hit the end of the file:
while read -r line
do
    echo "$line"
done < FILENAME # Replace FILENAME with the path to a text file you'd like to read
You can also replace a for loop with a while loop, e.g. to iterate from 0 to 9:
i=0
while [ $i -lt 10 ]
do
    echo $i
    let i=i+1
done
And you could also theoretically run a loop forever. Here’s a command example:
while true
do
    echo "running forever"
done
Tip: To kill the script, just press Ctrl+C.
While this infinite loop may seem useless at first glance, it can actually be quite useful, especially when combined with the break statement.
Breaking out of a loop
The break statement is used to break out of a loop.
This allows you to run an infinite loop and break out of it when any breaking conditions arise.
To look at a simple example, we can replicate our loop running from 0 to 9 with an infinite loop like this:
i=0while true
do
    if [ $i -eq 10 ]
    then
        break
    fi
    echo $i
    let i=i+1
done
If you have several nested while loops, you can add a number after the break statement to mention which level of loop to break from: break 1 is the same as break and will loop out of the closest surrounding loop, break 2 will break out of the loop one level above, etc.
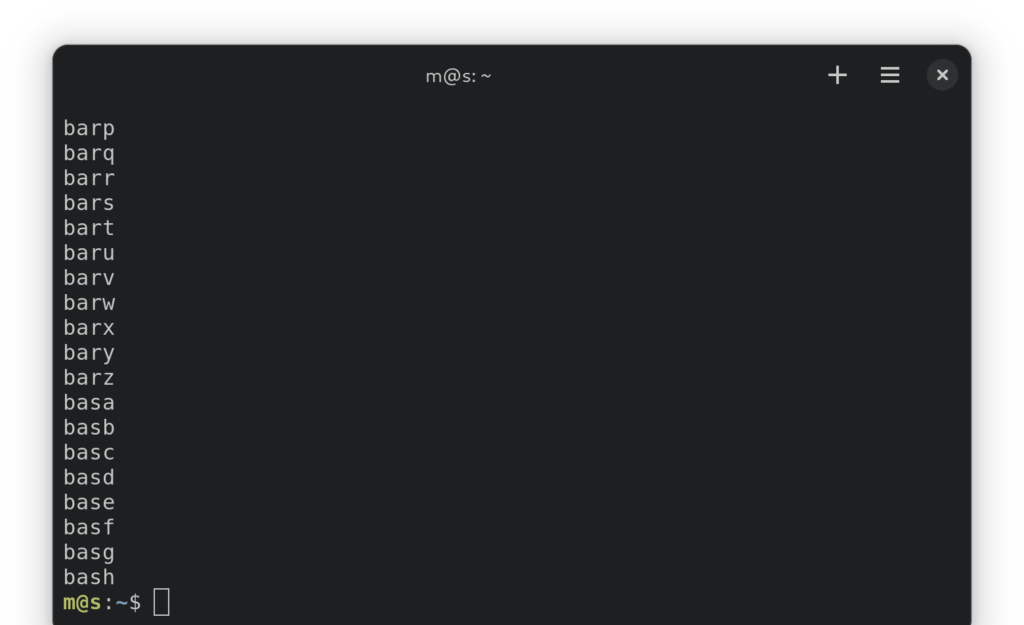
Let’s look at a quick example, this time with for loops, iterating through every four-letter word combination until the word “bash” is hit:
for l4 in {a..z}
do
    for l3 in {a..z}
    do
        for l2 in {a..z}
        do
            for l1 in {a..z}
            do
                echo "$l4$l3$l2$l1"
                if [ $l4 = "b" -a $l3 = "a" -a $l2 = "s" -a $l1 = "h" ]
                then
                    break 4
                fi
            done
        done
    done
done
A related keyword that’s also worth a mention is continue, which skips to the next iteration of the loop. Just like break, it also takes an optional numeric argument that corresponds to the loop level.
Here’s a silly example where we skip all words with Es in our shortened four-letter word list:
for l4 in {a..z}
do
    if [ $l4 = "e" ]
    then
        continue
    fi
    for l3 in {a..z}
    do
        if [ $l3 = "e" ]
        then
            continue
        fi
        for l2 in {a..z}
        do
            if [ $l2 = "e" ]
            then
                continue
            fi
            for l1 in {a..z}
            do
                if [ $l1 = "e" ]
                then
                    continue
                fi
                echo "$l4$l3$l2$l1"
                if [ $l4 = "b" -a $l3 = "a" -a $l2 = "s" -a $l1 = "h" ]
                then
                    break 4
                fi
            done
        done
    done
done
We could also perform all these continue statements at the deepest loop level:
for l4 in {a..z}
do
    for l3 in {a..z}
    do
        for l2 in {a..z}
        do
            for l1 in {a..z}
            do
                if [ $l4 = "e" ]
                then
                    continue 4
                fi
                if [ $l3 = "e" ]
                then
                    continue 3
                fi
                if [ $l2 = "e" ]
                then
                    continue 2
                fi
                if [ $l1 = "e" ]
                then
                    continue
                fi
                echo "$l4$l3$l2$l1"
                if [ $l4 = "b" -a $l3 = "a" -a $l2 = "s" -a $l1 = "h" ]
                then
                    break 4
                fi
            done
        done
    done
done
How to get user input in a shell script
Sometimes, you want the user to interact with your script directly rather than just using initial script arguments. That’s where the read command comes in.
To get user input and save it to a variable called NAME, you’d use this command:
read NAME
This is the simplest form of the command, consisting of just the command name and the variable you want to save the input into.
More frequently, though, you’ll want to prompt the user so that they know what to type. You do that with the -p argument, after which you write your preferred prompt.
Here’s how you might ask for a name, assigning it to a variable called NAME:
read -p "Your name: " NAME
echo "Your name is $NAME." # this line is here just to show that the name has been saved to the NAME variable

Printing special characters in a string
There are a number of characters in Bash that you have to be careful about using. For example, spaces within filenames, quotes within strings, or backslashes just about anywhere.
To tell Bash to ignore their special meaning in certain places, you can either “escape” them or wrap them in a literal quote.
“Escaping” a special character means telling Bash to treat it as just a character without any special meaning. To do that, write a backslash before that character.
Let’s say we have a file named img \ 01 *DRAFT*, for instance. In Bash, we could refer to it this way:
img\ \\\ 01\ \*DRAFT\*
Here’s a non-exhaustive list of special characters in Bash:
- Whitespace: space, tab, blank line
- Quotation marks: ”, “”
- Parentheses, braces, and brackets: ( ), { }, [ ]
- Pipes and redirects: |, <, >
- Wildcards: *, ?
- Miscellaneous: !, #, ;, =, &, ~, `
- The escape character itself: \
If you’re new to Bash, though, it might be a hassle to remember which characters have special meaning. As such, in many situations, it might be easier to use a literal quote: Simply surround the text containing any special characters with single quotes, and all special characters within those quotes will be ignored.
Here’s how that would look for our example:
'img \ 01 *DRAFT*'
What if you do want to use a special character, but escape the others? You could escape every other character using a backslash, but you can also save yourself the trouble and surround everything except that special character with literal quotes.
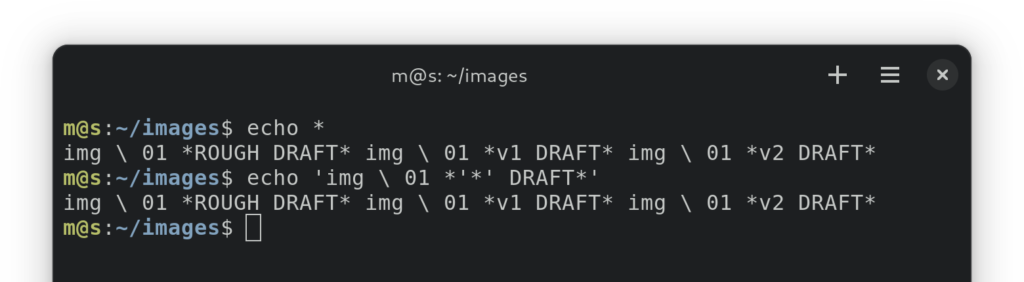
For example, say you have several files named img \ 01 *v1 DRAFT*, img \ 01 *v2 DRAFT*, img \ 01 *ROUGH DRAFT*, etc., and you want to use a glob expansion to match all those filenames. Here’s what you could write:
'img \ 01 *'*' DRAFT*'
If what you need to write contains a single quote — e.g. img \ 01 *’FINAL’* — you can use a similar strategy, combining literal strings and escaping:
'img \ 01 '\''FINAL'\'
How to concatenate strings in Bash
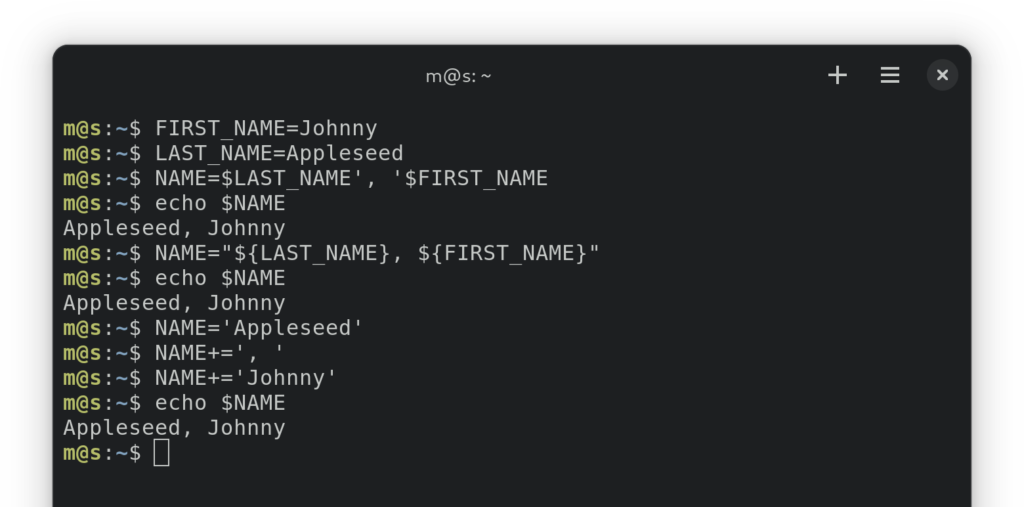
Let’s say you have two or more string variables — a first and last name, for instance:
FIRST_NAME="Johnny"LAST_NAME="Appleseed"
To combine those variables into one string, perhaps with a custom delimiter, simply create a new string consisting of those two variables:
NAME="$LAST_NAME"', '"$FIRST_NAME"
You can also use double-quotes with inline variables for this, using curly brackets to separate variable names from the surrounding text:
NAME="${LAST_NAME}, ${FIRST_NAME}"
Bash also allows the use of the += operator to append text to a string, like so:
NAME='Appleseed'NAME+=', 'NAME+='Johnny'
Running commands inside a string
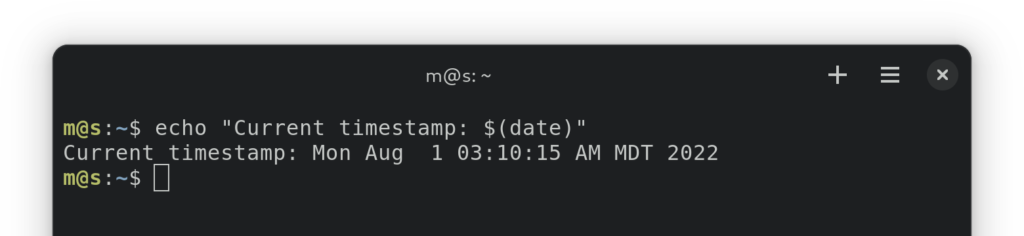
Bash also allows you to use the output of a command inside a string, also known as command substitution. Simply surround your command with $(). For example, to print a current timestamp, you can run:
echo "Current timestamp: $(date)"
You might also remember this syntax from a previous for loop example, when we iterated through a sequence of integers from 0 to 9:
for i in $(seq 0 1 9)
do
    echo $i
done
The substituted command is run in a subshell. This means that, for example, any variables created during the command will not affect the environment in which you’re running your script.
Setting and returning exit codes in a shell script
For a more complex script, it’s customary to have it return an exit code — a number between 0 and 255 that tells people whether the script ran successfully or encountered an error.
As for which numbers to use, the official Bash manual specifies these:
- 0: Program executed successfully.
- 2: Program used incorrectly (e.g. due to invalid or missing arguments).
- 1 and 3-124: User-defined errors.
- 126: Command is not executable.
- 127: Command was not found.
- 125 and 128-255: Error statuses that the shell uses. If a process is killed by a signal
N, the exit status is 128 + N.
As you can see, all numbers aside from 0 indicate some type of error. The exit code 1 is commonly used for general errors. In most cases, you won’t need to use any exit code above 2.
To return an exit code from your script, just use the exit command. For example, to exit with a code of 2, you would write exit 2.
If you don’t use the exit command in your script or use the command without specifying a code, the exit status of the last executed command in your script will be returned.
To get the exit code of the last run command in your shell, use the $? variable: echo $?.
How to call a function
When writing a longer script or one with repeating chunks of code, you might want to separate some code out into functions. There are two formats you can use to define functions: In both cases, all function code is contained inside curly braces and just the function declaration differs.
The more compact format uses parentheses that follow the function name to declare a function:
function_name () {
    echo "This is where your function code goes"
}
The other format uses the function keyword in front of a function name:
function function_name {
    echo "This is where your function code goes"
}
Functions must be declared before they are called in your script. You call a function just like you execute a regular command, using the function name as the command:
function_name
Passing data to a function using variables
In Bash, functions cannot take arguments. To send information to a function, you need to use global variables in your script.
For example:
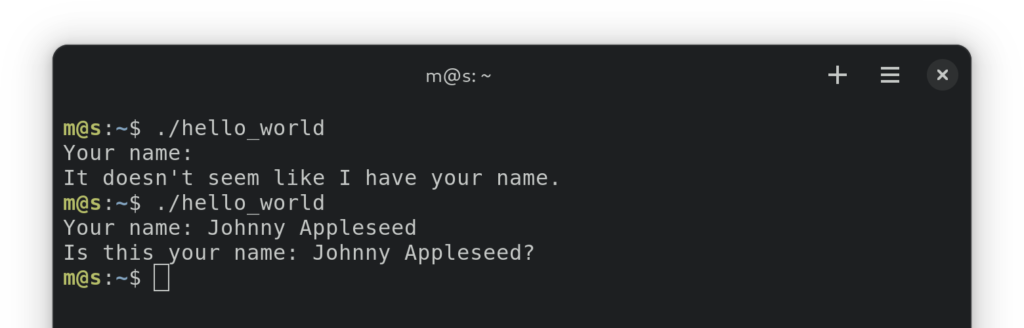
is_your_name_defined () {
    if [ -z "$YOUR_NAME" ]
    then
        echo "It doesn't seem like I have your name."
    else
        echo "Is this your name: ${YOUR_NAME}?"
    fi
}
read -p "Your name: " YOUR_NAME

is_your_name_defined
Unlike what you may be used to in other languages, the variables you define inside your function are global, and visible to the code outside your script. To define a variable scoped locally only to your function (meaning inaccessible to all code outside it), use the local keyword: e.g. local i=0.
If you’d like to return values from a function, you need to use global variables as well. In Bash, functions can only return exit codes, using the return keyword. Let’s look at an example:
is_your_name_defined () {
    if [ -z "$YOUR_NAME" ]
    then
        MESSAGE="It doesn't seem like I have your name."
    else
        MESSAGE="Is this your name: ${YOUR_NAME}?"
    fi
}
read -p "Your name: " YOUR_NAME

is_your_name_defined

echo $MESSAGE
Summary
Bash scripting allows you to do quite a bit on a UNIX-based operating system. This article touched on some of the basics of Bash scripting, including creating and running scripts, working with strings, and using loops in your code. Hopefully, it will serve as a good start to your journey in writing powerful Bash scripts that meet your needs.
There’s a lot more to learn about Bash though, including some of the most useful commands, filesystem navigation, and more. Let us know in the comments what topics we should cover next.
Related Article:

Miroslav is a UX designer by trade. And he has a bachelor’s degree in Software Engineering. As an avid free software enthusiast, he has made contributions to various open-source projects. And from this work, Miroslav knows his way around open-sourc...