How to Use Chmod Recursive to Change File Permissions on Linux and macOS

When you need to manage file permissions on Linux or macOS, the chmod command is the way to go. However, the chmod recursive option lets you apply the chmod command to all files inside a directory and its subdirectories.
In this article, we’ll explain how to use mac chmod recursive to easily change file permissions on macOS and Linux. We’ll also explain how to use the “X” argument to preserve file execution privileges and show you everything you need to know to use the chmod command like a pro.
How to use chmod recursive to change file permissions on macOS and Linux
If you’re just looking for a quick answer, here’s how to use the chmod command to set permissions for folders and files separately. In the example below, files are made executable for owners only if they had an executable bit before the permission change.
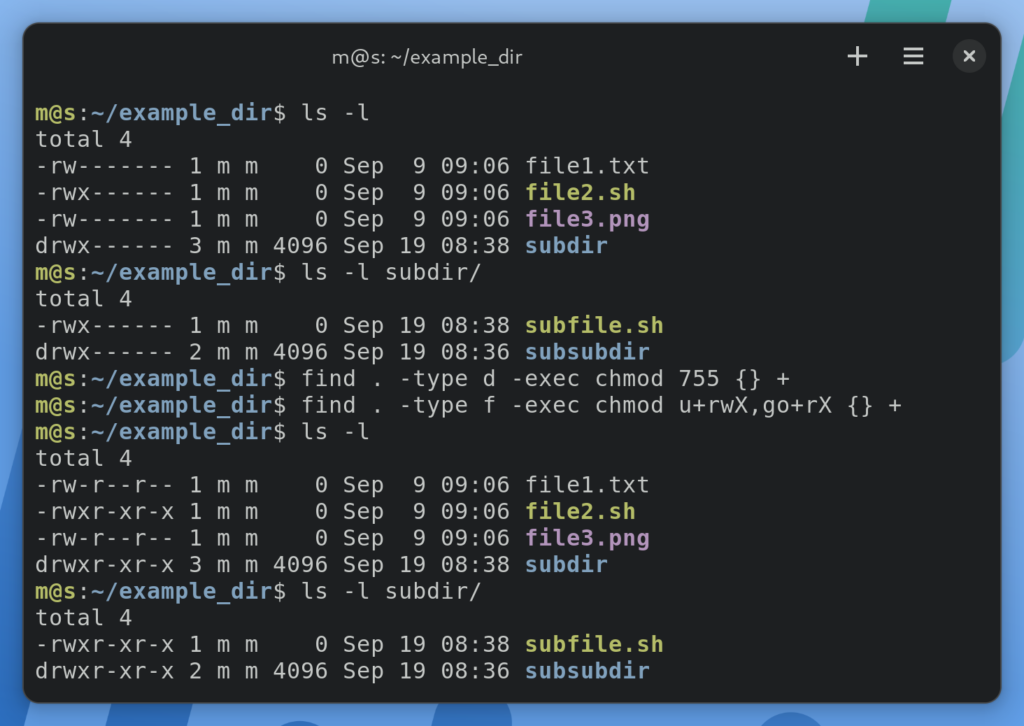
find . -type d -exec chmod 755 {} + # gives owners read, write, and execute permissions, everyone else just read and execute ones
find . -type f -exec chmod u=rw,og=r {} + #gives owners read and write permissions, read permissions to others
Need a bit more detail? Read on.
Understanding a basic recursive chmod
If you just want to change permissions inside a folder and all its subfolders (and subfolders without those, and so on), you can simply use chmod with the -R flag:
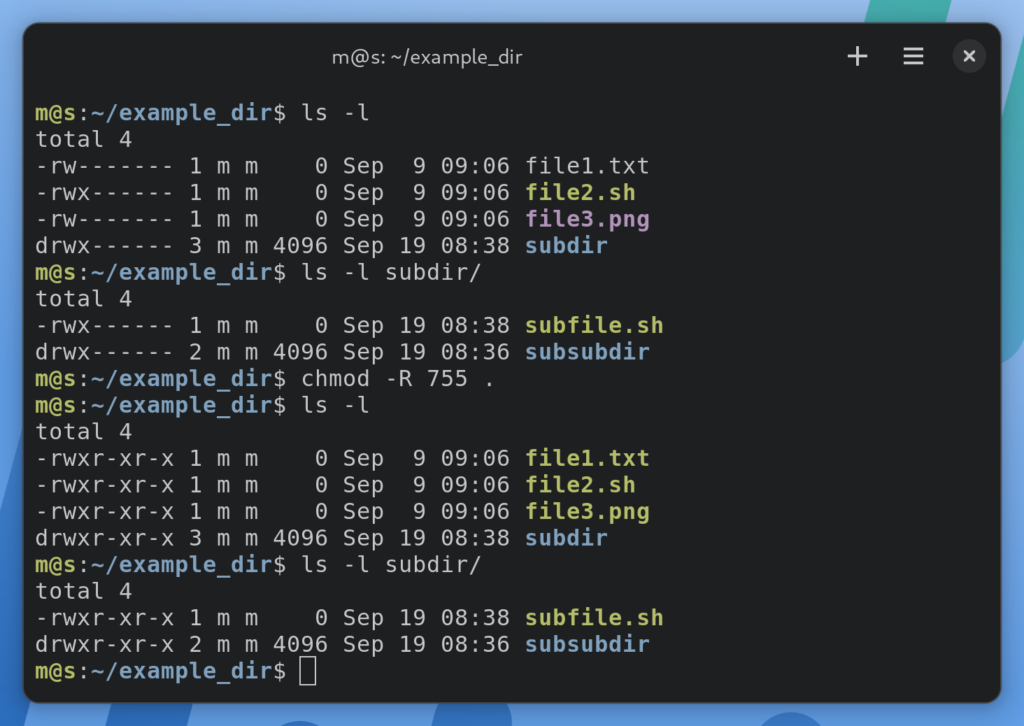
chmod -R 755 .
When using using the ls command to show file permissions, we see that chmod -R gives the owner group and others read and execute permissions in both the current folder and its subfolders
If what you’re changing requires admin rights, you will need to precede your command with sudo, as seen in the example below:
sudo chmod -R 755 .
Moreover, if you want to change the permissions for a path you’re not currently in, you’ll need to replace . with your desired relative or absolute path. Here’s a command example below:
sudo chmod -R 755 ./subdir.
For the purpose of this article, we’ll assume you’re familiar with how to specify permissions with chmod and we won’t cover that here.
Using the “X” argument to preserve file execution privileges
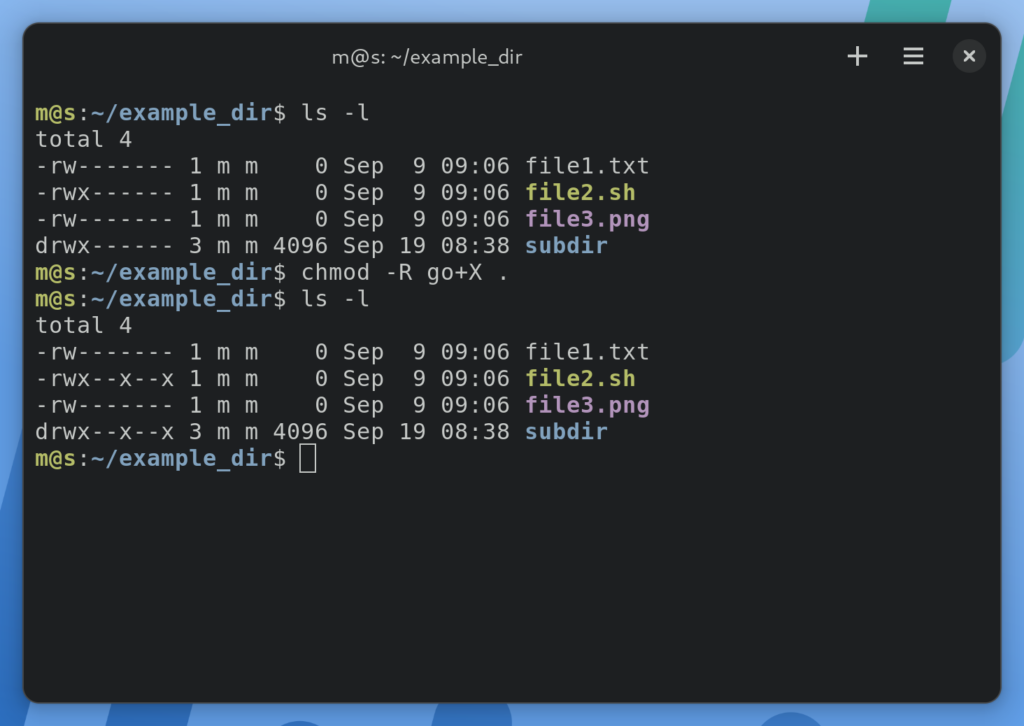
One useful permission symbol to use with chmod is X instead of the standard executable mode. This symbol allows you to only add the executable permission to files that had this executable bit active previously for at least one user class (regardless of which one), as well as to all folders.
The x symbol can be used to assign the executable bit if it is enabled for any user class. You can use it like this:
chmod -R u+rwX,go+rX .
It’s worth noting that this argument is not globally supported. On most Linux systems, you’ll find that chmod supports operations with =,+, and –. On macOS, however, only the + operation is supported.
Using the find command to differentiate between files and folders
If you want to give different permissions to different sets of files or folders, use the find command. Most often, you’ll want to give files different permissions than folders.
Here’s a command example below to illustrate that: The + at the end of the command tells find to string together all the file paths and run chmod once on all of them. If we had used ; instead, it would have led chmod to being executed once per file, which would be much less efficient.
find . -type d -exec chmod 755 {} +find . -type f -exec chmod u=rw,go=r {} +
You can, of course, use find to select specific files and folders as needed. This includes folders having a certain prefix to files having a specific extension. This article won’t go into details on how to use the find command, though.
Use xargs if you don’t want to use the “-exec” option
Perhaps the -exec option of the find command may be buggy on your system or even missing completely (it was added to GNU findutils in 2005). Or you might want to speed up execution a little by using all your CPU cores with parallel pipeline execution.
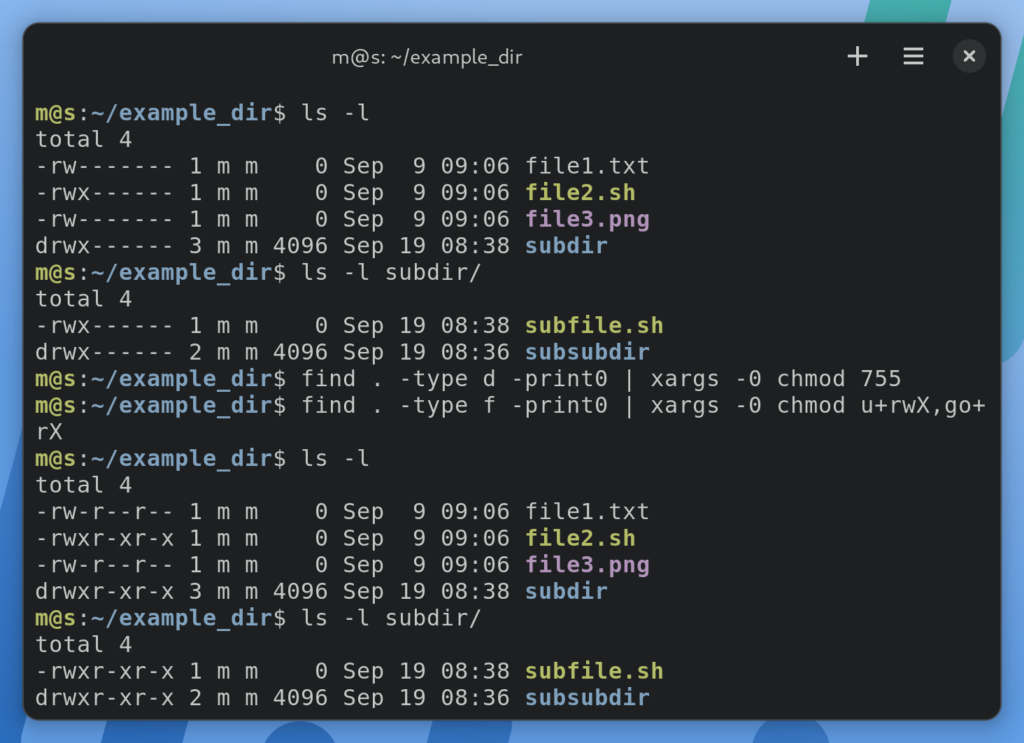
For any of these reasons, you can try using the xargs command instead:
find . -type d -print0 | xargs -0 chmod 755find . -type f -print0 | xargs -0 chmod u=rw,go=r
It’s important to use the -print0 parameter for find and -0 parameter for xargs, so that filenames with whitespace are handled correctly. That’s because -print0 makes find use a null character instead of a newline, and -0 tells xargs to consider a null character as the separator.
Note that these flags are part of GNU findutils and they might be missing on some non-Linux operating systems.
Conclusion
Now, you should have all the tools you need to change the permissions inside a folder and all its subfolders using the find command to apply the changes to specifically chosen files or folders with the mac chmod recursive technique. If you have any questions or perhaps suggestions on what to cover next, please drop us a comment down below.
FAQs
Can I use the chmod recursive technique to modify hidden files and folders?
Yes. With the chmod recursive technique you can modify permissions for hidden files by adding the -a flag to your command. For example: chmod -R -a 755 will process all files, including those that start with a dot.
How does the chmod recursive technique handle symbolic links?
When using the chmod recursive technique on symbolic links, by default it modifies the permissions of the target file or directory. To change the permissions of the symlink itself, you’ll need to use the -h option along with the recursive flag.
Is there a way to preview changes before applying the chmod recursive technique?
Yes. You can combine the mac chmod recursive technique with the -v (verbose) flag to see what changes would be made without actually applying them. Additionally, you can use the -n flag for a dry run that shows which files would be affected.
Can I use the chmod recursive technique on network drives or mounted volumes?
The chmod recursive technique works on network drives and mounted volumes, but you need appropriate permissions and the filesystem must support Unix-style permissions. Some network filesystems might have limitations or require additional authentication.
How can I recover if I make a mistake with the chmod recursive technique?
Before using the chmod recursive technique on important directories, it’s recommended to create a backup of the permission settings using getfacl command. You can also use Time Machine backups to restore original permissions if something goes wrong.

Miroslav is a UX designer by trade. And he has a bachelor’s degree in Software Engineering. As an avid free software enthusiast, he has made contributions to various open-source projects. And from this work, Miroslav knows his way around open-sourc...