Optimizing Azure Storage for Windows Server Virtual Machines
Data disks attached to Microsoft Azure Virtual Machines (VMs) are limited to 300 or 500 Input/Output Operations Per Second (IOPS) depending on the size of the VM, with the exception of D-series VMs, which are deployed on solid-state drives. If you want to the improve an application’s performance, Microsoft recommends attaching the maximum number of data disks allowed for the VM size and creating a simple striped volume using Windows Server Storage Spaces to increase throughput.
In this article, I’ll show you how to configure Azure Storage and Storage Spaces in Windows Server 2012 R2 to optimize disk IOPS. I’ll start by provisioning a VM that uses aggregated compute and storage resources, create and attach new disks to the VM, and finally configure Storage Spaces in Windows Server.
Create a New Storage Account and Affinity Group
When provisioning a new VM, Azure automatically creates a storage account in the same location as the VM if one doesn’t already exist. Otherwise, the VM’s disks are created in an existing storage account. As each storage account has a 20,000 IOPS limit, Microsoft recommends a maximum of 40 Standard Tier VM disks per storage account, or 66 Basic Tier VM disks. Microsoft also advises that for ease of administration and high I/O applications, each VM’s disks should be created in a separate account, of which there is a limit of 100 per subscription. Before provisioning a new VM, you might want to consider creating a dedicated storage account, and that’s what we’ll do in this demonstration.
Create a New Storage Account
Before following the instructions in this article, make sure that you have installed Microsoft Azure PowerShell, and set up a secure connection to your subscription by following the guide in Setup Windows Azure PowerShell Management on the Petri IT Knowledgebase.
Once you’ve set up a management PC to connect to your Azure subscription using PowerShell, open a PowerShell prompt and run the command shown below, replacing the value of –Location as required. Creating an affinity group by using the New-AzureAffinityGroup cmdlet, allows us to locate the compute and storage services together in the datacenter, helping to improve performance and reduce costs.
New-AzureAffinityGroup -Name SQLEurope -Location ‘North Europe’
Now we’ll create a new storage account using New-AzureStorageAccount, replacing –StorageAccountName, and –Label values as appropriate, noting that the –StorageAccountName must be all lowercase with no spaces.
New-AzureStorageAccount -StorageAccountName ‘sqlsrv1’ -Label ‘SQL Server 1’ -AffinityGroup SQLEurope
Locally redundant storage is the best performing storage type, but new storage accounts are created by default as geographically redundant. To change the storage account to locally redundant, use the Set-AzureStorageAccount cmdlet as shown here:
Set-AzureStorageAccount -StorageAccountName ‘sqlsrv1’ –Type Standard_LRS
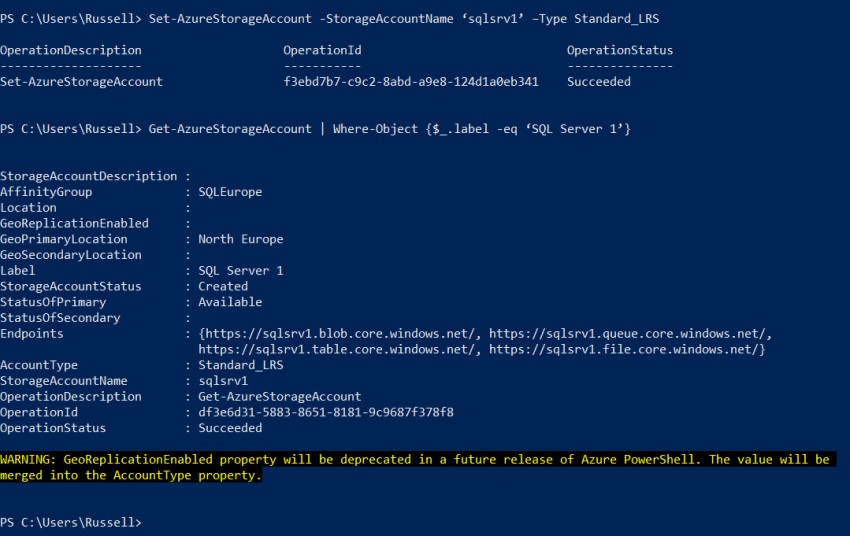
To see the full details about the new account, run Get-AzureStorageAccount with a filter as shown here:
Get-AzureStorageAccount | Where-Object {$_.label -eq ‘SQL Server 1’}
Provision a New Virtual Machine
Now we need to set the new storage account as the current storage account for the Azure subscription using the Set-AzureSubscription cmdlet, to ensure that the VMs disks get created in the right place:
Set-AzureSubscription –SubscriptionName Pay-As-You-Go -CurrentStorageAccount sqlsrv1
Before creating the VM, let’s get the latest available Azure image name for Windows Server 2012 R2 Datacenter in the gallery, and write it to the $images variable so it can be used later:
$images = Get-AzureVMImage | where { $_.ImageFamily -eq 'Windows Server 2012 R2 Datacenter' } | Sort-Object -Descending -Property PublishedDate | Select-Object -First(1)

Finally, create the VM using the New-AzureVM cmdlet with the maximum allowed number of attached disks, which is four for the A2 VM size. Note that if you intend to connect the VM to an existing virtual network, make sure that it’s located in the same region as the affinity group. The Set-AzureSubnet cmdlet and –VnetName parameter of the New-AzureVM cmdlet can be omitted if you don’t want to use a virtual network. Microsoft recommends that the disk size be set to the maximum of 1TB for best performance, but in this demo I’m going to make a tradeoff and use 100GB disks to keep costs down.
$vm = New-AzureVMConfig -Name ‘sqlsrv1’ -InstanceSize Basic_A2 -ImageName $images.ImageName -DiskLabel 'OS' | Add-AzureProvisioningConfig -Windows -Password ‘PassW0rd!’ -AdminUsername ‘sqlsrv1admin’ -DisableAutomaticUpdates | Set-AzureSubnet -SubnetNames ‘subnet-1’ $vm | Add-AzureDataDisk -CreateNew -DiskSizeInGB 100 -DiskLabel ‘disk 1’ -LUN 0 $vm | Add-AzureDataDisk -CreateNew -DiskSizeInGB 100 -DiskLabel ‘disk 2’ -LUN 1 $vm | Add-AzureDataDisk -CreateNew -DiskSizeInGB 100 -DiskLabel ‘disk 3’ -LUN 2 $vm | Add-AzureDataDisk -CreateNew -DiskSizeInGB 100 -DiskLabel ‘disk 4’ -LUN 3 New-AzureVM -ServiceName ‘sqlsrv1’ -VNetName ‘contoso’ -VMs $vm -AffinityGroup SQLEurope –WaitForBoot

If you get an error ResourceNotFound: The hosted service does not exist when running the New-AzureVM cmdlet, it’s likely that the cloud service name specified in the –ServiceName parameter is unavailable, so you’ll need to change it to something else.
Create a New Volume
The VM is up and running and the necessary disks are attached, so let’s create a new volume configured for maximum throughput. To do that, follow the instructions in Provision a Windows Server Storage Spaces Mirrored Volume with PowerShell on the Petri IT Knowledgebase, but adding some important parameters to the New-VirtualDisk and Format-Volume cmdlets as detailed below. Remember that to work with Storage Spaces, you need to log in to Windows Server 2012 R2 as a local administrator, and open a PowerShell prompt.

To optimize performance, instead of using a mirrored volume, we’ll use the Simple resiliency type because it has better throughput, and set the number of columns, which specifies the number of physical disks that data is striped across to equal the number of disks we have available.
The stripe size (interleave) should be set to no less than the I/O of the workload, which in the case of SQL Server is 64kb (65536 bytes). Contact the application vendor if you need more information about disk I/O. Finally, the block size of the disk should be set to 64kb, which we do using the Format-Volume cmdlet. Again, you may need to contact the application vendor to establish the appropriate value, but 64kb is likely to be suitable in most scenarios.

New-VirtualDisk -StoragePoolFriendlyName StoragePool1 -FriendlyName VirtualDisk1 –ResiliencySettingName Simple -NumberOfColumns 4 -Interleave 65536 -UseMaximumSize -ProvisioningType Fixed Initialize-Disk -VirtualDisk (Get-VirtualDisk -FriendlyName VirtualDisk1) -passthru | New-Partition -AssignDriveLetter -UseMaximumSize | Format-Volume -FileSystem NTFS -AllocationUnitSize 65536 –Force -Confirm:$false
If you open File Explorer on the server, you should now see the new volume ready for use.
Russell Smith, the Editorial Director at Petri IT Knowledgebase, has over two decades of hands-on experience in IT, in both small business settings and government IT infrastructure projects. Russell started writing for Windows IT Pro Magazine in t...

