In today’s Ask the Admin, I have a tip for quickly extracting all the images from a Microsoft Word document.
Images embedded in Word documents sometimes need to be removed but saved for later. It may be because you prefer to work with just a text document and enter placeholders for the images, or that before publishing a document, via WordPress for example, manually pasting the document into the WordPress editor requires that images be removed and uploaded separately. Word does allow posts to be published directly to WordPress but doesn’t offer all the features of the WordPress web-based GUI.
Note that the instructions in this article refer to Office 2016 running on Windows 10.
Zip Extraction Method
If you are using a newer version of Word – Office 2007 or later – the default file format is Office Open XML (OOXML), which is essentially a zip file that also contains the images embedded into the document. If you are working with a different file format in Word, you’ll need to select Save As from the File menu and save the document as a Word Document (*.docx) before you can extract images.
Once the file is saved in *.docx format, all you need to do is change the file extension from *.docx to *.zip.
- Make sure the file is not open in Word, locate the file in File Explorer (WIN+E) and make sure that you can see the file’s extension.
- If file extensions are not visible, click View on the ribbon and check File name extensions. Select the Word document in File Explorer and press F2 to rename it.
- Select ‘.docx’ and replace it with ‘.zip’.
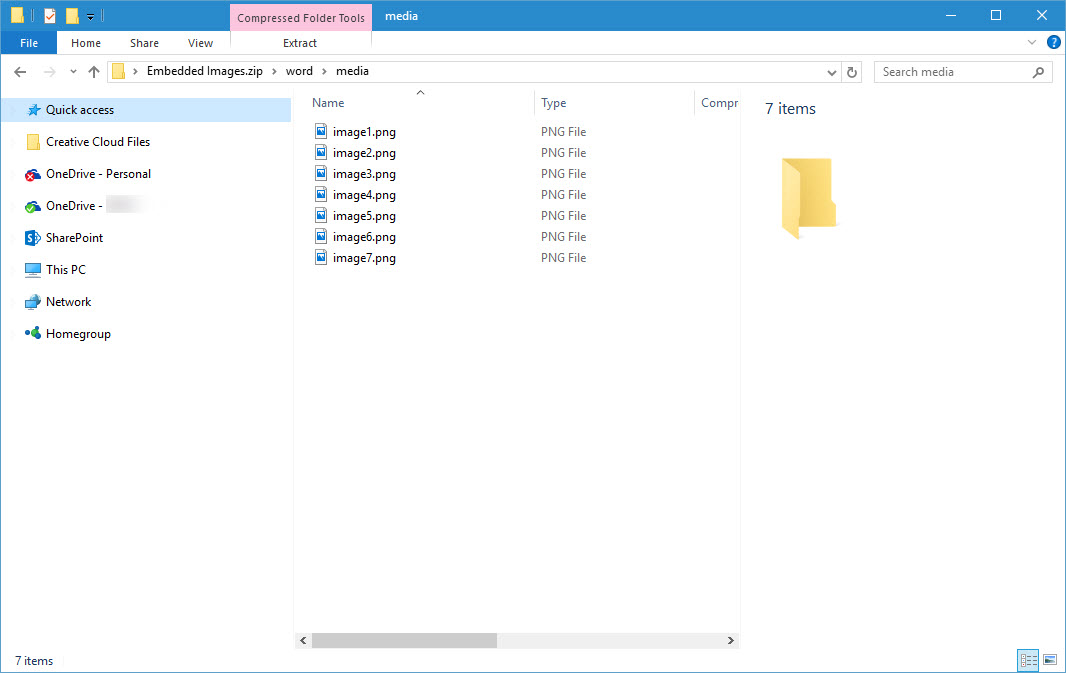
- Now double-click the zip file to open the archive, open the word folder and then the media folder. This is where the embedded images are located. You can cut and paste them to a different folder.
- Set the file extension back to .*docx once you’ve extracted the required images.

Save as HTML Method
The second method I’m going to show you works in any version of Word that supports saving files as a web page.
- Open the file in Word.
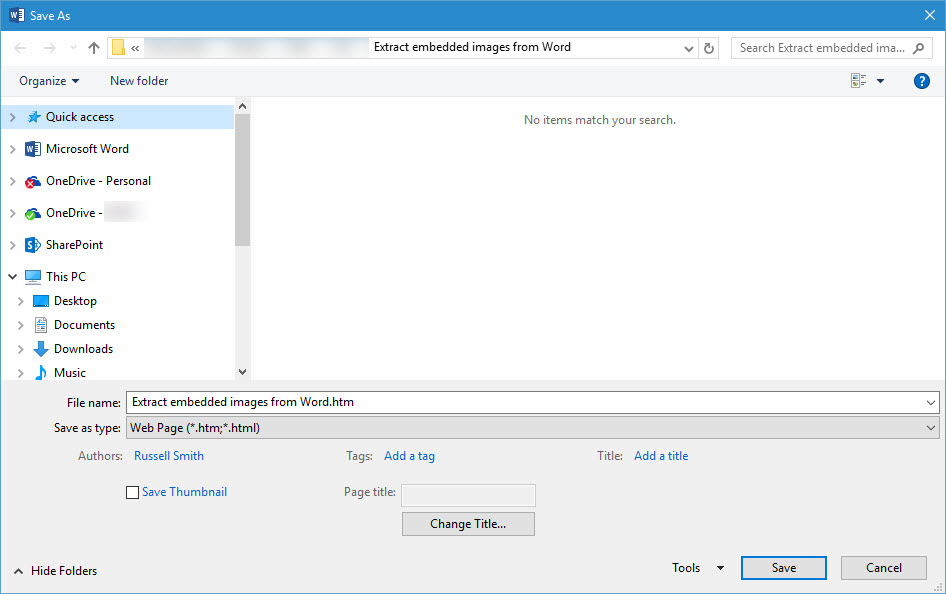
- Click File and select Save As from the menu.
- In the Save As dialog, change Save as type to Web Page (*.htm,*html).
- Save the file to the desired location by clicking Save.

In the location where the file was saved, you’ll see the html document and a folder with the same name of the saved html document but with _images appended or _files appended. This is where you’ll find all the embedded images. The images are numbered in order, but in some cases, Word will export two versions of the same image with different size dimensions (for example, image_003.png with dimensions 710×222 and image_004.png with dimensions 1065×333) might be two versions of the same image from Word) or even two file formats (for example, image_001.png and image_002.jpg might be two version of the same image from Word).


