How to Install Windows Server 2016 Nano in a VM
Microsoft announced the availability of Windows Server 2016 Technical Preview 2 at Ignite on Monday, and in this Ask the Admin, I’ll show you how to install Nano, the refactored minimal install option for Windows Server designed for cloud apps and micro services.
There’s been a long wait since Microsoft released the first technical preview of Windows Server 2016 in October last year, but since then rumours about a new minimal install option called Nano were confirmed, and there’s been much talk about Windows and Hyper-V containers, which will appear in the next technical preview to be released later this year. You can read Thoughts on Windows Nano Server on the Petri IT Knowledgebase to get more information on Nano. But in the meantime, Windows Server Nano is part of TP2, although not available for install using the traditional GUI setup tools, so you’ll need to get your hands dirty with PowerShell and WIM files. Before we get started, make sure you have downloaded the Windows Server 2016 Technical Preview 2, available free from Microsoft here. To complete the instructions below, you’ll also need to download the Convert-WindowsImage.ps1 script from the TechNet gallery here. Additionally, you’ll need to run the Add-WindowsPackage PowerShell cmdlet on Windows 10 Technical Preview 2, or on a Windows 8 device with the Windows 10 Assessment and Deployment Kit (Windows ADK) Preview installed, because upgraded Deployment Image Servicing and Management (DISM) support is required.
Create a Nano VHD File
Once you’ve downloaded the ISO, follow the instructions in Windows 8 (or later):
- Right click the Windows Server ISO, and select Mount Image from the menu.
- Open File Explorer and make a note of the drive letter that the image has been mounted on. In my case, the next available drive letter was D:
- Open a PowerShell prompt from the Start screen, and copy the NanoServer folder from the ISO image to the local disk using the command shown below, replacing d: as necessary.
- The Convert-WindowsImage.ps1 script is unsigned, so if you haven’t done already, you’ll need to set the PowerShell script execution policy to unrestricted:
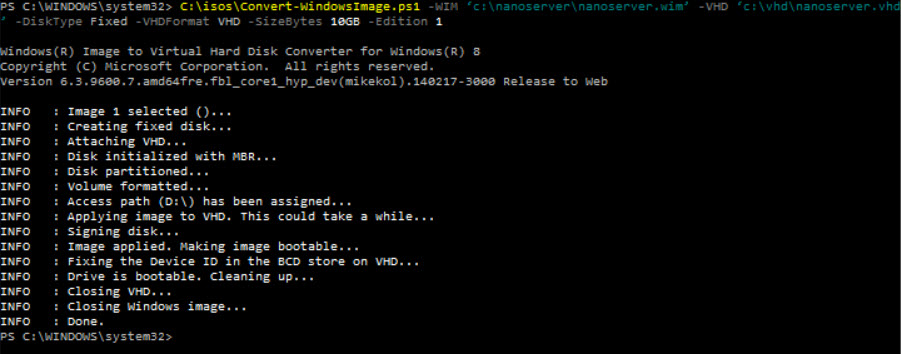
- Now use the Convert-WindowsImage.ps1 script to convert the WIM image in the NanoServer folder to a VHD file using the command line below, again replacing drive letters and paths as appropriate.

Note that the folder specified in the path given in the –VHD parameter must already exist. The –Edition parameter specifies the SKU to be used, and cannot be omitted. Additionally, if you want to run the Convert-WindowsImage.ps1 on Windows 10 build 10074 (or later), you’ll need to change the value of the $lowestSupportedBuild variable to 10074, and edit the following line of code, replacing 6.2 with 10.0.
- Once the script has completed and generated the VHD file, mount it so that you can add the required packages.
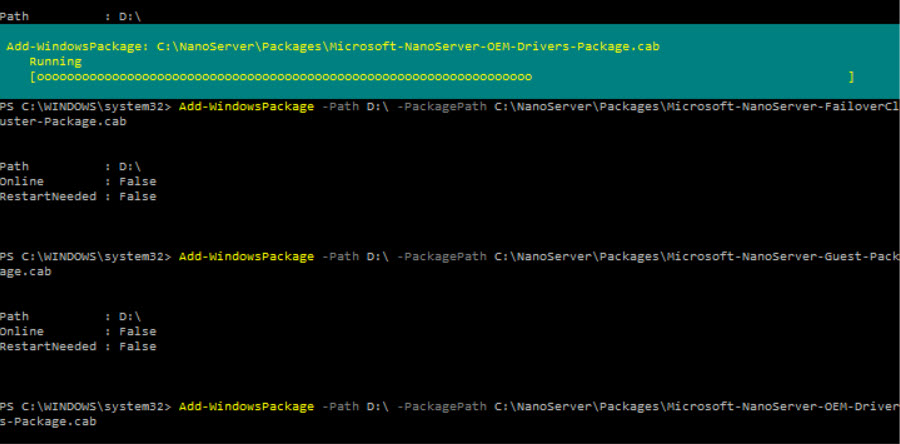
- Now use the Add-WindowsPackage cmdlet to add packages to the VHD from the NanoServer folder that we copied from the Windows Server ISO image. The –Path parameter specifies the disk letter assigned to the VHD by the Mount-DiskImage cmdlet that we ran above. Below are commands for all the available packages. You can pick which you’d like to include.

Add-WindowsPackage –Path E:\ –PackagePath C:\NanoServer\Packages\Microsoft-NanoServer-FailoverCluster-Package.cab Add-WindowsPackage –Path E:\ –PackagePath C:\NanoServer\Packages\Microsoft-NanoServer-Guest-Package.cab Add-WindowsPackage –Path E:\ –PackagePath C:\NanoServer\Packages\Microsoft-NanoServer-OEM-Drivers-Package.cab Add-WindowsPackage –Path E:\ –PackagePath C:\NanoServer\Packages\Microsoft-NanoServer-Storage-Package.cab Add-WindowsPackage –Path E:\ –PackagePath C:\NanoServer\Packages\Microsoft-OneCore-ReverseForwarders-Package.cab
- Once you’re done adding packages to the VHD, don’t forget to dismount it:
The VHD is now ready to be used. Create a virtual machine in Hyper-V, using the nanoserver.vhd as the virtual hard drive. For more information on how to use Hyper-V, see Windows 8 Client Hyper-V : Create a Virtual Machine Based on an Exisiting VHD File on Petri. In my testing, Nano server takes quite a long time to start, and presents a black screen when it’s finally booted, which is a little disconcerting. No doubt boot times will be improved as work on Windows Server 2016 progresses.Connecting to Nano
Once Nano is up and running, you can connect to it remotely using PowerShell Remoting. From a PowerShell prompt on a management PC, run the following two commands, replacing the IP address with that of your Nano server:
Enter-PSSession -ComputerName 192.168.184.128 -Credential Administrator

The Set-Item cmdlet is used to add Nano server to the list of trusted devices on the management PC, as neither Nano nor the management PC are a member of a domain. Enter-PSSession starts a new PowerShell Remoting session. Note that the administrator password is blank by default, which you should change. In a production environment, you would use an unattended.xml file to set an administrator password, and computer name etc so that the server is protected from the first boot.


