How To Install Puppet Enterprise on Red Hat Linux
In a previous article, I showed you how to install open source Puppet 5 on Red Hat Linux. Today, I’m going to show you how to install Puppet Enterprise, which comes with extra features, including reporting, interactive dependency visualizations, event inspection, role-based access control, and integration with Active Directory and LDAP to name just a few.
If you missed the previous articles on setting up Puppet in Red Hat Linux, I recommend looking here to learn how to get up and running with Red Hat Linux on Hyper-V. You can skip the second article if you want to install Puppet Enterprise server instead of open source Puppet.
Install and Configure Puppet 5 Part 1: Set Up Red Hat Linux in Hyper-V
Install and Configure Puppet 5 Part 2: Set Up Puppet
Download Puppet Enterprise
The open source version of Puppet is easier to install, because you can install it using a package manager like apt-get or yum. But if you want to install Puppet Enterprise, you’ll need to register with Puppet and download the package manually. If you haven’t already registered, you can do so here and download the Puppet Enterprise Master package for RHEL. Because Puppet doesn’t provide a direct download link, you can’t use a command-line utility, like wget, to download the package. You’ll need to use a browser.
Once you’ve downloaded the package, start your Red Hat Linux VM and log in as root. Let’s make sure that Red Hat is up-to-date using the yum package manager. This process might take a few minutes.
yum update
I downloaded the Puppet Enterprise package on the Hyper-V host, so now I need to transfer the installation tarball file to the Linux VM. Before I can transfer the file, I need to enable integration services so that I can copy the file to the guest VM. Open a PowerShell prompt on the Hyper-V host and run the Enable-VMIntegrationService cmdlet as shown below, replacing the value for -VMName with the name of your Red Hat Linux VM.
Enable-VMIntegrationService -VMName pspmaster -Name 'Guest Service Interface'
Check that the hypervfcopyd service is running in Red Hat Linux using the process status (ps) command:
ps -u root | grep hyper

On the Windows Hyper-V host in a PowerShell console, run the Copy-VMFile cmdlet to copy the installation tarball downloaded from Puppet to the Linux VM. Change the -SourcePath and -DestinationPath values to match your file locations. You can create directories in Linux using the mkdir command if needed.
Copy-VMFile -Name pspmaster -SourcePath "C:\Users\Russell\Downloads\puppet-enterprise-2018.1.4-el-7-x86_64.tar.gz" -DestinationPath '/home/russell' -FileSource Host
Edit Linux Hosts File
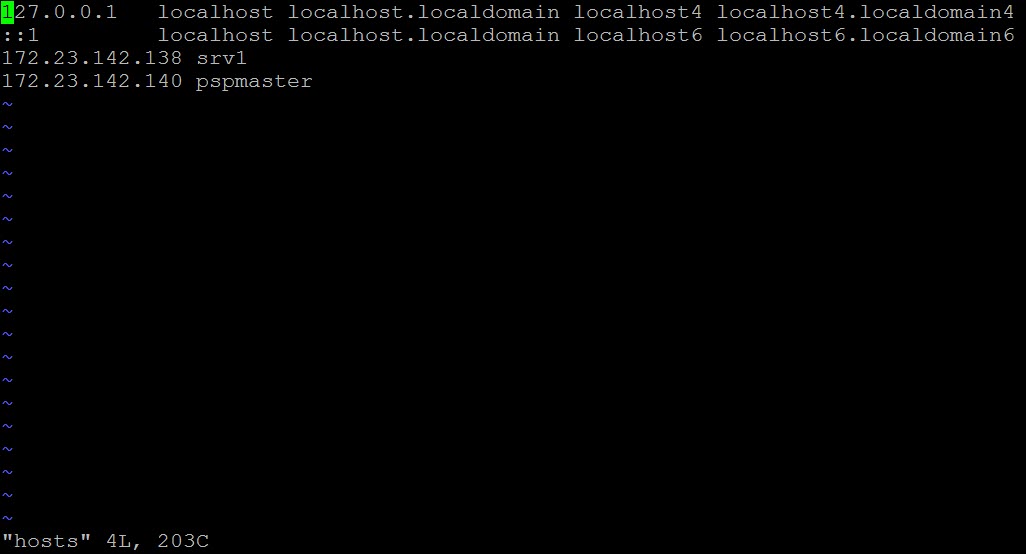
Before installing Puppet Enterprise, make sure that Linux can ping itself by name. That’s easy to do by adding an entry to the hosts file, in the same way that you would do in Windows. Using the vi text editor, open the hosts file, add an entry for the Linux VM, and then save the file. If you’re not familiar with vi, see Edit the Site Manifest in Managing Windows Server with Puppet Part 3 on Petri.
vi /etc/hosts
Add the Linux VM’s IP address and hostname as shown in the figure. If you don’t know the VM’s IP address, run ifconfig at the command prompt. Ifconfig is the equivalent of ipconfig in Windows. Add any other devices on your network that the Puppet Master server might need to communicate with. In a production environment, you can use a DNS server instead of manually adding entries to the hosts file.

Install Puppet Enterprise Master Server
Now that we have the install package in place and Linux is prepared, we can unpack the tarball file and install Puppet Enterprise. Unpack the installation tarball using the tar command as shown here, not forgetting to change the path to your tar.gz file.
tar -xf /home/russell/puppet-enterprise-2018.1.4-el-7-x86_64.tar.gz
Now let’s run the unpacked installer. If you need to change directory, use the change directory (cd) command. For instance, to set the working directory to /home/russell, run cd /home/russell. Run the installer from the installer directory as shown:
cd /home/russell/puppet-enterprise-2018.1.4-el-7-x86_64
sudo ./puppet-enterprise-installer

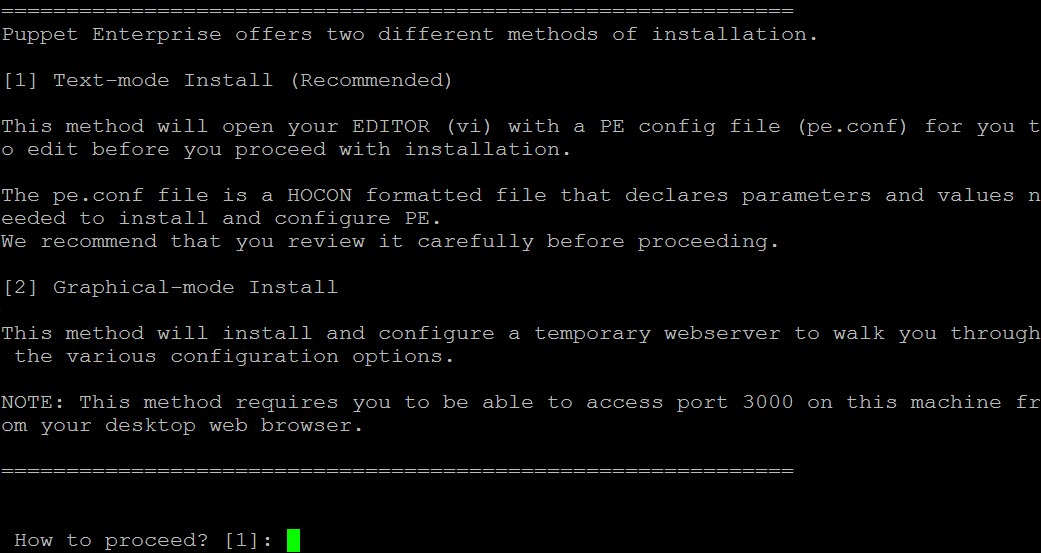
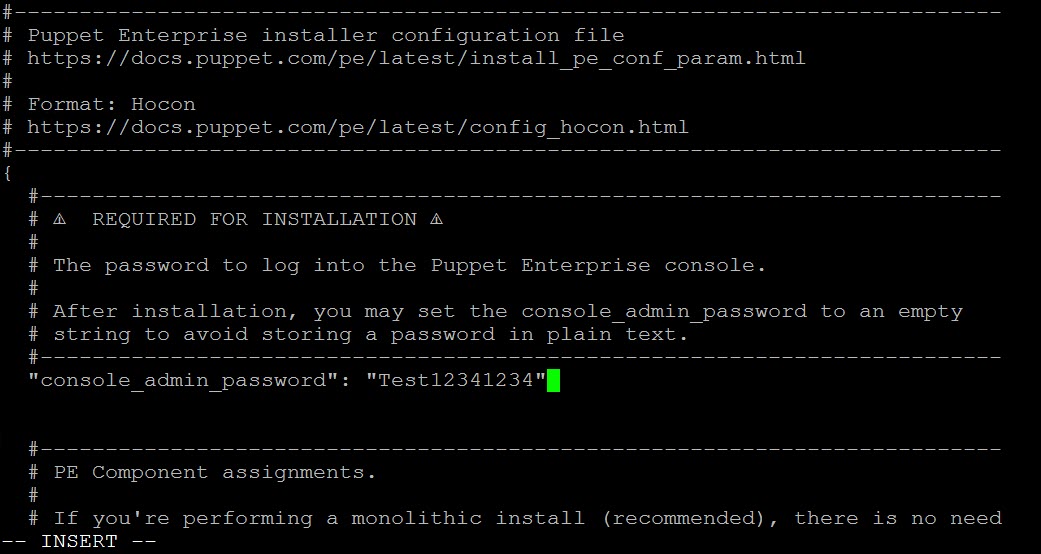
Install Puppet Enteprise with all the default options using the text-based installer. Select option 1 for a text-based install. The pe.conf file will open automatically. Add a PE console password between the last two quotation marks as shown here:
“console_admin_password”: “Test12341234”
Quit vi and write the file to disk.

You’ll be asked if you want to continue with installation using pe.conf. Type Y and press ENTER. Once installation is complete, run puppet agent -t twice.
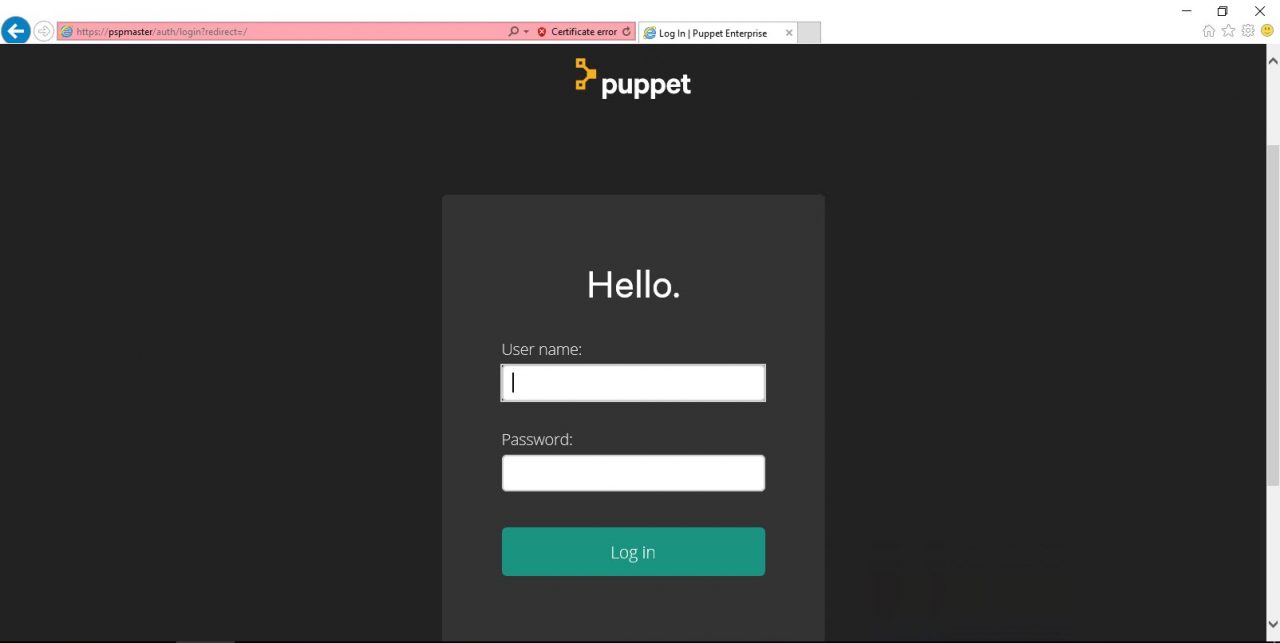
And that’s it! You can now log in to the Puppet Enterprise (PE) console from a remote device using the Puppet Master server’s hostname. In this case, pspmaster but you should use the hostname of your Linux VM. You must use https:// to connect to the PE console. You will get a certificate error because the browser doesn’t trust the Puppet Enterprise server. You can ignore the error and continue to the site. The default username is admin and you should type the password entered in the steps above.
https://pspmaster/

In this article, I showed you how to install Puppet Enterprise server version 7 on a Red Hat Linux VM running on Hyper-V.


