How to Configure BitLocker Auto Unlock
BitLocker is a full-disk encryption tool that is built-in to Windows 10. Full disk encryption prevents someone who gets physical access to a disk from reading the data stored on it. BitLocker is often used to encrypt the system drive but it can also be used to encrypt data volumes. And portable storage media, like USB sticks, using BitLocker To Go.
By default, if you encrypt a data drive using BitLocker, it will remain locked until you manually unlock it. For example, when you boot your device, you enter a password to unlock the BitLocker-encrypted system drive so that Windows can load. If you want to access data volumes that are encrypted with BitLocker, you can unlock them when required using a protector, which in this example is a password.
BitLocker Auto Unlock
BitLocker keeps data drives locked by default to protect the data stored on them while it’s not needed by the user. But in some scenarios, you might want BitLocker to unlock data drives at the same time as the system drive is unlocked. BitLocker Auto Unlock unlocks data volumes using encrypted information stored in the registry and volume metadata. Auto Unlock can be enabled by users in the Windows GUI and using PowerShell. But users require admin privileges to change BitLocker settings.
Enable or Disable BitLocker Auto Unlock in the Windows Control Panel
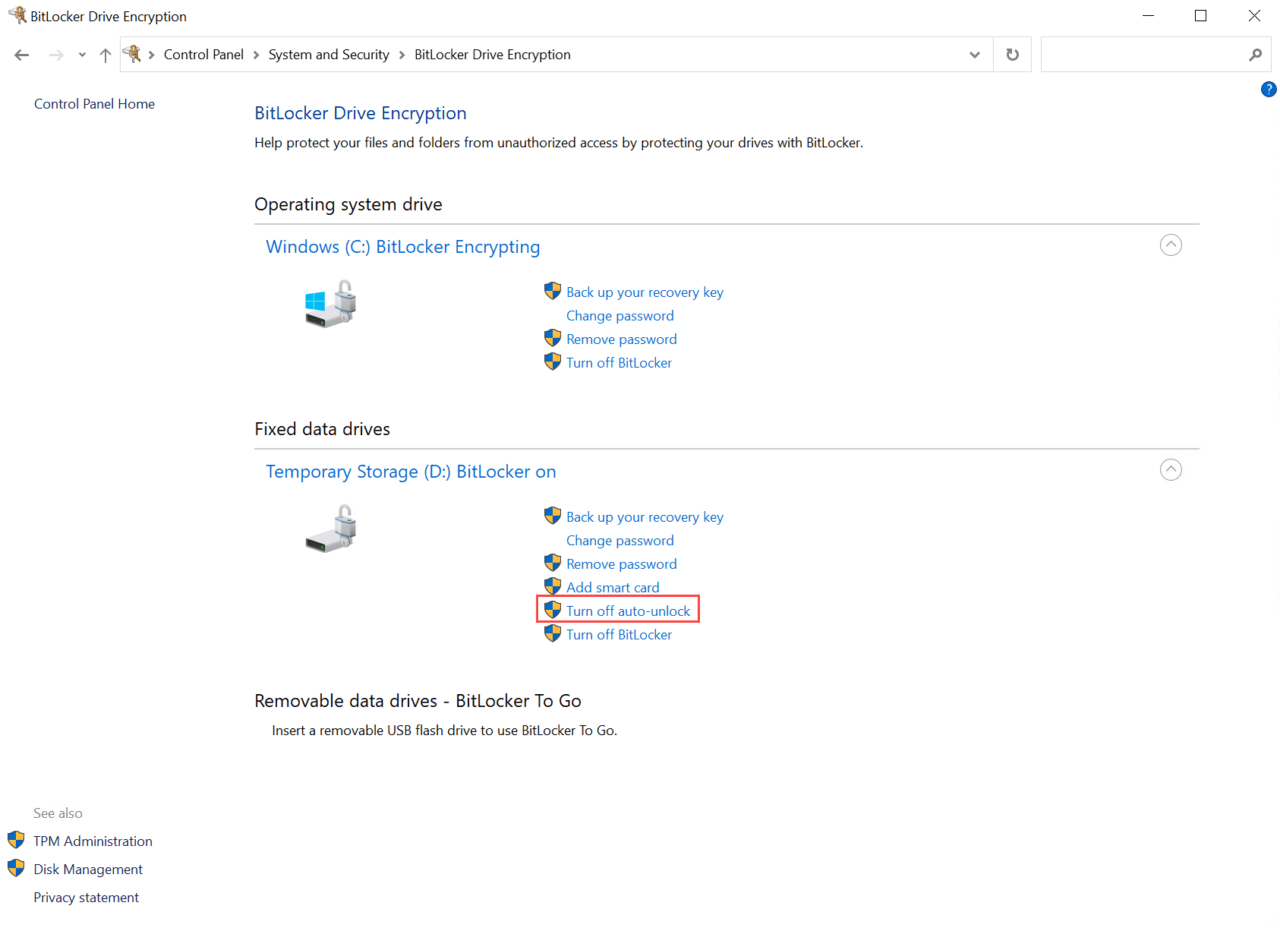
At the time of writing, BitLocker is still managed using the legacy control panel. The easiest way to get to the BitLocker settings in the control panel is to open the Windows 10 Settings app by pressing CTRL+I. Then in the search box, type bitlocker. Click Manage BitLocker in the search results and you will be redirected to the BitLocker control panel.
As you can see in the image below, users can enable or disable Auto Unlock for fixed data drives that are encrypted by BitLocker. You just click Turn on auto-unlock and Turn off auto-unlock respectively. Auto Unlock also works on removable data drives.
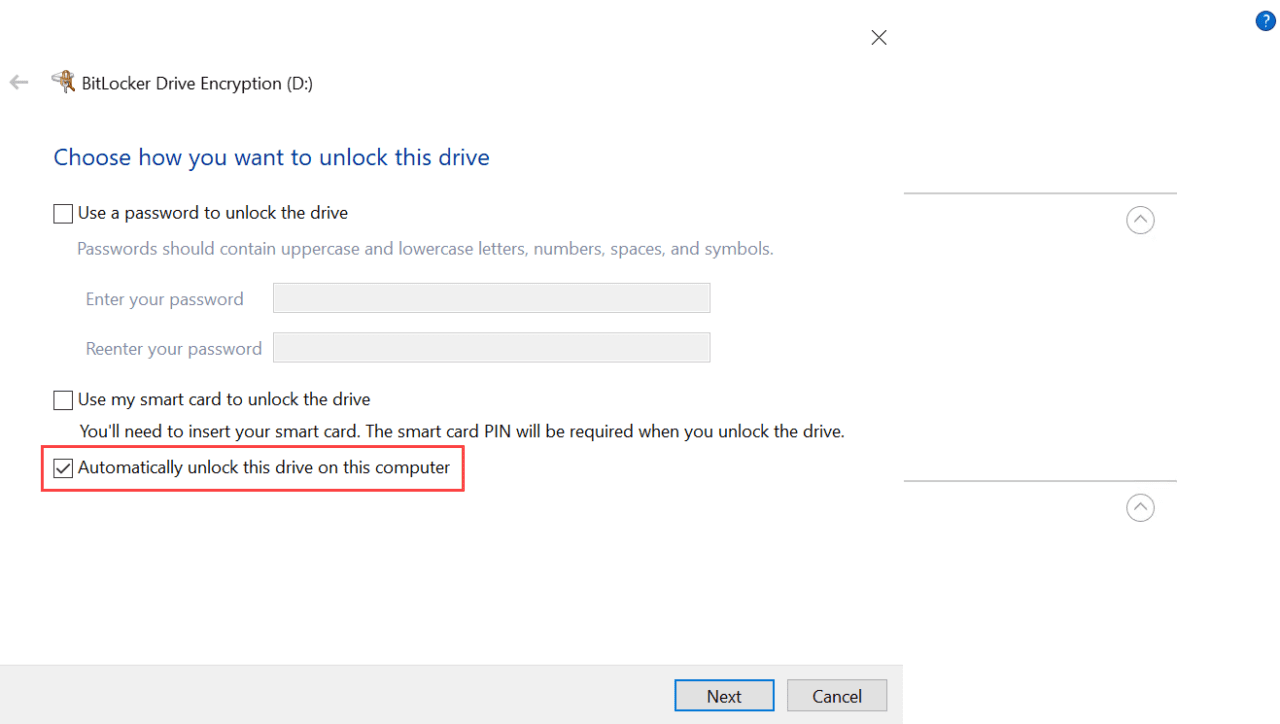
You can choose to enable Auto Unlock when setting up BitLocker drive encryption on a data volume by checking Automatically unlock this drive on this computer in the BitLocker configuration wizard.
Configure BitLocker Auto Unlock using PowerShell
To enable Auto Unlock on a data volume, use the Enable-BitLockerAutoUnlock cmdlet as shown below, changing the value of the MountPoint parameter to the volume you want to auto unlock.
Enable-BitLockerAutoUnlock -MountPoint d:
And Disable-BitLockerAutoUnlock removes encrypted information in the registry that’s required to unlock a volume, and then disables Auto Unlock on the specified volume. The command below disables Auto Unlock on a volume labelled D:
Disable-BitLockerAutoUnlock -MountPoint d:
Reporting
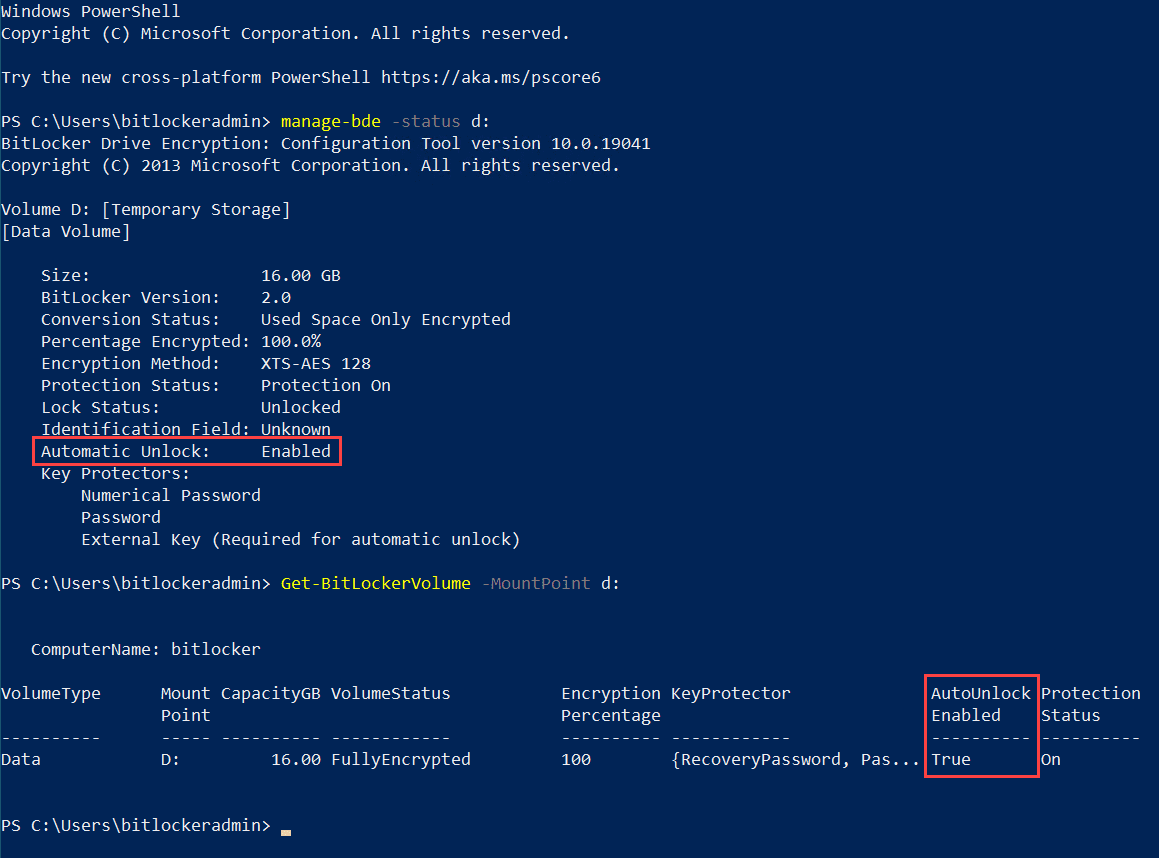
Administrators can use a couple of other commands to check the Auto Unlock configuration of a volume. Manage-BDE and Get-BitLockerVolume can be used to display information about a volume, including its Auto Unlock status.
Manage-BDE -Status d:
Or use Get-BitLockerVolume instead:
Get-BitLockerVolume -MountPoint d:
How to Use an Active Directory key protector to auto-unlock encrypted BitLocker volumes
Volumes can be protected and automatically unlocked using an Active Directory (AD) key protector. This allows AD users to access and auto unlock fixed or removable drives regardless of which device they log in to.
To add a BitLocker protector to a device, run Add-BitLockerKeyProtector with elevated privileges as shown below. Replace contoso\user1 with the AD username or group you want to add in the DOMAIN\user format.
Add-BitLockerKeyProtector -MountPoint d: -ADAccountOrGroup contoso\user1 -ADAccountOrGroupProtector
Then all you need to do is make sure the volume is configured for Auto Unlock:
Enable-BitLockerAutoUnlock -MountPoint d:
These commands will ensure BitLocker protected volumes labelled d: are automatically unlocked whenever CONTOSO\user1 logs in. In a production environment, it will be more practical to specify an AD group rather than individual user accounts.


