How to Connect Service Manager 2012 to Configuration Manager 2012
As you may remember, we covered the procedure of creating a connector to Configuration Manager 2007 in an earlier post by Peter De Tender. Today we will update the instructions as we look to establish the connection from Service Manager 2012 with Configuration Manager 2012 (RTM, SP1 and R2).
Create a Configuration Manager Connector
The only step we need to take is to create a new Configuration Manager Connector, which will also require us to create a new Run As profile for use by the connector.
Working from the Administration view, we will expand and select the Connectors tree branch, to be presented with any currently registered connectors in the environment. From the Actions pane, we can then select the option Create connector and select System Center Configuration Manager. This will launch the connector wizard.
- On the General page, provide a Name for the connector (for example SCCM Connector), along with a description for this connector.
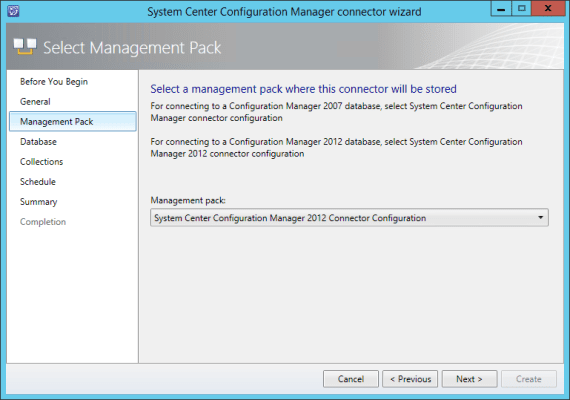
- On the Management Pack page, make sure that the System Center Configuration Manager 2012 Connector Configuration pack is selected from the drop-down.

On the Database page, we will need to provide the following:
– The Database Server Name, which should be the fully qualified name of the SQL instance that hosts the primary (or central, if deployed) database. Note: If you have multiple independent SCCM installations that need to be synchronized into SCSM, then you will need to establish a connector for each respectively.
– The Database Name, which will by default something as simple as CM_[SiteCode].
- For the Credentials, we will need to establish a new Run As account, which will have permission to the SCCM database. Click New… to launch the wizard.
- The New Run As Account dialog will show, ready to populate.
- In the Display Name, provide a name for the account (for example, System Center Configuration Manager Database Access).
- Provide a suitable User account name and password that has access to the SCCM Database. Click OK.
- On the Management Pack page, you can now click Test Connection. If you forgot to select the correct Management Pack at the start of the wizard, you will now be greeted with a notice informing you that the connector is the wrong version for the target configuration manager database, so pay attention! Assuming your permissions are all correct, we can proceed.
- On the Collections page, you will be presented with all the currently available collections in Configuration Manager. Generally you will want all systems to be synchronized across, so simply select All Systems. However, if you wish to manage what is synchronized into Service Manager, you can select the appropriate collections for your environment. You can also select the option to Not write null values for properties which are not set in configuration manager.
- On the Schedule page, you can choose the appropriate configuration options for your environment. For example, I am going to set my connector for daily syncs at 2 A.M. local server time.
- Before you can finally click Create to establish the new connector, the wizard Summary page will show and review all your choices.
As soon as the connected is created, it will automatically begin an initial synchronization job to import all the objects from Configuration Manager 2012 into Service Manager as configuration items.
It’s as simple as that!


