Windows 2000/XP SP Slipstreaming
Windows 2000/XP/2003 SP Slipstreaming
How can I slipstream service packs into the Windows 2000, Windows XP or Windows Server 2003 media?
This scenario explains how to create an integrated installation of Windows 2000 or Windows XP and the corresponding service pack in a shared distribution folder on a network. This integration is called “Slipstreaming”.
The integrated process installs the service pack during Windows 2000/XP Setup, so when the setup process is done, you’ll have the OS + SP in one operation.
Lamer Note: This explanation is based upon usage of Windows 2000 and SP4, but will also work for any SP and either Windows 2000 or Windows XP (of course you must use the correct SP… don’t try to install SP1 or SP2 for Windows XP on a Windows 2000 installation… Duh…)
Important: Do not update Windows 2000 integrated with a service pack in a shared distribution folder if there are users who are still using a previously installed integrated version in the same shared folder.
For instructions on how to slipstream Office XP/2003 and Office Service Packs please read Office XP SP1/2/3 Slipstreaming, Office System (2003) Hotfix Slipstreaming and Office System (2003) Hotfix Slipstreaming.
The Slipstreaming process
Prerequisites
Before we begin anything, you’ll need to have a few things:
- Installation CD of Windows 2000/XP.
- Service Pack 4 for Windows 2000 or Service Pack 2 for Windows XP
Download Windows 2000 SP4 (129mb)![]()
Download Windows XP SP2 (266mb)![]()
Download Windows Server 2003 SP1 Network Installation (329mb)![]()
Lamer Note: This guide is based on the English versions of Windows 2000/XP, and of their corresponding Service Packs. If you’re using a different localized build of Windows, you will need to find the right version of SP for your build.
- At least 1.5 GB of free space on your hard drives (you can later delete these files).
- A CDR/CDRW drive, CD burning software and (This is actually only optional, but if you want to burn the resulting slipstreamed Windows 2000/XP you’ll need it).
To create an integrated installation of Windows 2000/XP/2003 and the service pack:
- Connect to the network or computer on which you want to create the distribution folder.
- In the shared folder on the network, create a distribution folder for the Windows 2000/XP installation files. For example, to create a distribution folder named Win2000i386, type the following:
mkdir D:Win2000i386
Lamer Note: This is only an example. You can obviously use any drive letter or any folder name you want, just make sure your partition has enough free space.
Or, for Windows XP:
mkdir D:XPi386
Lamer Note: You got the point, don’t ask me about what folder name you should use for Windows Server 2003…
- Ensure only the system administrator has full access to this folder. Other users should have only read and execute permissions.
- Insert your original Windows 2000/XP/2003 CD into the CD-ROM drive, and then copy the contents of the CD to the distribution folder that you created in step 2. For example, to copy the installation files and folders from the Windows 2000 CD in the CD-ROM drive (E:) to the distribution folder named Win2000’i386, type the following:
xcopy E:i386 D:Win2000i386 /e
Lamer Note: This is only an example. Substitute E: with the drive letter of YOUR CD drive, and D:’Win2000’i386 with YOUR folder settings.
or, for Windows XP:
xcopy E:i386 D:XPi386 /e
Another Lamer note: You can also drag and drop the folder’s content.
- Extract the service pack source files from the downloaded SP file and put them in a folder you choose on your hard disk. For example, if you’ve downloaded SP4 for Windows 2000 to a folder called D:’W2KSP4 then type the following:
D:W2KSP4w2ksp4_en.exe /x
Note: You can use “-x” instead of “/x” if you want.
Or, for Windows XP SP2 use the correct file name:
D:XPSP2WindowsXP-KB835935-SP2-ENU.exe /x
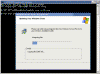
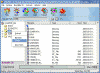
- In the Choose Directory For Extracted Files box, type
D:’W2KSP4
Or, for Windows XP:
D:XPSP2
![]()
Lamer Note: This is only an example. Substitute the path with the settings.
![]()
Another note: It will be easier for you if you chose a folder name that has no spaces in it. If you do use spaces, make sure you enclose it in quotation marks, i.e. “folder name” from now on through the entire guide.
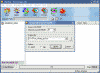
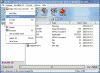
- After you’ve extracted the files you can apply the service pack to the Windows 2000/XP/2003 installation files located in the folder named D:Win2000i386 or D:XPi386 respectively by typing the following:
D:W2KSP4i386UpdateUpdate.exe -s:D:Win2000
Or, for Windows XP:
D:XPSP2i386UpdateUpdate.exe -s:D:XP
![]()
(Screenshot of XP SP2 Slipstreaming, W2K SP4 or Windows 2003 SP1 looks the same)
Lamer Note: Notice there IS a space between the “-s” and the “Update.exe”. Also, notice there is NO space between the “-s:” and the path of the installation files folder.
Note: You do NOT need to specify the i386 folder in the path. The slipstreaming process will automatically look for it in the folder root.
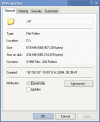
- Take a look at the folder’s properties, it should be approximately 634mb in size (that’s for Windows XP + SP2, Windows 2000 + SP4 or Windows 2003 SP1 have a different sizes).
You can now deploy Windows 2000/XP/2003 to your users’ computers from the shared distribution folder in either attended or unattended Setup mode. Alternatively, you can burn a CD containing the files from the distribution folder. During the standard installation process, Windows 2000/XP/2003 Setup (Winnt.exe or Winnt32.exe) installs the updated operating system with the service pack already applied.
Important: When you run the Update.exe program as described earlier for an integrated installation, a Svcpack.log file is created automatically in systemroot on the computer that is running the Update.exe program. If you plan to update more than one version of Windows 2000/XP on this computer, rename the Svcpack.log file after you update each version. This ensures that you do not overwrite the current log file when you update additional versions of Windows 2000.
How can I update the I386 folder on my computer with the SP files?
After installing SP4 (or any other Windows 2000, Windows 2003 or XP SP) on your computer you do NOT have to re-apply it if you choose to remove and reinstall a system component.
But whenever you want to install or reinstall a new system component or you will be prompted for both the original Windows 2000/XP/2003 i386 folder and the current Service Pack i386 folder, because the operating system “knows” it should be looking for the required files in both locations. Sometimes this can be a pain because you don’t always remember to keep both folders accessible on your local computer of network LAN.
That’s why you’d want to update the original i386 files with the latest SP files, thus providing a unified installation point for all future references.
The process of updating the i386 original folder with the latest SP files is similar to slipstreaming the latest SP into your installation files. You should follow the guidelines outlined in steps 5 through 7 in the slipstreaming guide.
You now have an installation point for all future needs.
How can I make a bootable CD of Windows 2000 and SP4, Windows XP and SP2 or of Windows Server 2003 SP1?
After you’ve slipstreamed your i386 folder with the current SP you’ll probably want to burn the files to CD and use them. This process will indeed let you use the CD as an installation point but it will not be a bootable CD, thus you will not be able to use this CD to boot into the setup phase.
There are a few good articles that describe the process of creating a bootable CD (See list of articles at the bottom of this page).
But the easiest method of them all (in my opinion) is using an already bootable CD to create the new bootable CD with the slipstreamed SP4 files.
The easy way – by using an ISO file
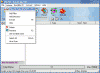
To do so you’ll need a good CD-burning software that will also be able to read and write ISO files. One of my favorites is WinISO (currently v5.3) but you can use any other software is you want.
WinISO is a CD-ROM image file utility that can convert BIN to ISO, extract/edit/create ISO files directly, make bootable CDs and as a BIN/ISO converter/extractor/editor. It can process almost all CD-ROM image file(s) including ISO and BIN. With WinISO, you can add/delete/rename/extract file(s) within image files. You can convert image files to the standard ISO format and you have the ability to create ISO image file(s) from a CD-ROM.
I’ll explain the needed steps using WinISO screenshots and commands.
Step one: Slipstream the SP into i386
Follow the steps described in the slipstreaming guide section at the top of the page. It does not matter what SP you’re using. This process will work for Windows 2000/XP/2003.
Step two: Create an ISO image of the standard W2K/XP/2003 CD
- Insert the original Windows 2000/XP/2003 CD into the tray.
You can use this process for any version of Windows 2000 (Professional, Server or Advanced Server), but you’ll need to create 3 separate images if you want to have all 3 versions of Windows 2000. Same goes for SP1 for Windows Server 2003.
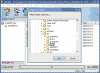
- Run WinISO. Click Actions > Make ISO from CD-ROM.
- Browse to select the folder where you want the ISO file to be created. Give it a name. Also choose the correct CD drive letter if you have more than one CD drive.
- Let it run till the progress bar finishes.
Step three: Replace the old i386 with the new one
- In WinISO click the Open button and browse to the ISO file you’ve just created.
- Delete the i386 from within the ISO image by selecting the i386 folder and pressing Delete.
- Also delete the Valueadd, Support, Docs and Cmpnents folders.
- Click Actions > Add Directory and browse to the location of the slipstreamed i386 folder from step one.
- Also add the Valueadd, Support, Docs and Cmpnents folders.
- Choose Add Files and add the files found in the rood folder where you’ve slipstreamed i386.
- The final picture should look like this:
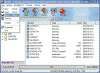
- Click Save and you’re done.
Step four: Burn the ISO on a CD
Now you’ll need a CD-Burning software that reads ISO files. If you’re using Windows XP you can use the new Powertoys or the ISO burner PowerToy to enable ISO file-burning as a native XP command. If you’re using another OS you should try Golden Hawk CDRWin, Easy CD Creator, Ahead Nero or any other program that will do that.
The hard way
The best tool that I know of to help you create a bootable Windows CD is Bart’s BootCD. It’s well worth the effort and it’s free:
Bart’s way to create bootable CD-Roms (for Windows/Dos)![]()
Other ways in which you can make a bootable CD-ROM (e-mail me if you have other, better resources):
- Using Roxio Easy CD Creator – For a good explanation on how to do the same in Easy CD Creator, read THIS tip or THIS article.
- Using Golden Hawk CDRWin – You can also use CDRWin to do the same. Read THIS tip or THIS tip for more info.
- A great article by Steven Bink – Making a Bootable Windows 2000 CD with Service Pack Integrated
Perform a search in Google for other articles. As I said, there are quite a few around.
Don’t forget you’ll need to repeat these steps for each Windows 2000/XP/2003 version you want to burn.

Renowned as the creator of the acclaimed Petri IT Knowledgebase back in 1999 Daniel Petri has become a distinguished figure in the IT realm, recognized for delivering reliable, expertise-driven content. This website - www.petri.com - not only embodie...