How to Use Windows File Recovery to Recover Lost Files

Windows File Recovery is a free command-line utility for recovering deleted files in Windows. If you have lost files on your PC after accidentally deleting them, this article explains how to use Windows File Recovery to recover them in a couple of steps.
Windows File Recovery (WFR) is a newer file restore utility Microsoft released around the time of Windows 10 version 2004 (approximately May 2020). The application is available to download from the Microsoft Store on Windows 10 and Windows 11.
What is Windows File Recovery?
If you can’t find a lost file on your C: drive and you’re without a backup, Windows File Recovery may come to your rescue. But, it would help if you act fast… I’ll get to that in a bit.
Windows File Recovery can restore files deleted from your local SSD drive, USB sticks, memory cards (sd card), and even external hard drives, and ZIP drives. How’s that for a blast from the past?
A command line app
Just a reminder that there is no official GUI application for Windows File Recovery. It is a command-line-only program.
Hopefully, you’re an IT Pro who is in a Windows Terminal shell often throughout your workday. It will make learning how to use Windows File Recovery and being adept at it much easier. However, if you’re brand new to command-line shells and utilities, this post will get you onboard quickly and easily.
Let’s move on to the engineering of what happens when you delete a file, especially after emptying the Recycle Bin.
What happens to deleted files on Windows?
I believe we all know that when you delete a file in the Explorer interface of Windows – the Desktop, File Explorer, etc. – the file goes to the Recycle Bin, a special hidden folder on your local volume (C: drive). The file stays there until you empty it or restore it easily in Windows.
However, what happens when you ‘permanently’ delete the file from the Recycle Bin, or empty the Recycle Bin? Windows (the filesystem) marks the logical blocks on the hard drive as free. However, the data that houses your file(s) is probably still there, but it’s ‘hidden’ from Windows.
How long will your file still be recoverable? Let’s answer that question by explaining how Windows File Recovery works.
How Windows File Recovery works
Recent releases of Windows File Recovery use two scanning methods to search for your deleted files.
- Regular: This mode uses the Master File Table (MFT) on your volume to search for files. This is best used when you recently deleted your files as there’s a better chance that your file data is still fully intact on the filesystem. This is used mainly for non-corrupted NTFS drives.
- Extensive: This is the mode that offers a thorough recovery option that’s suitable for all file systems including FAT, FAT32, ReFS, etc.
How to install Windows File Recovery
To install Windows File Recovery, you’ll need to use the Microsoft Store. Let’s go over some requirements first, then I’ll show you how to download and install it.
Minimum requirements
To download and use Windows File Recovery, you will need to be running at least Windows 10 version 2004 (May 2020) or Windows 11. You also need the Microsoft Store to download the application.
Downloading and installing Windows Windows File Recovery
Here are the steps to download and install WFR.
- Open the Microsoft Store application from your Taskbar or the Start Menu.
- Click in the Search bar at the top, type in ‘Windows File Recovery‘, and hit Enter. Alternatively, you can click on this Microsoft Store link.
- The Windows File Recovery application icon should be front and center. Click the Install button on the right.
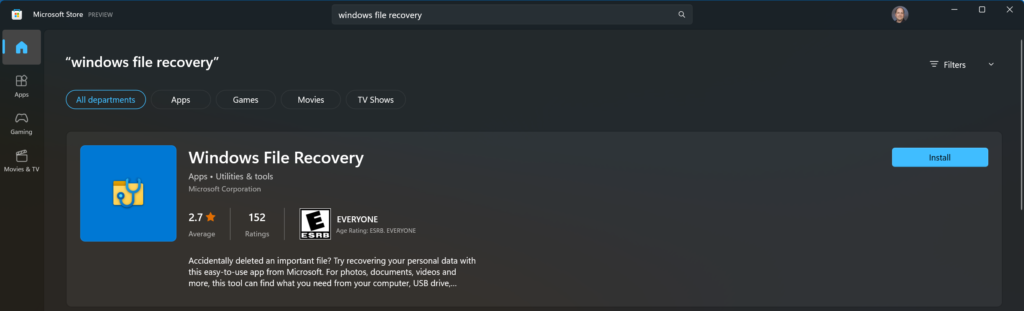
That’s it!
How to use Windows File Recovery to recover lost files
Because there is no official GUI interface from Microsoft, you’ll need to use the command line to access Windows File Recovery.
Note: You may have noticed something interesting in the Microsoft Store when searching for Windows File Recovery. If you happen to use winfr as your search term, you’ll find ‘WinfrGUI’. This is a third-party program that offers a GUI front-end to Windows File Recovery. You need to know that the program is NOT supported by Microsoft and you are on your own if you choose to use it. We recommend you stick to the official WFR program provided and supported by Microsoft.
Launching Windows File Recovery with the ‘winfr’ command
Go ahead and open your favorite shell, I’ll use Windows Terminal. Type in winfr and hit Enter.
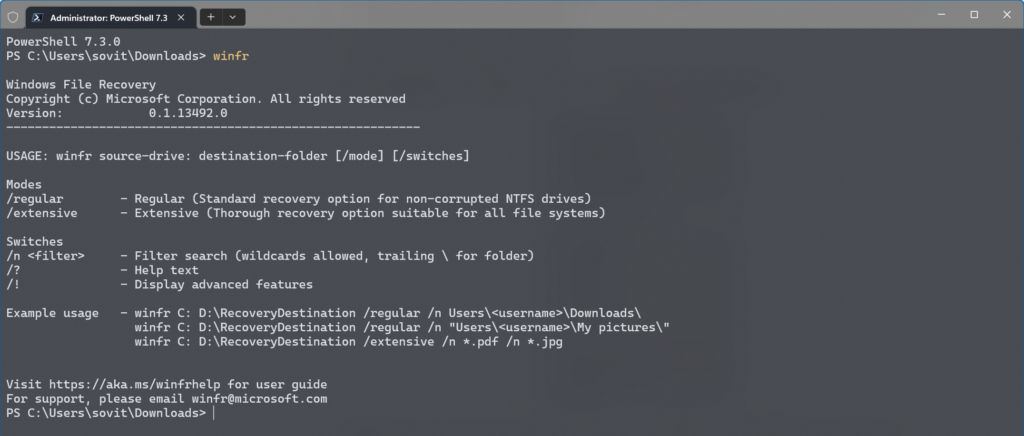
You’ll see the basic usage of the program and some examples of how to proceed. Based on a few facts, it will behoove you to use the best mode immediately. Let’s discuss this.
How to choose which Windows File Recovery mode to use?
You’ll most likely be using the /regular switch to perform your recoveries of files. If you are on an NTFS partition or volume and the volume is in good shape, you’ll be able to use this mode. This offers the quickest and most effective method to get your files back.
You’ll need to use the Extensive mode if you are using any other filesystem, like FAT32, FAT, ExFAT, or ReFS. Let’s go through a good number of examples and get you on your way to recovering those TPS reports.
You can also use this table provided by Microsoft to assist you in determining which mode is best for your situation.
| File system | Circumstances | Recommended mode |
|---|---|---|
| NTFS | Deleted recently | Regular |
| NTFS | Deleted a while ago | Extensive |
| NTFS | After formatting a disk | Extensive |
| NTFS | A corrupted disk | Extensive |
| FAT and exFAT | Any | Extensive |
How to recover a file in Regular mode
First, let’s do a search in our Downloads folder for any deleted files. Here’s one example to try.
winfr c: d: /regular /n \Users\sovit\Downloads\
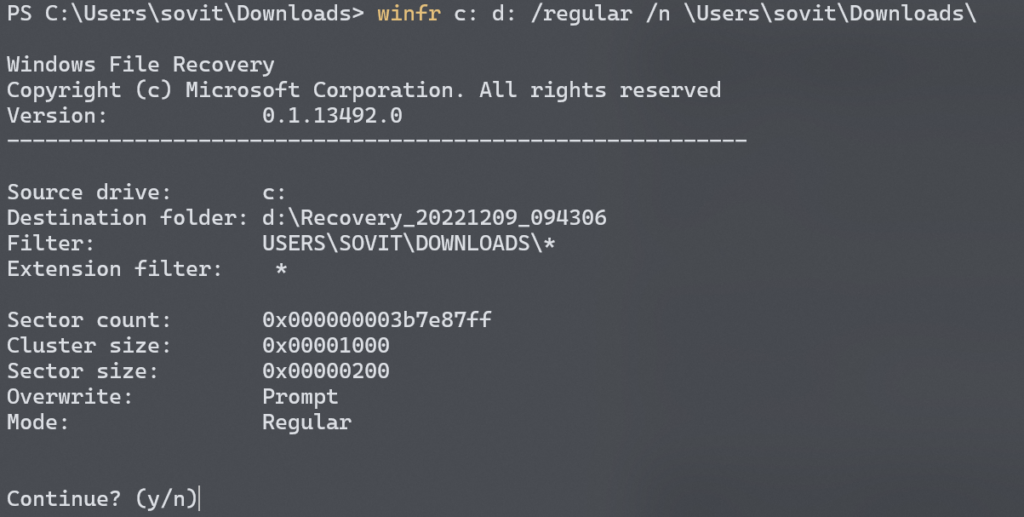
Press ‘y‘ to continue.
Here, The source drive is ‘C:’. The destination or location the files will be restored to is on the ‘D:’ drive. We are using the /regular switch. The /n is to tell the utility we are using a filter. In this case, we want to limit the search to the Downloads folder in my profile.
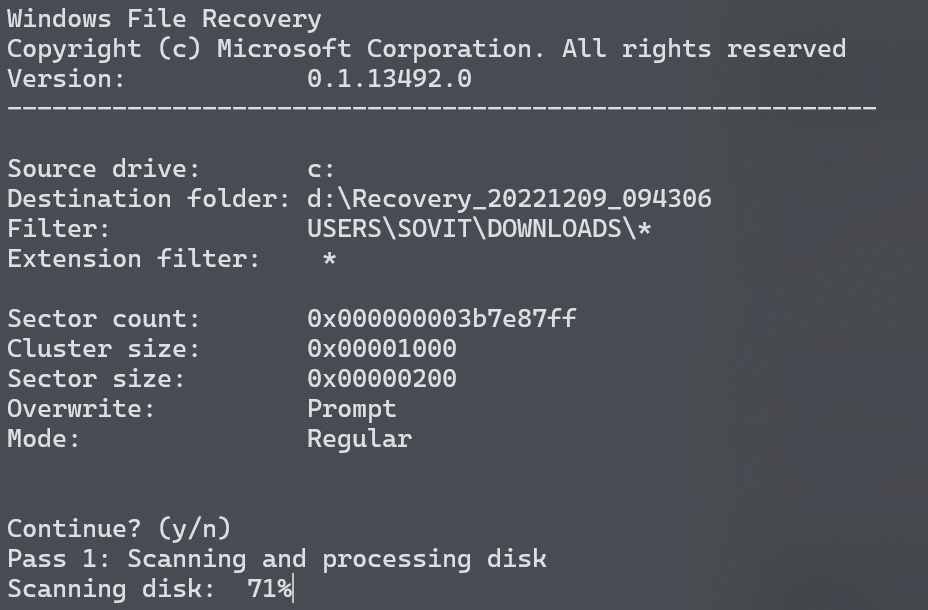
Let’s see what WFR found for us! And, be prepared – this will take some time to run.
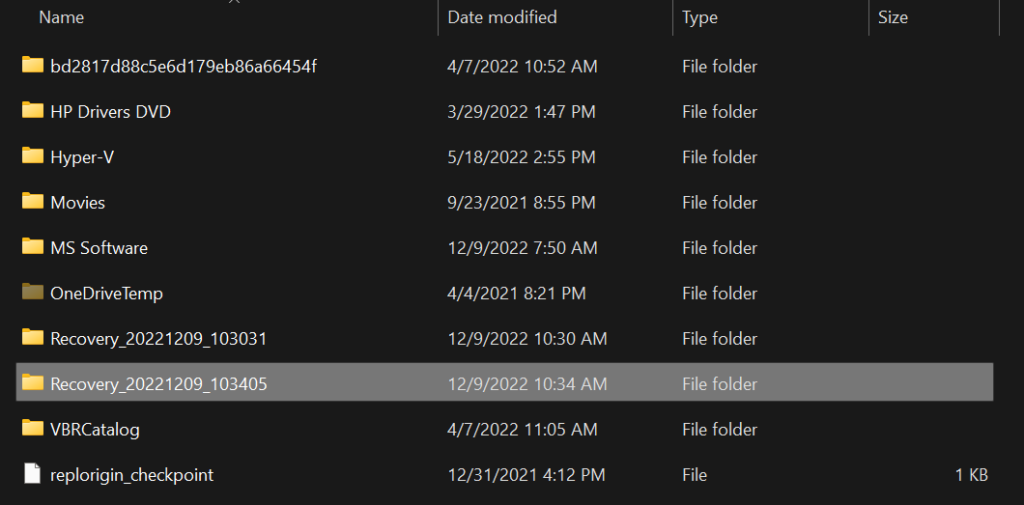
You can see the utility created a ‘Recovery’ folder on your destination volume and appends the date/time to it for easy reference. Here, you can search through the contents and copy files you wish to recover as easily as any other files!
You can also use file extension filters to search for specific file types. File extensions like .mp3, .MPEG, .pdf, .xps, .png, .jpeg, .jpg, and .docx are some examples.
Here is a quick example of a command to use for searching for PDF files exclusively:
Winfr c: e: /regular /n *.pdf
How to recover a file in Extensive mode
Let’s use the more ‘extensive’ (ahem…) mode to do a more thorough scan for specific files. Here, we will scan the entire D: drive for deleted files and save them to the C: drive.
You can use the following command to proceed:
winfr d: c: /extensive
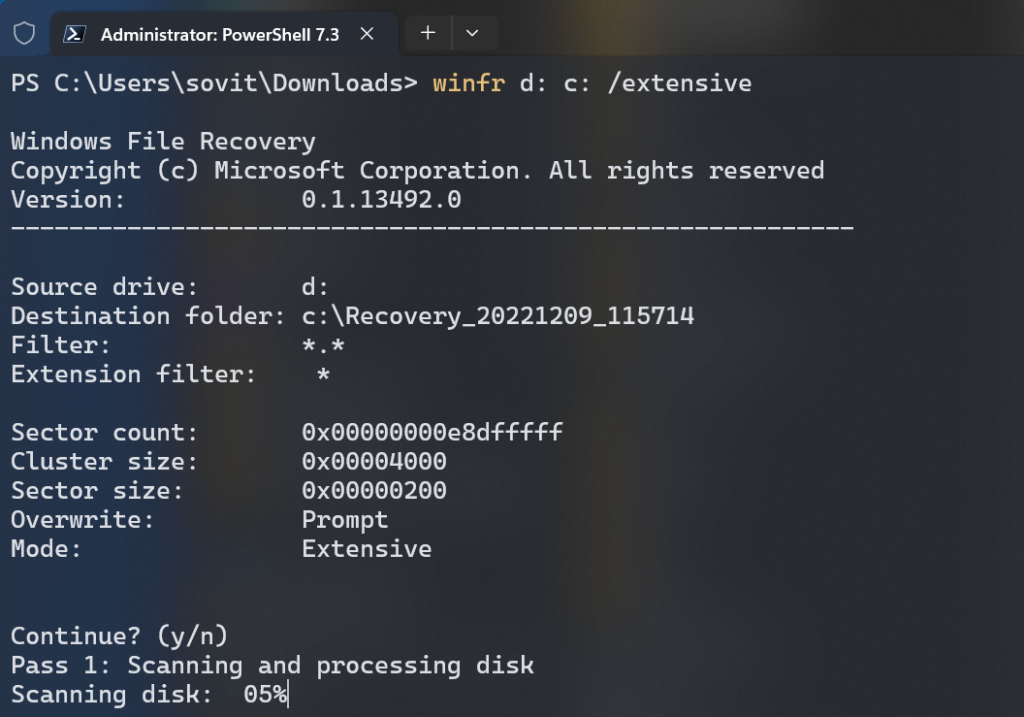
Let’s see what it found. We can open the C: drive and find the Recovery folder with all of its contents.
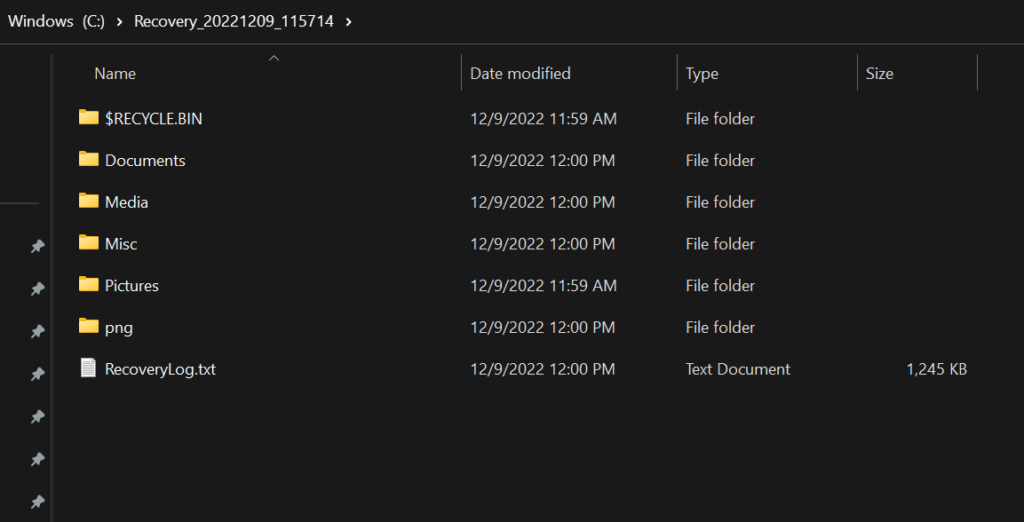
Here are all the files it was able to recover, sorted by location and file type.
This is an important point: You may not be able actually to use the restored files. The utility just pulled the data from the various parts of the volume or partition you scanned. Although it may be able to extract file contents, there is no guarantee that the files are actually usable. If you run into that situation, I recommend you engage a company that specializes in data restoration and recovery of physical media.
How to use the ‘older’ Segment and Signature modes
In earlier versions of WFR, there were 3 modes – Default, Segment, and Signature. In more recent versions, Microsoft is only listing Regular and Extensive as the modes to use in their documentation. They have moved the previous 3 (really 2 – Segment, and Signature) as ‘Advanced’ switches to use. Let’s go through those here.
The Segment mode is a recovery option for NTFS drives using file record segments. Instead of searching through the MFT (Master File Table), the various NTFS segments on the disk are searched. These can be file attributes like filename, type, size, date/time, etc.
The Signature mode searches the disk using the file signatures of different file types. Winfr has a few built-in signatures for the most popular file types. But be advised – this mode is not as effective for finding lots of small files.
Conclusion
You should now have a better understanding of what Windows File Recovery is and how it can assist you and your users in recovering deleted files. The requirement for Windows 10 version 2004 or later may be an issue. However, you always have the option of using another computer running later versions of Windows 10 or Windows 11 to examine your data.
If you have any questions about this article or wish to offer some commentary, please do so below. Thank you for reading!

Michael has been an IT Pro since 1998. He has worked predominantly in the Windows world including client and server operating systems, on-prem systems engineering (AD, DNS, etc.), and over the last ten years or so has embraced and immersed himself in...