We’re back with part two of this five-part series on Windows 8 Client Hyper-V. In the first article, I showed you how to install and configure the client Hyper-V feature in Windows 8. In this article, part two, our next step is to take the plunge and finish configure a virtual switch.
In part three, I’ll demonstrate how to populate Hyper-V with virtual machines. In part four, I’ll create a new virtual machine from an existing VHD that had a previously installed operating system. And finally, in part five, we’re going to run through the steps in managing Windows 8 Client Hyper-V with PowerShell.
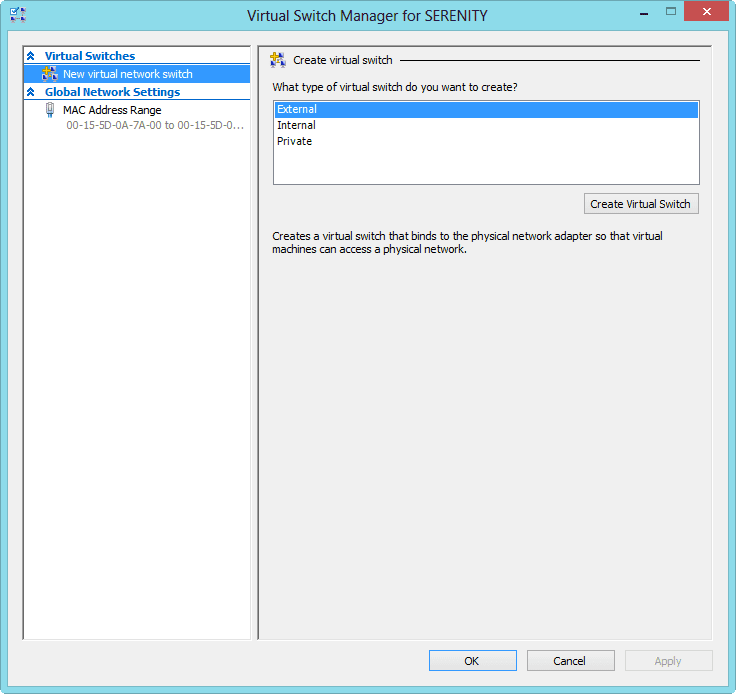
But first things first: We need to configure networking. In the Hyper-V Manager, click Virtual Switch Manager link in the Actions pane. You should see something like Figure 1.
You can create any number of switches from a variety of types, but because this is on a client operating system you may not need more than one or two. The type of switch to define depends on how you expect to use your virtual machines. If you are creating a VM that needs access to the physical network and resources then you’ll need an external switch. If you only need to communicate between the client and the VM then you can use an internal switch. The virtual machine won’t be accessible from nor can it reach the physical network. Another option is to use a private switch that is only accessible by your virtual machines. If your virtual machines will have multiple network interfaces you use these switches in any combination that you require.
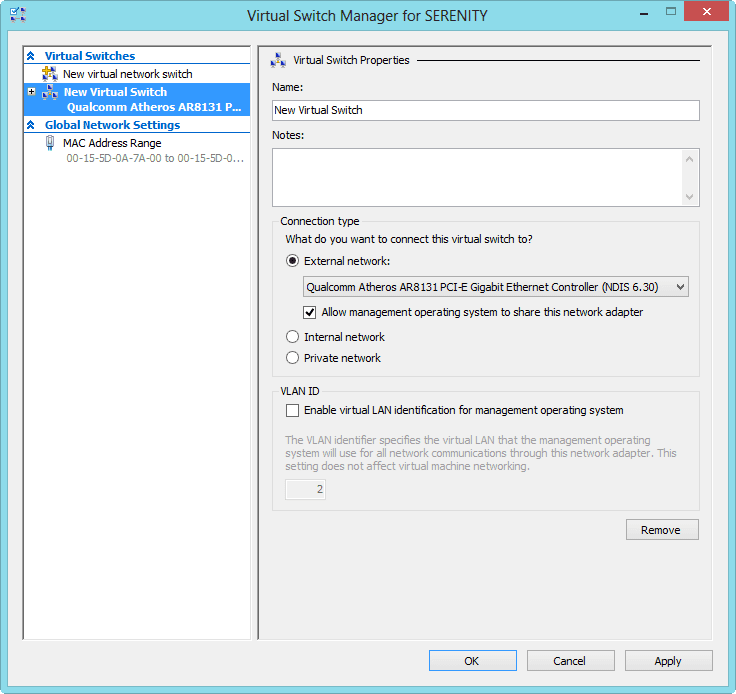
In my situation, I want my virtual machines to access the network, so I’m going to create an external switch. I highlight “External” and click Create Virtual Switch. The result is Figure 2.
I’ll go ahead and give my switch a name. You can see a drop-down list under Connection Type. This is for the different physical network adapters in my computer. Virtual network traffic will be bound to this adapter. The rest of the defaults are fine for me.
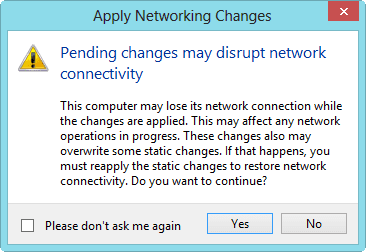
When you go to apply the settings you might get a warning, as seen below in Figure 3.
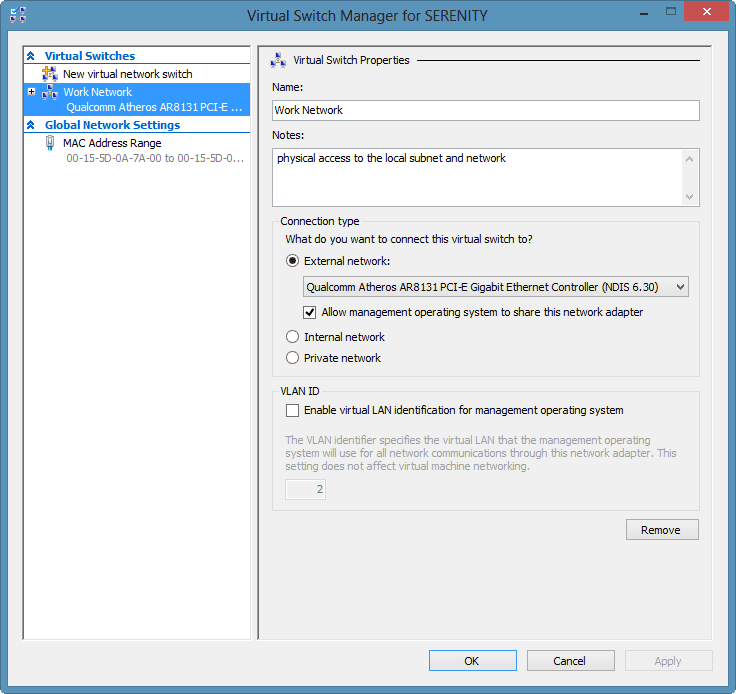
Basically there’s a chance your computer will drop off the network momentarily — don’t be doing anything important while configuring virtual networking! My new switch can be seen in Figure 4.
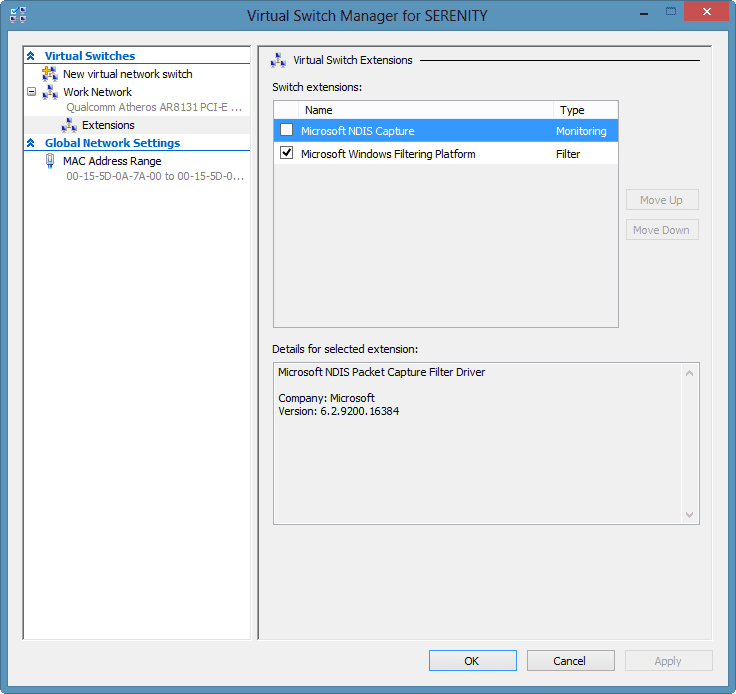
Click the little + sign next to the switch name to expand the switch, and then select Extensions. You should get Figure 5.
These extensions are used by vendors, as well as Microsoft, to offer ways to hook into network traffic. For example, I might want to be able to capture packets, so I’m going to enable the Microsoft NDIS Capture extension. Again, you might get a warning about potential network interruptions.
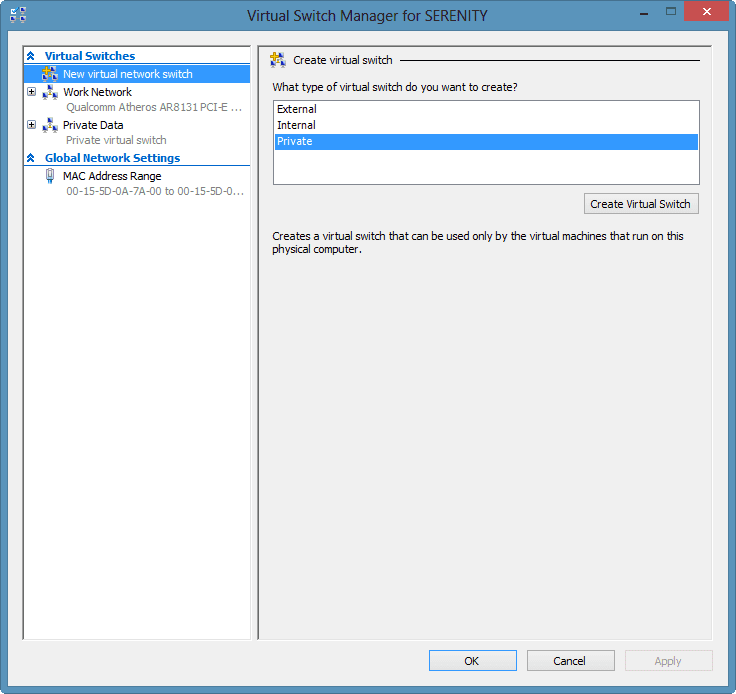
Because I’m thinking I might test some services that require a private network for things like heartbeat, I’m going to go ahead and also set up a private switch. My final results are in Figure 6.
If at some point in the future you need to delete a switch, simply select it and you should see a Remove button. For those of you who would like to dig into the technical details of these virtual switches take a look at Microsoft’s Hyper-V virtual switch overview.
That just about wraps up configuration. There is an option to configure a virtual fibre channel connection to a SAN, but this is of no use to me since I have no physical fibre channel connections. In the next installment of this series, we’ll get some virtual machines going.


