Horizon View is the virtual desktop solution from VMware. Groups of desktops or use cases can be served up from pools in View. A desktop pool in Horizon View is a group of desktops created from a common image or template. These can then be assigned to users or groups of users for access. There several ways to create desktop pools; today we’ll walk you through the steps of creating a commonly used type, the linked clone pool.
Creating Linked Clone Pools in Horizon View
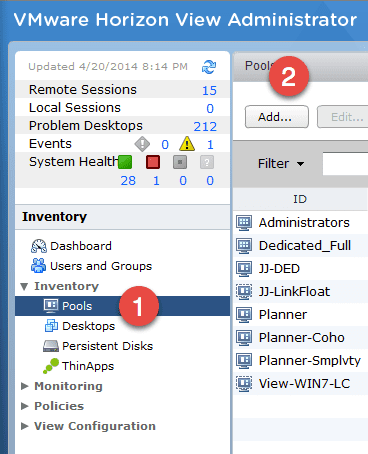
- Log into the Horizon View admin page, then expand the Inventory option on the left and click on Pools.
- Click on the Add button to start the wizard to create a new desktop pool.
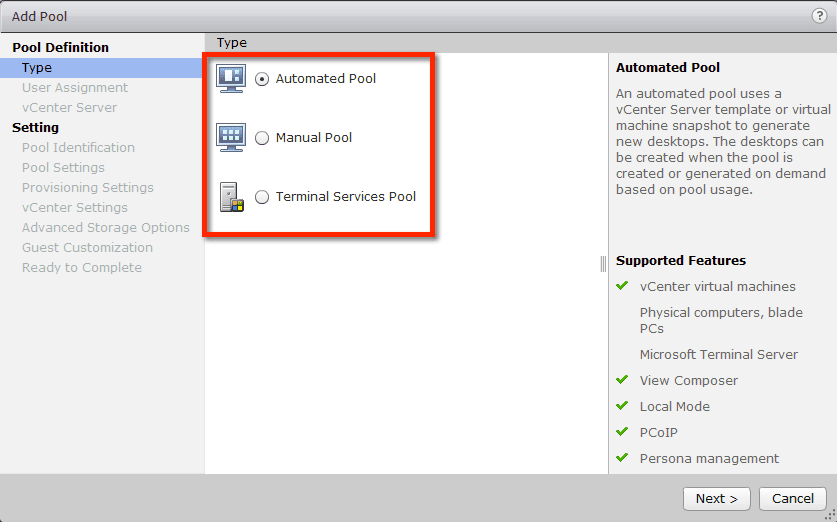
In the pool creation wizard you will be prompted to select the type of pool you want to create. The following are options:
- Automated pool – View and vCenter will automatically create new desktops when the pool rules and policies require it.
- Manual pool – This is just what it implies: You will need to manually create desktops or do via some other method and add them to the pool.
- Terminal service pool – This is used to broker TS sessions.
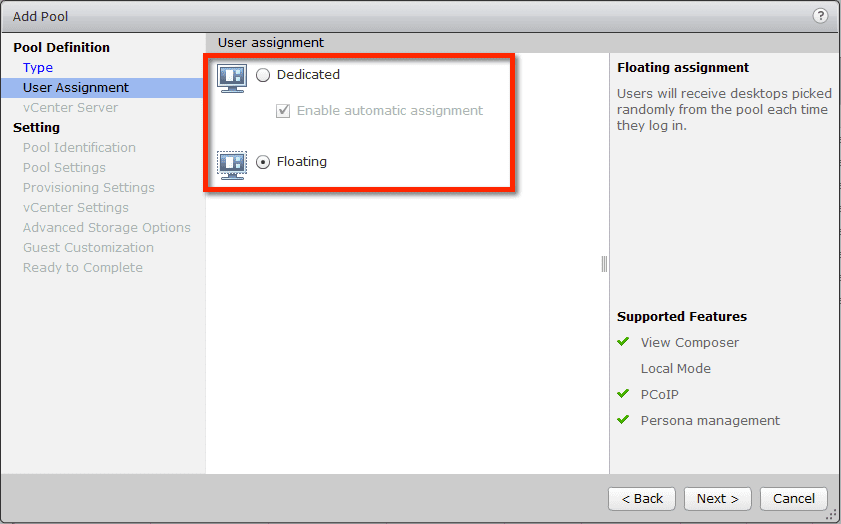
The next step is to choose how users will be assigned to their desktops. There are two options: dedicated and floating. Dedicated means that a user is assigned a desktop, and they are the only user who will get access to it. The floating option means that a pool of desktops will be used, and at the time of login Horizon View will assign the user a desktop. Each time a user logs in they could get a different desktop.
Desktop Types and Pool Configuration
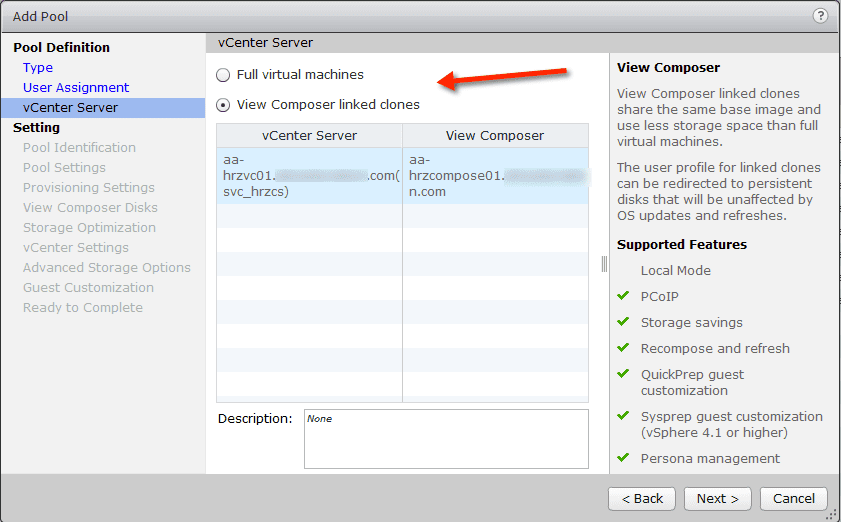
Now we’ll choose which type of desktop our pool will provide: full virtual machines or linked clones. A full virtual machine is a complete clone of a virtual machine template. A linked clone uses a parent VM, but each child VM only consumes that space that is unique for the VM.
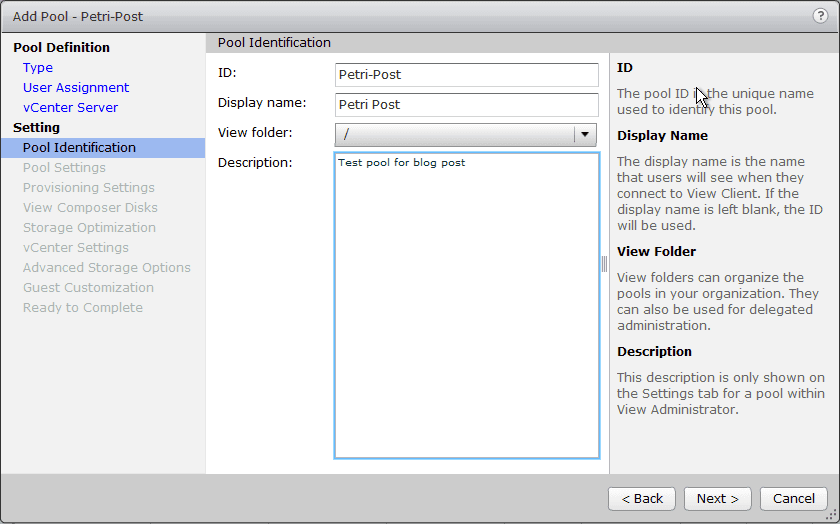
Now the pool must be named. The ID field is what View will use, while the display name is the human-friendly name that users see. The folder option is the ability to create a folder structure in view and then assign rights based on folders. This can be used to restrict access for admins on a per-folder basis.
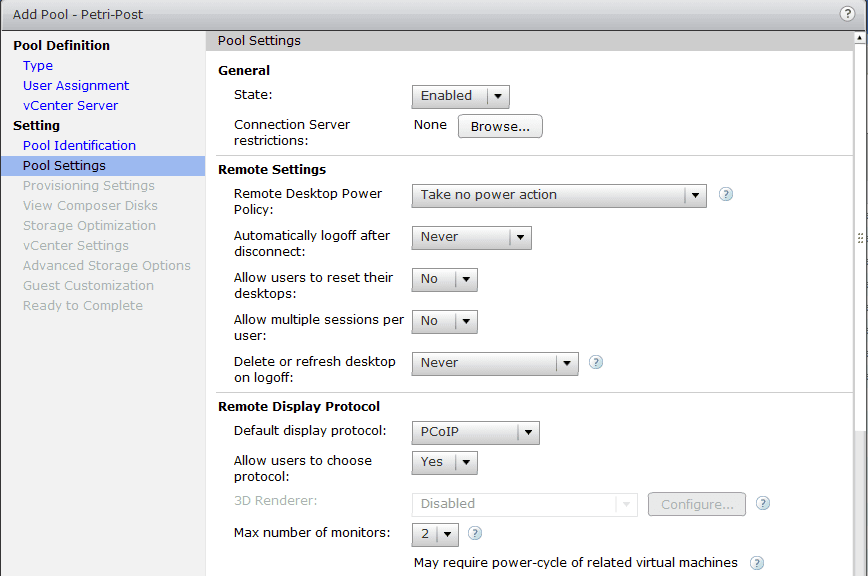
In this step you can control the majority of the policies for the pool that is being created. Policies such as power behavior, ability to reset desktops, and which protocol to use are set here.
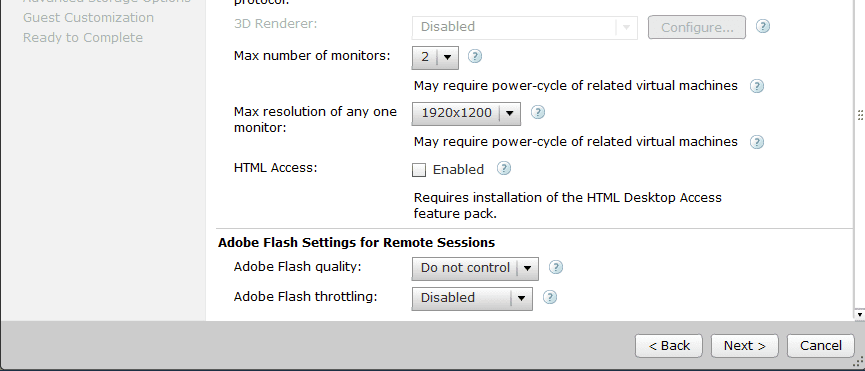
The following image is a continuation of the previous one, as it would not fit on a single screen. This section controls the number of monitors and max resolution, as well the ability to set any bandwidth control around Adobe Flash.
VM Naming Patterns
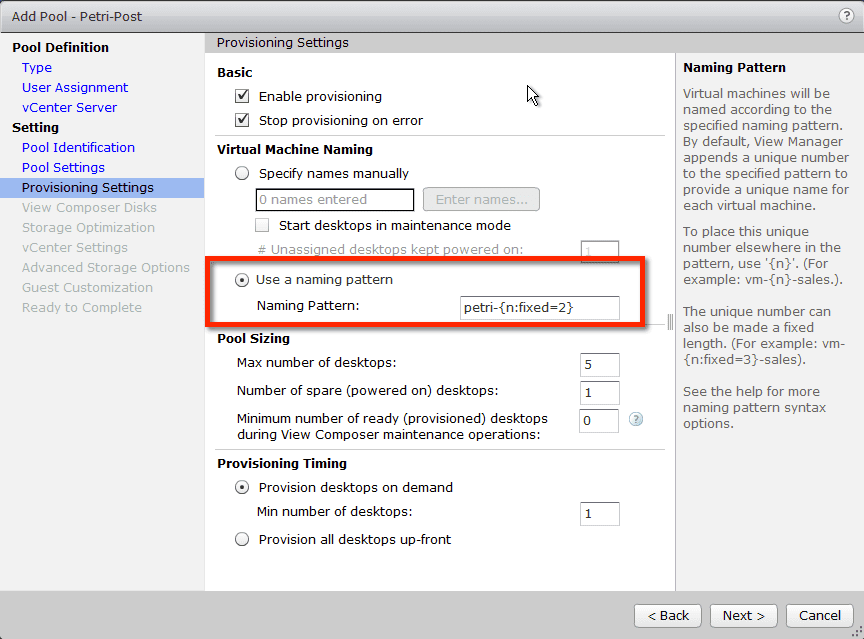
This is an important step. This is where we control how are desktops are named. In the highlighted area I have chosen to use a naming pattern that uses my prefix. The system enumerates it with a two-digit number. At this stage you can also control how many desktops are created and when they are created.
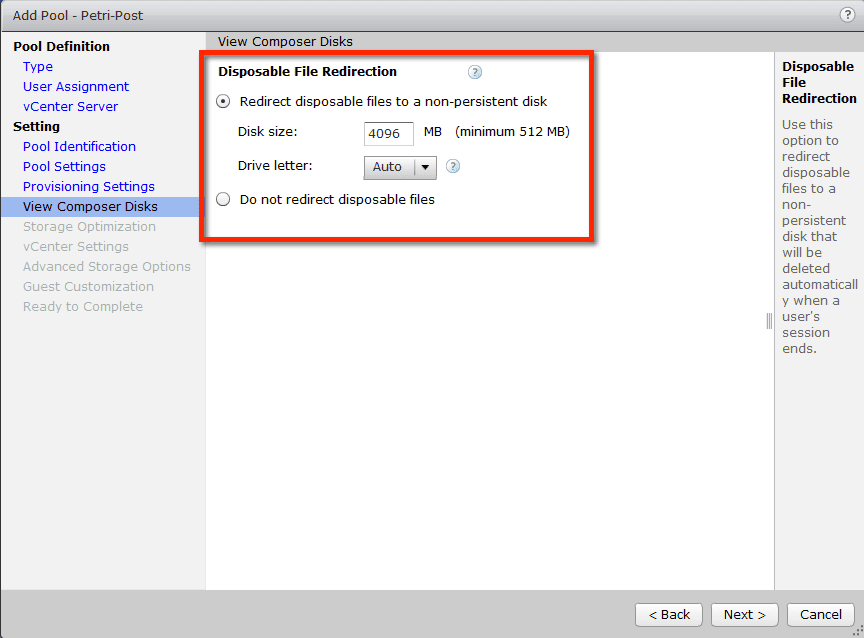
Now we see the option to redirect disposable files for Windows. If selected, the Windows page file and temp folder are redirected to a separate disk. View automatically attaches this to each VM and it is flushed on a regular basis.
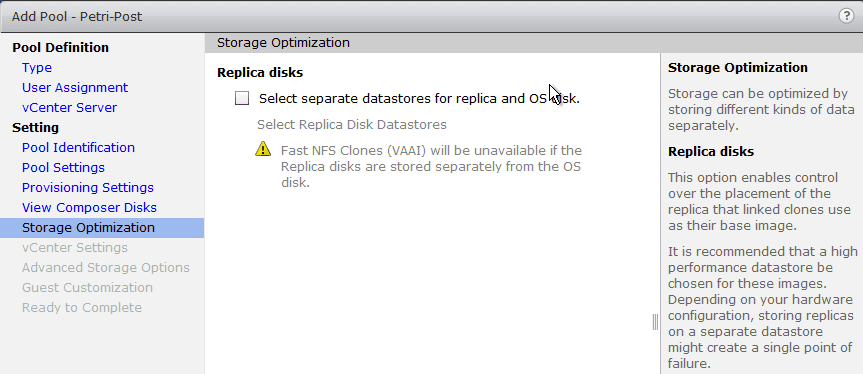
This step allows you to locate the linked clone replica on a separate dedicated datastore, which might be necessary depending on your storage solution. For example, this could be a dedicated datastore that is all flash storage.
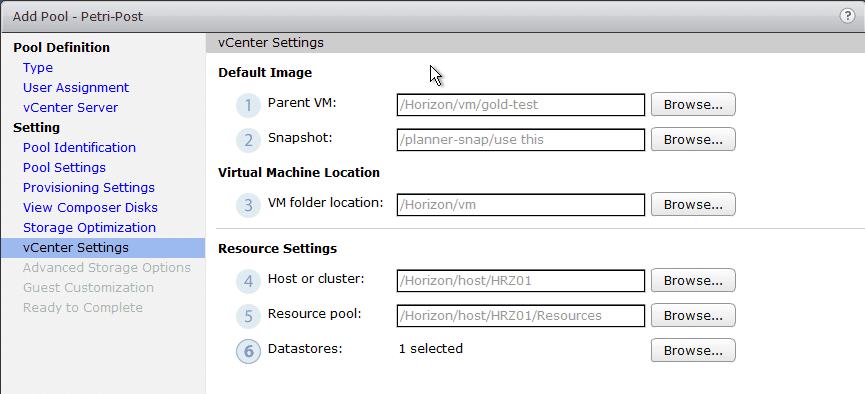
Now you must tell the pool which virtual machine it will use as the parent VM. It will browse vCenter for VMs with the view agent and a snapshot. You also need to point it to the vSphere cluster and datastore to use.
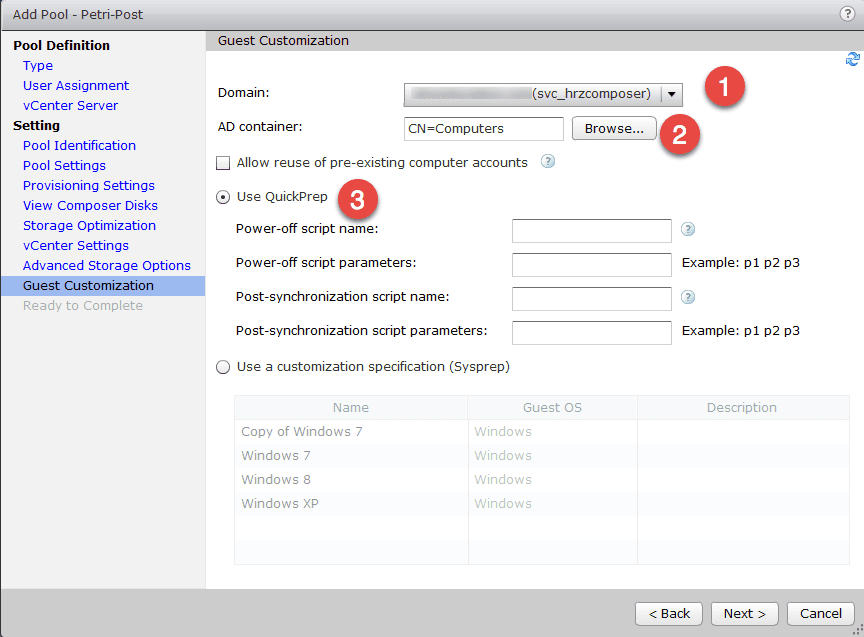
Now the pool must know which Active Direct domain to use. Use the drop-down list to select the domain. Then use the Browse button to find the OU in which you want the desktops to be placed after creation.
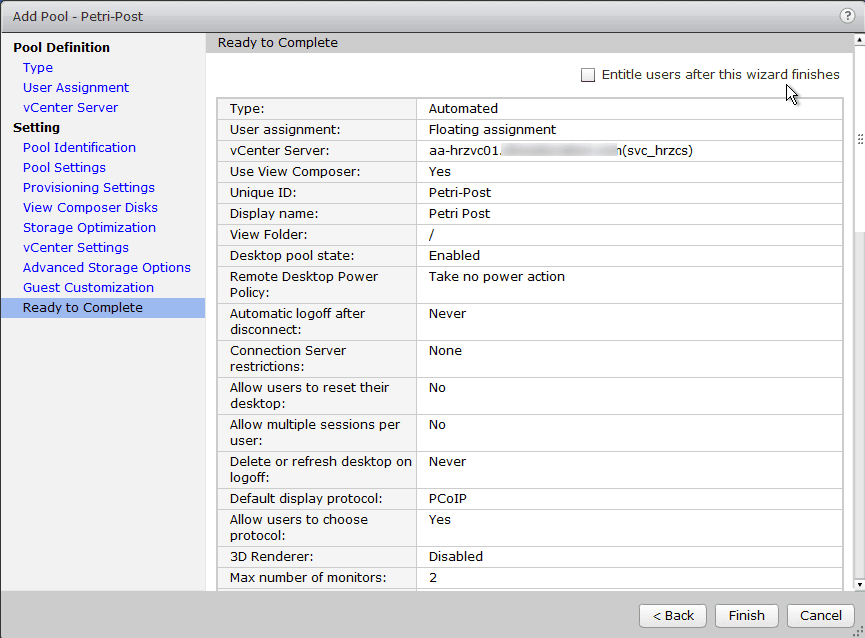
The final step presents all the options so that they can be reviewed before creating the pool.
The pool is now created! All that is left is to enable users to use the pool. The steps for creating the full clone pool are virtual the same, minus a few choices specific to linked clones.


