How to Slipstream Updates for Office 2007
I recently received a couple of emails asking me how to do a clean installation of Microsoft Office 2007 using an Office 2007 image along with SP1 at the same time. This is called “Slipstreaming”, and it is available, with some modifications, to previous versions of Office and even to entire operating systems. Needless to say, this also works with the recently published Service Pack 2 (SP2).
You can read my “Office System (2003) SP3 Slipstreaming” and “Windows Server 2003 SP Slipstreaming” articles for more information on that.
Unlike previous versions of Office, in Office 2007 Microsoft has made use of the Updates folder in the installation media. With Office 2007, and new updates that the setup program finds in the Updates folder will automatically be installed during the product’s installation process. This will enable us to get a fully updated (or almost fully updated, depending on the level of updates that you keep) version of Office 2007, and will rid us from the need to use Windows/Office Update for these downloads. As of the time of this article, there are over 300 MB of updates that need to be downloaded. This will save us the time required to download them and manually install each and every one of them. At the beginning of May 2009, Service Pack 2 was released, including most of the previously available patches and updates.
However there is one last bridge that needs to be crossed before applying these updates to our Office 2007 source. In order to be able to process and recognize these updates, they must be in the .MSP file format. Otherwise, the setup program will not recognize them and therefore it will not install them. Since the Office 2007 updates are delivered in the .EXE format, an extra step is required before being able to proceed. In this step, we manually extract each .EXE file and place it in the Updates folder.
To slipstream updates to your Office 2007 installation follow these steps:
Copy the contents of the Office 2007 installation media to a temporary folder. For our example: D:\Office2007.
You can copy these files by manually selecting them from inside the Office 2007 CD, and the copying them, later pasting them in the destination folder. Or, you could use an XCOPY script that’ll do the same.
xcopy Z:\*.* D:\Office2007\ /e /y
(Change Z with the drive letter of your CD/DVD drive)
Now, download Office 2007 Service Pack 1 (SP1) or Service Pack 2 (SP2) from this location (or from any other source such as MSDN if you’ve got access to it).
Download details: The 2007 Microsoft Office Suite Service Pack 1 (SP1):
http://www.microsoft.com/downloads/details.aspx?FamilyId=9EC51594-992C-4165-A997-25DA01F388F5&displaylang=en
Download details: The 2007 Microsoft Office Suite Service Pack 2 (SP2):
http://www.microsoft.com/downloads/details.aspx?FamilyID=b444bf18-79ea-46c6-8a81-9db49b4ab6e5&displaylang=en
Next, download all the necessary updates from Microsoft’s website. Yours may vary, but this is the list I am using for the moment. Remember that new updates will probably be released in the future, so do your own research and download the files you need. Also note that specific language packs require additional updates. I am using the Hebrew Language Pack, so some updates you see here may not be for your language.
Note: You’ll notice when installing SP2, there will be a lot less updates to download. As time goes on, there will be more and more updates till the future release of SP3 (if any will exist, it’s too early to tell now).
Place the SP alongside with any updates you’ve got in a folder on your hard disk. I’ve used D:\Office2007-Temp-Updates for this task.
Then, open a Command Prompt window (Start > Run > CMD) and run the following command for SP1:
D:\Office2007-Temp-Updates\office2007sp1-kb936982-fullfile-en-us.exe /extract:”D:\Office2007\Updates”
For SP2, run this command:
D:\Office2007-Temp-Updates\office2007sp2-kb953195-fullfile-en-us.exe /extract:”D:\Office2007\Updates”
Note: Replace D:\Office2007-Temp-Updates and D:\Office2007 with the folder names and drive location suitable for your setup.
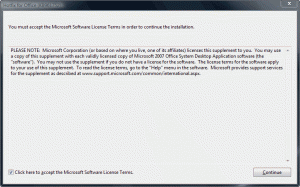
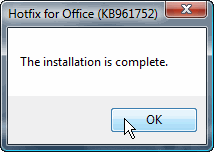
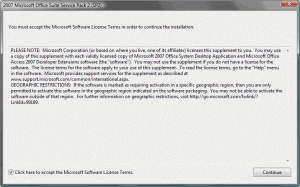
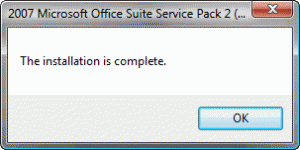
After agreeing to the Microsoft Software License Terms, the SP and/or the update will be extracted to D:\Office2007\Updates.
For SP2, screenshot will look like this:
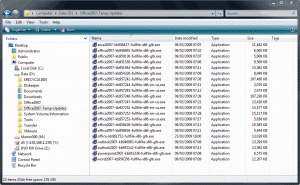
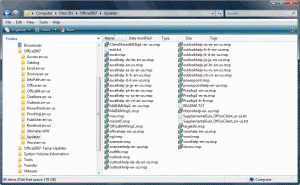
Repeat the same command over and over till you run it on all the updates. For SP1, this is the way my folder looks like:
Automatically extracting the updates and placing them into the Updates folder:
If you want, you can manually download all the required Service Pack(s) and Updates, place them all in one folder, and then run this command to prevent the need to manually go through each file:
for %g in (D:\Office2007-Temp-Updates\*.exe) do %g /extract:D:\Office2007\Updates /quiet
If you’re using a batch file, change “%g” to “%%g”.
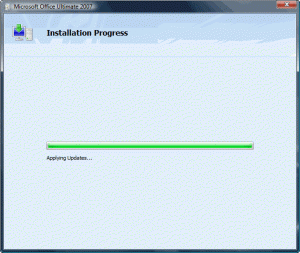
Going back to our example, anytime you start the Office 2007 setup, it’ll automatically pick up and installed any Service Pack or update it finds in the Updates folder during the setup.
Note: This folder can now be burned back to an optical media (DVD), or you can create an .ISO file from it for later use.
Remember, when new updates become available, all you need to do is to add them to the Updates folder.
Note about future Service Packs: As noted above, SP2 has made all (or most of) the Pre-SP2 updates obsolete. I would safely assume that SP3 (if any will exist) will make all Pre-SP3 updates obsolete, thus, when SP3 is available (and we don’t know if such a service pack will in fact exist) then you’ll need to start from scratch and remove all the Pre-SP3 updates from the Updates folder.
Note regarding Visio: The same logic applies to Microsoft Visio 2007, which has its own Service Pack and updates.


