Manually Seed an Exchange 2010 DAG Database
If you’ve deployed an Exchange 2010 Database Availability Group (DAG) or are thinking about it, you already know that this is a high-availability feature that allows you to have multiple copies of each database on up to 16 mailbox servers.
Without going into a whole discussion on how a DAG functions, essentially you have a group of mailbox servers that contain active/passive databases. The passive databases replicate data between the active databases; this provides high availability in the event a database should go down. The process to create a passive copy database is pretty straightforward and can be achieved by either using the Exchange Management Console (EMC) or the Exchange Management Shell (EMS). You kick off the wizard, after some time it completes and your DAG databases are replicating. I recommend reading J. Peter Bruzzese’s article on how to configure a Database Availability Group for more detailed instructions.
Why Manually Seed a Database?
However, there may be a time when the seeding doesn’t go correctly. During an upgrade to Exchange 2010, I ran into the issue of not being able to create a database copy. When trying to create a copy of a 200GB database that had been running for several weeks using the EMC database copy wizard, the wizard failed and I was unable to get a copy up and running. When I attempted to run the update database wizard, the database would go through the update process, but it wouldn’t successfully update and then it threw itself into a failed suspended state. What happens here is that there is a huge difference between the database logs, and the copy queue lengths are so great that the database cannot keep up.
One may think it would be easier not to bother with trying to seed an old database when you can create a brand new database and create the passive copy right away, preventing any differences in logs. If we were to do that, then after databases are replicated, you would migrate mailboxes to that new database.
That scenario is definitely an option if you have the disk space for the additional databases, but another alternative would be to do a manual seed of the database. In a future article I will discuss a scenario in which I used a form of this option to seed over 20Tb of data to a co-location facility to create a stretched DAG in less than four days.
Important: Prior to attempting any manual seeding, ensure that you have a good backup of your original database. This is vital because you will be working within the directories that hold the actual database files and logs that run your database. Also keep in mind that this is a “use at your own risk” method that provides an alternative option for an unsuccessful database seeding. This method will require a database dismount that causes some downtime, so warn any users that email services will be down before proceeding.
How to Perform a Manual Seed on an Exchange 2010 DAG Database
If a backup has not been completed yet do so now before proceeding.
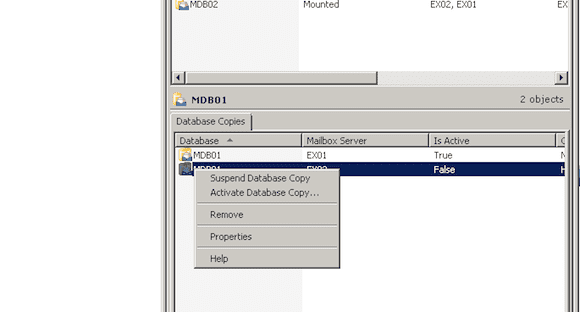
You will need to suspend the additional database copy that is not seeding; it could either be in the failed or disconnect state. You can approach the next part in two ways.
- Using the EMS, type the following cmdlet: Suspend-MailboxDatabaseCopy -Identity database\server
OR
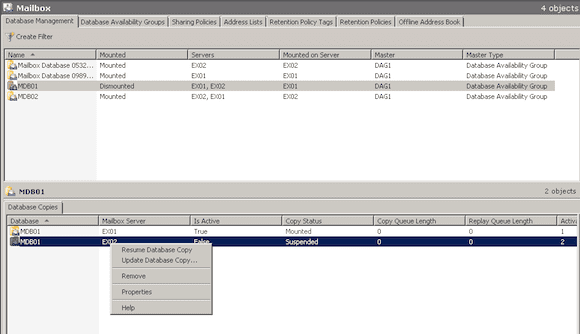
- Using the EMC: Locate the database in the mailbox server, then right-click on the database and select Suspend.
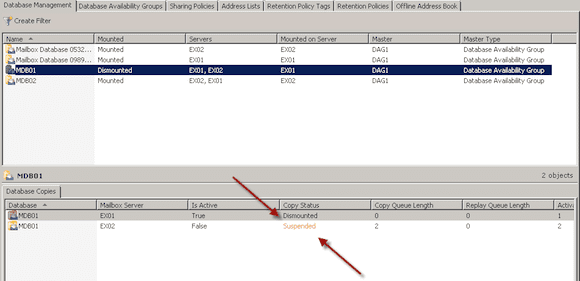
After the database has been successfully suspended, delete the database copy’s entire file and all logs.
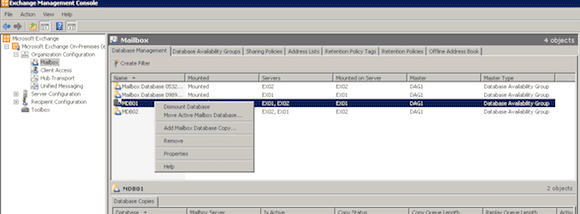
Next you will need dismount the original database. Again, we can do this in two ways.
- Using the EMS, type the following cmdlet: Dismount-Database “yourdatabase”
OR
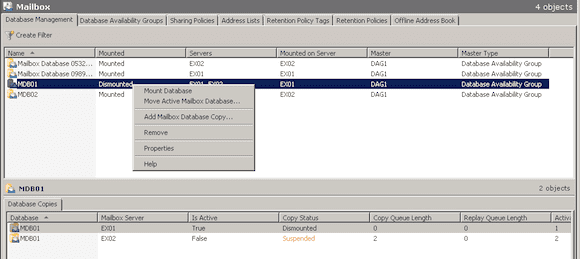
- Using the EMC, locate the database in the mailbox server. Next, right-click on the database and select Dismount. Click OK at the warning.
Do not proceed until you have confirmed the database has completely dismounted. Moving forward prior to the dismount can risk corrupting your database.
Once your database has completely dismounted, you will need to copy all logs for the database and move them to anywhere that has space available. This can be a location on the same server or even a network share. Once the logs are copied to another location, you will delete all the logs for the dismounted database. I recommend copying the logs prior to deleting in the event something goes wrong.
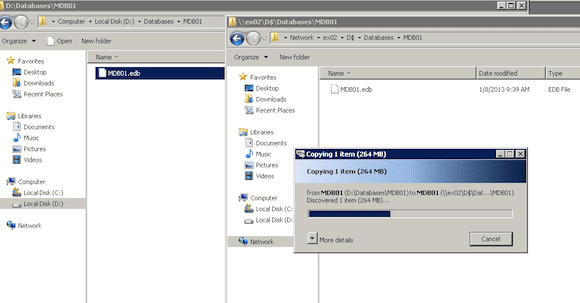
Next, copy the actual database file ending with databasexxxxx.edb from the server that holds the dismounted database onto the server that will hold the additional database copy. The file directories for both databases should be the same on both servers.
Locate the database file, right-click on it, and select Copy. Navigate to the same directory on the database copy server and select Paste. The length of copy time is dependent upon how large the file is and how fast the connection is between the two servers.
After the copy successfully completes, you can remount the database as soon as you’re ready to resume services again. Once again, use one of two ways.
- Using the EMS, type: Mount-Database “yourdatabase”
OR
- Using the EMC, locate the database in the mailbox server, then right-click on the database and select Mount.
Once the database has successfully mounted, you will need to resume the database copy as soon as possible so that the logs are not too far apart, preventing any major differences with the logs.
- Using the EMS, type: Resume-MailboxDatabaseCopy –identity “database\server”
OR
Using the EMC, locate the database in the mailbox server. Then right-click on the database and select Resume.
Manually seeding a database isn’t a common practice when deploying an Exchange 2010 DAG, but there may be times that one would need to do it. The preferred method of creating a passive copy is by using the EMC or EMS to create the copy and letting Exchange handle the seeding on its own. This is by far the “quick & dirty” method of getting your DAG replicating, so take great caution if you choose to go down this route.


