Using Microsoft PST Capture Tool for Exchange 2010
Microsoft Exchange PST Capture is a tool that enables you to search for PST files on any system in your network and import them directly into any cloud or on-premises Exchange 2010 mailboxes. For those who are utilizing the native mailbox archive feature in Exchange 2010 this tool is great for importing a user’s PST files into his or her archive mailbox or even regular mailbox.
Today I’ll walk you through the various steps involved with setting up Microsoft PST Capture, from installing the PST Capture Console to searching for PST files on systems with the PST Capture Agent.
To get started using this new tool, you’ll first want to understand the basic architecture of it. The PST Capture tool consists of three components that run from a server that connects to an agent on a client system somewhere on your network. The PST Capture Central Service runs on a server where its main function is to maintain the listing of all the PST files that have been searched by the tool. For best performance it is recommended to use a dedicated server for PST Capture Central Service. The PST Capture Console is the GUI interface that is used to search and import the PST files. The console can be installed on the same server that is running the PST Capture Central Service. The final component is the PST Capture Agent which is the “searching” component. The agent performs the search for PST files on the systems that it is installed on and reports back the list of PST files to the PST Central Service host.
In order to successfully search and import PST files you will need to ensure that the account used to run the PST Capture Service has the app ropriate permissions to access the exchange mailboxes. Review all the details on the required permissions and the Microsoft PST Capture tool requirements.
Installing PST Capture Console
To begin searching and importing PST files you first need to download and install the PST Exchange Capture 2.0 Console onto a server in your network.
- Download the PSTCapture.msi. onto the server and run the msi file to begin the install wizard.
- Select Next on the Welcome screen.
- Review and accept the terms. Then click Next.
- You can choose the location of the installation path, then select Next.
- Specify the user name and password for the service account that the Central Service will use. Since this service account is used to import the PST files into the user’s mailboxes ensure that it has the correct permissions. Select Next.
- Review the installation and select Install.
- When installation completes, select Finish.
Installing PST Capture Agent on client systems
To search client systems on your network you will need to download and install the PST Capture Agent. If you are running System Center Configuration Manager (SCCM) or any type of package management solution, you can package the msi and send to client systems to be installed automatically. To install manually use the following steps:
- Download and run the PSTCaptureAgent.msi.
- On the welcome page, select Next.
- Review and accept the terms, then select Next.
- You can choose the location of the installation path, then select Next.
- Next, specify type the name of the host computer where the PST Capture Console is installed.
- By default, the PST Central Service uses the port 6674. If you did not change this during the PST Capture Console install then accept the default port.
- Review the installation and select Install.
- When installation completes, select Finish.
Searching for PST Files on Systems with the PST Capture Agent
Once the console and agents are installed on the respect systems you are ready to begin searching for PST files. To begin a search on a system that you have installed the PST Capture agent use the following procedures:
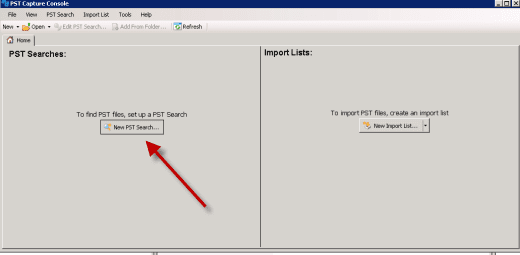
Open the PST Capture Console, and click New PST Search.
Locate the name the computer(s) on which you want to search for PST files. You can only search for PST files on computers that have the PST Capture agent installed.
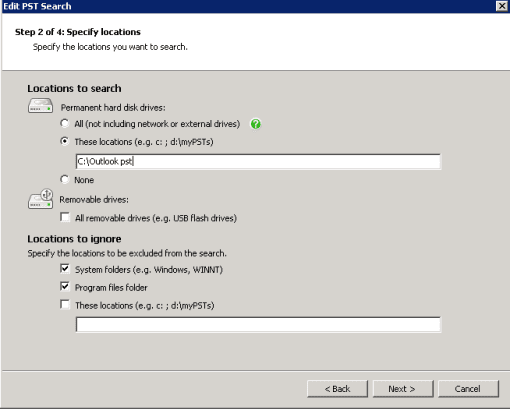
Specify the file locations for the search and select Next.
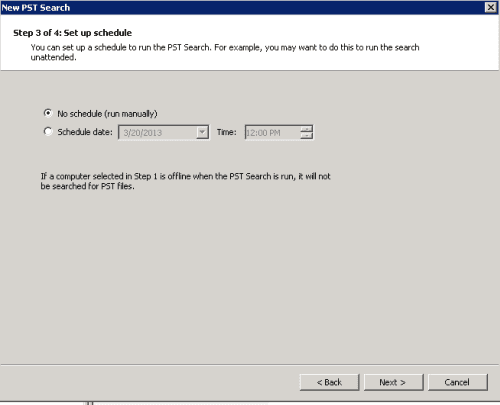
You can either set up schedule or select to search manually. Choose one and click Next.
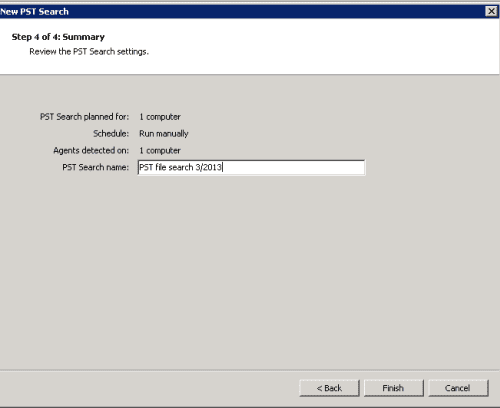
Review and name your PST search, and then click Finish.
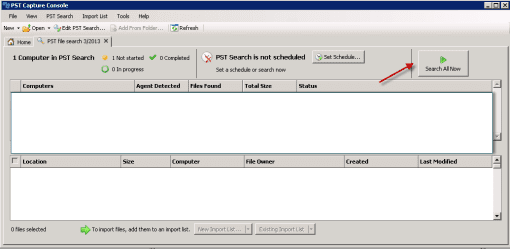
If you selected to do a manual search, select the Search All Now, otherwise the search will run according to schedule to which you’ve set it.
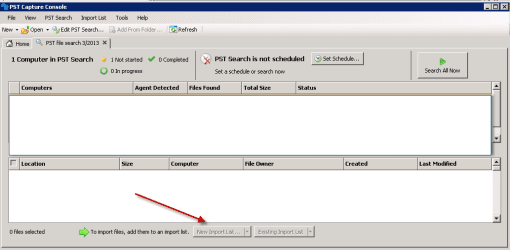
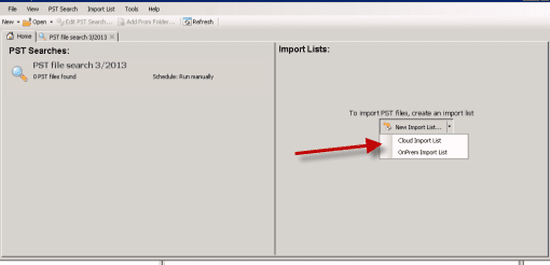
Once the search is complete, select the PST file that want to import, and select New Import List, select either On-Prem Import or Cloud Import (based on your type of Exchange setup).
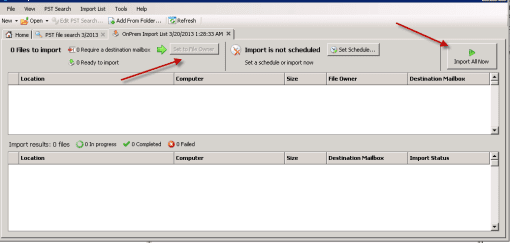
Click Set to File Owner to assign the mailbox associated with the user’s AD account that’s listed as the file owner as the mailbox.
You can either schedule or run a manual import of the PST file. Click Import All Now to run a manual import.
When the import is completed, the contents of the PST files will appear in user mailboxes.
By default PST files are imported into the top-level folder of the user’s mailbox. If you want to configure how files are imported into the mailboxes see Configure PST Capture Settings.
Importing PST Files without the PST Capture Agent
You can import PST files without using the PST Capture Agent if you know the exact the location of the PST file and to whom the PST files belongs. This is a great option to use when PST files are stored on a SAN or file share.
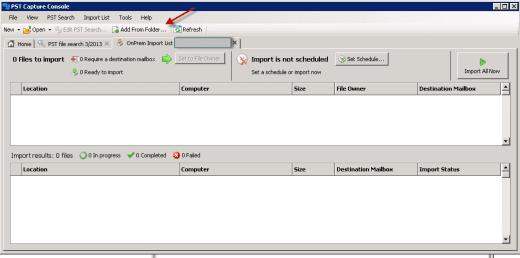
Open the PST Capture Console, click New Import List, choose either On-Prem Import or Cloud Import list (based on your type of Exchange setup).
Click Add from Folder. Locate and select the PST file you want to import.
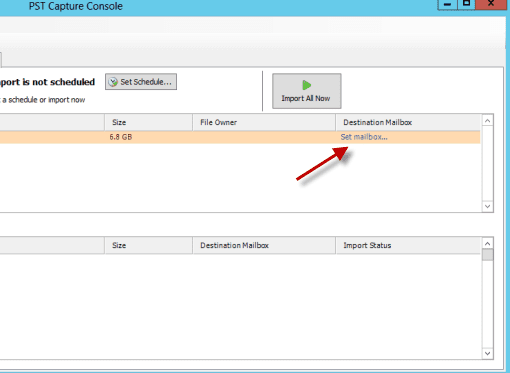
Click Set mailbox under the Destination Mailbox column. Search for the owner of the PST file by locating his or her mailbox.
You can either schedule or run a manual import of the PST file. Click Import All Now to run a manual import.
The Microsoft Exchange PST Capture tool can be a life saver for those needing to locate PST files out in the field for any type of e-discovery search while on a budget, or for those that just need to import PST files into a mailbox. The tool does the job of importing PST files into mailboxes pretty well. It’s simple and fairy easy to set up and get running. The length of time for the imports is all dependent upon the size of the PST file and how many items there are to be imported. There are different settings and options available so I encourage you to give it a try if you’re in search of a PST search and import tool.


