


Microsoft Defender for Endpoint – Important Service and Endpoint Settings You Should Configure Right Now
Microsoft Defender for Endpoint (MDE) is much more than a traditional antivirus service. Now being offered in Plan 1 and Plan 2, the full offering you get with Plan 2 not only provides antivirus capabilities but also extended detection and response, attack surface reduction rules to harden the OS against common threat mechanisms, and threat and vulnerability management (TVM) to monitor first and third-party patch and exploit status. That’s not even all of it.
With all these capabilities, there’s a lot to navigate. It’s not made simpler by the choice of locations you have to configure it all: the Microsoft 365 Defender portal, Intune, ConfigMgr, and Group Policy. In this article, the third in a series on MDE, I’ll talk you through some of the key and most important configuration settings you need to know about, specifically for Windows 10 and Windows 11, and general advice on getting up and running.
With potentially thousands of things to configure, we can’t cover everything, but this will steer you towards the most significant options you should know about.
Microsoft Defender for Endpoint – Important Settings to Configure
Here is a list of the most important service and endpoint settings you should configure in Microsoft Defender for Endpoint:
- Live response
- Allow or block file
- Custom network indicators
- Web content filtering
- EDR in block mode
- Tamper protection
- Role-based access control (RBAC)
- Block at first sight (BAFS)
- Real-time protection
- Firewall
- Attack surface reduction rules (ASR)
Service settings: Microsoft 365 Defender portal
The Microsoft 365 Defender for Endpoint portal at security.microsoft.com is where you’ll do the service side configuration for important settings. This refers to settings that either:
- Govern how security teams perform tasks in the portal, such as administration and investigation
- Apply to (supported) clients, such as blocked websites or tamper protection
The key things to know
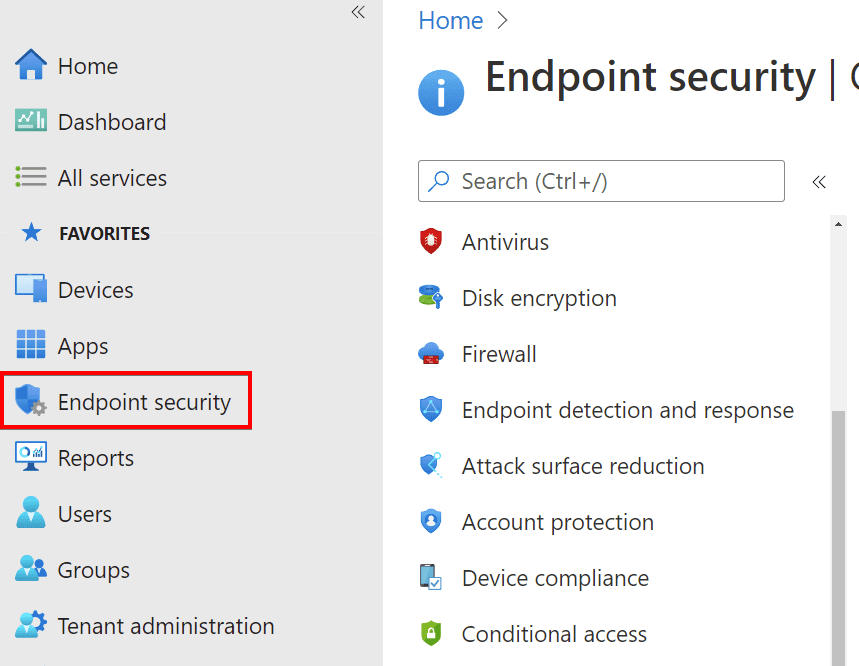
Firstly, head to the Microsoft 365 Defender for Endpoint portal then settings > endpoints. Within advanced features, you’ll want to make sure “no brainer” features are enabled such as live response, allow or block file, custom network indicators, all settings to do with integration with other platforms like Intune + Defender for Identity, and web content filtering.
There are also some advanced features that you should really think about how they fit into your architecture before proceeding. For example, EDR in block mode is one I almost always recommend, but it’s a tenant wide setting. You cannot, for example, only scope it to some devices. Therefore, if you are onboarding critical infrastructure, consider reviewing first if the EDR identifies false positives. But keep it at the top of your to-do list.
Next up is tamper protection, which aims to block malware (or users) disabling protection. This feature is also a tenant wide setting. It’s actually the only way you can configure tamper protection for Windows Server (as there’s no GPO option for it), but it also restricts the ability to make changes to Microsoft Defender Antivirus with Group Policy, so consider ensuring you’re happy with the configuration prior to enforcing this.
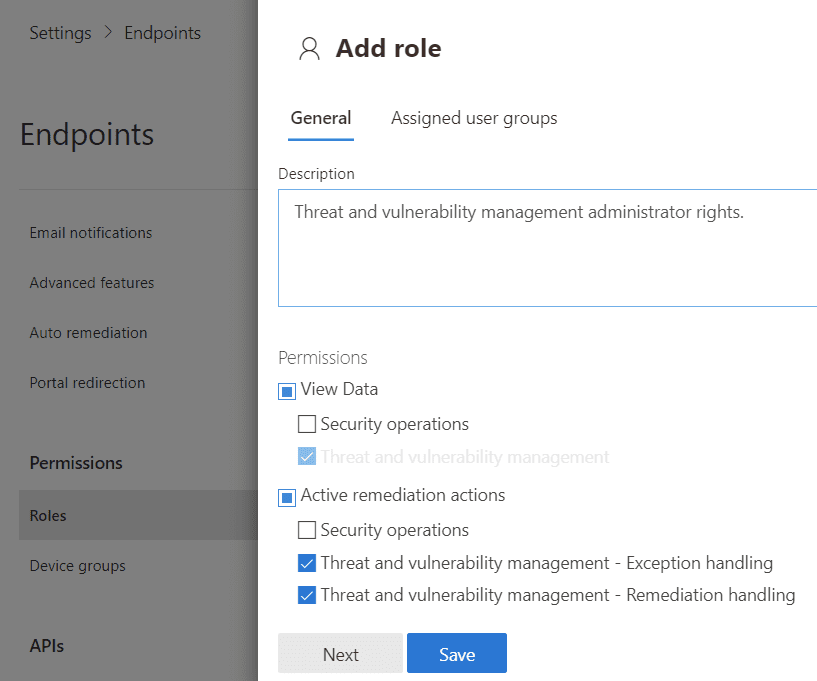
If you have an IT/security team at any considerable scale, next consider role-based access control (RBAC) settings. RBAC, available across Microsoft’s cloud offerings, is best practice at minimizing an administrator’s privileges to only what they need to get their job done.
For example, someone who only needs to view data can be given a role that restricts performing actions; or someone who only manages vulnerability posture can have the permission to initiate a live response revoked. Another common scenario is Tier 1, 2, and 3 staff divisions. To manage this, head to endpoint settings again, then permissions > roles. You create a role that has permissions, then assign that role to Azure AD user groups.
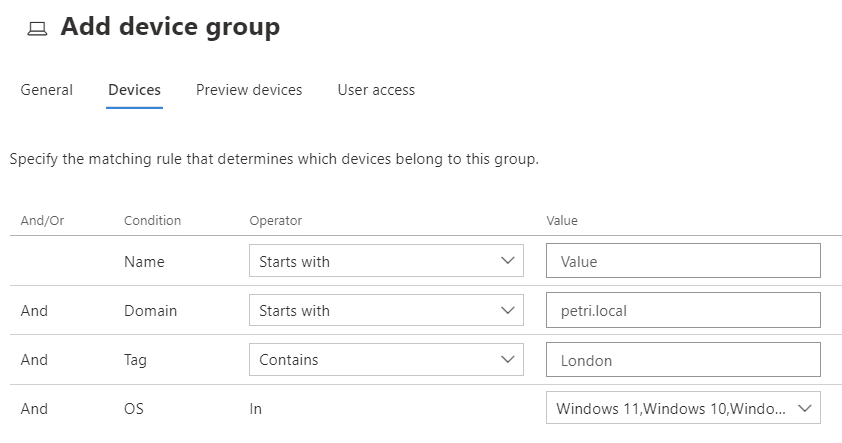
Your roles can then be coupled with device groups, also configured in settings. Device groups kind of do what they say on the tin, and your onboarded devices can only belong to one of them. Why bother? Device groups control some important things. Firstly, the EDR automation level: you may want to choose to fully automate threat remediation, not have it all, or require some level of approval. For example, auto-remediate clients but not servers.
Secondly, the groups also control web content filtering policy, which we’ll address soon. Lastly, we’re back to RBAC. You can limit access to device groups by Azure Active Directory (AD) user group (that’s been assigned a role). This is very important in multi-IT-team environments with responsibility boundaries.
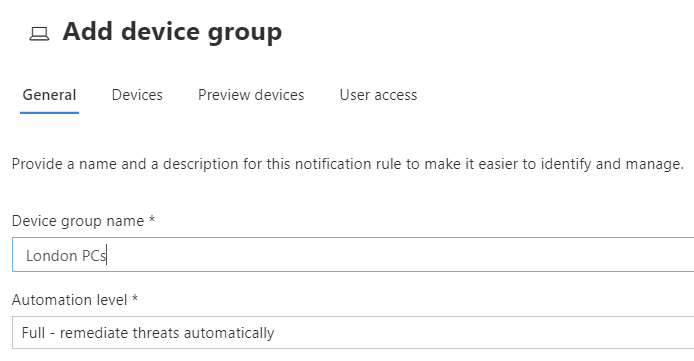
Membership is best controlled by queries. You can dynamically join devices to a group based on name, on-premises domain, operating system, or a tag (a device can have multiple tags, assigned manually by portal administrators on the device page or using Intune/Group Policy/registry).
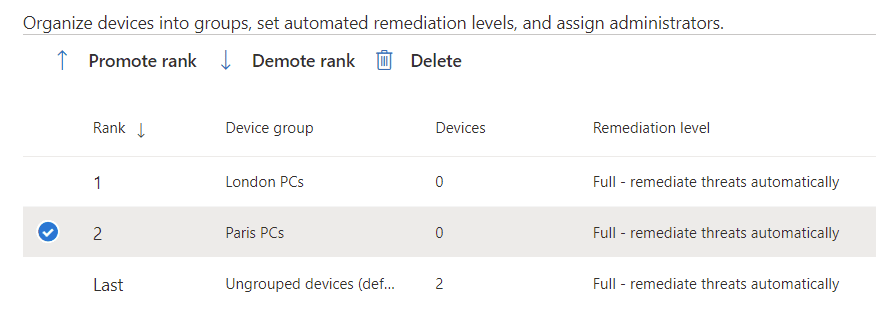
A device that does not get a tag ends up in a group called ungrouped, which has a full remediation level by default. If a device matches multiple queries, it lands in the one with the best rank, with 1 being the best, which you order in the list of device groups.
The last areas we’ll look at now are still in the endpoint settings page: web content filtering and indicators. Web content filtering blocks web access by category to device groups, which you can then view reports and telemetry on.
These are typically used to block content inappropriate for work or that otherwise may be undesirable on your corporate devices, such as social networking or legally dubious.
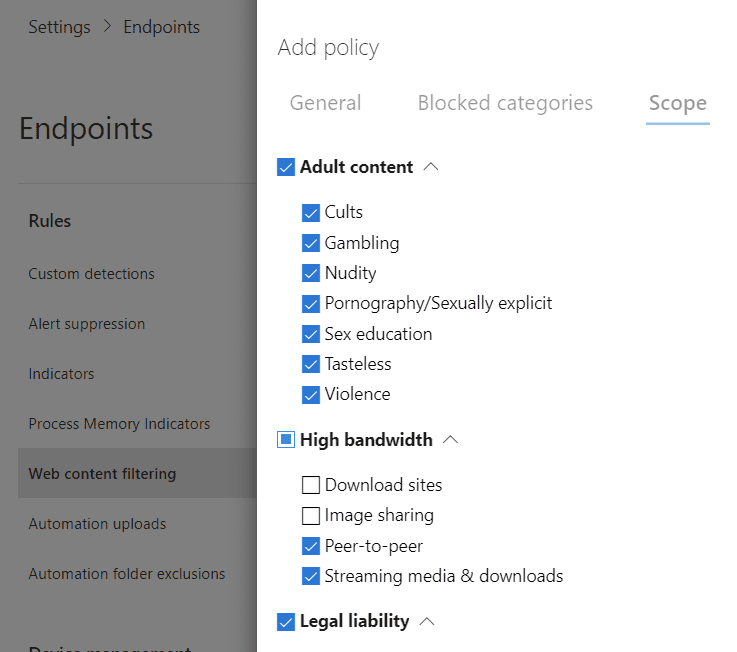
What about custom web blocks or allows? This, amongst other things, is controlled by indicators. Indicators, also known as indicators of compromise or IoCs, are references to objects you want to block or allow.
Sticking with web content, this could be a URL/domain, but for other things, it could be a file hash, IP address, or certificate. Indicators can allow, audit, warn, or block, with alerts appearing in Microsoft 365 Defender for Endpoint too.
Endpoint settings: Microsoft Endpoint Manager (Intune, ConfigMgr, Co-management, Tenant Attach) or Group Policy
Intune, Configuration Manager (ConfigMgr) in all its guises, Group Policy… that’s a lot of different management tools. What gives? Unlike most other endpoint security vendors, you don’t control all settings that apply to clients through a single management console because Microsoft already has a bunch of different ones depending on your current environment.
If you’re completely on-premises, you’ll likely use either Configuration Manager or Group Policy; if you’re starting to move to cloud tools, you may have extended ConfigMgr to support co-management or tenant attach; and if you’re really adopting a cloud-first approach, you’ll be able to manage clients entirely with Intune mobile device management (MDM).
In this article, I’ll cover configuring things for Intune-enrolled Windows devices. Deploying Microsoft Defender for Endpoint offers a great opportunity to also switch to modern management with MDM, and you should also be able to “translate” the MDM settings covered here into ConfigMgr or Group Policy equivalents with just a little bit of research.
The key things to know
Introduced last year, the bulk of important settings for MDE on clients should be configured within the endpoint security section of the Microsoft Endpoint Manager admin center at endpoint.microsoft.com. The policy categories we’ll cover in this article for a solid posture are:
- Antivirus, which controls Microsoft Defender Antivirus/Windows Security on the client
- Firewall, which controls the built-in Windows Defender Firewall with Advanced Security
- Endpoint detection and response, which deals with the onboarding of your Windows devices into Defender for Endpoint
- Attack surface reduction, which aims to restrict the kinds of behavior permitted
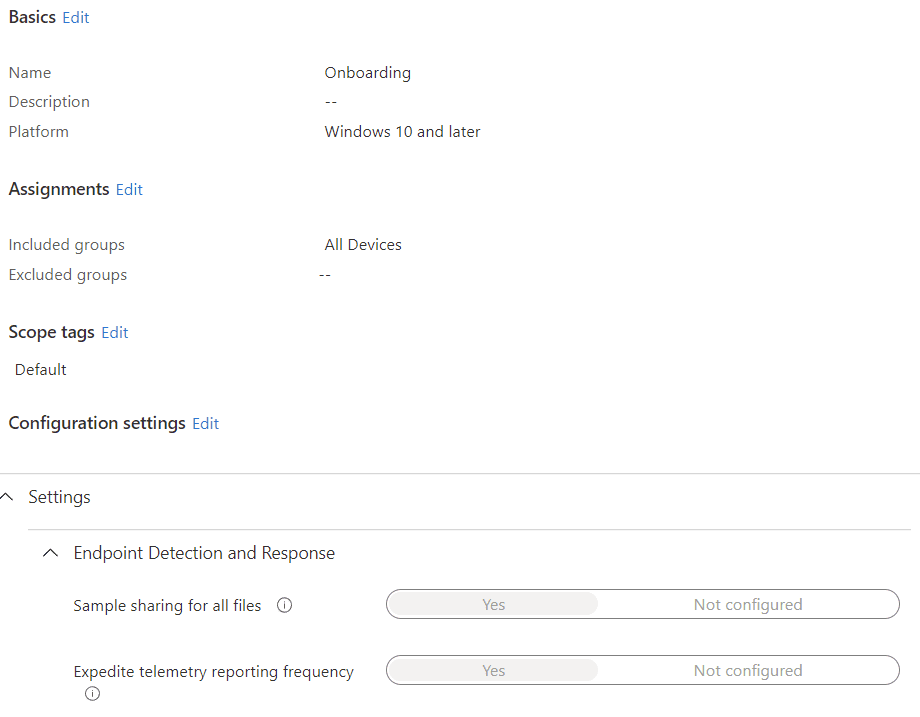
Let’s start with endpoint detection and response to get clients into MDE. As explained in the last article, different operating systems have different ways of onboarding, but for Windows 10 and Windows 11 this is where to go. As a prerequisite, however, head to tenant administration > connectors and tokens > Microsoft Defender for Endpoint and confirm the connection is enabled. You previously set this up in the advanced settings of Microsoft 365 Defender.
Integration confirmed, create an endpoint detection and response policy for Windows 10 or later and set the only two settings to yes. Note that the expedite setting is a bit redundant as of Windows 10 1709+, where it is configured as the only option; I keep it selected to cover myself.
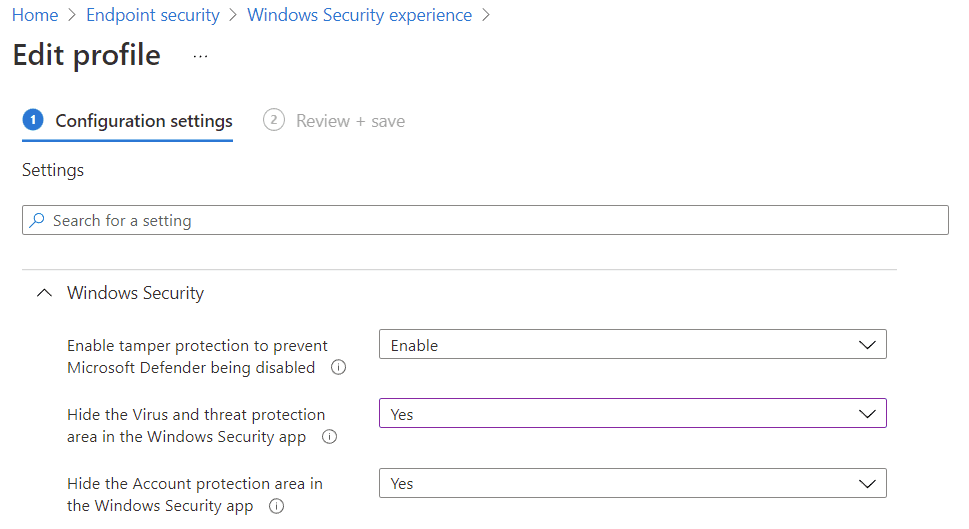
Next up, let’s look at the antivirus policies. There are two types to concern ourselves with: Windows Security experience and Microsoft Defender Antivirus.
When you create a Windows Security experience policy, you’re mostly controlling how much of the GUI is exposed to end users. You can hide it entirely, or specific areas. Note that most significant features require administrative rights anyway, and a determined attacker doesn’t need a GUI.
Also of note in here is the ability to enable or disable tamper protection at the policy level, and not tenant like in the portal. If you have enabled it in the portal but want to disable it for a certain device, you can do so here: Intune “wins” that fight.
Microsoft Defender Antivirus (MDAV) is our next policy and this controls a lot of significant things. MDAV is the endpoint protection engine on the client and, while it can operate independently of MDE, it leverages a lot of the licensed features MDE provides.
When creating this policy, you absolutely want to turn on cloud-delivered protection with a cloud-delivered protection level of high and a decent cloud extended timeout (50 seconds being the maximum). These important settings combine to enable a feature called block at first sight (BAFS).
When MDAV sees a suspicious but not confirmed malicious (hey, that rhymes) executable with a mark of the web, it checks the hash’s reputation according to Microsoft’s telemetry. If it can’t confirm this, it locks the executable until it has been uploaded and analyzed before allowing execution (or not).

Within MDAV settings you also have the option to add exclusions. Note that these only apply to MDAV and not MDE. The Microsoft 365 Defender portal is the best place to configure exclusions and have them honored across the whole platform.
Basically, all real-time protection settings should be enabled, with the possible exception of network files, which relates to shares and mapped drives, as you hopefully have a scanner on those file servers anyway.
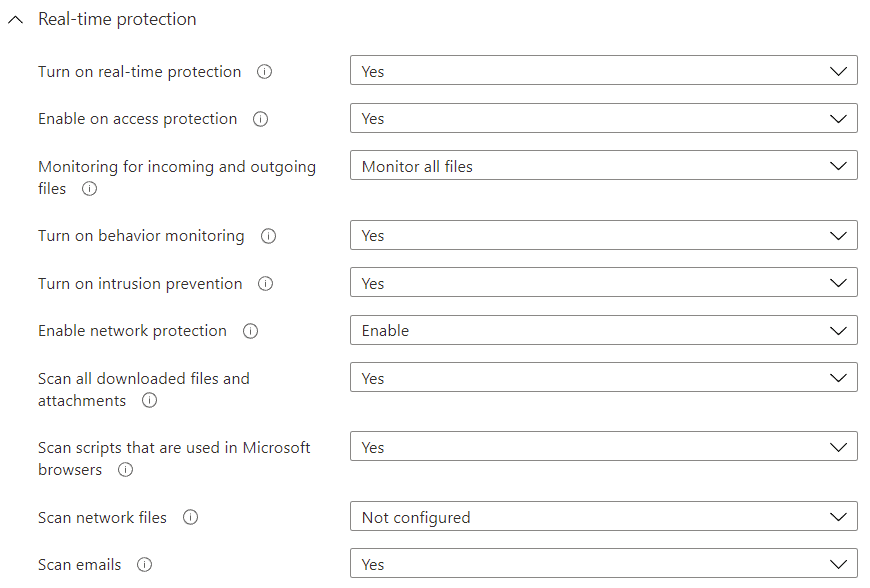
Make sure that actions for detected threats within the remediation setting are configured so that users are not prompted to decide. Regarding scan settings, CPU usage limiting is recommended, starting at 50% and adjusting if necessary, and most guidance advises not to hog up resources with a scheduled full scan – only a daily quick scan – as a full scan is more appropriate when actively investigating. If bandwidth is not extremely tight, you should also check for signature updates before running the scan.
- Turn on the firewall for domain, personal, and public networks.
- Block inbound connections and notifications. If you’re up to the challenge, investigate also moving away from the default of allowing all outbound to only traffic and apps you have vetted; particularly in high-security environments.
- Choose to ignore authorized application firewall rules, which translates to do not allow local policies to “win”. This prevents local administrators from bypassing the rules you create in Intune. Note that if an app creates the rules during installation, that may cause communication problems, so understand what your apps do when installing.
- If you’ve used Group Policy to control the firewall and now want to use Intune, you can migrate using a Microsoft-provided tool.
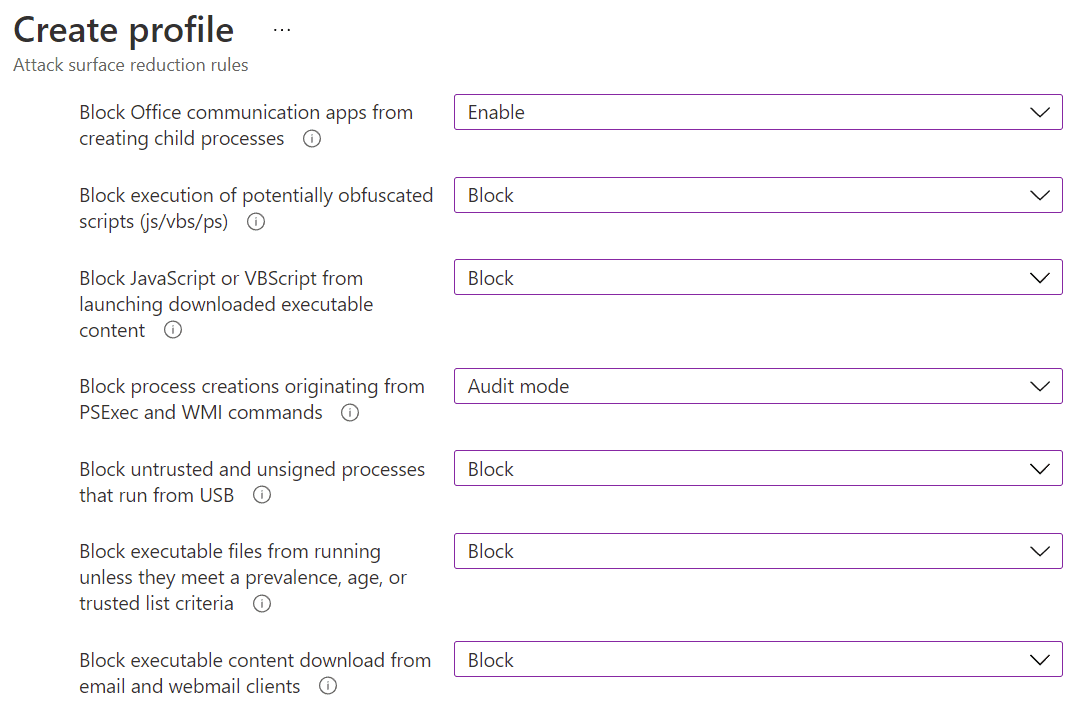
Lastly, let’s talk about attack surface reduction (ASR). There are several types of ASR policy available in Intune, but this article will focus only on attack surface reduction rules. These are powerful ways of protecting against threats that have not been identified by the endpoint protection capabilities – which could happen for a number of reasons – and living off the land (LotL). It’s no secret that Windows, way back at conception, wasn’t designed with security at the forefront of concerns.
The same is true of Office and Adobe Reader. There are many types of behavior the OS and these apps permit that are commonly used by bad actors, but might still have some legitimate usage (but not often). For example, Office macros or Adobe Reader creating executable child processes; scripts that obfuscate their code; and the running of unsigned processes.
ASR rules let us protect against threats that utilize these weaknesses by trying to block that type of action altogether. Whether for good or bad use; ASR rules can block it completely. Alternatively, you can run ASR rules in audit or warn mode, which act as a sort of what-if mode or block-with-override mode.
These modes are great for the initial deployment, so you can confirm, via telemetry in Microsoft 365 Defender, what kind of disruption you may cause. The advice here is review the ASR rules, throw as many as you can reasonably stomach into block mode, and all others in audit or warn mode.
One, in particular, I’ll highlight is Block executable files from running unless they meet a prevalence, age, or trusted list criteria. So many environments still have users with local admin rights. While I won’t lecture about this (don’t do it, please), if you feel you must, at least use this ASR rule. If an executable has rarely been seen by Microsoft’s telemetry and/or is less than a day old, it will be blocked. This is a one-up to the aforementioned BAFS in the fight against zero-day threats.
Get your devices onboarded and secured at a foundational level
That should keep you busy, and there’s so much more to configure. The guidance here should give you an understanding of where MDE needs to be configured to get your devices onboarded and secured at a foundational level, and the kind of cloud-powered tools that MDE provides, such as block at first sight and attack surface reduction rules.
Of course, we’re only dealing with endpoints so far. Microsoft Defender for Endpoint is part of Microsoft 365 Defender, a fully-fledged extended detection and response (XDR) offering, which means you get consolidated protection, investigation, and reporting across other areas of concern.
Defender for Office 365 (mail and files), Defender for Identity (on-premises Active Directory Domain Services, Active Directory Federation Services, VPN), and Cloud App Security (cloud apps + services) all combine with Defender for Endpoint to really illustrate a threat as it navigates through the ecosystem.
In the next article in this series, we’ll talk about these integrations (and more) to explain how you can effectively investigate and respond using Microsoft 365 Defender.
Related articles: