Microsoft Azure: Using Linked ARM Templates
In today’s Ask the Admin, I’ll explain how to use linked Azure Resource Manager (ARM) templates to facilitate complex deployment options.
There are several choices when deploying resources in Microsoft Azure, among them the classic service model, PowerShell scripts, or ARM templates. If you follow my Azure articles on the Petri IT Knowledgebase, you’ll have noticed that everything I do related to Azure is based on Azure Resource Manager (ARM), although occasionally I still provide how-to articles for beginners on configuring Azure using the web portal.
In Use Visual Studio to Deploy a Virtual Machine on Petri, I showed you how to work with ARM templates in Visual Studio (VS). And today I’d like to extend that theme and show you how to link child templates to a master deployment template, again with the help of Visual Studio.
Decomposition
The ability to link templates enables administrators and developers to simplify complex Azure deployments using targeted templates for specific purposes. For example, rather than putting all the code to deploy resources for a complex app in one template, you can call child templates, based on decisions made at deployment time, to deploy the app from a set of smaller building blocks.
This process is known as decomposition. Developers often use it to separate an application into code classes, enabling easier testing, reuse and deployment.
Linking Templates
Azure templates can be linked to a ‘master’ template, creating a hierarchy of a master and one or more child templates. Child templates are represented in the master as resources and can be added like any other Azure resource.
- Open VS 2015.
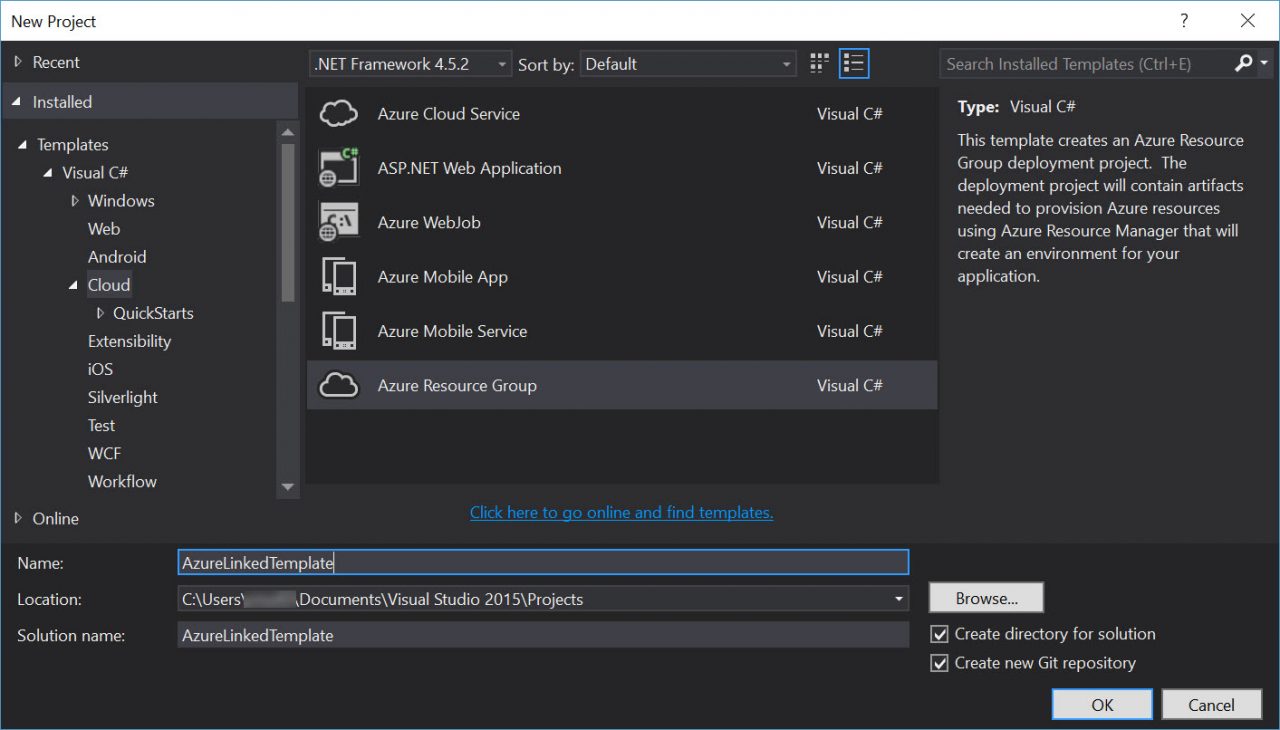
- Click New Project… under Start on the Start Page tab in VS.
- In the New Project dialog box, expand Installed > Templates > Visual C# and select Cloud.
- In the list of templates, select Azure Resource Group.
- In the Name field, type AzureLinkedTemplate and then click OK.

- In the Select Azure Template dialog, select Blank Template and click OK.
- Click Solution Explorer in the View menu.
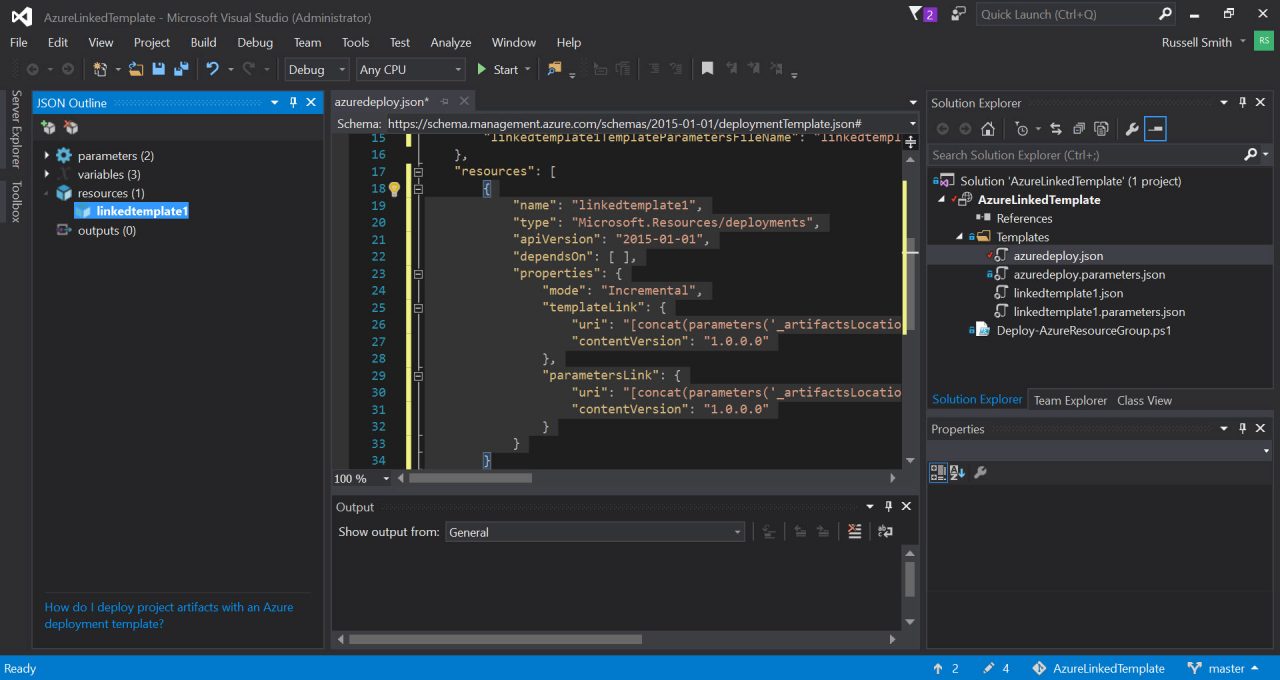
- In the Solution Explorer dialog on the right, expand the Templates folder and double-click azuredeploy.json. The template code will appear to the left, along with the JSON Outline pane.
- In the JSON Outline pane, right-click resources and select Add New Resource from the menu.
- In the Add Resource dialog, select Nested Deployment from the list of resources and type linkedtemplate1 into the Name field. Click Add.

In the main script pane, the code for the new resource will be highlighted, and two more files will appear in Solution Explorer: one for the JSON code (linkedtemplate1.json) and a second (linkedtemplate1.parameters.json) for parameters. Now let’s add two resources to the linked template.
- In Solution Explorer, double-click linkedtemplate1.json.
- In the JSON Outline pane, right-click resources and select Add New Resource from the menu.
- In the Add Resource dialog, select Web App from the list of resources.
- First select Create New from the App Service plan (Server Farm) menu.
- In the Name field, type linkedtemplate1serviceplan and then click Add.

- Now type linkedtemplate1webapp into the Name field on the Web App screen and click Add.
- Two new resources will appear in JSON Outline.
- In Solution Explorer, double-click linkedtemplate1.json
- Add an extra value in the parameters section after minlength, noting the required comma after minlength.
“defaultValue”: ” linkedtemplate1serviceplan”
- Click CTRL+S to save the project.

Deploying Linked Templates
As I mentioned in Use Visual Studio to Deploy a Virtual Machine on Petri, VS 2015 must be launched with an administrator account to deploy resources in Azure. So if you haven’t already done so, start VS as an administrator and open the project we just saved from the Start page.
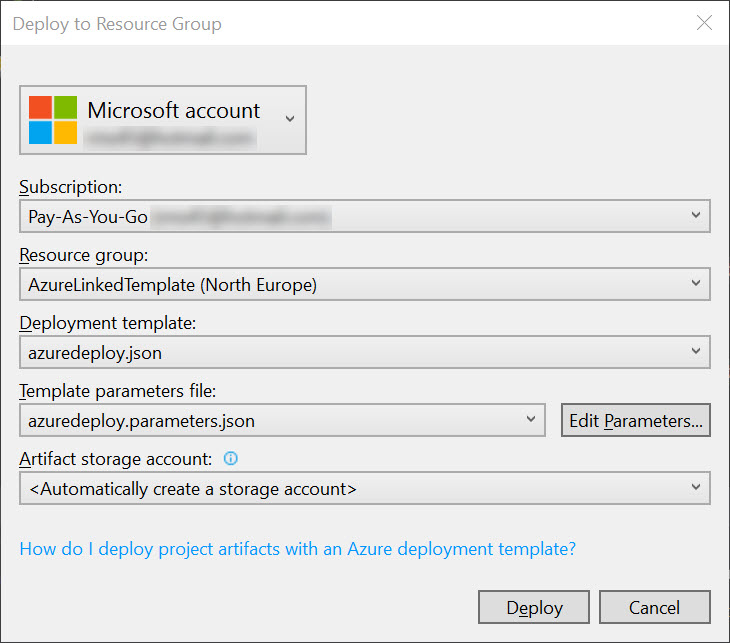
- Right-click AzureLinkedTemplate in Solution Explorer and select Deploy > New Deployment… from the menu.
- In the Deploy to Resource Group dialog, select <Create New…> in the Resource group menu.
- In the Create Resource Group dialog, type AzureLinkedTemplate in the Resource group name field and then select a region from the Resource group location menu and click Create.
- In the Deploy to Resource Group dialog, select the master template, azuredeploy.json from the menu under Deployment template.
- In the Template parameters file menu, select azuredeploy.parameters.json.
- In the Artifact storage account menu, make sure that Automatically create a storage account is selected and then click Deploy.

What is an Artifact Storage Account?
Azure can read the master template from your local hard disk, but any linked templates must reside in Azure storage so that they can be read, hence the need for an artifact storage account. The storage account is accessed using a Shared Access Signature (SAS).
Check Resource Deployment
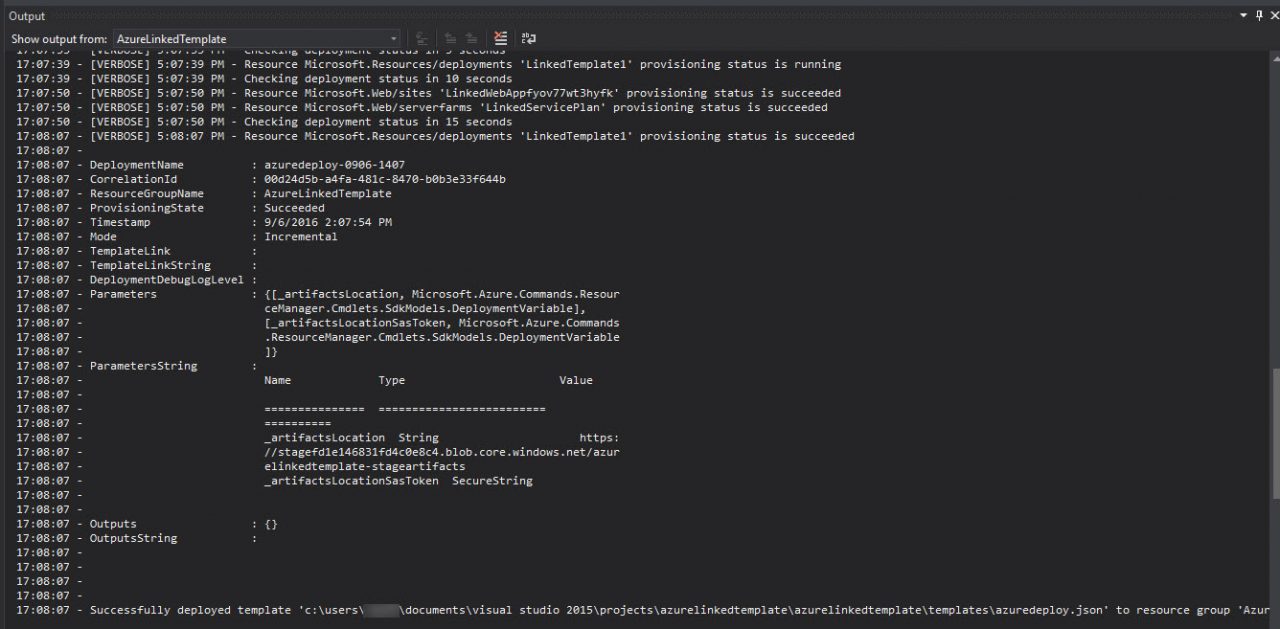
Once the deployment has completed successfully, you should see a message: ‘Successfully deployed template…’ in the Output pane. To verify that the App Service Plan and Web App have been deployed, open Cloud Explorer from the View menu and check the list of resources.

In this article, I showed you how to deploy resources from a linked template in Azure. In a future article, I’ll show you how to make conditional decisions in an ARM template.


