I was talking to some users recently and was having a discussion about how to create a vApp in vCloud Director. I thought to myself that creating a VM will by default create a vApp. But in most peoples minds a vApp translates to a multi-VM vApp. I have prepared this walk through from the side that a user can also use to create this kind of vApp.
Making a vCloud Multi VM vApp
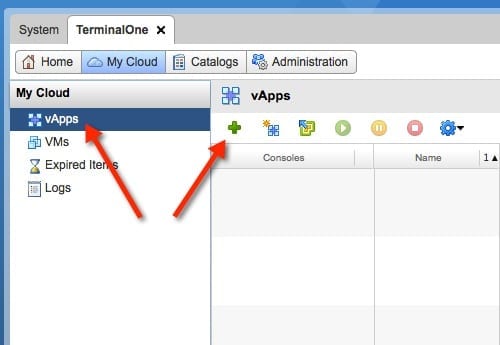
- To begin with, I have entered my vCloud organization and selected vApps from the tree on the left. To start the vApp creation, simply click on the green plus as shown in the image below.
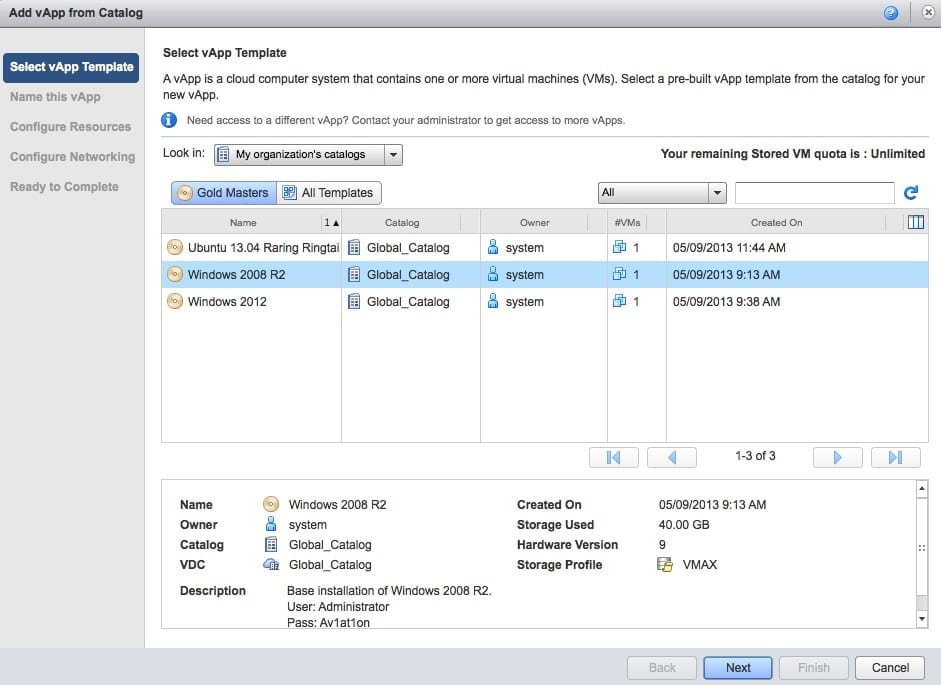
- Now on to the process of creating the initial VM. As shown in step 2, we are prompted to select a VM template from the catalog that we have access to for our Organization. For this walkthrough I will pick a Windows Server 2008R2 template from the catalog.
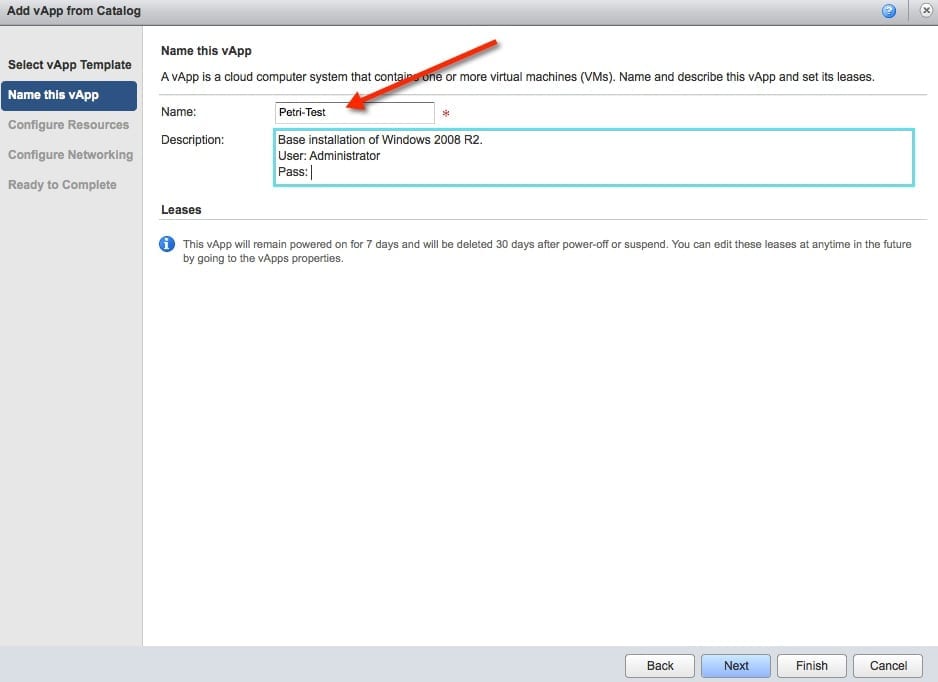
- We are now prompted to enter a name for our vApp. I have called it “Petri Test” for this article. There is also a description field that we can use to enter details that will help myself or others easily understand what this vApp is used for.
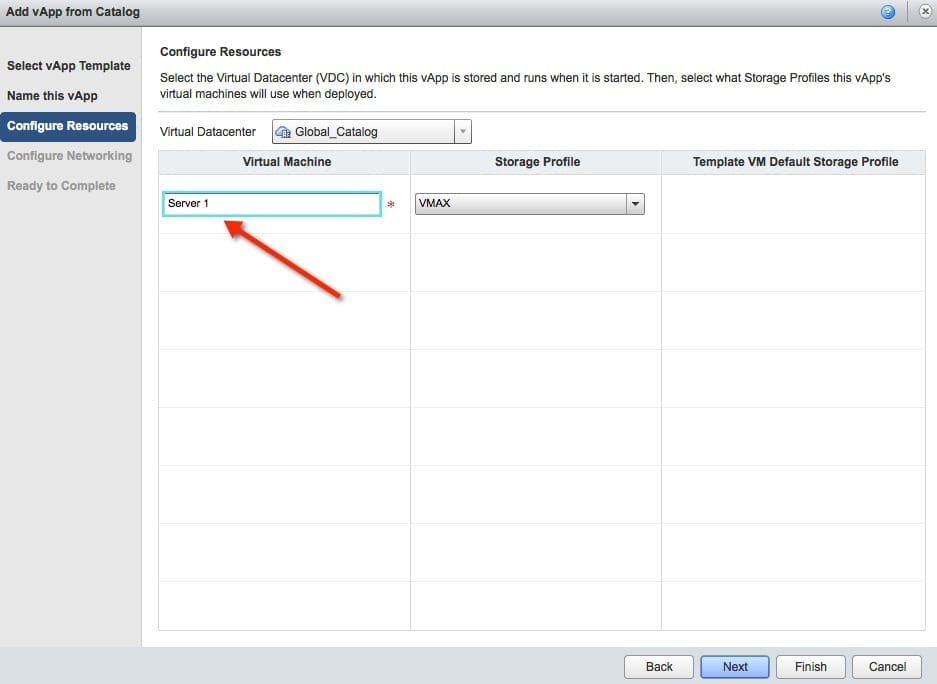
- Time to provide details about the VM that will be created as part of our vApp. In this step we are entering the name of the VM within vCloud. We also can choose the storage profile that will decide on which datastore the VM is placed.
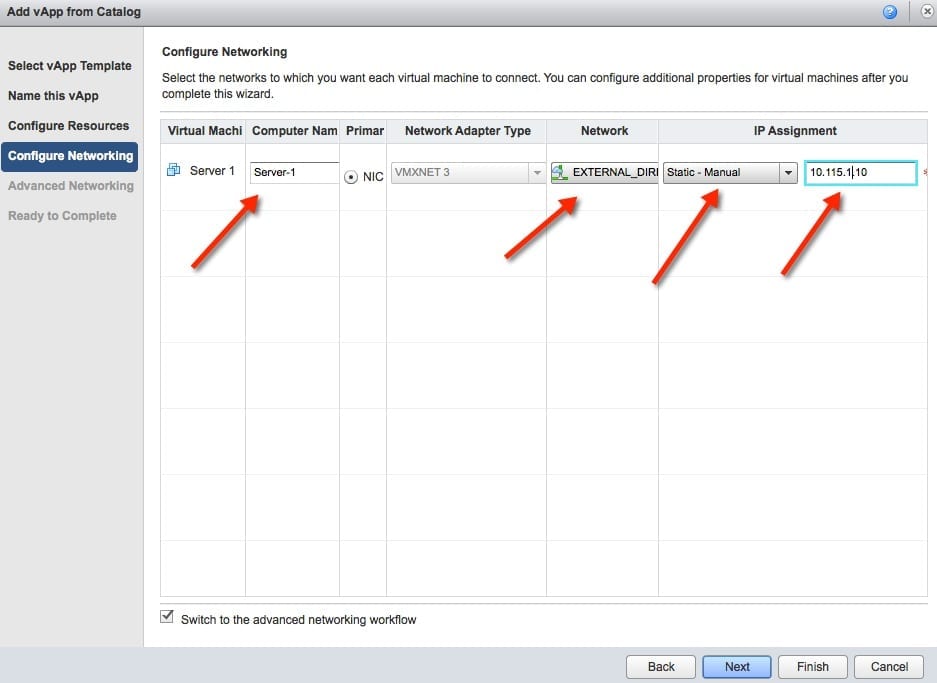
- Now we can begin to configure the network settings for our VM. In this step (see image below) we have first provided the computer name that will be configured as the identify of the server OS.
- Select the network that we want our VM to be attached to.
- Next, select how we want the IP address to be assigned. For this purpose I have chosen to use Static-Manual, which means I will be presented with a field to manually enter an IP address. The IP address that I want assigned must match the network that I selected earlier. (The reason I’m selecting to manually enter the IP is that I am writing up a separate article that will show how to fence off this vApp.)
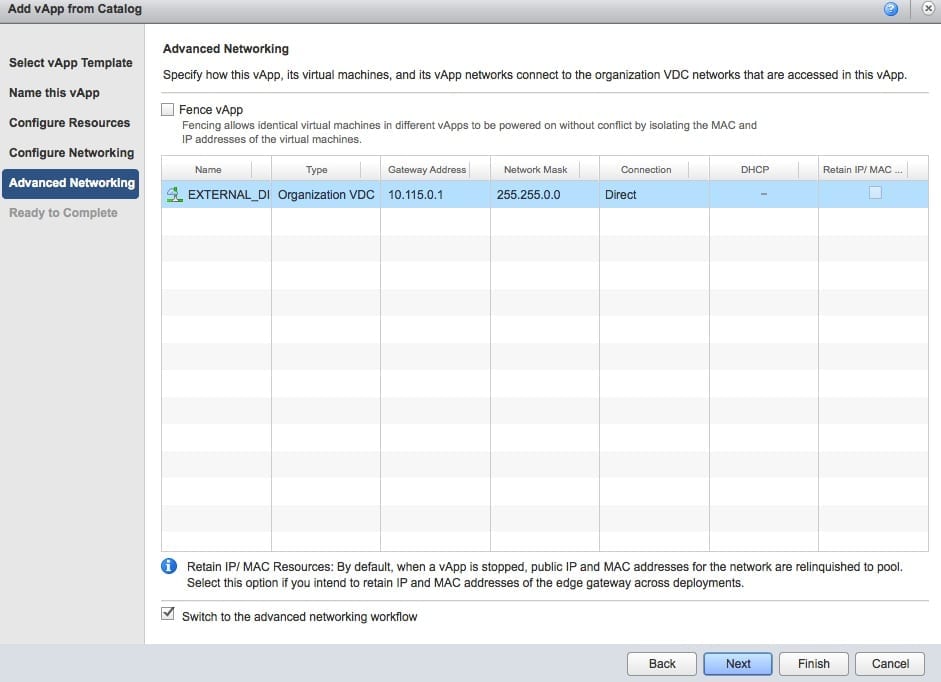
The image below shows confirmation of the settings that were configured for networking in the previous step. If everything looks right we can proceed.
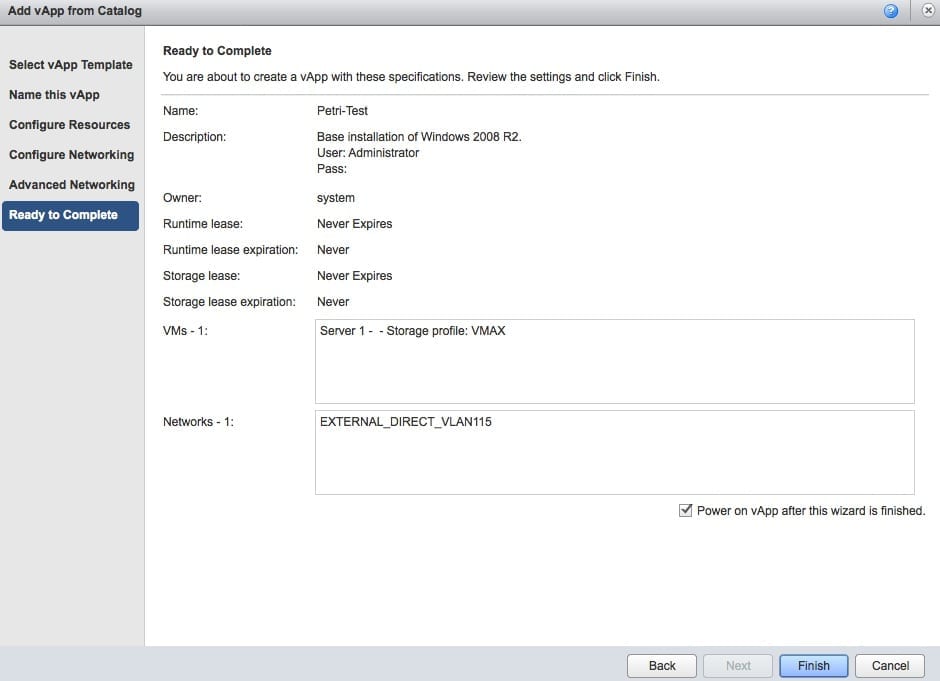
- We are almost ready to start the creation of this vApp. In step 7 we get the final confirmation screen. If all is right we can proceed and wait for the deployment to finish.
Now that we have our vApp created and it contains a single VM, we are going to add a second VM. This will leave us with a vApp that will contain two VMs.
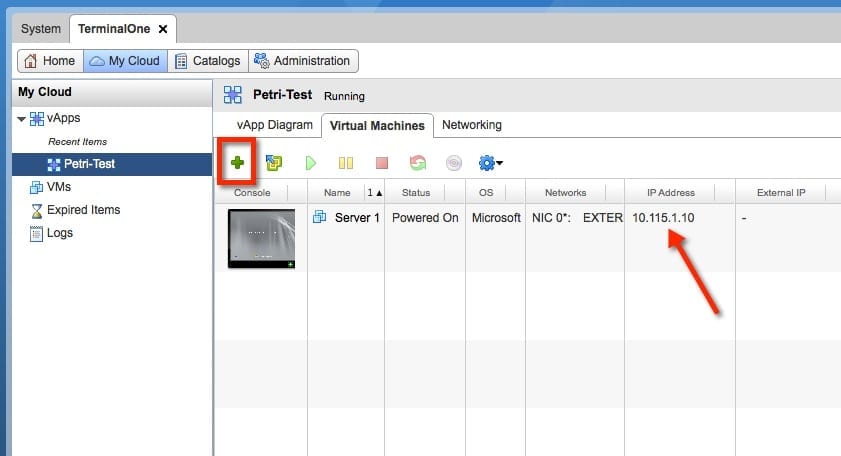
- In step 8 I have navigated back to the vApp list and selected the vApp we created already. Once selected I will click on the green plus sign shown in the image below.
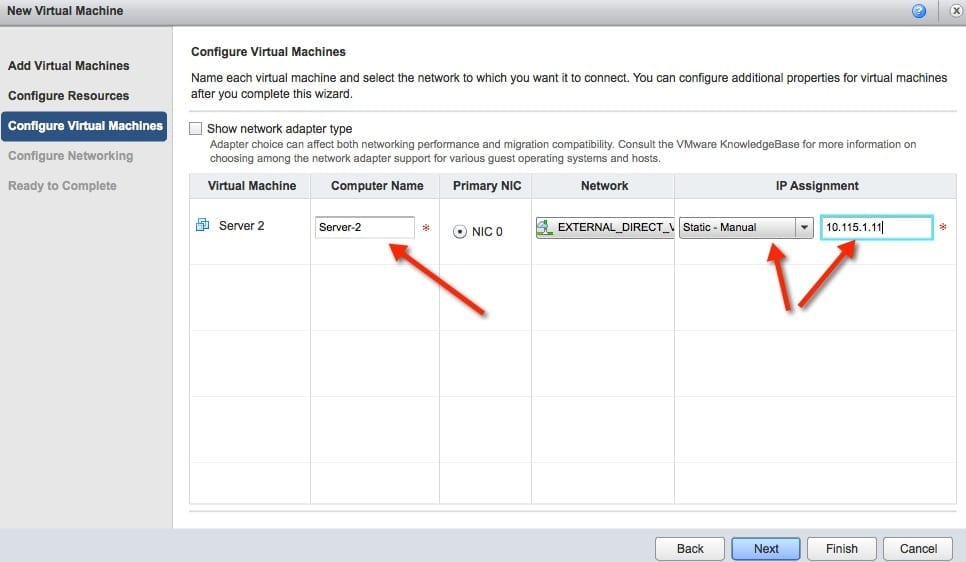
For the creation of the second VM I am not going to do the complete walkthrough again. I have just highlighted the configuration of the networking section.
- In step 9 below you can see that I have named our second VM and have entered in the static IP address. I will finish the deployment and we will look at what we created.
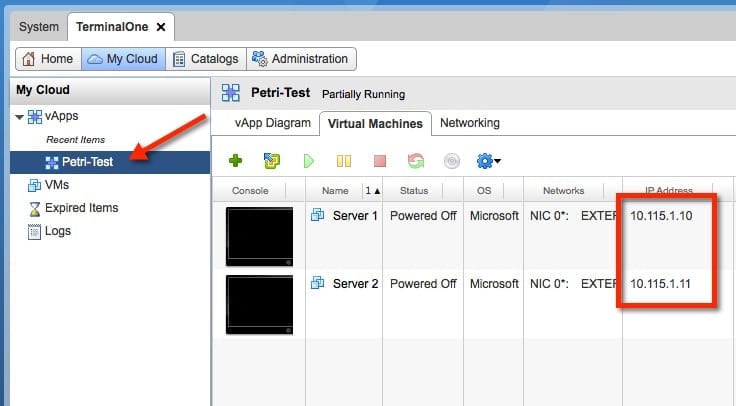
- Now in step 10 we can see by viewing the vApp that we now have two VMs. I have powered them both off after they were customized giving them their server names and IP addresses. As seen in the image below, I have highlighted the IP addresses that we assigned to them in the earlier steps.
In this walkthrough we have created a vApp with a single VM and then went back and added a second VM. When completed we now have a VM that contains two VMs and they both have static IP addresses. If you wanted to create a larger vApp you can continue the process with your third, fourth, etc.


