How To Import Contacts into Office 365 and Outlook Web Access
If you’re a new user of Office 365, you may be excited at the ability to connect to your work email as easily as you’ve been connecting to your personal Hotmail account. With always on service and the ability to connect to your work email from anywhere, your productivity is sure to improve.
One of the first things you will want to do is import your contacts from other email accounts. Of course, if you’re an administrator or support professional, you’ll need to be able to teach others how to import their contacts.
Depending on the system that you are importing your contacts from, there are several approaches to moving your contacts or address book into Office 365.
If you’re moving from an existing Exchange server (on-premises) to Office 365, then you’ll migrate the users through the PowerShell console.
This is beyond the scope of this article, but if you’re moving from an Exchange Server that is on site to Office 365 in the cloud, then you do not want to leave the importing of contacts up to the users. That is handled by the administrators as they move the mail and contacts for their users.
Option 1: Use Import Contacts to Load Your Contacts From a CSV
Get your contacts into a CSV file, and then:
- From Office 365’s Outlook Web Access, go to your Contacts.
- Click Import on the contacts toolbar.
If you don’t already have a CSV of your contacts (some email clients call it an address book, but it’s the same either way), here’s how you get it from most popular email systems and clients:
| Steps | |
| Outlook 2010 and 2007 |
|
| Hotmail/Live |
|
| Gmail |
|
| Yahoo! |
|
| Windows Live Mail |
|
| Mozilla Thunderbird 3 |
|
Option 2: Use Outlook to Export and Import Mail, Contacts, Calendar, and Task Items Between Connected Accounts
If you have both accounts in Outlook already, you can export your items from one account using the Export to a .PST feature, and then import that PST data into the Office 365 account.
How To Connect Your Office 365 Account to Outlook 2010
The connection to Office 365 from Outlook needs to be setup from within Outlook. There is a link in the administration page for a user to “Connect Outlook to this account”, but it is an informational link, not an automated process. However, from within Outlook, there are many settings such as the server settings and ports which are automatically configured.
From Outlook 2010:
- Click File > Add Account
- Fill in Your Name and E-mail Address (they may automatically populate)
- Click Next to finish
- Outlook will configure the server and port settings without further input
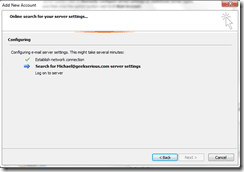

- Restart Outlook
After both accounts are added, you can move contacts between the accounts in one of two methods. If you want to copy all of your contacts into Office 365, then you can do an export and import. If you already have an export of your contacts, then this would be ideal for you. Alternately, if you want to go through this process, and also keep a backup of your current contacts, then this is a good way to do that. However, if you want to simply and easily move contacts into Office 365, then you can move or copy contacts between all the accounts in Outlook, including your Office 365 account. This provides the flexibility of being able to select only some contacts to move into Office 365.
How To Copy or Move Contacts Into Office 365
Without going through the extra steps of importing and exporting, if you’ve gotten your accounts all into Outlook, you can simply go to the Contacts page.
From Contacts in Outlook:
- Expand Folders (if not already shown)
- Select the Mailbox that you want to move Contacts from (the old email account)
-
Select Contacts to import into Office 365 (hold the CTRL key to select multiples)
-
To copy the contacts (keeps them in the old account also):
-
With contacts selected, press CTRL + C to copy the contacts
-
Select the Office 365 folder
-
Press CTRL + V to paste the contacts
-
-
To move the contacts (deletes them in the old account):
-
Drag and Drop the contacts into the Office 365 folder
-OR- -
With accounts selected, press CTRL + X to cut the contacts
-
Select the Office 365 folder
-
Press CTRL + V to paste the contacts
-
This first copies the contacts into the PST file on the local hard drive, then synchronizes the contacts with Office 365 in the cloud. For most people that already use Outlook and have most of their contacts already in Outlook, this is the fastest and easiest way to import contacts into Office 365. However, you can also use the Export and Import feature in Outlook to perform the importing.
How To Export and Import Your Contacts Into Office 365
If you export your contacts from your old email account to import them into Office 365, then you will end up with a full set of your contacts in Office 365, and also you will still have the exported contacts file. This could be useful in case you ever accidentally delete a necessary contact (though Office 365 does include a Recycle Bin so you can actually get that contact back). Or, if you’ve already got your contacts in an exported file, then this will help you to import your contacts into Office 365.
Export (From Outlook):
- Click File > Import and Export
- In the Import and Export Wizard:
- Click Choose an action to perform > Export to a file > Next
- Click Export to a File > Personal Folder File (.PST) > Next
- Select the old emails Contacts folder in the Export Personal Folders > Select the folder to export from selector
- Select the Include subfolders check box
- Click Next
- In the Export Personal Folderspage:
- Use the Save exported file as box to name and save the file.
(Default location is in your profile’s “AppDataLocalMicrosoftOutlook” folder) - Select Options > Replace duplicates with items exported
- Click Finish
- Use the Save exported file as box to name and save the file.
- Click OK to create the .PST backup file. A password can be set on the PST file, but that is optional.
Import (from Outlook):
- Click File > Import and Export
- In Import and Export Wizard:
- Click Choose an action to perform > Import from another program or file > Next
- Click Import a File > Personal Folder File (.PST) > Next
- Find the PST to import with the Import Personal Folders > File to import dialog.
- Select Replace duplicates with items imported
- Click Next
- In Import Personal Folders:
- Select the top node in Select the folder to import from
- Select Include subfolders
- Select Import items into the same folder in <Office 365 mailbox>
- Click Finish
Before the contacts are imported into the cloud, they are first stored on your computer in the contacts folder of your Office 365 mailbox profile (the PST file in Outlook). Once the contacts have finished importing into your local PST file, they are synchronized to Office 365 in the cloud. Of course, this takes longer the more data you’ve imported.
Once it’s done, you have successfully imported your contacts into Office 365, and they are ready to be accessed no matter where you’re connecting from.
Conclusion
Once you’ve gotten your account setup in Office 365, you’ll need to import your contacts from your old email accounts. Some email accounts may have already been migrated into Office 365 by the Office 365 administrator, such as any accounts from an on-premises Exchange Server. However, for customers who did not previously have Exchange, or for contacts that are in multiple email accounts from multiple providers, you can import your contacts into Office 365 to unify your address book and to make it accessible from everywhere.
There are two primary ways to import your contacts. You can either export and import your contacts into the Outlook Web App using a CSV file, or you can connect your Office 365 account to your already connected email accounts in Outlook.
