


Implementing Storage Spaces Inside Azure Virtual Machines

In this article, I’ll show you how to implement Storage Spaces inside a Windows Server 2012 R2 Azure virtual machine to aggregate the capacity and performance potential of multiple data disks. This article is a follow-up to “The Role of Azure Virtual Machine Data Disks, Plus Tips on Sizing Disks for Capacity,” where I explained why you would aggregate disks together.
Quick Reminder on Data Disks
We should never store data in the C: or D: drive of an Azure virtual machine; all data should be stored in data disks. Every data disk has limited capacity of 1023 GB and performance potential, which is up to 500 IOPS for Standard Storage. We can overcome these limitations by deploying multiple data disks, the same way that we would have multiple physical disks in RAID, and using features of the guest OS to aggregate those disks so we can create a single spanned volume.
In the case of Windows Server 2012 R2, we will use Storage Spaces to aggregate the disks. Remember that Storage Spaces is not the old Windows 2000 dynamic disks technology that most of us only ever used to prepare for exam questions. Storage Spaces is a low-level technology that is very similar to RAID, but is actually a modern form of software defined storage designed for scalability and performance. We can use the GUI tools to deploy Storage Spaces, but PowerShell offers more scalability and control over performance tuning. And don’t forget there’s the added bonus that PowerShell is faster to deploy if you script it.
Deploying Multiple Data Disks
Make sure you have selected a virtual machine spec that can handle the number of required data disks:
- Enough disks to provide raw capacity: 4 x 1023 GB = 4092 GB.
- Sufficient number of disks to multiply out their performance potential: 4 x 500 IOPS = 2,000 IOPS.
Next, edit the settings of the virtual machine to add the data disks. I will do this using the Ibiza portal:
- Browse to the virtual machine.
- Expand All Settings > Disks.
- Click Attach New.
- Name the disk (consider using the name of the VM and a disk number), size the disk, and configure caching based on guidance for your application.
- Repeat steps 3-4 for each required data disk.
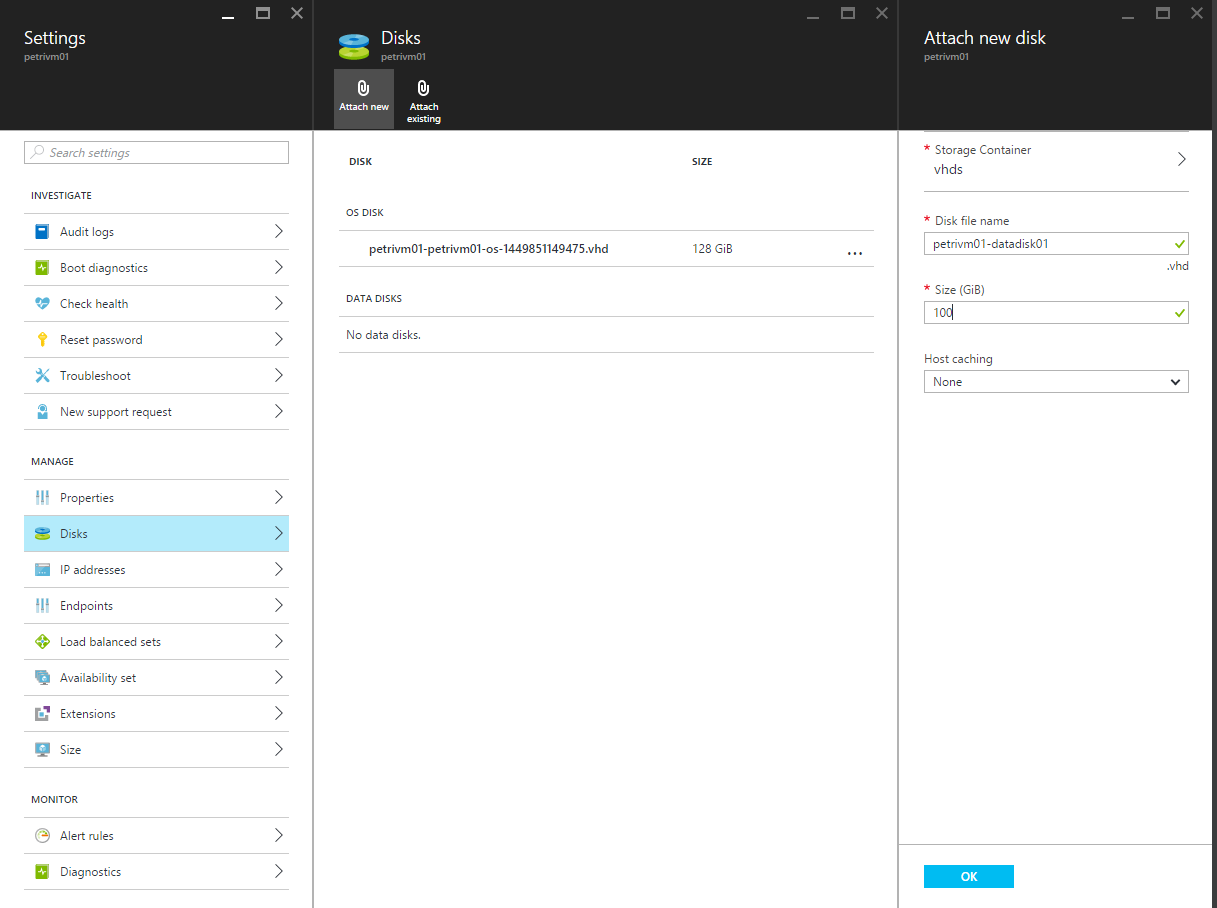
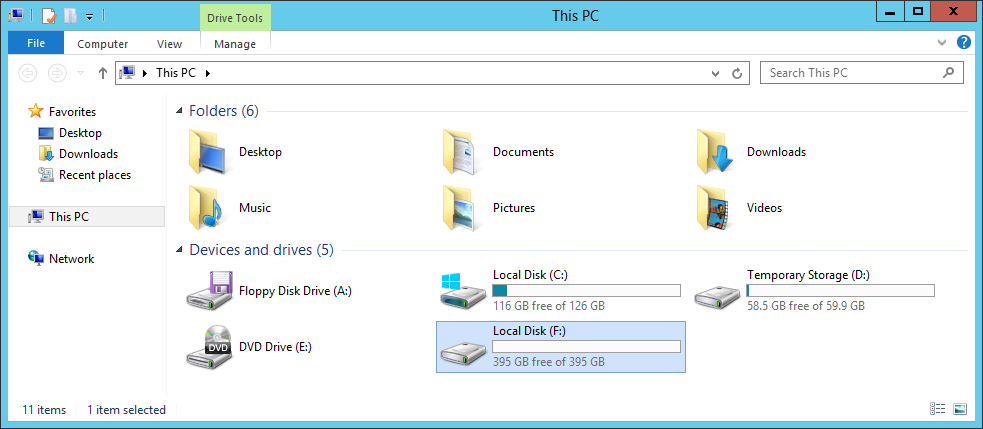
My machine, a Basic A2, will have 4 x 100 GB data disks on Standard Storage, with each disk offering up to 300 IOPS. My goal is to have a single 400 GB volume that can perform up to 1,200 IOPS.
![An Azure virtual machine with multiple data disks [Image credit: Aidan Finn]](https://petri-media.s3.amazonaws.com/2015/12/MultipleAzureVMDataDisks.png)
Configuring Storage Spaces
The next phase of the deployment requires you to:
- Log into the guest OS of the virtual machine.
- Launch PowerShell and run some PowerShell cmdlets. You can write a script and run this instead if you want to minimize human effort.
Next, we’ll run the following cmdlets. The first cmdlet will create a storage pool, which is the domain of performance and fault tolerance. Stated differently, any virtual disk that you create is spread across all the disks of a storage pool. If you want to maximize the performance of two data volumes, such as SQL Server logs and database file volumes, then create two storage pools using two sets of data disks.
In this example, there will be one volume, so there will be just one storage disk pool.
New-StoragePool –FriendlyName StoragePool1 –StorageSubsystemFriendlyName "Storage Spaces*" -PhysicalDisks (Get-PhysicalDisk -CanPool $True)
The next line will retrieve the disks from the pool and store them in a variable; we’ll use this variable in later cmdlets.
$Disks = Get-StoragePool –FriendlyName StoragePool1 -IsPrimordial $False | Get-PhysicalDisk
Next, we’ll create a new virtual disk or LUN using all of the space in the storage pool with a simple configuration. Note the interleave is set to 256 KB. We’re also setting the number of columns to be equal to the number of disks in the pool.
New-VirtualDisk –FriendlyName VirtualDisk1 -ResiliencySettingName Simple –NumberOfColumns $Disks.Count –UseMaximumSize –Interleave 256KB -StoragePoolFriendlyName StoragePool1
Finally, we’ll format the virtual disk with NTFS and a 64 KB allocation unit size.
Get-VirtualDisk –FriendlyName VirtualDisk1 | Get-Disk | Initialize-Disk –Passthru | New-Partition –AssignDriveLetter –UseMaximumSize | Format-Volume –AllocationUnitSize 64KB
Make sure that you search for the best practices for interleave and allocation unit size for the data that will be stored on this volume.
The result of this exercise is that you have aggregated the space and IOPS of each data disk into a single data volume that can exceed the capacity or performance limitations of a single disk.