As Microsoft advances with Office 365 many organizations are moving their email to the cloud. This suddenly places setup and configuration at the top of the task list so that users can get at their new cloud-based email.
Administrators may need to create Office 365 mailboxes and connect them to Outlook. This article provides step-by-step instruction on how to properly do this.
Before getting started it is important to note that the Office 365 program does have options allowing your organization to download the full client through Office 365. Review the Office 365 program options before proceeding if your system doesn’t have Outlook installed.
Here is a link to the Office 365 subscription options that can tell you if the full Office client is part of the Office 365 package purchased by your organization.
Create an Office 365 Mailbox
Creating a mailbox in Office 365 involves signing into your Office 365 account. The following steps assume your organization has already signed up for Office 365 through the Microsoft Office 365 Fast Track enrollment website.
1) Sign in to your Office 365 portal at http://portal.microsoftonline.com.
Office 365 log in
2) Click Go to Users and Groups.
Office 365 – Users and Groups
3) Click the + sign to add a new user.
Add New Users
4) Fill in the appropriate details for the user being added. See the following example then click on Additional Details.
Adding details for users
5) Fill in the appropriate details for the user being added. See the following example and click Next.
Continuing to add details for users
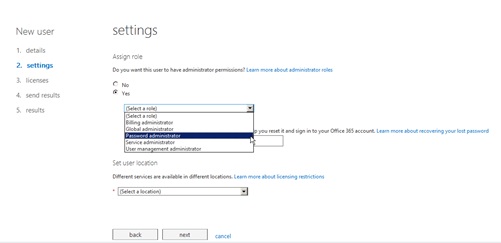
6) Determine if the user will be an administrator. If yes, choose the administrator type. Here are some detail to assist with the correct selection.
Setting admin level access
- Billing Administrator – Helps make purchases, manage Office 365 subscriptions, oversee support tickets and monitor service heath. This role will not be available if Office 365 was not purchased directly through Microsoft.
- Global Administrator – Will give access to all administrative features. Note the individual that enrolls Office 365 for your organization will also be a global administrator.
- Password Administrator – Applies to those individuals that will need to reset a password, manage service requests, and monitor service health. This is great for a Helpdesk or an organization’s Security Administrators.
- Service Administrator – This role is great for managing service requests and monitoring service health. Also note, before this role can be assigned to a user, they much first have admin access to a service such as Exchange Online.
- User Management Administrator – Another great option for help desk or security administrator access this role allows them to reset passwords, monitor service health, manage accounts, groups and requests. This role is unable manipulate other administrator accounts or create admins’ roles.
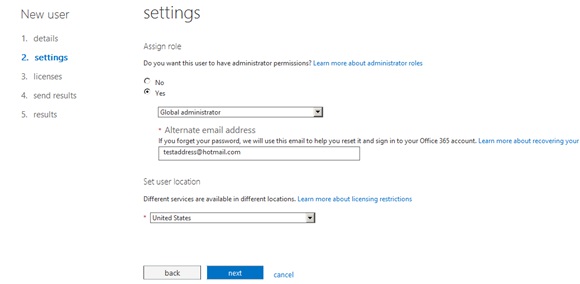
7) For this example we are creating a Global Administrator in the United States. An alternate email address must be specified, then click Next.
Creating a Global Administrator
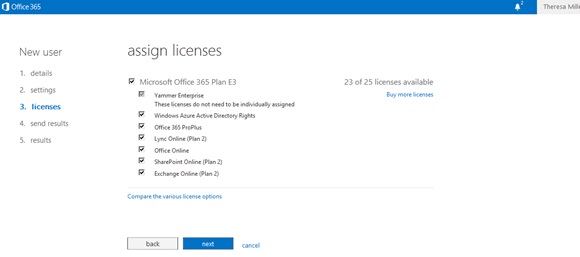
8) Choose the appropriate licenses the account will need. This link provides better insight into the many licensing options. For this example we will choose all the products available within the Enterprise plan. Click Next after making the selections.
Assigning appropriate licenses
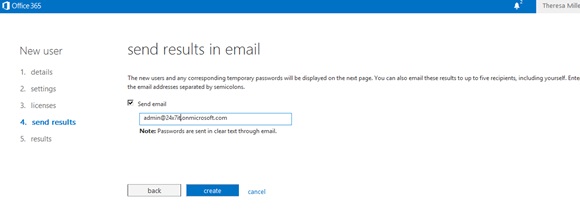
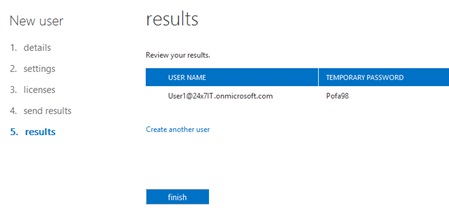
9) Provide an email address to email up to five users the temporary password for this account. The password will also appear on the screen after clicking Create if sending the email is an option that will not be pursued.
Send Results in Email screen
10) Click Create another user if there are more to be created or click Finish if there are not.
Email Results and Create another user screen
Connect an Office 365 Mailbox to Microsoft Outlook (Outlook 2007 or 2010)
This next step assumes that your workstation already has the full Outlook 2007 or 2010 client installed on the PC.
1) Open your web browser.
2) Go to the following website https://login.microsoftonline.com.
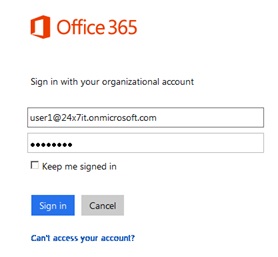
3) Enter your credentials and click Sign In.
Office 365 Sign-in Screen
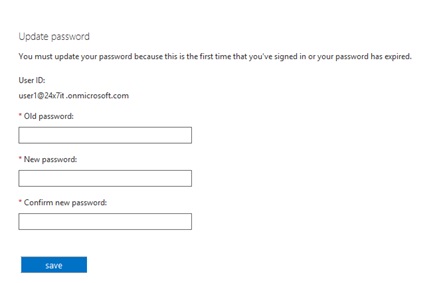
4) If this is the first time the user is signing into the account then the password must be changed. Fill in the appropriate information and click Save.
Update Password Screen
5) Once signed in choose Settings from the upper right-hand corner.
Settings
6) Next, choose Office 365 Settings.
Choose Office 365 settings
7) If this is the first time that account is being signed into, all of the information about the account should be reviewed. This will be the information that was entered by the account administrator in Step 6 in the “Create a Mailbox” section. Once the information is verified, scroll down and click Save.
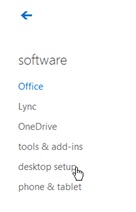
8) On the left-hand side of your screen click Software.
Install and manage software
9) On the left-hand side of your screen click Desktop Setup. Please note, this document assumes that the full Outlook Client is already installed.
Select desktop setup
10) Click Setup.
Click set up
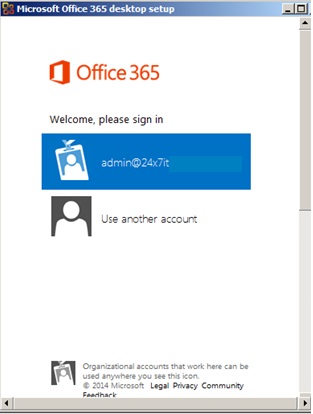
11) After you click setup the automatic configuration will start however, when prompted, fill in the password for the account being configured.
Microsoft Office 365 desktop setup
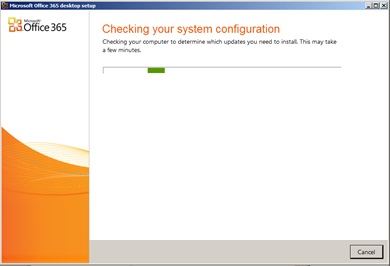
12) A setup wizard will startup.
Setup wizard
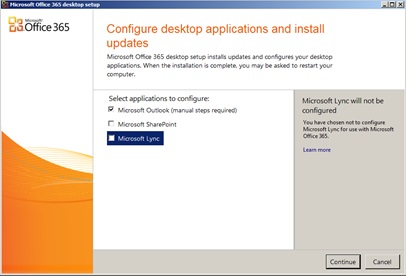
13) In this case we will only choose Microsoft Outlook and uncheck the rest. Click Continue.
Configure desktop applications and install updates
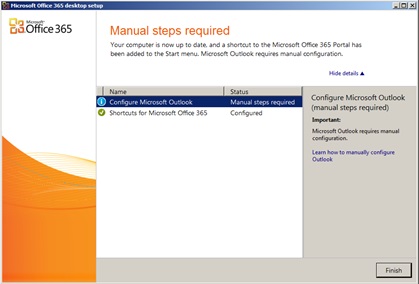
14) Next, Click Finish.
Click Finish to complete process
In this case the Wizard has determined that Manual Configuration will be required. In order to complete these processes, go to the section below which covers how to connect to the full Outlook 2013 Client. Also, if this wizard fails, please see the following troubleshooting document for additional information about the issue being seen.
Connect an Office 365 Mailbox to Microsoft Outlook 2013
This manual configuration can be used if the automatic configuration wizard determines your client requires a manual configuration for Outlook 2010 clients as well.
1) Open the Control Panel on the PC.
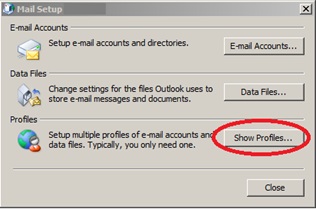
2) Double-click on the Mail applet in the Control Panel.
3) Choose Show Profiles.
Select Show Profiles
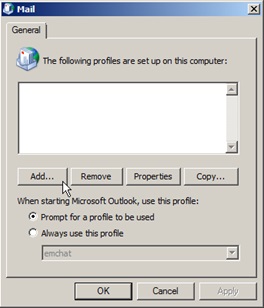
4) Click the Add button.
Click the Add button
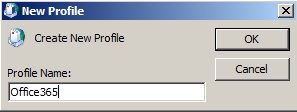
5) Enter a profile name and Click OK.
Enter a profile name
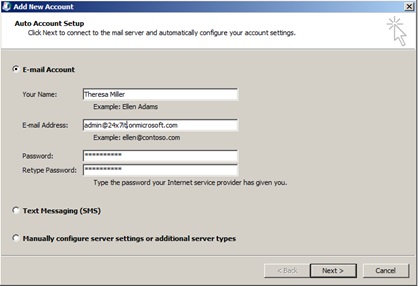
6) Fill in the information for your Office 365 account. Please note, Internet access is required for this to work.
Add new account
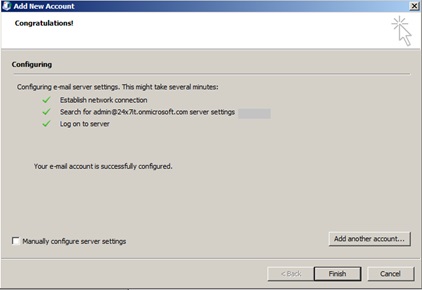
7) Once the account and password have been verified the screen will appear as shown below. Click Finish.
Click Finish
8) Open Outlook to start using your Office 365 account.
That’s all there is to it! You are now embarking on a journey to email in the cloud with Microsoft Office 365.


