Dynamic Access Control: Kerberos, Claim Types, and Resource Properties
In the first part of this series on Dynamic Access Control (DAC) in Windows Server 2012, I explained why DAC is a much-needed enhancement to the existing ACL model of controlling access to file server resources. I also discussed some of the terminology and components that you will need to understand before configuring DAC. Moving on, today in part two I’ll go over DAC and how to configure Kerberos, define claim types, and define properties in the resource Active Directory Administrative Center (ADAC).
DAC: Enable Kerberos Support for Claims
Before using DAC in your environment you need to enable Kerberos armoring, sometimes referred to as Flexible Authentication Secure Tunneling (FAST), and compound authentication on domain controllers and clients. There are two settings that need to be enabled: claims support for the Active Directory (AD) Key Distribution Center (KDC), and claims support for Kerberos clients. The easiest way to do this is by applying the necessary configuration settings using Group Policy.
Open the Group Policy Management Console (GPMC) on Windows 8 or Server 2012 using a domain account that has permission to create new Group Policy Objects (GPOs):
- In the left pane of GPMC, expand your AD forest and domain.
- Right-click the Group Policy Objects folder and select New from the menu.
- In the New GPO dialog, name the GPO Kerberos DAC settings and click OK.
- Click the Group Policy Objects folder in the left pane.
- Right-click the new GPO in the right pane of GPMC and select Edit from the menu.
- In the Group Policy Management Editor window, expand Computer Configuration > Policies > Administrative Templates > System > KDC.
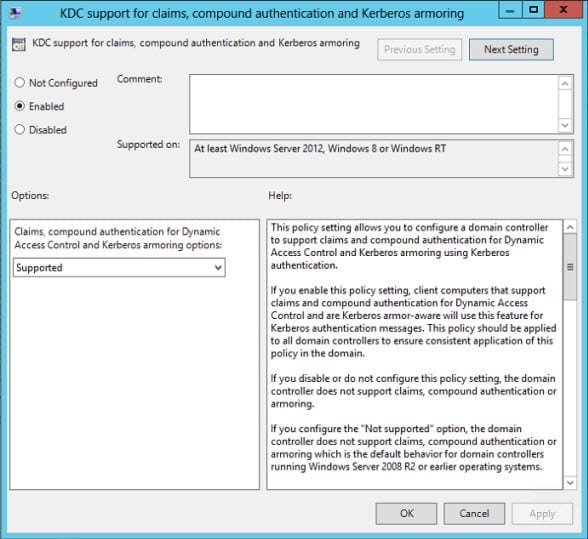
- In the right pane of the Group Policy Management Editor window, double-click KDC support for claims, compound authentication, and Kerberos armoring.
- In the new dialog window, set KDC support for claims to Enabled.
- Under Options, select Supported from the drop-down menu and then click OK.
The default option in the drop-down menu is Supported, where DCs advertise to clients that the domain is claims and compound authentication capable and that Kerberos armoring is supported. In Supported mode, claims and compound authentication are provided by Windows Server 2012 DCs on request. Always provide claims and Fail unarmored authentication requests require that you raise the domain functional level to Windows Server 2012, and as such you would need to make sure all DCs in the domain are Windows Server 2012.
- Back in the Group Policy Management Editor window, expand Computer Configuration > Policies > Administrative Templates > System > Kerberos.
- In the right pane of the Group Policy Management Editor window, double-click Kerberos client support for claims, compound authentication, and Kerberos armoring.
- In the new dialog window, set Kerberos client support to Enabled and click OK.
- Close the Group Policy Management Editor window.
Now that we have a Group Policy Object prepared to enable claims support, I recommend that you link the GPO to your domain, unless you need to exclude some devices from claims support.
- In the left pane of GPMC, right-click your AD domain and select Link an Existing GPO here from the menu.
- In the Select GPO dialog, choose the Kerberos DAC settings GPO and click OK.
Define Claim Types in the Active Directory Administrative Center (ADAC)
Now that the domain is ready for claims support, we need to define some claim types in Windows Server 2012. For the purposes of this demonstration, let’s define two claim types based on the Active Directory Country and Department attributes.
- Log in to Windows Server 2012 with a domain administrator account.
- Open Server Manager from the Start screen or using the icon on the desktop Taskbar.
- Select Active Directory Administrative Center from the Tools menu in Server Manager.
- In the left pane of the Active Directory Administrative Center (ADAC), click Dynamic Access Control.
- In the central pane of ADAC, double-click Claim Types.
- In the Tasks pane on the right of ADAC, click New > Claim Type.
- In the Create Claim Type dialog, type country into the Filter box under Source Attribute.
- You should see three results: countryCode, c, and co. Highlight c in the results.
You’ll notice that the default value type is Single-valued Choice. You can define multiple suggested values for this value type, and administrators can then select one of the pre-defined suggested values from the list when configuring conditional expressions.
- Select Suggested Values in the left pane of the claim type dialog.
- Select The following values are suggested and click Add.
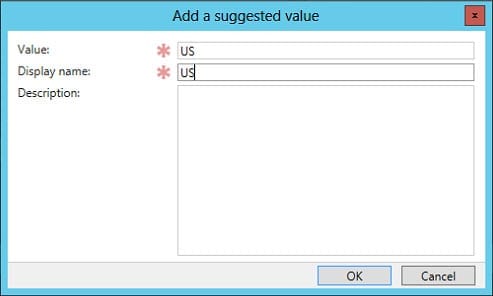
- In the Add a suggested value dialog, type US in the Value and Display name boxes. Now click OK.
- Repeat the above procedure to add UK as a suggested value and then click OK in the claim type dialog.
Repeat the steps above, but search for the department attribute in the Filter box and make sure that the department string is highlighted in the results. Add Finance and HR as suggested values. Back in ADAC, you should now see your two new claim types in the central pane.
Define Resource Properties in the ADAC
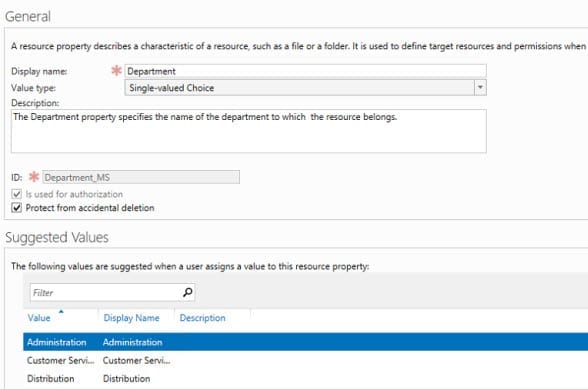
Dynamic Access Control extends FCI functionality by allowing administrators to centrally define resource properties, which can be downloaded to file servers and used to tag files for classification purposes. Microsoft includes some resource properties out-of-the-box and a default resource properties list. In the instructions below, we’ll enable the existing department resource property and create a new resource property for country.
- In the left pane of the Active Directory Administrative Center (ADAC), click Dynamic Access Control.
- In the central pane of ADAC, double-click Resource Properties.
- In the central pane of ADAC, right-click the Department resource property and select Enable from the menu.
- In the Tasks pane on the far right of ADAC, select New > Resource Property from the menu.
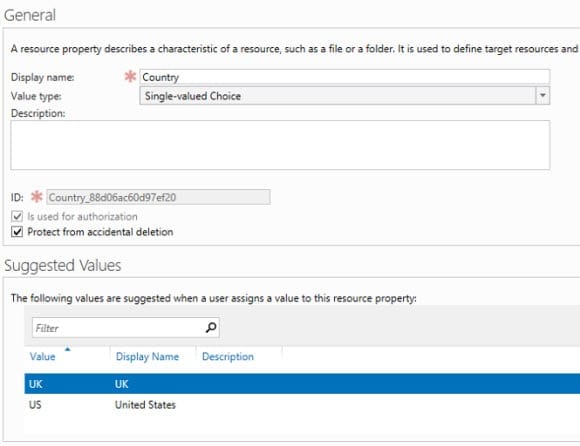
- In the Create Resource Property dialog, type Country in the Display name box and click Add under Suggested Values.
- In the Add suggested value dialog, type US in both the Value and Display name boxes, and click OK.
- Click Add again, type UK in both the Value and Display name boxes, and click OK.
- Click OK in the Country resource property dialog box.
Now we’ll make sure both properties belong to the main resource property list.
- In the left pane of the Active Directory Administrative Center (ADAC), click Resource Property Lists under Dynamic Access Control.
- In the central pane of ADAC, double-click Global Resource Property List.
- In the Global Resource Property List dialog, scroll down the list of Resource Properties and check that both Department and Country are present.
- If you can’t find them listed, click Add and select Country and Department in the Select Resource Properties dialog. Then click the right arrow, followed by OK.
- Close the Global Resource Property List dialog window.
What Next?
In part three of this series, I’ll show you how to create central access rules, deploy central access policies, and how to configure a Windows Server 2012 file server with Dynamic Access Control.


