Many of the VMware ESX Server advanced features cannot be used without a SAN (storage area network). Besides the high cost of the ESX Server software and the Virtual Infrastructure Suite, a SAN can be a huge barrier to using VMware ESX and features like VMotion, VMware High Availability (VMHA), and VMware Distributed Resource Scheduler (DRS). In this article, we take a look at how you can download a free open-source iSCSI server and use it as your SAN storage for VMware ESX and its advanced features.
Steps to Connect VMware ESX to an iSCSI Server (OpenFiler)
While these are the basic steps to connecting any VMware ESX Server to an iSCSI SAN, in my case, I am running VMware ESX Server 3i Beta inside a VMware Workstation VM.
Step 1 – Licensing
First, make sure that your server is licensed to use iSCSI. You can do this inside the Configuration tab for the server and then check under Licensed Features.
Step 2 – Add the Networking Adaptor
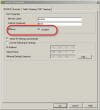
Next, add the VMKernel Port under the Networking configuration option. The VMKernel port is required to use iSCSI. Check the properties of that port and ensure that iSCSI Enabled is checked.
Step 3 – Open a port on your Firewall for iSCSI
If you are using VMware ESX 3i, like I am, then you can skip this step. However, on VMware ESX 3.0.x systems, you need to open a port in your security profile (your firewall) for iSCSI to function.
To do this, go to the Configuration tab, then to Security Profile and click Properties. Check the port for the iSCSI Initator.
Step 4 – Configure your Storage Adaptors
Go to the Configuration tab, then to Storage Adaptors. Your adaptor may be called vmhba40 or, in my case, it is called the iSCSI Software Adaptor. Select that adaptor, then click Properties.
Click on the Configure button, then check Enable, then click OK, then Close. Your adaptor will be modified and you should see Completed in your Recent Tasks, when done.
Now, go back into the Properties for the adaptor and click on the Dynamic Discovery tab. Choose to Add, and new Target. Enter the IP address of the OpenFiler iSCSI server and click OK.
Your adaptor will be modified and you should see Completed in your Recent Tasks, when done.
Now, click Rescan, and rescan for new Targets. When done, you should see that your iSCSI adaptor now has 1 Target (the OpenFiler server), like this:
Step 5 – Verify that you have access to the new iSCSI Storage array
To verify that you can use the new iSCSI SAN volume, you should add a VMFS volume on it by going to the storage section, then clicking Add Storage. Here is what the 100GB array will look like with a VMFS volume on it:
Please Note, if you find this interesting & useful, I recommend the VMware ESX Video series where I go through this process with you in video format, step by step.
Summary
The ability to have your Windows Server and VMware Servers access SAN storage opens up many possibilities. Given that you have a fast & reliable network, using iSCSI is an excellent option. When compared to Fibre Channel (FC), the cost of iSCSI will always be “right”. Plus, by using an iSCSI SAN with VMware ESX, you can gain the benefits not only of centralized storage but also for the advanced features of VMware ESX Server.


