Configure a DNS Zone Using Azure DNS
In today’s Ask the Admin, I’ll show you how to configure a DNS Zone using Azure DNS, and how to add records to the zone.
In Microsoft Azure: A First Look at Azure DNS on the Petri IT Knowledgebase, I introduced you to Microsoft’s new Azure DNS service, and how it gives you the ability to use Microsoft’s DNS infrastructure for name resolution of your domain’s zones. For example, you might have an application, such as sharepoint.acme.com, for which you need to set up and manage DNS records, so it can be reached internally or from the public Internet. Azure DNS doesn’t allow you to purchase domain names from Microsoft, but it does enable you to utilize their infrastructure for fast and reliable DNS.
Set Up an Azure DNS Zone
Azure DNS can be configured using the management portal or PowerShell, but in this article, I’m going to use PowerShell because it also allows for testing. If you’ve never used PowerShell to configure Azure, you’ll need to download Microsoft Azure PowerShell using the Web Platform Installer.
- Log in to Windows 10.
- Open a PowerShell window by typing powershell in the search box on the taskbar and selecting Windows PowerShell from the list of results.
- Log in to Azure using the Login-AzureRmAccount cmdlet, and enter your Azure tenant credentials when prompted. If you have more than one Azure subscription associated with your Microsoft account, you’ll need to select it using the Set-AzureSubscription cmdlet. In the example below, I used Get-AzureRmSubscription to list the available subscriptions, and then set Pay-As-You-Go as the subscription to use.
Get-AzureRmSubscriptionSet-Azure

Subscription –SubscriptionName Pay-As-You-Go
Azure DNS zones must be associated with a Resource Group (RG). So, let’s create a new RG for the zone:
New-AzureRmResourceGroup -Name DNSZoneResourceGroup -Location 'West US'

RGs must be linked to a region, in the example above ‘West US’, but Azure DNS zones are global, so the location setting of the RG has no bearing on the resulting DNS zone. Before creating a zone, you must register the Microsoft.Network resource provider for your subscription. This is a one-time only operation and doesn’t need to be repeated when creating additional zones.
Register-AzureRmResourceProvider -ProviderNamespace Microsoft.Network
I’m going to create a zone called contoso.com for internal Azure use only. There will be no name resolution from the public Internet because I don’t own the domain name. To create the new zone, use the New-AzureRmDnsZone, as shown below:
New-AzureRmDnsZone -Name contoso.com -ResourceGroupName DNSZoneResourceGroup
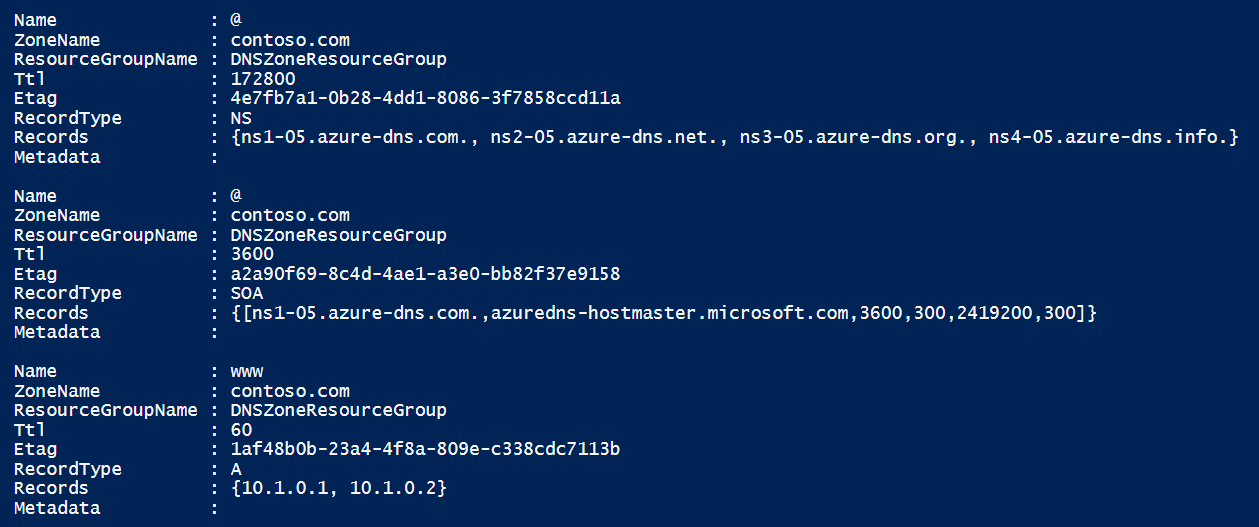
To check that the zone was created properly and find out the host names of the Azure name servers, use the Get-AzureRmDnsRecordSet cmdlet:
Get-AzureRmDnsRecordSet -ZoneName contoso.com -ResourceGroupName DNSZoneResourceGroup
Let’s try to resolve the new DNS zone name using the Resolve-DnsName cmdlet. You can use any of the name servers for the zone as returned in the output of the Get-AzureRmDnsRecordSet cmdlet above:
Resolve-DnsName -Name contoso.com -Server ns1-05.azure-dns.com
Finally, lets add an A record to the zone using the New-AzureRmDnsRecordSet, Add-AzureRmDnsRecordConfig, and Set-AzureRmDnsRecordSet cmdlets. I start by using the New-AzureRmDnsRecordSet cmdlet to create an A record called WWW, with a Time-to-Live (TTL) value of 60 seconds. Then I add two IP addresses with Add-AzureRmDnsRecordConfig, and finally commit the changes using Set-AzureRmDnsRecordSet.
$rs = New-AzureRmDnsRecordSet -Name www -RecordType A -ZoneName contoso.com -ResourceGroupName DNSZoneResourceGroup -Ttl 60

Add-AzureRmDnsRecordConfig -RecordSet $rs -Ipv4Address 10.1.0.1
Add-AzureRmDnsRecordConfig -RecordSet $rs -Ipv4Address 10.1.0.2

Set-AzureRmDnsRecordSet -RecordSet $rs
Let’s run Get-AzureRmDnsRecordSet again to check the changes have been committed:
Get-AzureRmDnsRecordSet -ZoneName contoso.com -ResourceGroupName DNSZoneResourceGroup

In this article, I showed you how to set up a DNS zone in Azure DNS and add records.


