Overview
One of the great new features of vSphere 5 allows you to roll out pre-configured VMware ESXi hosts, “en masse.” This is the absolute fastest way to have a large vSphere infrastructure up and running, in no time.
As part of the VMware vSphere 5 Training I created with Elias Khnaser, Elias created a one hour video on Auto Deploy (yes, there is a lot to know). By the way, if you are preparing for your VCP5, then learning Auto Deploy is on the blueprint and something to be studied.
In the 8 minute video sample below, taken from the full course, Elias shows us how to:
- use PowerCLI to create a deployment rule
- boot host via PXE to install ESXi
- view that newly installed host in a vCenter staging profile
- create a cluster & add the host to a cluster
- attach a host profile to the host to configure it
- move a host from a staging folder to the production cluster with PowerCLI
(Instructional video below provides a walkthrough of the steps contained in this article.)
What is Auto Deploy?
Auto Deploy is one of the coolest features that comes with VMWare vSphere 5. It enables admins to significantly cut down time they usually spend in provisioning vSphere servers. It makes a very substantial impact when you need to provision hundreds or thousands of physical hosts with ESXi.
To use Auto Deploy, you will need:
- A PXE Boot Infrastructure comprised of DHCP and TFTP servers for network booting
- An ESXi image profile created using Image Builder, which is a new vSphere 5 tool for creating and maintaining custom ESXi images
- vCenter Server to configure hosts using vCenter host profiles. Host configuration is usually done after ESXi has been installed, the host has been added to vCenter, and the host profile has been applied.
- Auto Deploy Server to install ESXi on the hosts after the PXE boot. It is also used in adding hosts to vCenter, and applying host profiles.
In this post, we’ll jump into the portion wherein you’ll actually get to see Auto Deploy in action. To get into the details of the preceding steps, watch our videos!
Step 1: Use PowerCLI to Create a Deployment Rule
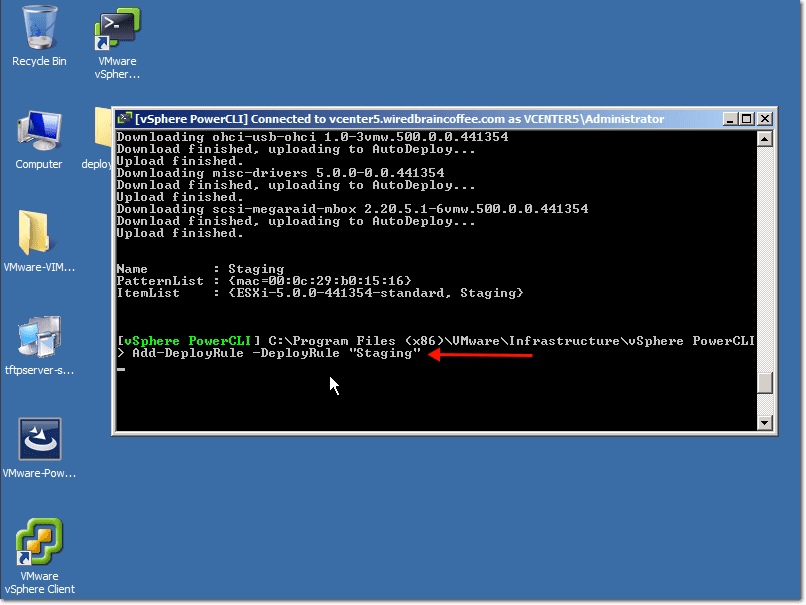
Ok, let’s assume you’ve created a new rule. You now have to add that new rule to the Active Set Rules. Otherwise, it won’t take effect. To do that, you go to the vSphere PowerCLI and execute this command:
Add-DeployRule -DeployRule "Staging"
wherein “Staging” is the name of the rule you just created.
Step 2: Boot Host via PXE to Install ESXi
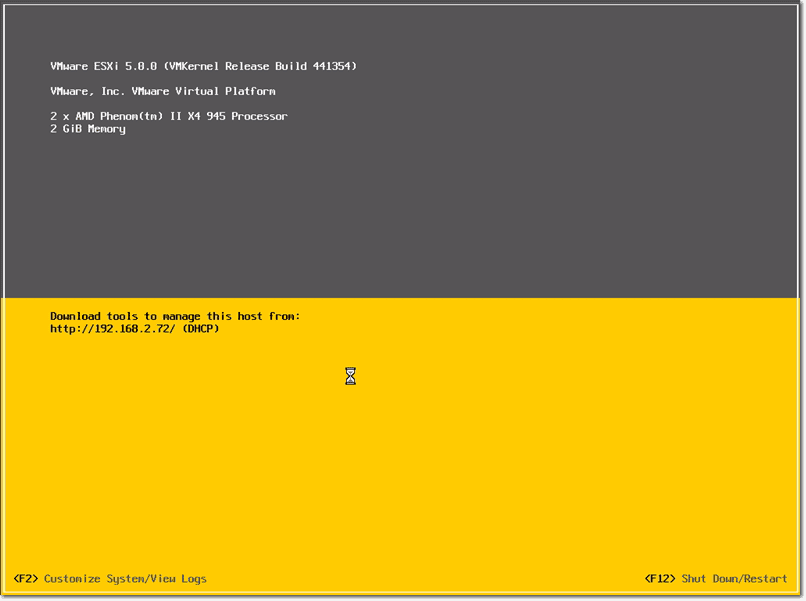
Once you’re done with that, the next step would be to reset your host. If everything goes well, it should PXE-boot right into ESXi and start the installation. During the PXE boot process, Auto Deploy will obtain an IP address via DHCP and then redirect the host to a TFTP server. In turn, the TFTP server will stream an ESXi image into the physical host’s memory.
Remember, this is all done over your network.
Step 3: View that Newly Installed Host in a vCenter Staging Profile
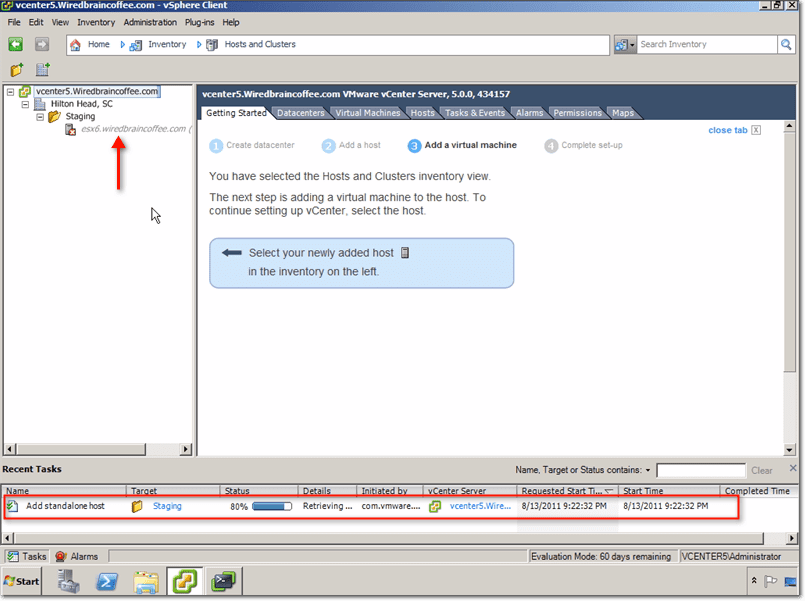
After that, the ESXi host will reboot and make itself available in vCenter inside a folder you should have created earlier.
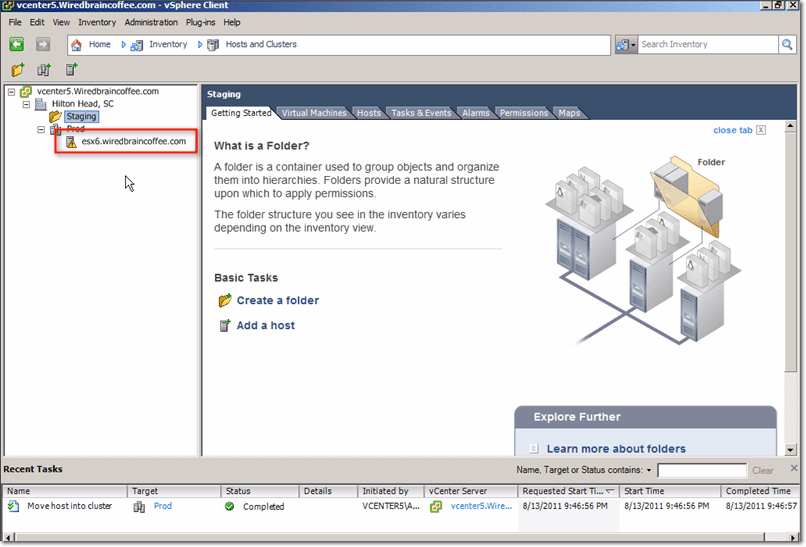
In our case, the folder we created was named “Staging”. That folder serves as the staging location of the ESXi host before it is moved into a production cluster. Inside the panel at the bottom of the screen, you can monitor the progress as the ESXi host is added into the folder.
All other processes that you’ll be doing inside vCenter can be monitored inside that panel as well.
Step 4: Create a Cluster and Add the Host to a Cluster
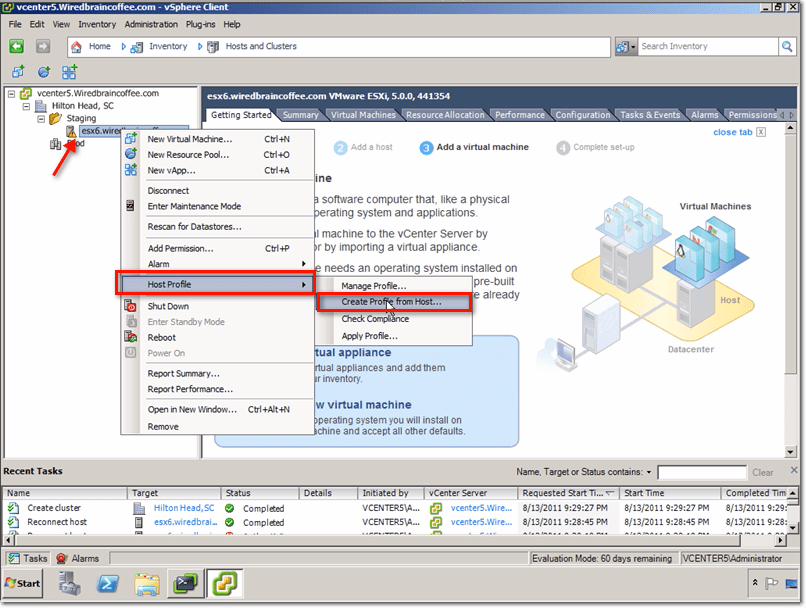
After having added the ESXi host into the Staging folder, the next step would be to create a profile from that particular host. Let’s assume of course you already made all the necessary configuration changes and the server is already exactly the way you want it.
To proceed with creating a host profile from that host, right-click on the host and, in the context menu, navigate to Host Profile > Create Profile from Host.
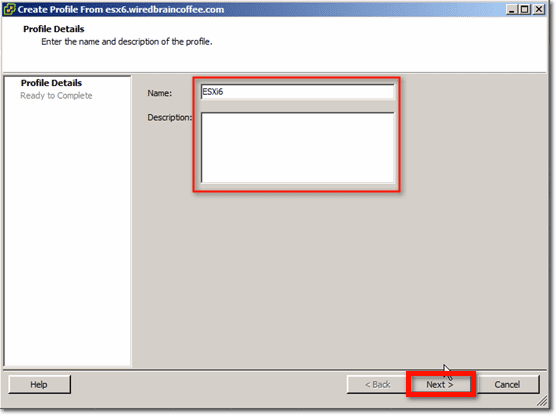
Give the profile a Name and a Description and click Next.
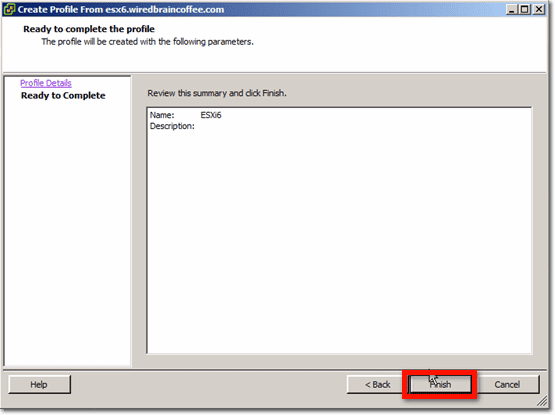
Click Finish.
Step 5: Attach a Host Profile to the Host to Configure it
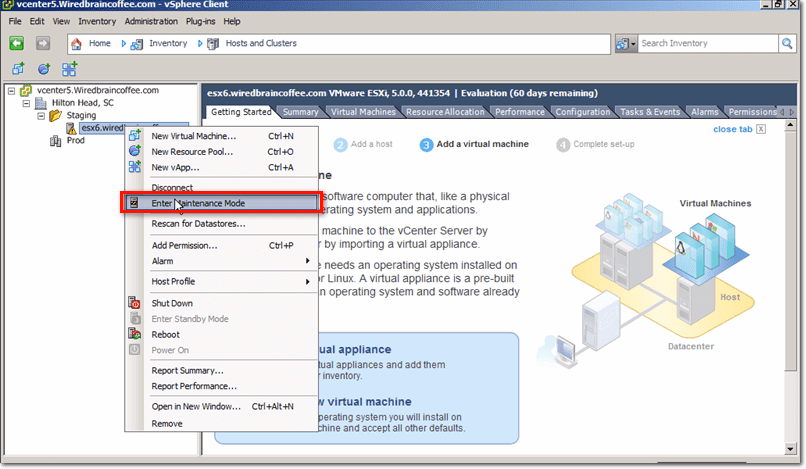
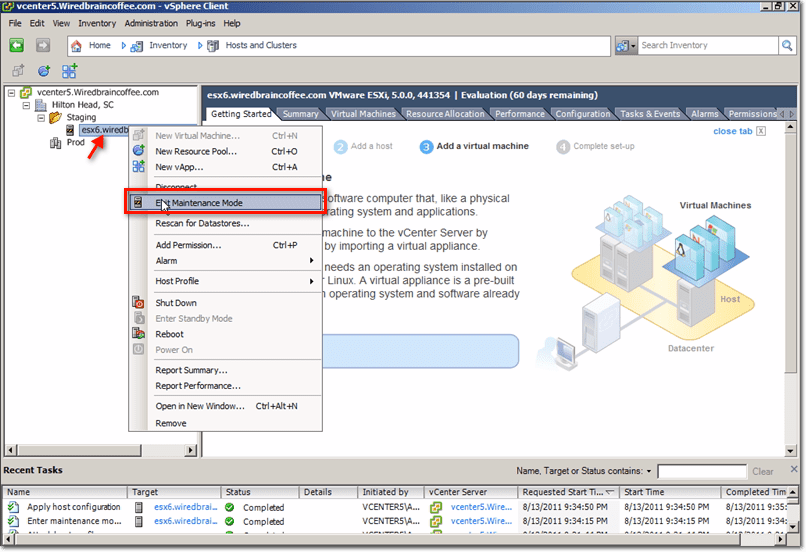
You also need to attach that particular host profile to this server. To do that, you have to put the server to maintenance mode first. Again, right-click on the host and then click Enter Maintenance Mode.
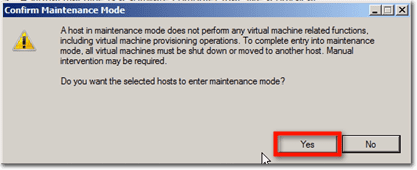
Confirm that you want to enter maintenance mode by clicking Yes.
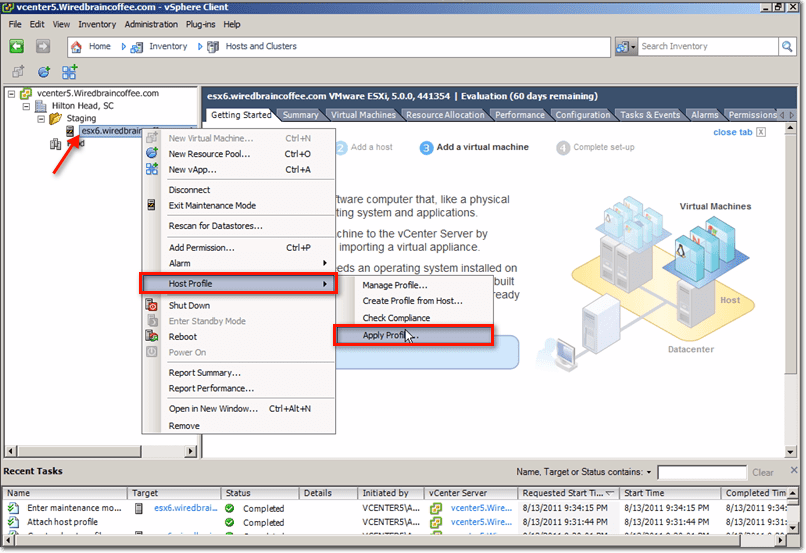
The moment the server enters maintenance mode, right-click on it and navigate to Host Profile > Apply Profile.
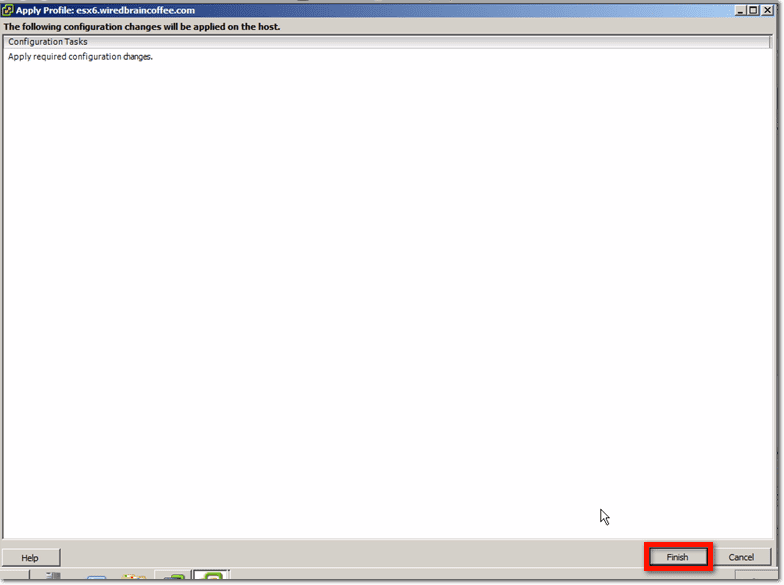
Click Finish.
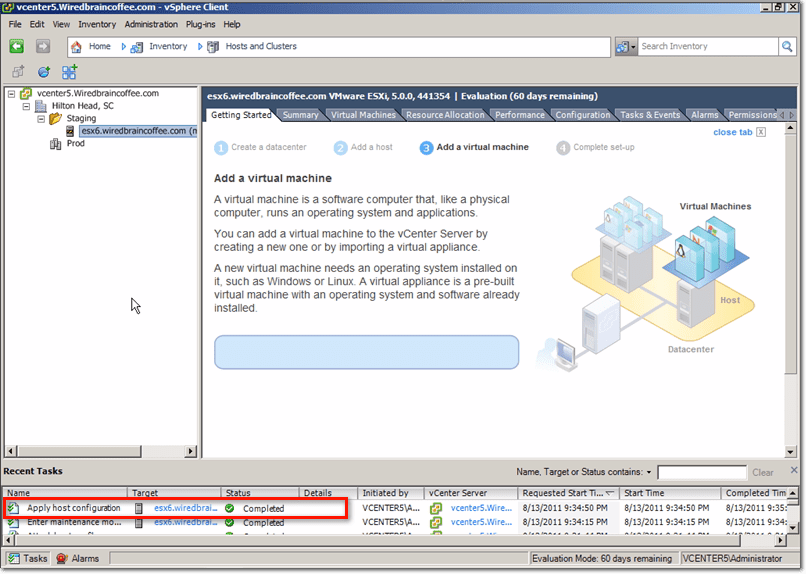
Wait until the system finishes applying the host configuration.
So at this point, you would have already PXE-booted, created an image profile entry for that host in vCenter, as well as created a host profile entry for it. Therefore, you could easily reboot that host and do whatever it is you need to do to it.
But first, you need to take it out of maintenance mode. Right-click the host and select Exit Maintenance Mode.
Step 6: Move a Host from a Staging Folder to the Production Cluster with PowerCLI
One thing you will want to do is move the host from staging into production. Let’s say you have a production cluster named “Prod,” which is where you’ll be moving the host into. To proceed, bring back PowerCLI.
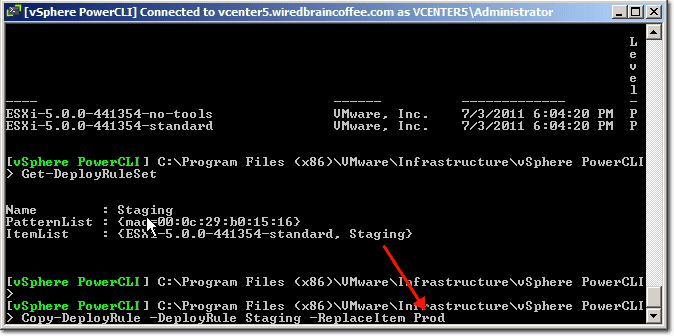
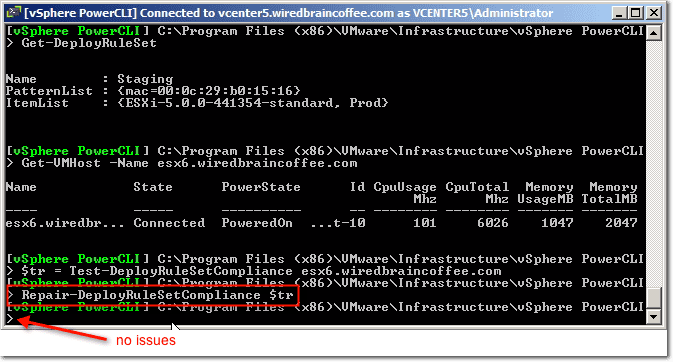
Now, take note. You can’t modify a rule that is already active. You have to copy that rule and then make the modifications and changes you want on that copy. To do that, execute the command:
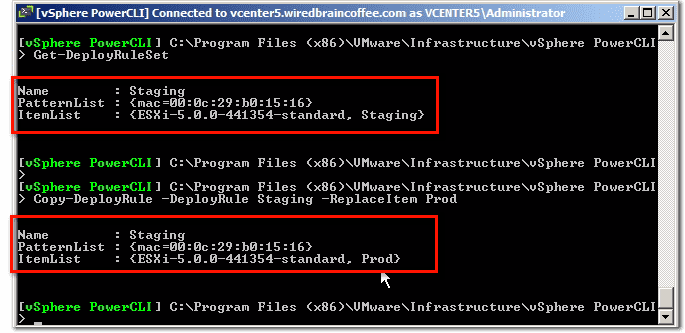
Copy-DeployRule -DeployRule Staging - ReplaceItem Prod
Wherein Staging is the name of the rule you want to modify and Prod is the name of the item that will replace the original item, which in this case is also named Staging.
You”ll see that particular item change as soon as you execute the command.
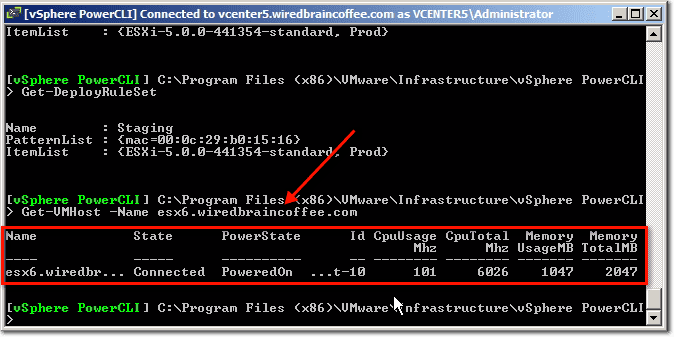
After that, if you want to verify whether the host is actually accessible (i.e., whether it is possible to attach to that particular host), execute this command:
Get-VMHost -Name esx6.wiredbraincoffee.com
wherein esx6.wiredbraincoffee.com is just the FQDN (fully qualified domain name) of the host that you want to verify.
If everything’s running perfectly, it should show in the results that appear after you execute the command.
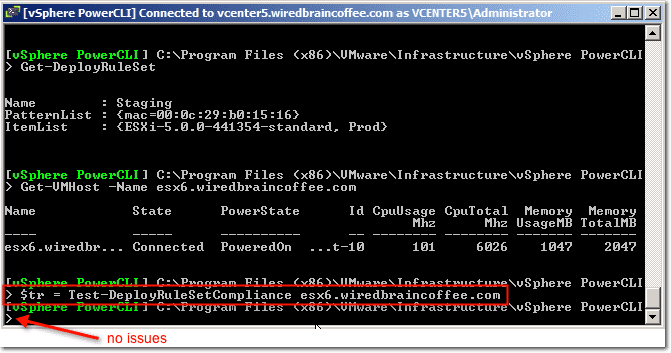
Once you see that the results are good, you’ll be ready to test that particular configuration. Testing can be done by executing this command:
$tr = Test-DeployRuleSetCompliance esx6.wiredbraincoffee.com
wherein $tr is an environmental variable which you’ll be using in the command that’s about to follow.
If the command above executes without any issues, that means you’re ready to proceed.
Meaning, your configuration is valid and you’re allowed to make the change. The last command you need to execute, which as mentioned earlier will be using the environmental variable $tr, is this:
Repair-DeployRuleSetCompliance $tr
Although it uses the term ‘repair,’ it really isn’t doing any repairs. This is just VMWare’s way of telling you that you’re about to modify this.
Again, if there are no issues after execution, then you’re good to go.
Once you check vCenter, you’ll notice that the host has already been moved from the staging folder to your designated production folder.
Conclusion
I just showed you how to use Auto Deploy to easily move your hosts back and forth between your folders and apply any kind of particular profile on those hosts.
For the full one hour training video on Auto Deploy, check out our 16 hour VMware vSphere 5 Training course from TrainSignal.com.


