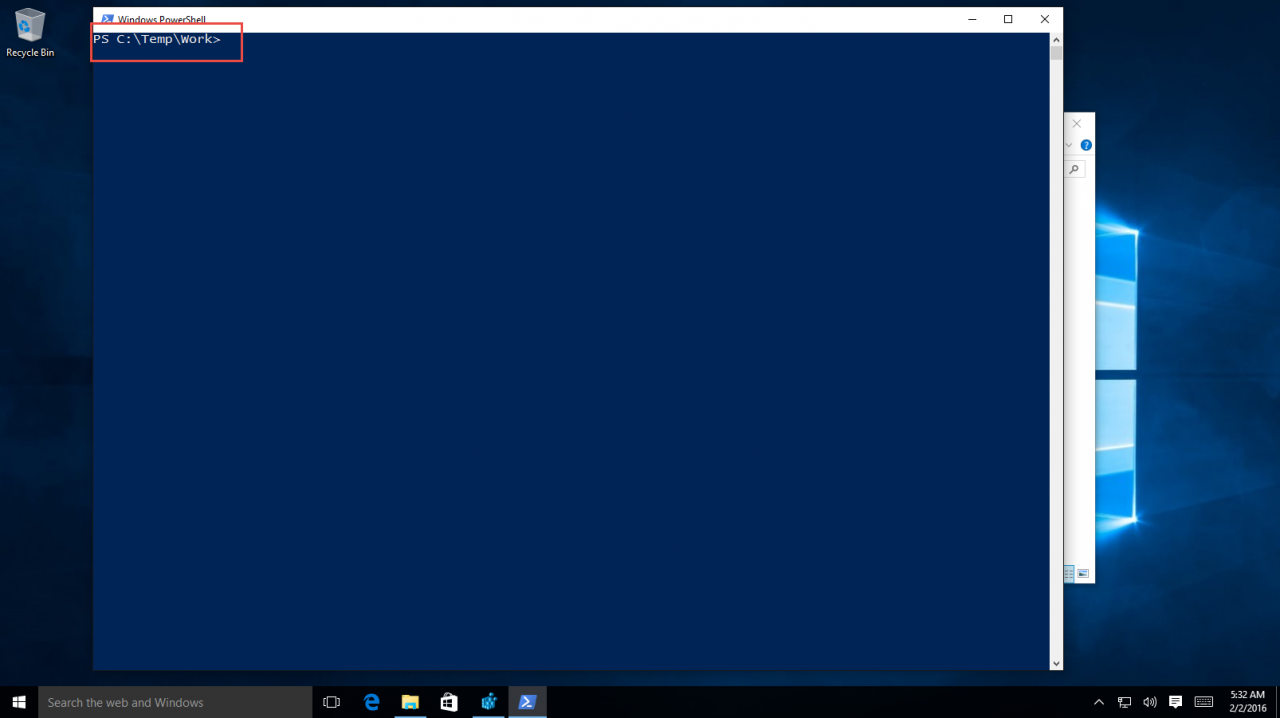
Add PowerShell to Windows Explorer Context Menu in Windows 10
Ever since the days of Windows Vista, it was possible to use Windows Explorer’s context menu to quickly open a command prompt window to a specific location by holding the shift key and right-clicking a folder. The “Open Command Prompt Here” appeared, allowing you to open the command prompt in the folder of your choice.
However, this option only worked for the command prompt, and as we all know, PowerShell is the preferred command-line application in Windows operating systems since the last seven or eight years. So why not add it to the Windows Explorer context menu as well?
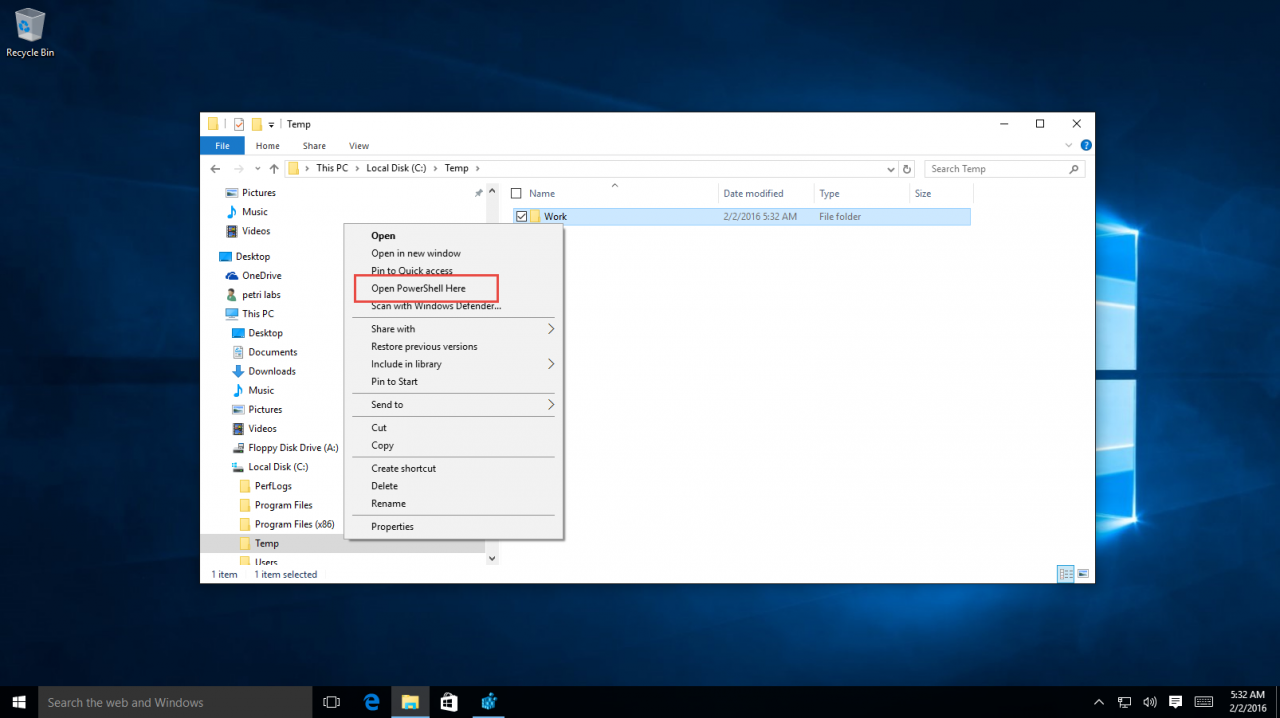
If you find that you frequently open a PowerShell window and change to a specific directory, you can add the “Open PowerShell Here” option to your Windows Explorer context menu. This option enables you to right click on a folder within Windows Explorer, and choose it, which opens a PowerShell window with that folder as your active directory.
To add the “Open PowerShell Here” option to the default right click context menu in Windows Explorer, perform the following steps:
Before proceeding, please read carefully:
Warning: This document contains instructions for editing the registry. If you make any errors while editing the registry, you can potentially cause Windows to fail or be unable to boot, requiring you to reinstall Windows. Edit the registry at your own risk. Always back up the registry before making any changes. If you do not feel comfortable editing the registry, do not attempt these instructions. Instead, seek the help of a trained computer specialist.
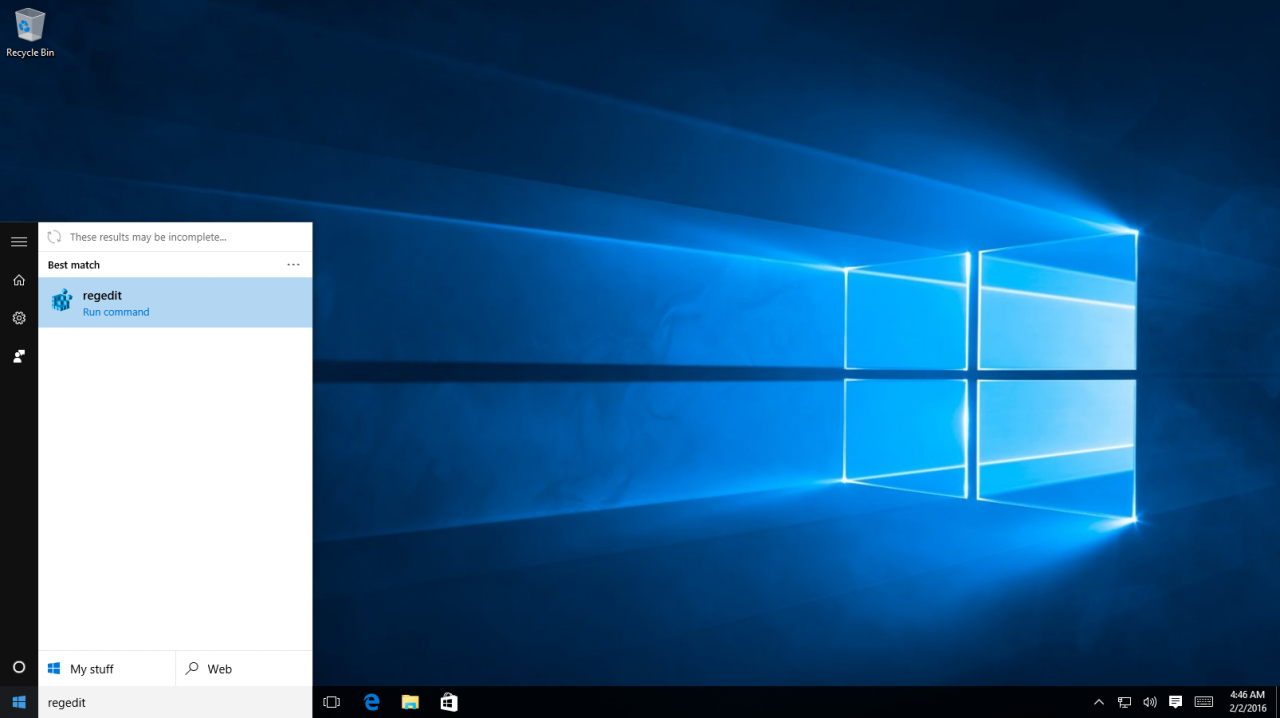
1. Open the Registry Editor. You can do this by clicking on Start and typing regedit.
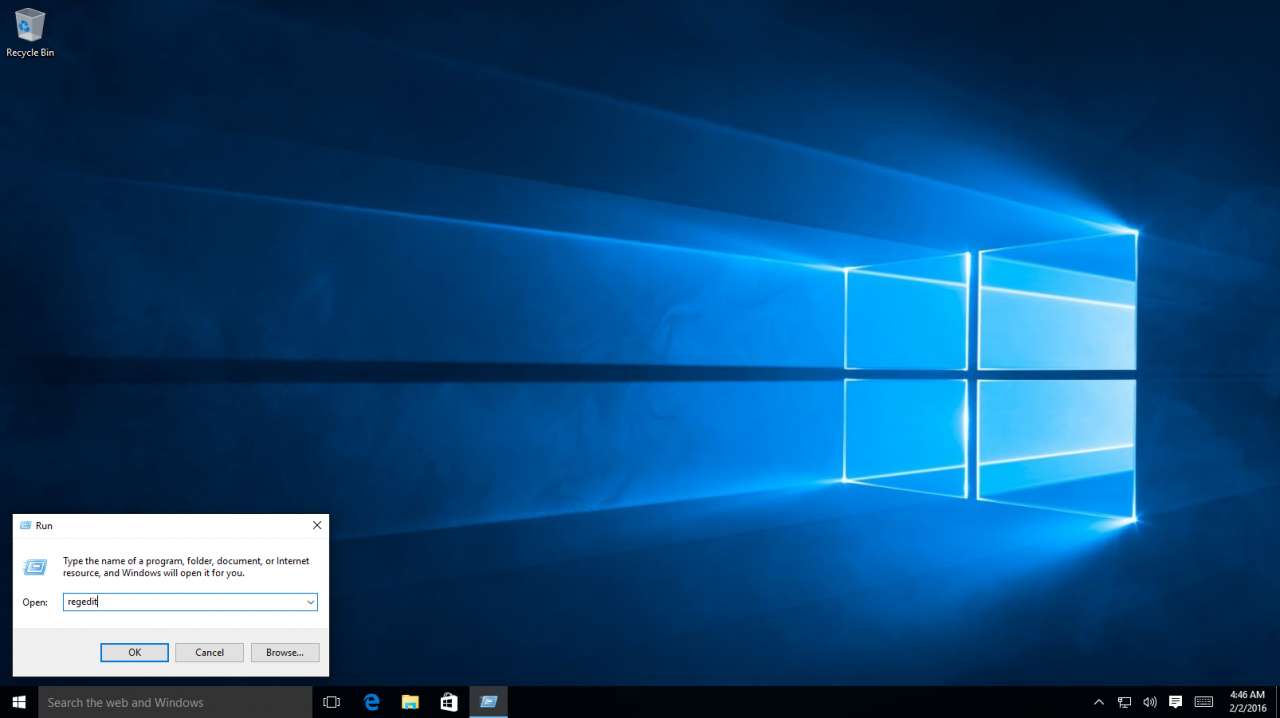
If you want, you can also click on the Windows key + R, and type “regedit.” Click “OK.”
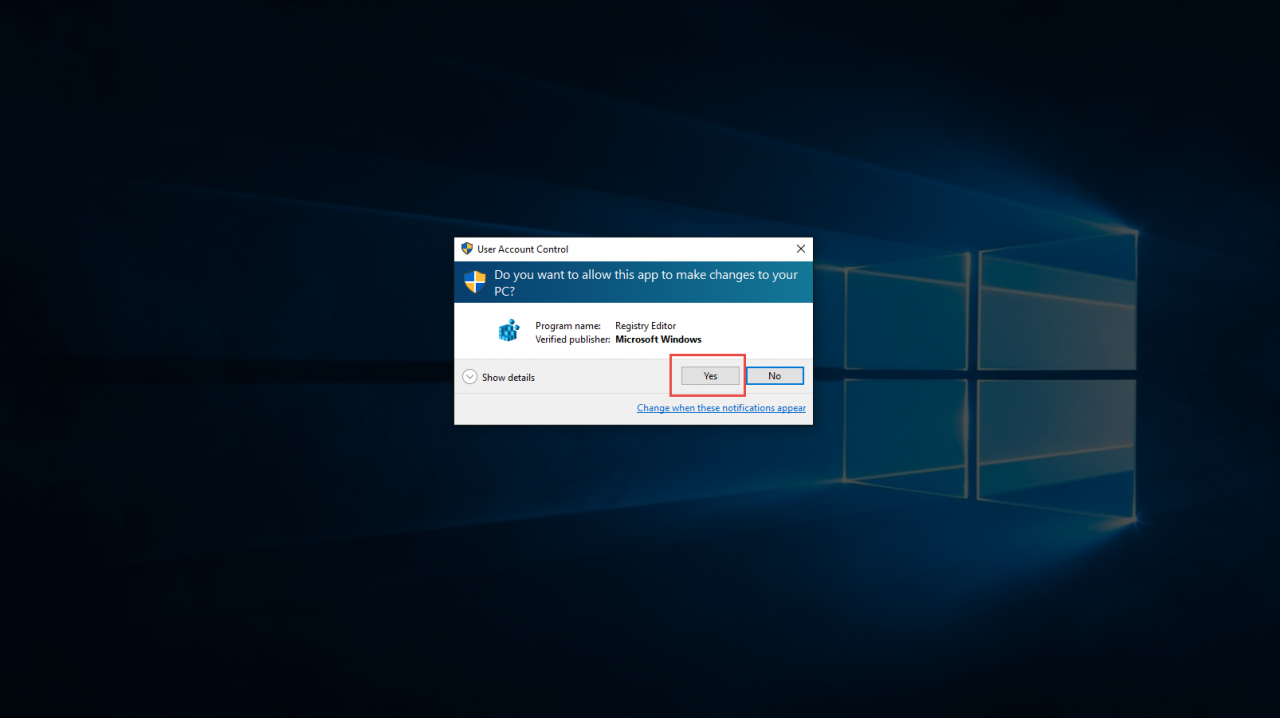
You may be prompted with a UAC prompt, click “Yes.”
2. Navigate to the following path:
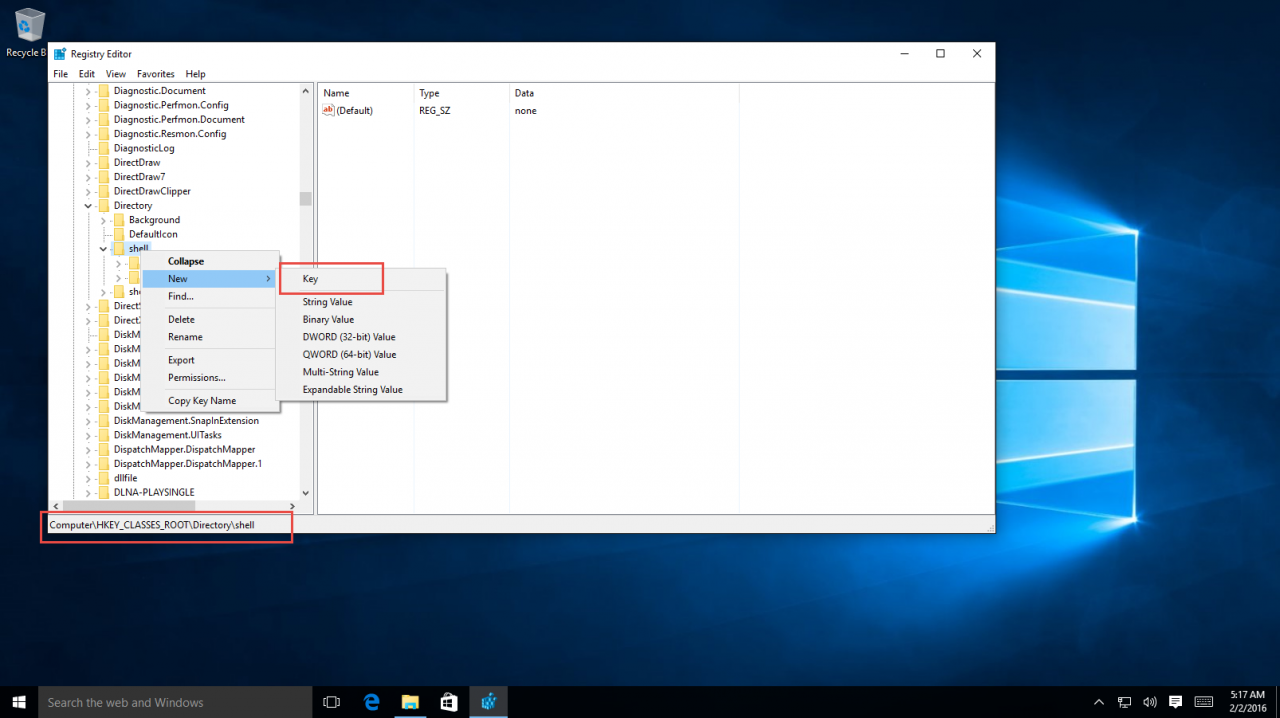
HKEY_CLASSES_ROOT\Directory\Shell
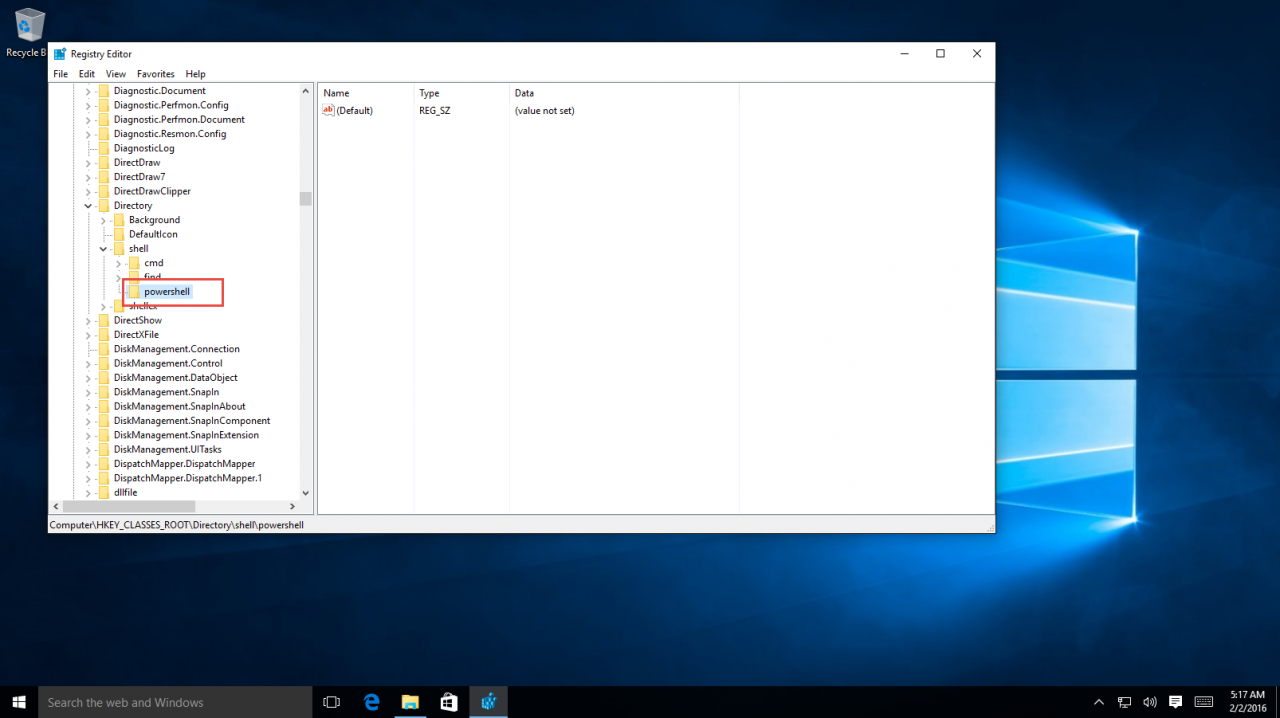
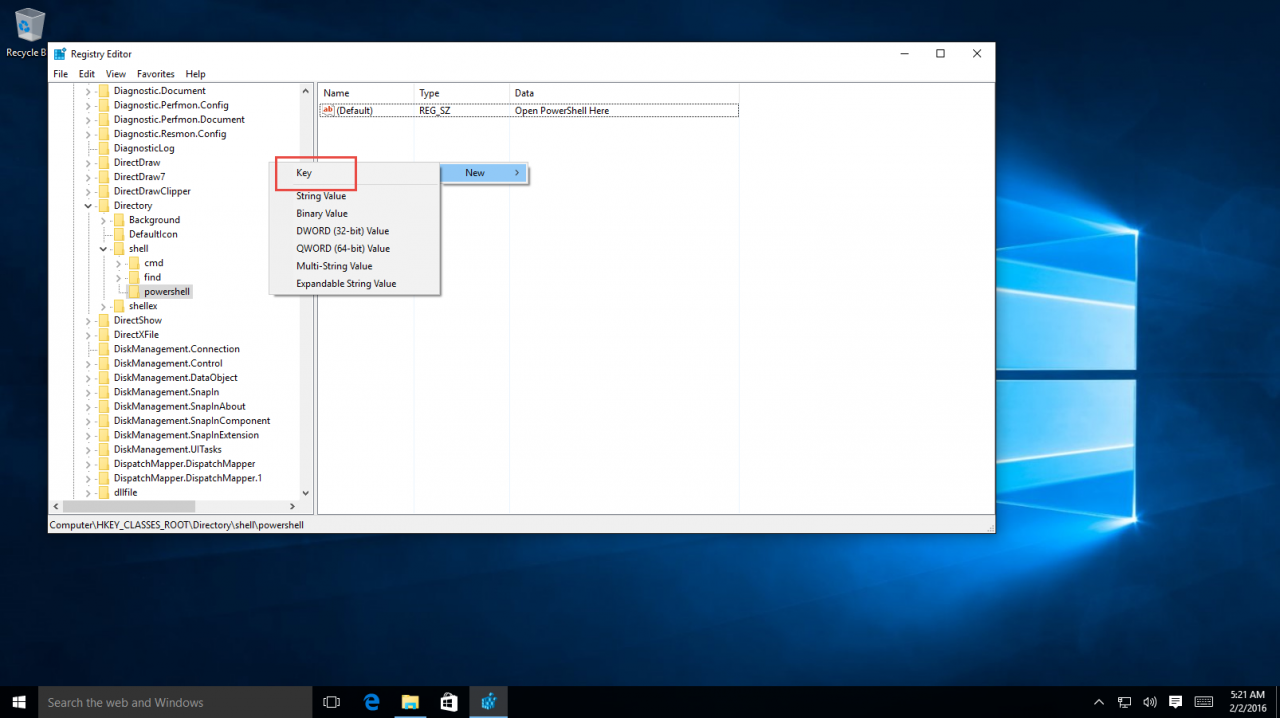
3. Create a new key by clicking Edit > New > Key.
Call the new key “powershell.”
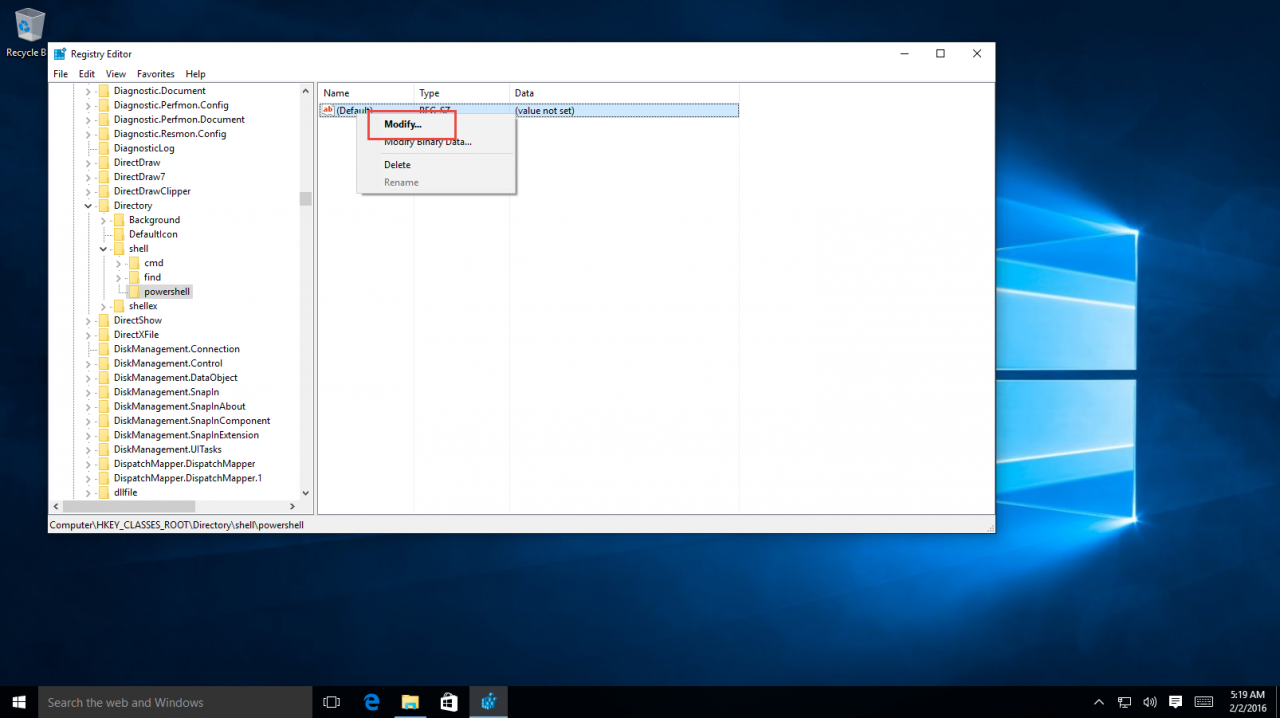
3. Modify the default string in the “powershell” key by right-clicking it and selecting “Modify…”
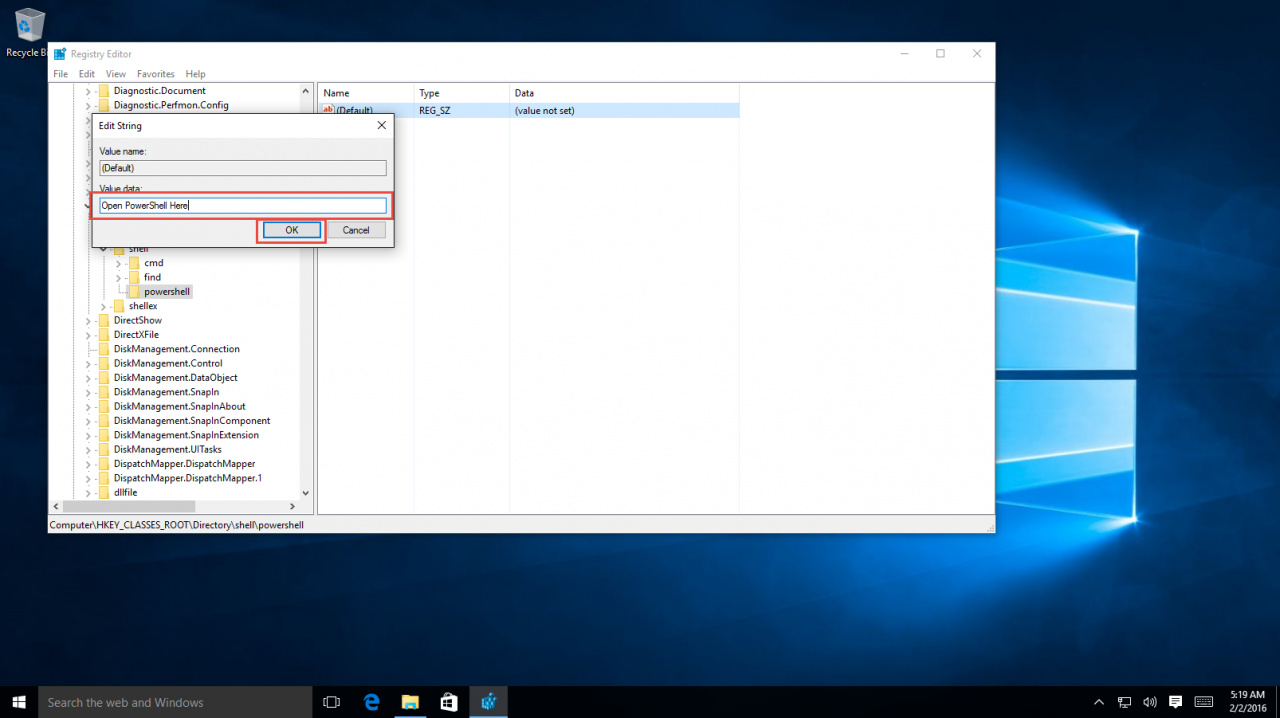
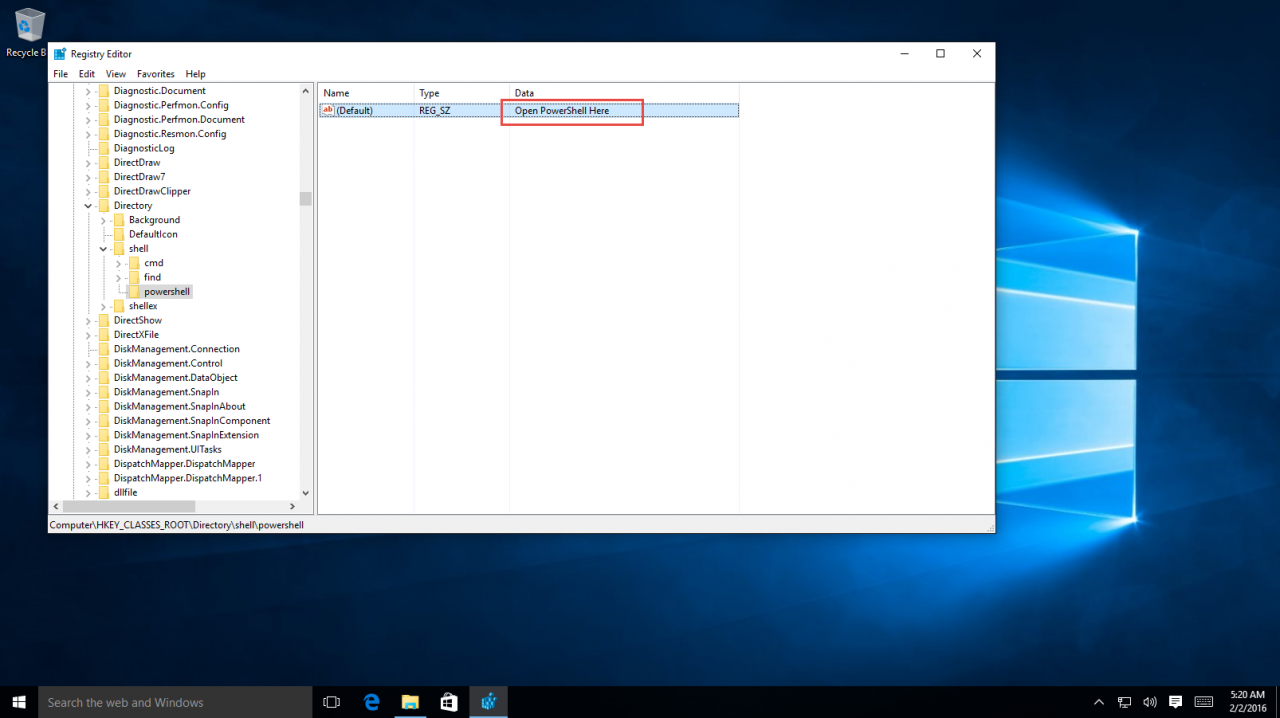
Call the new value “Open PowerShell Here.” Click “OK.”
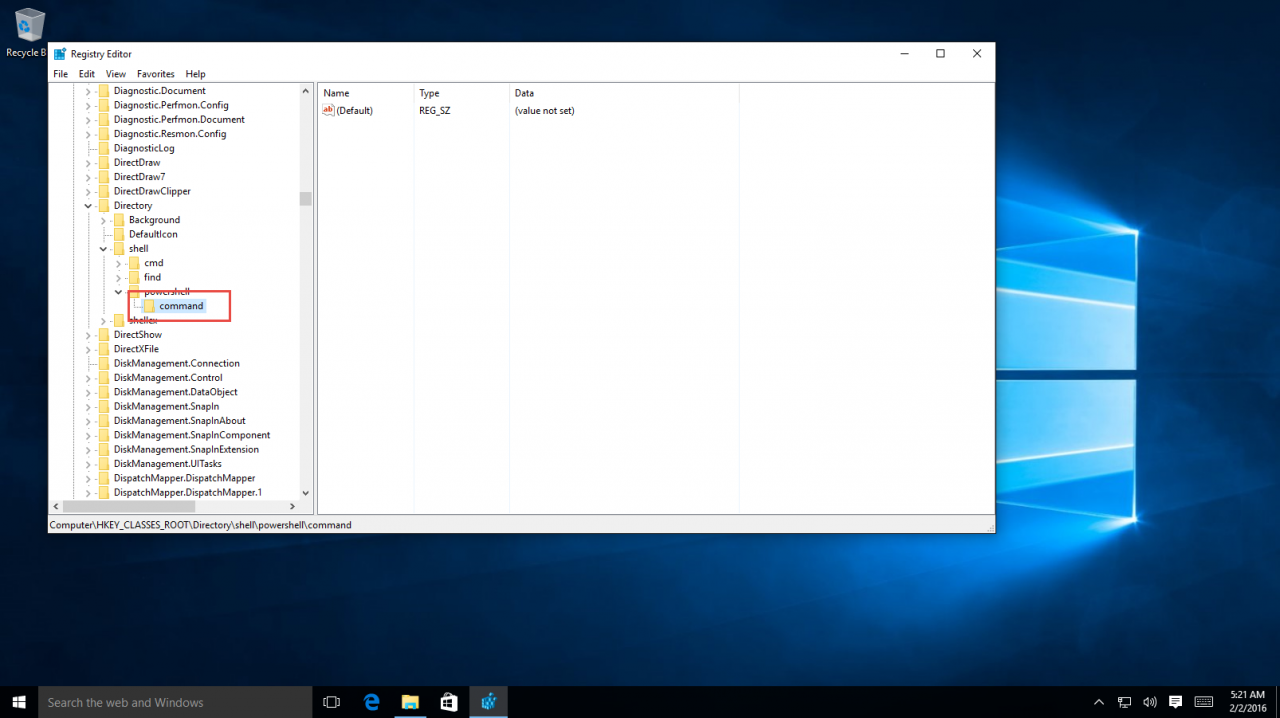
4. In the powershell key, create a new key by clicking Edit > New > Key.
Call the new key “command.”
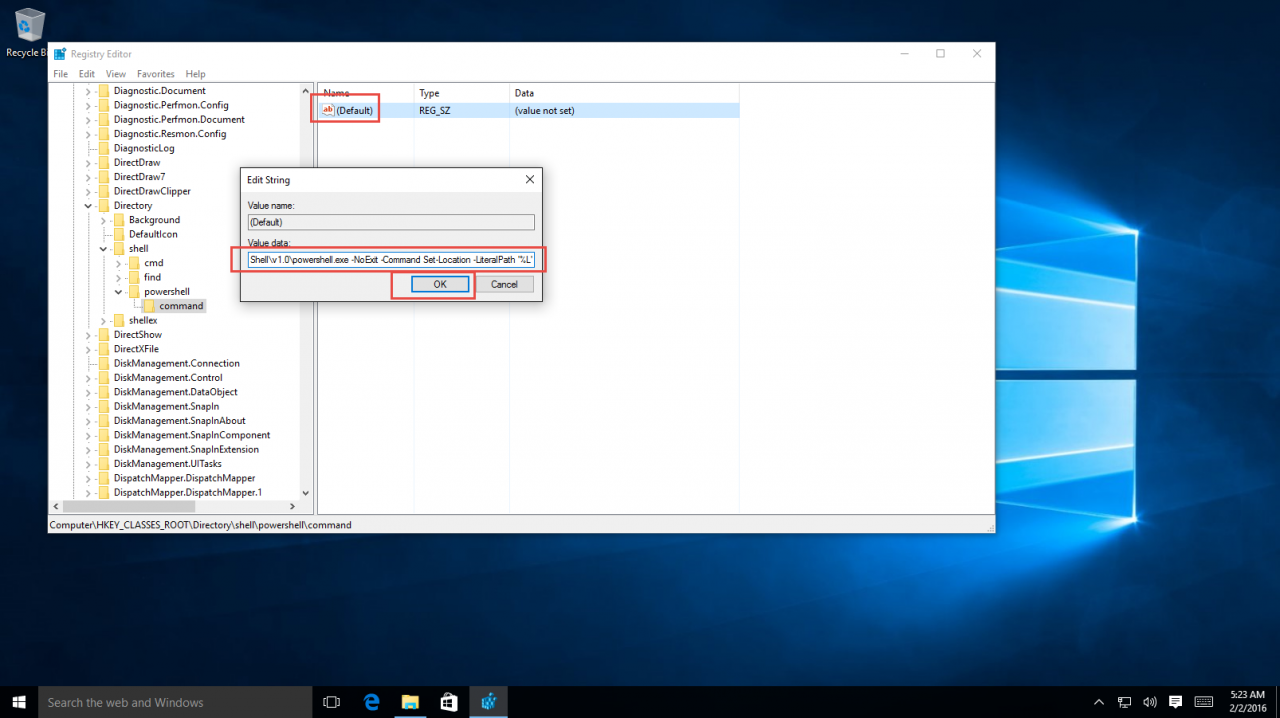
6. Modify the default string in the command key by using the following text:
C:\Windows\system32\WindowsPowerShell\v1.0\powershell.exe -NoExit -Command Set-Location -LiteralPath ‘%L’
Click “OK.”
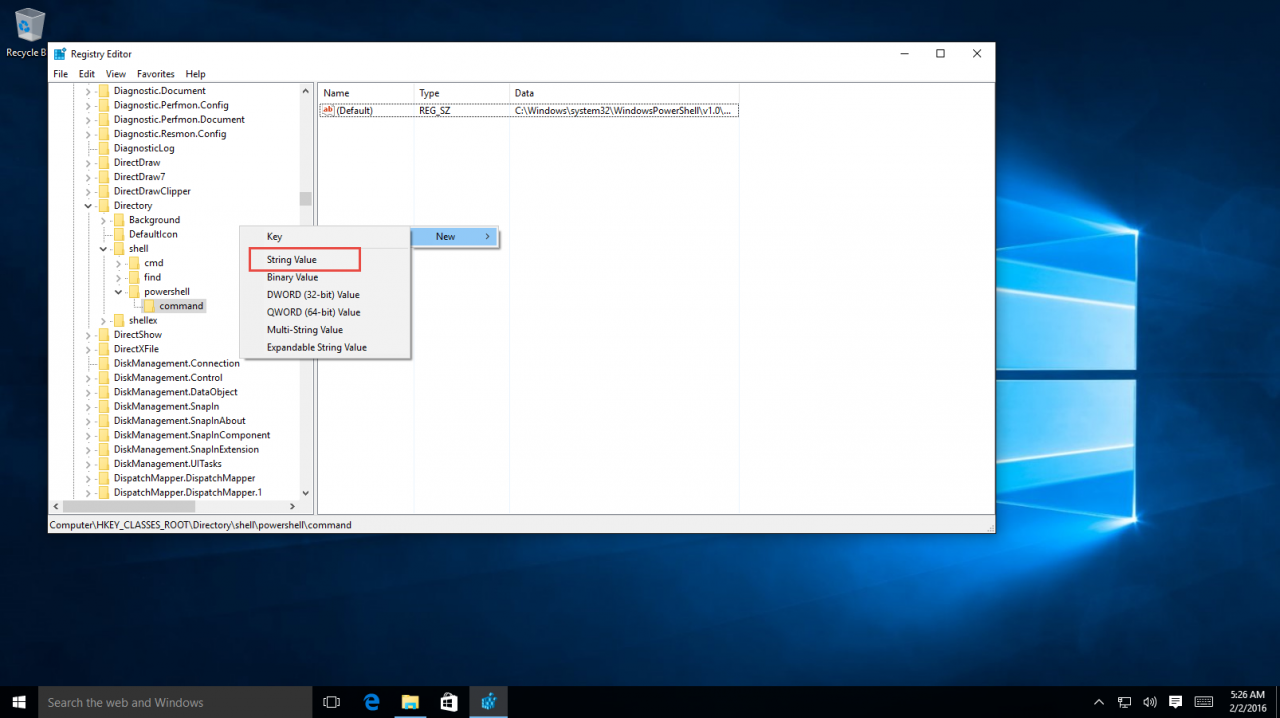
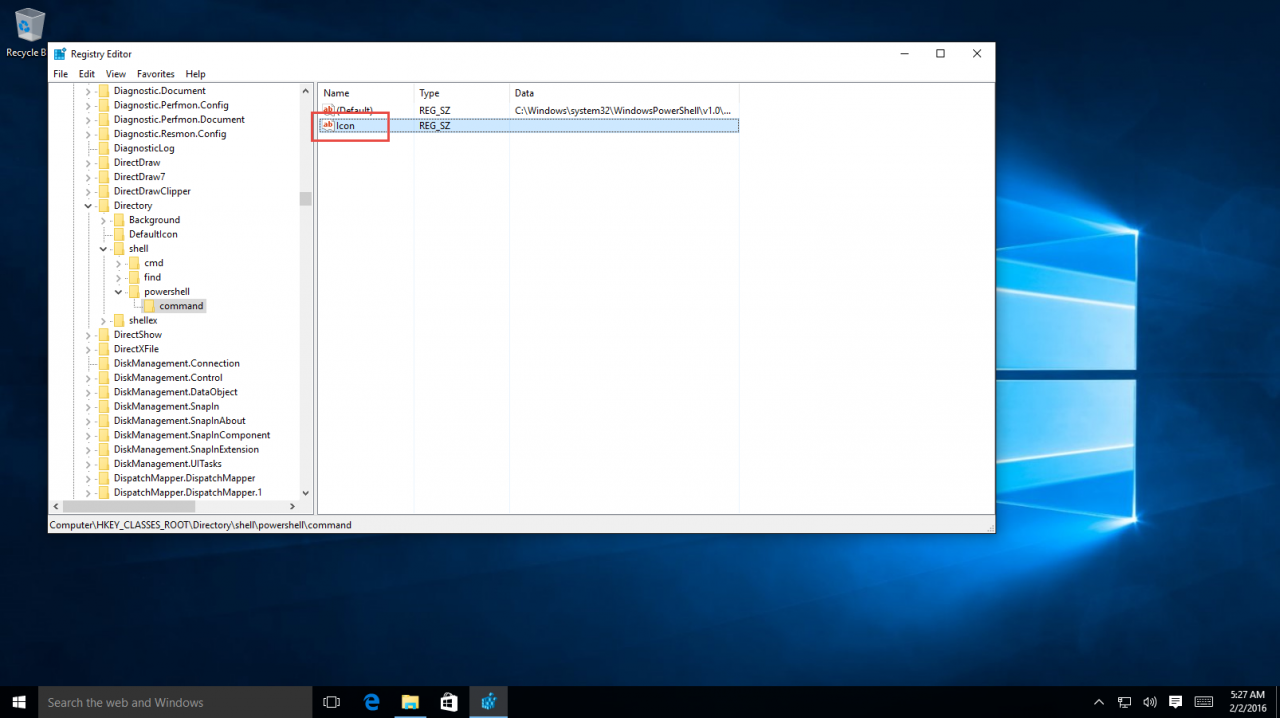
7. Add a new string by clicking Edit > New > String value.
Let’s call it “Icon.”
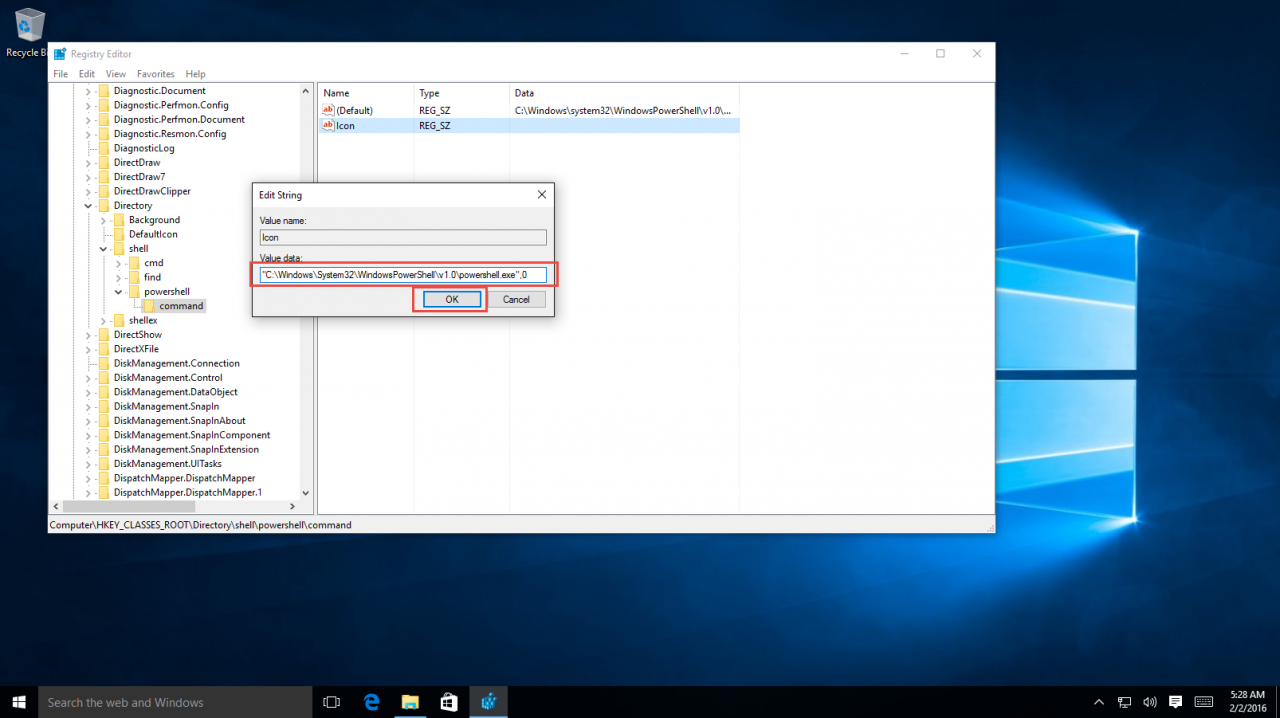
8. Modify the value by using the following text:
“C:\Windows\System32\WindowsPowerShell\v1.0\powershell.exe”,0
Click “OK.”
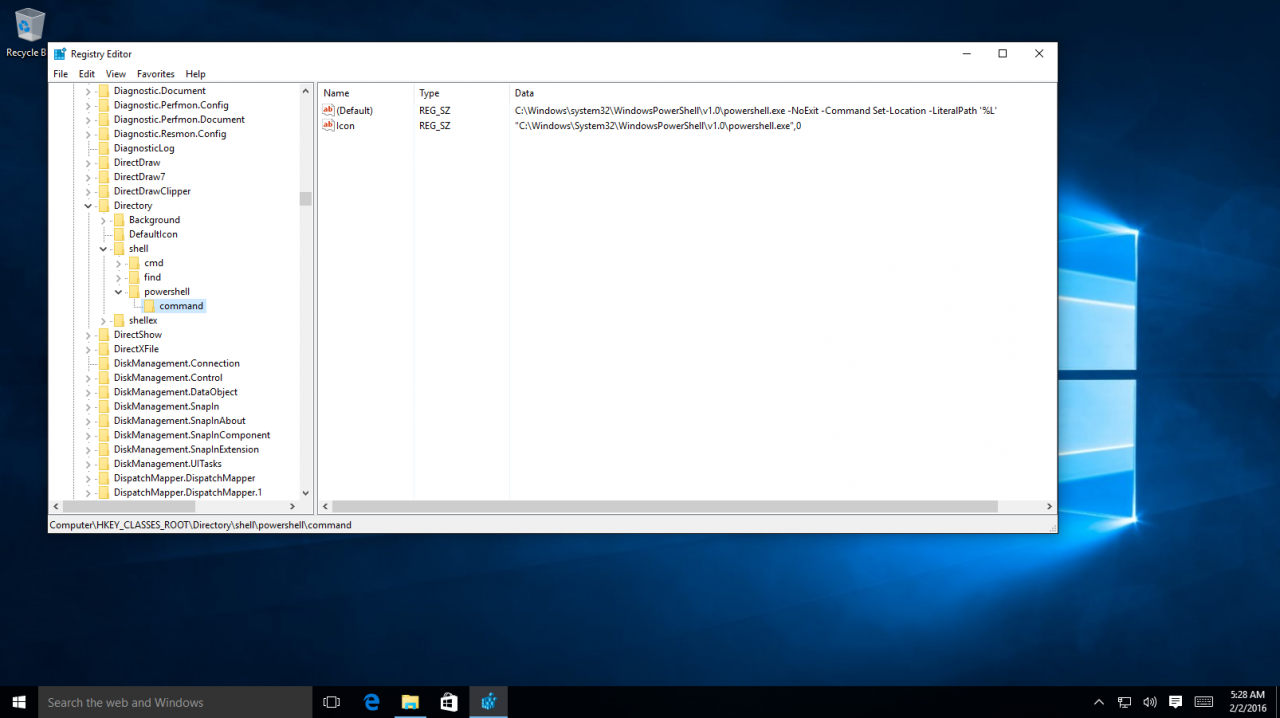
9. This is how it’s supposed to look once you’re done.
After completing these steps, close the registry, and open Windows Explorer. Go to any folder of your choice and right-click the folder:


