Add NAS-Based Network Locations to Windows 10 for Fast Search
In today’s Ask the Admin, I’ll show you how to add network locations to File Explorer in Windows 10 for faster search.
If you’re using Windows Server in an office environment as a file server, indexing of files on network shares is handled automatically by the OS so that you can quickly find what you’re looking for. But if instead you have some form of network-attached storage (NAS) that runs Linux, even though there is support for SMB baked in, you lose out on some of the advantages of Windows-based storage.

Not that this poses too many issues for small businesses or home users, but one issue you may have is that when searching a network location, Windows will take much longer to return results because the OS has to manually crawl through the files each time rather than referencing a search index like it does for locally stored files.
Add network locations in File Explorer
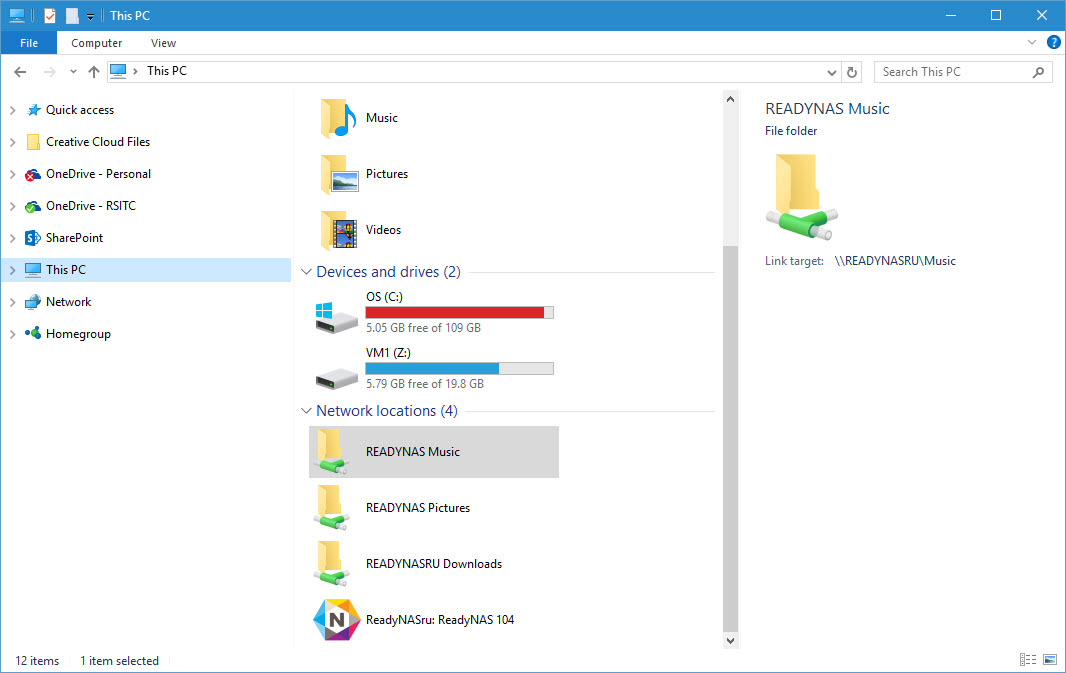
But there’s an easy way to solve this problem, at least partially, and that’s by adding network locations that you’d like Windows to index to This PC in File Explorer. I say partially, because indexing on Windows Server also provides full-text indexing, where not only the name of each file is indexed, but also the contents of supported file formats. And when Windows Server is hosting the file share, the search client returns results provided by the indexing service on the server.
But when you add a non-Windows Server based network location to Windows 10, a local mirror is created using placeholders, or shortcuts, without the actual contents of the files, allowing the local indexing service to catalogue the file and folder names locally for quick search results.
Let’s look at how to add network locations to File Explorer.
- Log in to Windows 10.
- Open File Explorer using the icon on the taskbar, or by pressing CTRL+E.
- In the left pane of File Explorer, click This PC.
- In the right pane of File Explorer, expand the Network locations group.
- Right click in the Network locations group and select Add a network location from the menu.

- Click Next on the welcome screen of the Add Network Location wizard.
- Make sure that Choose a custom network location is selected on the Where do you want to create this network location? screen if there’s more than one option presented, and click Next to continue.
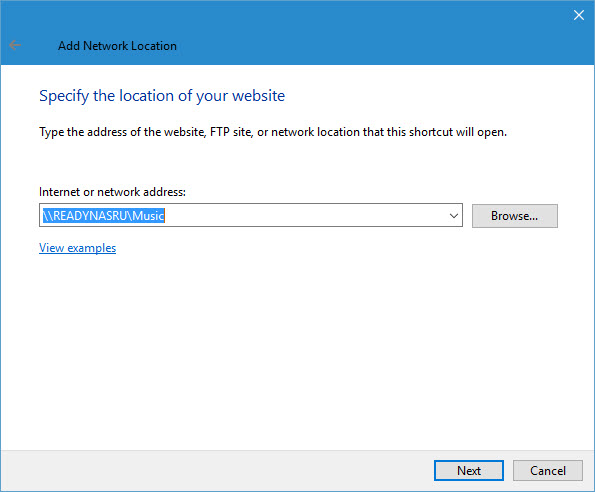
- On the Specify the location of your website screen, type the network path in the Internet or network address box, or click Browse to find the location. Click Next when you’re done.
- Give the network location a name on the What do want to name this location? screen, and then click Next.
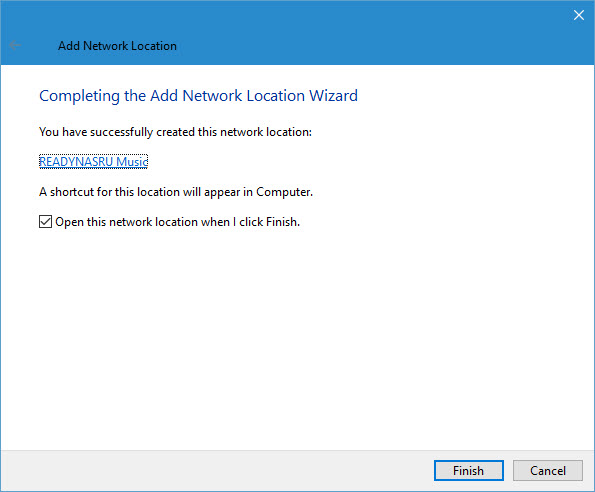
- On the Completing the Add Network Location Wizard screen, click Finish.
- The new network location will now open in File Explorer.

The indexing service will now add the files in the new location so you can perform fast searches.


